how to setup wifi connection on laptop windows 8

Title: How to Connect to WiFi on Windows 8
Channel: HOWTECH
How to Connect to WiFi on Windows 8 by HOWTECH
how to connect wifi on laptop windows 8, how do i connect my windows 8.1 laptop to wifi, can windows 8 connect to wifi
Windows 8 WiFi Nightmare? Solved! (Easy Setup Guide)
Finally! Kiss Goodbye to Windows 8 WiFi Woes (Quick Fixes & Foolproof Guide)
Remember the era of Windows 8? Ah, the memories! For many, this operating system sparked mixed emotions. Some loved its innovative tile interface. Others, however, wrestled with its quirks. One persistent issue cast a long shadow: WiFi connectivity headaches. Troubleshooting WiFi on Windows 8 could be a frustrating experience. Many users encountered dropped connections, slow speeds, and outright refusal to connect. But fear not! This isn't a tale of despair. Consider this your rescue mission.
The WiFi Whisperer: Unveiling Your Windows 8 WiFi Mystery
Let's face it, struggling with unreliable WiFi is maddening. You crave seamless browsing, streaming, and staying connected. Your Windows 8 machine is fighting you every step of the way. First, let’s grasp the core of the problem. Windows 8, though generally reliable, presented unique challenges for network configurations. Drivers and software incompatibilities were common culprits. The underlying network infrastructure can also be complex. This often left users baffled and frustrated. The good news? Solutions abound. We'll dissect the most common culprits. Then, we’ll present clear, easy-to-follow fixes. And, we'll restore your peace of mind by going through the essential steps to take.
Step 1: The Driver Detective – Your WiFi Card’s Best Friend
Your WiFi adapter is the unsung hero of your online life. Think of it as your ticket to the digital world. Sadly, outdated or corrupted drivers often sabotage its performance. They are the first thing to check when issues arise. So, how do you keep your driver in tip-top shape? Well, it's a multi-step process, but it's easy. Firstly, access the Device Manager. Secondly, locate your network adapters. Once there, right-click your WiFi adapter. Afterward, select "Update driver." Windows will then search for the latest version. If a new one is found, install it. Moreover, consider downloading drivers directly from your manufacturer’s website. This ensures you obtain the most current and compatible versions. This is a crucial first step, which sometimes gets missed.
Step 2: Power Cycling – The Magical Reboot for Your Router
While it’s common knowledge, it remains powerfully effective: Rebooting your router. Often, the simplest solutions are the most effective. Your router, after all, is the gateway to your internet experience. Begin by unplugging it from the power source. Wait a full 60 seconds. Then, plug it back in and allow it to boot up fully. Next, check your WiFi connection on your Windows 8 device. In many cases, this simple act resolves connectivity issues. If it does, consider it a win. Often, a reboot is the quick fix you needed.
Step 3: Firewall Frenzy – Taming the Security Beast
Your Windows Firewall, designed to protect your system, can sometimes be overzealous. It can mistakenly block your WiFi connection. Consequently, you might need to adjust its settings. First, access the Windows 8 Control Panel. Then, navigate to "Windows Firewall." Next, ensure your WiFi network is allowed through the firewall. You can do this by checking the firewall settings. Also, consider temporarily disabling the firewall. Then test your internet connection to see if it resolves the issue. However, do not leave it disabled for long, given the security risks.
Step 4: Channel Surfing – Find the Perfect WiFi Frequency
WiFi routers broadcast on different channels. These channels can experience interference from other devices. Therefore, switching to a less crowded channel can boost performance. You could try this easily. Access your router’s configuration page. The setup will vary depending on your router model. Check the router's manual for detailed instructions. Then, consider researching the least congested channels near you. You may need to experiment to find the ideal channel.
Step 5: Network Troubleshooter – A Built-in Ally
Windows 8 features a built-in Network Troubleshooter. This tool is deceptively useful. It can often diagnose and fix common WiFi problems. Access it by right-clicking the WiFi icon in your system tray. Select "Troubleshoot problems". Follow the prompts. The troubleshooter will scan your network. It will also attempt to resolve any identified issues. This is a simple, yet potent, tool.
Beyond the Basics: Advanced Troubleshooting
If these steps haven't resolved your Wi-Fi woes, don't panic! There are other avenues to explore. You might consider:
- Checking for Hardware Issues: A faulty WiFi adapter can cause problems. If possible, test your connection on another device. You can also try a different WiFi adapter.
- Factory Resetting Your Router: This will erase your router's settings. This will restore it to its default configuration. Before you proceed, make sure to have your internet service provider credentials handy.
- Contacting Your ISP: Your internet service provider can assist with troubleshooting. They can test your internet signal and offer technical support.
Wrapping Up: Your WiFi Victory is Within Reach!
Dealing with Windows 8 WiFi issues can be incredibly frustrating. However, with these troubleshooting tips, you can conquer these challenges. From updating drivers to tweaking firewall settings, you have the tools you need. Moreover, remember to be patient and persistent. Hopefully, these steps will ensure a smoother, more enjoyable online experience. With these clear fixes, you can reclaim your online experience. You have everything for a fast and solid WiFi connection. Embrace the freedom of seamless connectivity again!
XP Wifi Nightmare? Fix Your Dell Laptop's Connection NOW!Windows 8 WiFi Nightmare? Solved! (Easy Setup Guide)
Hey there, fellow tech travelers! Remember the good ol' days when plugging an Ethernet cable into your computer was the peak of technological simplicity? Then came Wi-Fi, promising a world of wireless freedom. But for anyone who wrestled with a Windows 8 machine and its finicky Wi-Fi connection, that promised land often felt more like a treacherous swamp. You're not alone! We've all been there, staring blankly at that little Wi-Fi icon, praying for a signal, and maybe shedding a tear or two. But fear not, because we're about to dive deep and emerge victorious from the Windows 8 Wi-Fi wilderness!
1. The Windows 8 Wi-Fi Woes: A Shared Struggle
Let's be honest, Windows 8 had its charms, but its Wi-Fi implementation? Not so much. It was like a moody teenager – sometimes it worked, sometimes it didn’t, and you never quite knew what you did to upset it. Many of us spent hours troubleshooting, refreshing our routers, and pulling our hair out. We've heard it all: “Can't connect to this network,” “Limited connectivity,” “No internet access.” Sound familiar? We feel you. This guide is for you, for us – for everyone who's battled a Windows 8 Wi-Fi demon.
2. Understanding the Enemy: Why Windows 8 Wi-Fi Gives Us Headaches
Before we can conquer the monster, we need to understand it. The problems often stemmed from a combination of factors: outdated drivers, conflicting software, incorrect network settings, and sometimes, just plain gremlins in the machine. Just like a car, your Wi-Fi connection relies on a few key components working together, and if one part is faulty, the whole system grinds to a halt. Think of it as a communication breakdown; your computer is trying to talk to your router, but the message isn't getting through.
3. Before We Start: A Quick Check-Up
Before we unleash the troubleshooting arsenal, let’s do a little pre-flight check. This is like making sure your car has gas before a long drive.
- Is Your Router Working? (We know, it sounds obvious, but it's the first thing to eliminate!) Try connecting another device (phone, tablet, another laptop) to the same Wi-Fi network. If other devices connect, you know the problem lies within your Windows 8 machine.
- Physical Check: Make sure the Wi-Fi switch on your laptop (if applicable) is in the "on" position. It sounds silly, but we’ve all been there!
- Reboot Everything: This is the tech equivalent of "Have you tried turning it off and on again?" Restart your Windows 8 computer and your router. Often, this simple step works wonders.
4. Driver Detective: Updating those pesky Drivers
Think of drivers as the language your computer uses to communicate with its hardware. Outdated drivers are like speaking a dead language – the router can’t understand what your computer is saying! This is usually the culprit.
Method 1: The Device Manager Dance:
- Press the Windows key + X and select “Device Manager.”
- Expand the “Network adapters” section.
- Right-click on your Wi-Fi adapter (it will likely have the name of your Wi-Fi card manufacturer, like "Intel" or "Broadcom").
- Select "Update driver."
- Choose “Search automatically for drivers.”
- Follow the on-screen instructions.
Method 2: Manufacturer’s Website: If the Device Manager doesn’t find an updated driver, head to your computer manufacturer's website (e.g., Dell, HP, Lenovo). Search for drivers for your specific Windows 8 model, then download and install the Wi-Fi driver. This is like getting the official translation handbook!
5. Network Troubleshooter to the Rescue!
Windows 8 actually has a built-in network troubleshooter, which is like having a tech support guru right at your fingertips!
- Right-click on the Wi-Fi icon in your system tray (the bottom-right corner of your screen) and select "Troubleshoot problems."
- Windows will scan for issues and attempt to fix them. Cross your fingers!
This is often a surprisingly effective first step, and often times resolves the most common issues.
6. Forgetting and Reconnecting: A Fresh Start
Sometimes, a clean slate is all you need. Forget your current Wi-Fi network and reconnect.
- Click the Wi-Fi icon in the system tray.
- Right-click on your Wi-Fi network and select "Forget this network."
- Click on the Wi-Fi icon again and select your network.
- Enter your Wi-Fi password.
It's like deleting old contacts and starting again - sometimes the simplest fixes are the best!
7. Check Your Security: WPA2 vs. WPA3
Your router security setting needs to match what your Windows 8 device is expecting. This is about the encryption protocol your router is using. The most common setting is WPA2-PSK (AES).
- Access Router Settings: You’ll need your router's IP address (usually 192.168.1.1 or 192.168.0.1). You can find this by searching online for “what is my router IP address.” Enter the IP address into your web browser to access the router’s configuration panel. Make sure you know your router's admin login credentials (usually found on the router itself or in the manual).
- Find Wireless Settings: Navigate to your router's Wi-Fi settings (usually under "Wireless" or "Wi-Fi").
- Check Security: Verify that the "Security Mode" is set to WPA2-PSK (AES). If it's set to something else, like WEP or TKIP, consider changing it to WPA2-PSK (AES) for better security and compatibility.
- Save and Reboot: Save your changes and reboot your router.
8. Static IP Magic? (Advanced Users Only!)
If all else fails, you might need to delve into more advanced settings. This is like tinkering under the hood of your car.
- Open the Network and Sharing Center (search for it in the Windows 8 search bar).
- Click on "Change adapter settings."
- Right-click on your Wi-Fi adapter and select "Properties."
- Double-click on "Internet Protocol Version 4 (TCP/IPv4)."
- Select "Use the following IP address." You'll need to get this information from your router. Typically, the IP address will be similar to those of other devices connected to your home network.
- Enter the subnet mask (usually 255.255.255.0), the default gateway (your router's IP address), and the DNS server addresses (you can use public DNS servers like Google's: 8.8.8.8 and 8.8.4.4).
- Click "OK."
9. Firewall Frolics: Are You Blocking Yourself?
Sometimes, the Windows Firewall can get a little overzealous and block your Wi-Fi connection.
- Open the Windows Firewall (search for it in the Windows 8 search bar).
- Click "Allow an app or feature through Windows Firewall."
- Find "Network Discovery" and "File and Printer Sharing" and check the boxes next to them for "Private" and "Public."
- Click "OK."
10. Disabling Power Saving: Keep the Connection Alive
Windows 8 sometimes tries to conserve power by turning off the Wi-Fi adapter.
- Open Device Manager (Windows key + X, then "Device Manager").
- Expand "Network adapters."
- Right-click on your Wi-Fi adapter and select "Properties."
- Go to the "Power Management" tab.
- Uncheck "Allow the computer to turn off this device to save power."
- Click "OK."
11. Router Reset: The Nuclear Option (Use with Caution!)
If you've tried everything, you might need to reset your router to its factory settings. This will erase your router's configuration, including your Wi-Fi password, so make sure you have the necessary information before proceeding.
- Locate the reset button on your router (usually a small recessed button).
- Use a paperclip or a similar object to press and hold the reset button for about 30 seconds.
- Wait for the router to reboot.
- Reconnect to your Wi-Fi network using the default credentials (usually found on the router itself or in the manual).
12. Consider A USB Wi-Fi Adapter
If you have a particularly stubborn Wi-Fi card, consider adding a USB Wi-Fi adapter as an alternative. This is like buying a new engine for your car. They're relatively inexpensive and plug directly into a USB port, bypassing your built-in Wi-Fi card.
13. The Ultimate
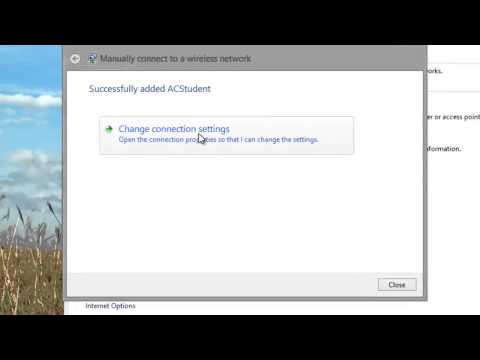
Dell Wifi Nightmare? FIX Your Windows 10 Connection NOW!Connecting Manually to a Wireless Network in Windows 8 HP Computers HP Support

By HP Support Connecting Manually to a Wireless Network in Windows 8 HP Computers HP Support by HP Support
Windows 8 - How to turn on WiFi

By HowTo Windows 8 - How to turn on WiFi by HowTo
Connecting to Wifi Windows 8
By Academic Algonquin Connecting to Wifi Windows 8 by Academic Algonquin

Title: Cara mengaktifkan wifi di windows 8
Channel: AW Tutorial
Cara mengaktifkan wifi di windows 8 by AW Tutorial
Wifi On Laptop Phone
Windows 8 WiFi Woes? A Straightforward Solution Guide
Have you recently upgraded to Windows 8, only to be met with a frustrating barrage of WiFi connectivity issues? Are you finding yourself plagued by dropped connections, slow speeds, or a complete inability to connect to your home network? Fear not, fellow Windows 8 user, for the days of wireless uncertainty are over. This comprehensive guide is specifically crafted to navigate the often-complex world of Windows 8 networking, providing clear, concise, and actionable steps to resolve your WiFi problems and restore your peace of mind. We will traverse the potential pitfalls, delve into the nuances of Windows 8's network settings, and emerge victorious, with a stable and reliable WiFi connection.
Diagnosing the WiFi Dilemma: Identifying the Root Cause
Before we dive headfirst into solutions, it's crucial to perform a preliminary diagnosis. Understanding the underlying cause of your WiFi problems is paramount to implementing the correct fix. Are you experiencing intermittent connectivity issues, where your connection drops randomly? Or are you completely unable to see or connect to any WiFi networks? The answers to these questions will guide our approach.
Begin by checking the basic indicators. Is your WiFi adapter enabled? Look for the WiFi icon in your system tray (typically located in the bottom right corner of your screen). If the icon is greyed out or displays a red "X," your adapter might be disabled. Right-click on the icon and select "Open Network and Sharing Center."
Within the Network and Sharing Center, locate the "Change adapter settings" option on the left-hand side. This will display a list of your network adapters. Right-click on your WiFi adapter (it will likely be labeled something like "Wireless Network Connection" or similar) and ensure it is enabled. If it's disabled, select "Enable."
If your adapter is enabled, and you still have problems, the issue likely lies deeper. Consider the following potential causes:
- Incorrect Network Credentials: Double-check that you are entering your WiFi password correctly. Case sensitivity is critical; ensure the capitalization matches precisely what's printed on your router or provided by your internet service provider (ISP).
- Router Issues: Sometimes, the problem isn't with your Windows 8 device, but with your router itself. Try restarting your router by unplugging it from the power outlet for about 30 seconds and then plugging it back in. This often resolves minor glitches.
- Driver Problems: Outdated or corrupted network adapter drivers can wreak havoc on your WiFi connection. We will explore updating drivers in detail later in this guide.
- Interference: Wireless signals are susceptible to interference from other electronic devices, such as microwave ovens, Bluetooth devices, and even other WiFi networks in your vicinity.
- Distance from Router: The further you are from your router, the weaker your signal will become. Consider moving closer to the router to see if the connection improves.
- Network Settings Problems: Occasionally, Windows 8 network settings themselves can be misconfigured.
Driver Detective: Updating Your WiFi Adapter's Drivers
Outdated or corrupted drivers are among the most frequent culprits behind WiFi woes in Windows 8. Drivers are essentially software programs that act as intermediaries, enabling your operating system to communicate with your hardware, including your WiFi adapter. Keeping drivers current is vital for optimal performance and compatibility.
Here’s how to update your WiFi adapter's drivers:
Access Device Manager: Right-click on the Start button (or press the Windows key + X), and select "Device Manager" from the menu. This opens a window displaying a list of all the hardware connected to your computer.
Locate Your Network Adapter: In Device Manager, expand the "Network adapters" section. You should see a list of all your network adapters, including your WiFi adapter (which will have a name like "Wireless Network Adapter" or "Intel(R) Wireless-AC").
Update Driver: Right-click on your WiFi adapter and select "Update driver."
Choose Update Method: Windows 8 offers two primary methods for updating drivers:
Search automatically for updated driver software: This option allows Windows 8 to search for and install the latest drivers available through Windows Update or from your hardware manufacturer's database.
Browse my computer for driver software: If you already have a driver file downloaded (perhaps from your hardware manufacturer's website), you can use this option to manually install the driver.
Follow the On-Screen Instructions: If you choose the "Search automatically" option, Windows 8 will begin searching for an updated driver. Follow the on-screen instructions to install the driver. If a newer driver isn't found through the automatic search, you may need to visit your computer manufacturer's website (e.g., HP, Dell, Lenovo) or the website of your WiFi adapter manufacturer (e.g., Intel, Broadcom, Realtek) to download the latest driver.
Restart Your Computer: Once the driver installation is complete, restart your computer for the changes to take effect. This helps to ensure that the updated driver is properly integrated into the system.
Troubleshooting Network Settings: Configuring the Network Adapter
Sometimes, the problem isn't with the drivers themselves, but rather with the configuration of your network adapter. Windows 8 offers several settings that can impact your WiFi connection. Let's explore a few key areas:
Power Management: Your WiFi adapter may be set to conserve power, which can temporarily disable the wireless connection. To check and adjust this setting:
- Open Device Manager (as described above).
- Expand "Network adapters," right-click on your WiFi adapter, and select "Properties."
- Go to the "Power Management" tab.
- Uncheck the option "Allow the computer to turn off this device to save power." This setting prevents your WiFi adapter from being automatically disabled to conserve battery life. Click "OK" to save the changes.
IP Address Configuration: Ensure that your WiFi adapter is configured to obtain an IP address automatically from your router. This is the default and recommended configuration.
- Open the Network and Sharing Center (as described above).
- Click on "Change adapter settings."
- Right-click on your WiFi adapter and select "Properties."
- In the list of items, select "Internet Protocol Version 4 (TCP/IPv4)" and click "Properties."
- Make sure that both options, "Obtain an IP address automatically" and "Obtain DNS server address automatically," are selected.
- Click "OK" to save the changes.
Network Reset (Advanced): If all else fails, consider resetting your network settings. This will reset all network adapters on your Windows 8 machine to their default settings.
- Open Settings (Windows Key + I, then click “Change PC settings”).
- Click on "Network."
- Choose "Connections."
- Scroll down and choose "Reset." Windows will restart your computer after the procedure.
Router Revelations: Examining Your Router's Configuration
As noted earlier, the problem might not be with your Windows 8 device, but with your router. Routers act as traffic controllers for your home network and sometimes require periodic maintenance.
Restart Your Router: This remains the simplest and often most effective fix. Unplug your router from the power outlet for approximately 30 seconds and plug it back in. This process can clear temporary glitches and refresh the router's settings.
Check Router Firmware: Router manufacturers periodically release firmware updates that improve performance, address security vulnerabilities, and fix bugs. Check your router's documentation or the manufacturer's website to determine if a firmware update is available for your model. Updating firmware can sometimes resolve WiFi connection problems.
Router Channel Selection: Wireless routers broadcast WiFi signals on different channels. If your router is using a channel that is congested with other WiFi networks in your area, it can lead to interference and connection issues.
- Access your router's configuration interface. This is usually done by typing your router's IP address (often 192.168.1.1 or 192.168.0.1) into your web browser. Consult your router's manual for the correct IP address and login credentials.
- Once logged in, look for the "Wireless" or "WiFi" settings.
- Find the setting for "Channel" or "Wireless Channel."
- Experiment with different channels (e.g., 1, 6, or 11). These are generally seen as the least congested channels. Try changing your channel and restart the router for the change to take effect.
Security Protocol: Ensure that your router is configured with a secure WiFi security protocol, such as WPA2 or WPA3. Avoid using older, less secure protocols like WEP, as they are vulnerable to security threats and can sometimes cause connection problems.
Router Placement: The physical location of your router can significantly impact the strength and range of your WiFi signal. Place your router in a central location in your home, away from walls and obstructions. Avoid placing your router near microwave ovens, cordless phones, and other devices that can interfere with wireless signals.
Advanced Strategies: Exploring Less Common Solutions
If you've exhausted the basic troubleshooting steps outlined above, you can delve into some more advanced solutions:
- **Network Adapter Reset (
