cara mengatasi wifi laptop tanda silang windows 7

Title: Cara Mengatasi WiFi Laptop Silang Merah WiFi Tidak Connect
Channel: LANGIT MERAH TUTORIAL
Cara Mengatasi WiFi Laptop Silang Merah WiFi Tidak Connect by LANGIT MERAH TUTORIAL
cara mengatasi tanda silang di wifi laptop windows 7, cara mengatasi tanda silang merah pada wifi laptop windows 7
Dead Wifi? Fix that Windows 7 Cross Symbol NOW!
Wi-Fi Woes? Vanquish the Windows 7 Cross Symbol for Good!
Let's be honest, there's few things more frustrating than a Wi-Fi connection that decides to take a vacation when you need it most. Suddenly, the internet vanishes, leaving you staring at that dreaded red "X" – the universal symbol of digital despair. If you're still rocking Windows 7 (and no judgment here; nostalgia is a powerful force!), you’ve probably encountered this nemesis of connectivity. But don't fret, friend! Getting that internet back is simpler than you think. We're diving into some tried-and-true methods to banish that cross symbol and reclaim your digital life. Because seriously, who has time for digital silence?
Troubleshooting Time: Your First Steps to Wi-Fi Salvation
First things first, let's perform a digital triage. Before we embark on any elaborate fixes, follow these initial steps. They’re quick, easy, and often resolve the issue instantly.
The Router Reboot: Sometimes, the simplest solution is the most effective. Unplug your router and modem for a full 60 seconds. Then, plug the modem back in first. Allow it to fully boot up. Finally, plug in the router again. This resets the connection and often clears up any minor glitches.
Check the Physical Connections: Are all the cables securely plugged into your modem, router, and computer? Ensure everything is firmly seated. A loose cable can cause all sorts of headaches. Also, verify that your Ethernet cable (if you're using one) is properly connected to both your computer and the router. It's so simple, yet sometimes we miss the obvious!
Airplane Mode Foe: Make sure Airplane Mode isn't accidentally switched on. This is a common culprit. Look for the Airplane Mode symbol in your system tray (usually near the clock) and ensure it’s disabled. Otherwise, you are completely disconnected!
Delving Deeper: Unmasking the Network Adapter Issues
If the initial steps didn’t do the trick, we need to investigate deeper. It’s time to roll up our sleeves and delve into the network adapter settings.
Checking the Network Adapter: Right-click on the network icon in your system tray (the one with the red "X"). Select "Troubleshoot problems." Windows 7 will attempt to diagnose and fix the problem automatically. Frequently, it can identify and rectify any issues on its own.
Enable or Disable the Network Adapter: Navigate to the "Network and Sharing Center" via the Control Panel. From there, click "Change adapter settings." Locate your wireless network adapter. Right-click on it. Choose "Enable" if it's disabled. Conversely, if it shows as enabled, try "Disable" and then "Enable" again. Refreshing the driver often helps.
Driver Dilemmas: Updating Your Network Adapter Drivers: Outdated or corrupted drivers can wreak havoc. You need to update the network drivers for your machine. Right-click on "Computer" from the Start Menu, selecting "Manage". Click "Device Manager" in the left pane. Expand "Network adapters". Locate your Wi-Fi adapter. Right-click and select "Update driver software." Choose "Search automatically for updated driver software." Windows will search for the latest drivers. If that fails, you can download them manually from your computer manufacturer's website.
The Advanced Arsenal: Employing More Technical Tactics
Still staring at that cross? Don’t give up yet. We now consider some more advanced troubleshooting methods.
IP Address Configuration: Sometimes, your IP address configuration may be the source of the problem. Ensure your network adapter is set to obtain an IP address automatically. Again, access the "Network and Sharing Center". Select "Change adapter settings". Right-click your wireless adapter. Choose "Properties". Select "Internet Protocol Version 4 (TCP/IPv4)" and click "Properties." Ensure "Obtain an IP address automatically" and "Obtain DNS server address automatically" are selected. Then restart the connection.
Flushing the DNS Cache: A corrupted DNS cache can lead to connection problems. You can flush this cache quickly from the command prompt. Type "cmd" in the Start Menu search bar and press Enter. In the command prompt, type "ipconfig /flushdns" and press Enter. This clears the DNS cache. Then, restart your computer.
Antivirus Interference: Your antivirus software might be blocking your Wi-Fi connection. Temporarily disable your antivirus software. See if your internet connection restores. If it does, you might need to adjust the settings within your antivirus. Make sure it's not actively blocking network traffic from your wireless adapter. Remember to re-enable your antivirus software afterward.
The Final Frontier: When All Else Fails
If you've tried everything mentioned so far, you may need to consider more drastic measures.
System Restore: You can revert your system back to a point before the Wi-Fi issues arose. This often fixes driver conflicts. Search for "System Restore" in the Start Menu. Follow the prompts, selecting a restore point close to when the problem started. Note: this will revert the system to the chosen date. Thus, back up your essential data first!
Contacting Support: If all else fails, it’s time to seek professional help. Contact your internet service provider (ISP). They can diagnose potential issues from their end. Additionally, they may be able to guide you further. Also, consult a computer repair technician. They have a deep understanding of hardware and software problems. They will be able to pinpoint the root cause.
Reclaiming Your Digital Domain
In conclusion, that dreaded red "X" doesn't have to be the end of the world. With these steps, you have a comprehensive toolkit to tackle Wi-Fi issues. Don't be discouraged. Each step, each troubleshooting technique, brings you closer to a solution. So, grab a cup of coffee, put on your detective hat, and get ready to reclaim your digital freedom. Hopefully, soon you will be browsing, streaming, and connecting without any Wi-Fi woes. Now go forth and conquer the cross symbol!
HP Laptop WiFi Nightmare? FIX It NOW!Dead Wifi? Fix that Windows 7 Cross Symbol NOW!
We've all been there. You're in the middle of something important – maybe you're video conferencing with your boss, streaming your favorite show, or (let's be honest) scrolling through social media – and BAM! The Wi-Fi symbol in your Windows 7 system’s system tray transforms into a dreaded cross. It’s a digital death knell, a visual representation of internet isolation. Fear not, friends! We're here to dissect this digital drama and resuscitate your connection. This isn't just about clicking a button; it's about understanding the story behind the cross and becoming the hero of your own internet saga.
1. The Cross of Defeat: Understanding the Windows 7 Wi-Fi Cross Symbol
That little red cross, that silent, menacing X over the Wi-Fi symbol? It’s not just a random error. It's a statement. It’s your Windows 7 operating system screaming, "Houston, we have a problem!" The cross usually signifies one of two things: either there's a problem with your connection to your wireless network, or perhaps, there's a deeper issue, an unresolved conflict at the heart of your internet plumbing. It might be an issue with your internet service provider (ISP), with your router, or with your computer's internal settings. It’s like your computer is a car; that cross is the engine light flashing, urging you to pull over and investigate.
2. Is It REALLY Dead? Checking the Obvious First
Before we dive into the deep end, let's do some quick checks. Sometimes, the simplest solutions are the most effective. We call this "the sniff test" of Wi-Fi troubleshooting.
- Check the Router: Is it even powered on? Are all the lights behaving themselves? A blinking light is often your friend, but a completely dark router is a dead giveaway.
- Restart the Router: Unplug it, wait 30 seconds (yes, 30 seconds!), plug it back in, and let it boot up. Think of it as a digital nap for your router. This often clears minor glitches and gets things flowing again.
- Check Other Devices: Are other devices (phones, tablets, laptops) experiencing the same issue? If yes, the problem likely lies with your internet service or your router. If not, the problem is likely with your Windows 7 computer.
- Airplane Mode/Wi-Fi Switch: Believe it or not, some laptops have a physical switch to turn Wi-Fi on or off. Make sure it hasn't been accidentally flicked! Also, double-check that Airplane Mode is turned off. It's a sneaky culprit.
3. The Network Troubleshooter: Your Digital Detective
Windows 7 has a built-in troubleshooter that can often diagnose and even fix common network problems. It's like having a digital detective on your computer.
- Access the Troubleshooter: Click the Wi-Fi icon in your system tray (the one with the cross). Click "Troubleshoot problems."
- Follow the Prompts: The troubleshooter will analyze the problem and offer potential solutions. It may suggest resetting your network adapter or trying other fixes.
This tool is definitely worth a try, especially if you're not tech-savvy. It's a straightforward way to get some automated assistance. Think of it as your first line of defense.
4. Resetting Your Network Adapter: A Digital Reboot
If the troubleshooter fails, it's time to roll up your sleeves and get a bit more hands-on. The network adapter is the hardware that connects your computer to your Wi-Fi. Sometimes, it just needs a little nudge to get back on track.
- Open Network Connections:
- Click the Start button.
- Type "Network Connections" in the search box and press Enter.
- Disable and Re-enable: Right-click on your wireless network adapter (it will likely be called something like "Wireless Network Connection") and select "Disable." Wait a few seconds, then right-click again and select "Enable." This is like giving your network adapter a digital pep talk.
5. Driver Drama: Updating Your Wireless Network Adapter Driver
Outdated or corrupted drivers can also cause Wi-Fi woes. Drivers are essentially the software that allows your computer to communicate with your hardware. Think of them as the translators between your computer and its Wi-Fi card.
- Open Device Manager:
- Click the Start button.
- Type "Device Manager" in the search box and press Enter.
- Locate Your Network Adapter: Expand the "Network adapters" category. Find your wireless network adapter (look for names like "Wireless Network Adapter" or "Wi-Fi Adapter").
- Update Driver: Right-click on your network adapter and select "Update driver software." Choose "Search automatically for updated driver software" and let Windows find and install the latest driver.
- Manual Driver Update (If Necessary): If Windows can’t find an update, you might need to visit the manufacturer's website for your computer or network adapter and download the driver manually. You'll then install it by using the "Browse my computer for driver software" option in the Device Manager.
6. The IP Address Tango: Checking Your IP Configuration
Sometimes, your computer might be having trouble obtaining an IP address from your router. This is like your computer not being able to get a phone number to make calls.
- Open Command Prompt:
- Click the Start button.
- Type "cmd" in the search box and press Enter.
- Release and Renew Your IP: Type the following commands, pressing Enter after each one:
ipconfig /releaseipconfig /renew
- Check Your IP Configuration: After the
ipconfig /renewcommand has completed, typeipconfig /alland press Enter. Look for an IP address, subnet mask, and default gateway. If these are all filled in, then your IP configuration is good. If they are blank, then you may have a problem with your router's DHCP server.
7. Firewall Frustrations: Checking Your Firewall Settings
Your firewall acts as a gatekeeper, protecting your computer from unwanted access. However, sometimes it can be too zealous and block your Wi-Fi connection.
- Open Windows Firewall:
- Click the Start button.
- Type "Windows Firewall" in the search box and press Enter.
- Check Allowed Programs: Click "Allow a program or feature through Windows Firewall." Make sure that your network adapter's software, and any programs that rely on the internet, are allowed to communicate through the firewall.
8. Router Rumble: Addressing Router Interference and Configuration
Your router is the central hub of your home network. It’s the heart of your Wi-Fi. If that heart isn't beating correctly, you’ll feel the effects.
- Distance and Obstacles: Ensure your computer is not too far from the router, and that the signal isn’t blocked by thick walls or metal objects. Think of your Wi-Fi signal like a ray of light; anything that can dim or block light can also interfere with it.
- Channel Congestion: Other Wi-Fi networks in your area can interfere with yours. Log in to your router’s configuration page (usually by typing its IP address – often 192.168.1.1 or 192.168.0.1 – into your browser) and change the Wi-Fi channel to a less congested one.
- Router Firmware: Make sure your router's firmware is up-to-date. This often fixes bugs and improves performance.
9. Malware Mayhem: Scanning for Malicious Software
Sometimes, sneaky malware can wreak havoc on your Wi-Fi settings. It's like having a digital gremlin in your system.
- Run a Scan: Run a full scan with your anti-virus software. This will help detect and remove any malicious software that might be interfering with your connection.
10. Power Cycling: The Ultimate Reset (Again!)
We mentioned restarting the router earlier, but sometimes a more comprehensive power cycle is needed.
- Unplug Everything: Turn off all your networking equipment – your modem, router, and computer.
- Wait: Give everything a good 60 seconds (or even longer!).
- Power On: Plug in your modem first, wait for it to fully boot up, then plug in your router and let it boot up. Finally, turn on your computer.
11. Network Profile Blues: Deleting and Re-Adding Your Network
Windows can sometimes keep outdated or corrupted profiles of your Wi-Fi networks.
- Open Network and Sharing Center:
- Click the Start button.
- Type "Network and Sharing Center" in the search box and press Enter.
- Manage Wireless Networks: Click "Manage wireless networks" on the left side of the window.
- Delete the Network: Right-click on the name of your wireless network and select "Remove network."
- Reconnect: Reconnect to your Wi-Fi network by clicking the Wi-Fi icon in the system tray and entering your password.
12. Hardware Hiccups: Considering a
Samsung Laptop WiFi Password Change: The SHOCKINGLY Easy Trick!Cara mengatasi wifi silang merah di windows 7 TERBARU
By Ani Saja Cara mengatasi wifi silang merah di windows 7 TERBARU by Ani Saja
Cara Mengatasi Wifi Laptop silang Merah di Windows 789

By TV UHF Cara Mengatasi Wifi Laptop silang Merah di Windows 789 by TV UHF
Cara Atasi WiFi Silang Merah Pada Windows 7, WiFi Tidak Mau Kokek, WiFi Not Connected

By asal ngelik Cara Atasi WiFi Silang Merah Pada Windows 7, WiFi Tidak Mau Kokek, WiFi Not Connected by asal ngelik

Title: Tutorial cara mengatasi WIFI tanda silang merah pada laptop windows7
Channel: Faisal Muhammad
Tutorial cara mengatasi WIFI tanda silang merah pada laptop windows7 by Faisal Muhammad
Wifi On Laptop
Dead Wi-Fi? Fix That Windows 7 Cross Symbol NOW!
Have you encountered the dreaded red "X" over your Wi-Fi icon on your Windows 7 taskbar? This seemingly insignificant symbol can usher in a wave of frustration, cutting you off from the digital world. But fret no more! We understand the urgency of regaining your internet access, and we've meticulously crafted this guide to help you eradicate that persistent cross and reclaim your connectivity. This is a deep dive, a comprehensive troubleshooting manual, leaving no stone unturned in the quest to resurrect your Wi-Fi.
1. Unveiling the Mystery: Deciphering the Red Cross of Doom
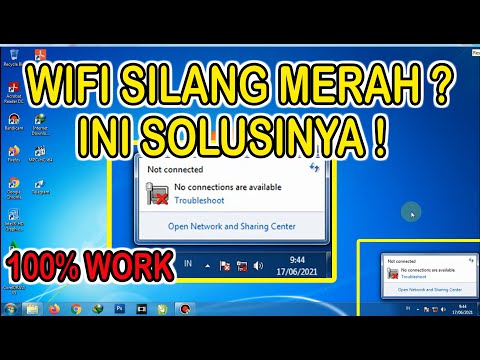
The red "X" on your Wi-Fi icon isn't merely a cosmetic issue; it's a clear signal that your Windows 7 system is experiencing a problem connecting to the internet via your Wi-Fi adapter. The specific manifestation of this error can vary slightly, sometimes appearing as "No internet access," "Limited access," or simply "Not connected." Regardless of the precise wording, the underlying issue remains consistent: your computer cannot establish a viable connection to the internet through your wireless network. Before diving into solutions, it's crucial to understand that this problem can stem from various sources. This is not a simple one-size-fits-all situation. It requires diligent observation of each step with each possibility.
2. The Initial Triage: Basic Checks Before the Deep Dive
Before we unleash the full arsenal of troubleshooting techniques, let's perform a quick, preliminary assessment. This basic triage helps us eliminate the most common and easily resolved issues.
- Is your Router Alive and Kicking? Let's start with the obvious: are your router and modem powered on, and are their respective indicator lights showing normal activity? Sometimes, a simple power cycle (unplugging both devices for 30 seconds, then plugging the modem back in, waiting for it to initialize, and finally plugging in the router) can work miracles.
- The Physical Connection: Although we are dealing with Wi-Fi, ensure your modem itself is properly connected to your internet service provider's (ISP's) wall outlet via an Ethernet cable. A loose or damaged cable can disrupt your entire internet flow.
- The Obvious Suspect: The "Off" Switch: It sounds basic, but double-check your laptop's physical Wi-Fi switch, if it has one. On some laptops, this is a physical slider or a dedicated button that can disable the wireless adapter. Make sure it's in the "on" position.
- Other Devices: Are They Online? Test the internet connection on other devices in your home, such as smartphones, tablets, or other computers. If they can't connect, the problem is most likely with your internet service or your router, shifting the blame away from Windows 7 and your laptop.
3. Diagnosing the Culprit: Windows 7's Built-In Troubleshooter
Windows 7 provides a built-in Network Troubleshooter that can often identify and automatically fix common Wi-Fi problems. While it's not a silver bullet, it's an excellent starting point.
1.  Right-click on the Wi-Fi icon with the red "X" in your system tray (the bottom-right corner of your screen).
2.  Select "Troubleshoot problems." Windows will then begin diagnosing your network connection.
3.  Follow any prompts that the troubleshooter presents. It might suggest solutions such as restarting your network adapter, resetting the network settings, or even contacting your ISP if it can't find any problems.
4.  Allow it to apply any suggested fixes and reboot your machine if prompted. See if the problem is solved.
4. Delving Deeper: Examining Your Network Adapter
If the troubleshooter doesn't bear fruit, it's time to scrutinize your network adapter settings. The network adapter is the hardware component responsible for communicating with your Wi-Fi router.
1.  **Access Device Manager:** Click on the Start button, type "Device Manager" into the search bar, and press Enter. Alternatively, you can get there by right-clicking "Computer" from the Start Menu, selecting "Properties," and then clicking "Device Manager."
2.  **Expand Network Adapters:** In the Device Manager window, expand the "Network adapters" category. You should see a list of network adapters, including your Wi-Fi adapter (often labeled as something like "Wireless Network Adapter" or "Wi-Fi Adapter").
3.  **Check Adapter Status:** Right-click on your Wi-Fi adapter and select "Properties." In the "General" tab, check the "Device status." If it says "This device is working properly," that's a good sign. However, you should also look out for error messages. Common error codes indicating problems include: Code 10 ("This device cannot start") or Code 39 ("Windows cannot load the device drivers for this hardware").
4.  **Update the Driver:** If your device isn't functioning properly, you should first attempt to update the driver. In the "Driver" tab of the adapter's properties, click "Update Driver." You can choose to search online for updated driver software.
5.  **Roll Back the Driver:** If you recently updated your drivers and the problem started afterward, try rolling back to a previous version. In the "Driver" tab, click "Roll Back Driver" (if the option is available). When doing so, you may need to reboot your machine.
6.  **Uninstall and Reinstall the Driver:** As a last resort, try uninstalling the driver and then restarting your computer, Windows will attempt to reinstall the driver automatically upon reboot. If not, download and install the latest driver from the manufacturer's website.
5. The Wireless Network Connection: Unveiling the Secret Settings
Your Wi-Fi adapter settings also affect how your computer interacts with your wireless network. Let's investigate these settings.
1.  **Open Network and Sharing Center:** Click on the Start button, type "Network and Sharing Center" into the search bar, and press Enter. Click on "Change adapter settings" on the left side.
2.  **Locate Your Wireless Connection:** Find your Wi-Fi adapter in the list of network connections. It will likely have a similar name to your adapter on the Device Manager, and it may have a red "X" if your Wi-Fi is not working.
3.  **Check Properties:** Right-click on your Wi-Fi adapter and select "Properties."
4.  **Verify TCP/IP Settings:** In the "Networking" tab, ensure that both "Internet Protocol Version 4 (TCP/IPv4)" and "Internet Protocol Version 6 (TCP/IPv6)" are checked. Select "Internet Protocol Version 4 (TCP/IPv4)" and click "Properties". Make sure that "Obtain an IP address automatically" and "Obtain DNS server address automatically" are selected. If your ISP or network administrator has given you static IP settings, ensure these settings are entered correctly.
5.  **Advanced Wireless Settings:** In the "Networking" tab, click the "Configure" button (usually near the top). This will open your adapter's configuration settings. On the "Advanced" tab, explore these settings, which can vary depending on your adapter:
     *   **802.11 Mode:** Your wireless adapter may have different modes, such as 802.11a, 802.11b, 802.11g, 802.11n, or 802.11ac. Ensure it's set to a mode compatible with your router (most modern routers support 802.11n or 802.11ac). Experiment with different settings like 802.11g mode.
     *   **Wireless Mode:** The settings for this should usually be enabled.
     *   **Power Saving Mode:** Some adapters have power-saving modes. Try disabling it to see if it resolves the issue.
     *   **Channel Selection:** Check the channels for each of your available networks and select the least crowded channel.
6.  **Reboot and Reconnect:** After making any changes to these settings, restart your computer and attempt to reconnect to your Wi-Fi network.
6. The Network Security Key: Recalling the Password
Incorrect Wi-Fi passwords are a common cause of connection problems.
1.  **Forget the Network and Reconnect:** In the Network and Sharing Center, click on "Manage wireless networks." Select your Wi-Fi network, right-click it, and choose "Remove network." Then, click on the Wi-Fi icon in your system tray and select your network again. You'll be prompted to enter your network security key (the Wi-Fi password).
2.  **Double-Check Your Password:** Ensure you are entering the correct password, paying careful attention to capitalization and special characters.
3.  **Reset Your Router's Password:** If you're unsure of the password, consider resetting your router to its factory default settings. This will usually involve pressing a reset button on the router for a few seconds. Consult your router's manual for specific instructions. This will however reset all of your router settings.
7. Firewall Frolics: Ensuring Smooth Traffic Flow
Firewalls, whether built into Windows 7 or
