how to turn your laptop into a wifi repeater

Title: How to make any Windows computer or laptop as WiFi Repeater or WiFi Extender
Channel: UniqueTutorials
How to make any Windows computer or laptop as WiFi Repeater or WiFi Extender by UniqueTutorials
Laptop to WiFi Repeater: The SHOCKINGLY Easy Trick!
Unleash Wi-Fi Nirvana: Transforming Your Laptop into a Signal Superhero!
Ever find yourself wrestling with a Wi-Fi signal that feels weaker than a kitten's meow? You're not alone! We've all been there. The dreaded buffering icon is the bane of our existence. What if I told you there's a secret weapon, a shockingly simple trick, to banish weak Wi-Fi forever? Prepare to be amazed!
The Wi-Fi Whisperer: Your Laptop's Secret Identity
Did you know your trusty laptop is capable of more than just spreadsheets and streaming? Indeed! It's also a potential Wi-Fi repeater. Consequently, you can spread the wireless love throughout your home. It's a hidden superpower, waiting to be unleashed! The process is easier than you think. It offers a powerful solution to dead zones.
Decoding the Digital Dance: How It Works
Think of your laptop as a messenger. Its task is to receive a weak Wi-Fi signal. Then, it amplifies and rebroadcasts it. This action extends the reach of your network! Consequently, this creates a stronger, more reliable connection. This concept might seem complex. However, the setup is surprisingly straightforward.
Gear Up for Greatness: What You'll Need
First, let's gather our essentials. You'll obviously require a laptop. Additionally, you'll need a functioning Wi-Fi network. You should have a laptop capable of running Windows or macOS. You'll also benefit from having administrative privileges. Get ready to transform your wireless experience!
The Windows Route: A Step-by-Step Adventure
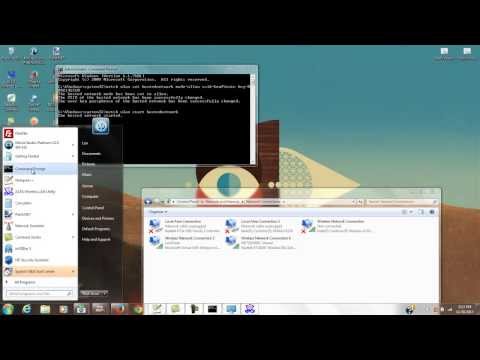
Windows users, rejoice! The process is fairly intuitive. First, access your network settings. Then, locate the "Mobile Hotspot" option. Enable this feature. Decide on a network name and password. Now, configure your laptop to receive the existing Wi-Fi signal. Furthermore, connect devices to your new hotspot. You should be enjoying improved Wi-Fi.
In other words, navigate to Settings -> Network & Internet -> Mobile Hotspot. Next, toggle the "Share my Internet connection with other devices" option to "On." Adjust your connection source (Wi-Fi). Edit the network name and password to your preferences. Finally, connect your other devices to the new network. The signal should be better immediately.
Mac Mavericks: Conquering the Connectivity Challenge
Mac users aren't left out! The process is similar, yet distinct. Start by opening "System Preferences." Next, click on "Internet Sharing." Choose your Wi-Fi connection as "Share your connection from." Select "Wi-Fi" under "To computers using." Now, configure your network settings. You'll need a name and password. Then, start the sharing feature.
Follow these steps to unlock your Mac's Wi-Fi prowess! From the Apple menu, select "System Preferences." Subsequently, click on "Sharing." In the left-hand panel, select "Internet Sharing." Choose the connection you want to share. Then, select Wi-Fi. Customize the Wi-Fi options. Finally, check the box next to "Internet Sharing."
Troubleshooting Troubles: When Things Go Awry
What if things don't go according to plan? Don't panic! First, check your internet connection. Ensure it's functioning on your laptop. Second, verify your firewall settings aren't blocking the connection. Additionally, reboot your laptop and router. These steps often resolve minor hiccups. If the issues persist, research specific error messages.
Beyond the Bandwidth: Perks and Pitfalls
The advantages are clear! You'll eliminate those pesky dead zones. You'll also experience stronger Wi-Fi signals. However, there are a few caveats. This method uses your laptop's processing power. As a result, it might affect performance. Additionally, your laptop must remain powered on for continuous operation.
Expanding Your Wi-Fi Horizon: Pro Tips
For optimal performance, place your laptop strategically. Position it where it can receive a good signal. In addition, ensure it has adequate ventilation. Experiment with different locations. Furthermore, periodically check the connection speed. This ensures consistent performance. Ultimately, proper setup is key.
The Verdict: Embrace the Wireless Revolution
Transforming your laptop into a Wi-Fi repeater is a game-changer! It's a simple, cost-effective solution. It can drastically improve your internet experience. Thus, embrace this powerful trick! Say goodbye to buffering and hello to seamless streaming. So, go forth and conquer the Wi-Fi wilderness!
WiFi Printer to Laptop: The SHOCKINGLY Easy Setup Guide!Laptop to WiFi Repeater: The SHOCKINGLY Easy Trick!
Hey there, tech enthusiasts! Ever find yourself wrestling with weak Wi-Fi signals? You know, that frustrating feeling when your connection resembles a snail’s pace during peak hours, or maybe your favorite streaming service just won't cooperate? Trust me, we’ve all been there. I've been there myself – stuck in the dreaded "dead zone" of my house, desperately clinging to the hope of a decent internet connection. But what if I told you there’s a super simple, maybe even shockingly simple, way to boost your Wi-Fi coverage using something you probably already own – your laptop? That's right! Today, we’re diving into the world of turning your trusty laptop into a Wi-Fi repeater. Get ready to say goodbye to those Wi-Fi woes!
1. Why Bother Turning Your Laptop Into a Repeater? The Real Deal!
So, why even bother with this trick? Well, the reasons are vast and varied. Firstly, it's a fantastic solution for boosting your existing Wi-Fi range. Imagine, you're on a video call, and the connection suddenly drops. Infuriating, right? Or maybe you're trying to download a massive file, and the download speed is agonizingly slow. A laptop-as-repeater setup can significantly improve those scenarios. Secondly, it's a super cost-effective alternative to buying a dedicated Wi-Fi repeater or extender. Let's face it, those things can sometimes cost a small fortune. And lastly, it's a great way to learn a little bit more about your technology and see it in action. Think of it as unleashing the hidden potential of your laptop!
2. Understanding the Wi-Fi Repeater Concept: Simplifying the Tech Jargon
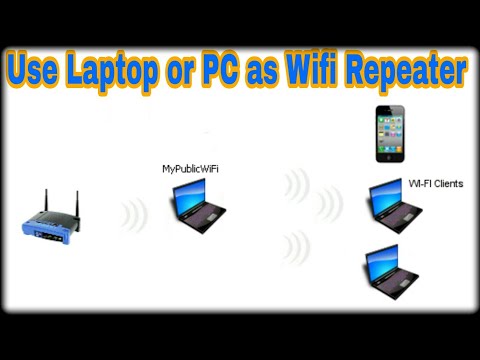
Before we jump into the how-to, let's break down the basics. A Wi-Fi repeater, in essence, acts as a bridge. It picks up the Wi-Fi signal from your router, amplifies it, and rebroadcasts it, extending your wireless network’s reach. Think of your router as a radio station broadcasting signals. The repeater is like a relay tower, catching the signal and passing it on further. Your laptop, when configured as a repeater, performs the same function. It receives the Wi-Fi signal and then creates a new access point, extending your Wi-Fi's coverage area. Simple, right?
3. Windows vs. Mac: The Great Repeater Showdown
The beauty of this trick is that it’s possible on both Windows and macOS laptops! We’ll cover both operating systems, but the fundamental principle remains the same: you're using your laptop's built-in Wi-Fi card to rebroadcast the signal it's receiving. The specific steps differ slightly depending on your OS, but the goal is universal – boosting that Wi-Fi signal!
4. Windows Warriors: The Step-by-Step Guide to Repeater Supremacy
Alright, Windows users, let’s get your laptops working as Wi-Fi repeaters. Here’s a straightforward approach:
- Step 1: Accessing the Mobile Hotspot Settings: First, navigate to your ‘Settings’ application. You can typically find it by clicking the ‘Start’ button and then selecting the gear icon.
- Step 2: Unveiling the Mobile Hotspot Feature: Within ‘Settings,’ click on ‘Network & Internet.’ Then, select ‘Mobile hotspot.’
- Step 3: Enabling the Sharing: Toggle the ‘Mobile hotspot’ button to ‘On.’
- Step 4: Customizing the Network Details: Now, click on ‘Edit’ to customize your hotspot’s ‘Network name’ and ‘Password.’ Make sure it's a secure password!
- Step 5: Connecting Other Devices: Connect your other devices to this newly created network!
And that's it! You have successfully transformed your Windows laptop into a Wi-Fi repeater.
5. macOS Mavericks: The Apple-fied Approach to Signal Boosting
For our Mac aficionados, the process is equally straightforward, though a little more…Apple-esque. Here's how to do it:
- Step 1: Accessing 'Internet Sharing': Open ‘System Preferences’ by clicking on the Apple icon in the top-left corner of your screen. Then, select ‘Sharing.’
- Step 2: Initiating Internet Sharing: In the left pane, click on ‘Internet Sharing.’
- Step 3: Choosing the Source: From the ‘Share your connection from’ dropdown list, pick the source of your internet – your Wi-Fi connection (the one your Mac is already connected to).
- Step 4: Selecting the Sharing Method: In the ‘To computers using’ section, select ‘Wi-Fi.’ Then, click ‘Wi-Fi Options…’
- Step 5: Configuring your Wi-Fi: In the ‘Wi-Fi Options’ box, create a ‘Network Name’ and a ‘Password’ for your new Wi-Fi network. Make it secure!
- Step 6: Finishing Up: Click ‘OK’ and then check the box next to ‘Internet Sharing.’ You might get a warning, just confirm it, and you are good to go.
There you have it! Your Mac laptop is now acting as a Wi-Fi repeater.
6. Troubleshooting Common Wi-Fi Repeater Headaches
Even with the simple steps, hiccups may arise. Sometimes, the Wi-Fi signal might be weak, or the connection might be unstable. Thankfully, there are some straightforward ways to handle these common issues:
- Weak Signal: Position your laptop strategically. Try placing it halfway between your router and the area with weak Wi-Fi.
- Connection Drops: Ensure your laptop is fully updated with the latest drivers. Outdated drivers can cause instability.
- Security issues: Always choose strong passwords. Consider using WPA2 or WPA3 security protocols on your extended network for enhanced security.
- Network conflicts: Ensure your extended network doesn't interfere with any existing networks.
7. The Power of Placement: Where to Place Your Laptop Repeater For Maximum Effect
Where you position your laptop is crucial. The effectiveness of your Wi-Fi repeater hinges on its placement. Think of it like a relay race; you want the laptop to be in a position where it can effectively receive the signal from your router and rebroadcast it efficiently. A central location, halfway between the router and the ‘dead zone’, often works best. Experiment! Move the laptop around to find the sweet spot where the signal is strongest.
8. The Router's Role: Understanding the Backbone of Your Wireless World
It's important to understand your router's limitations. Old routers or those with limited range might not be ideal for this setup. If your router struggles to provide a strong signal initially, the laptop's repeater capabilities will be limited. Consider upgrading your router if you're consistently struggling with weak Wi-Fi. Think of your router as the engine of your Wi-Fi car. A good engine helps you reach your destination.
9. The Bandwidth Battle: Managing Your Network's Capacity
Remember, the laptop repeater shares the bandwidth it receives. So, if your internet speed is slow, expect the extended Wi-Fi to be slower as well. Minimize simultaneous streaming or heavy downloading on both your main and extended networks to optimize performance. Think of bandwidth as highway lanes. The more traffic, the slower everyone goes.
10. Security First: Protecting Your Newly Extended Network
Always prioritize security. Use strong passwords for your Wi-Fi network. Consider using WPA2 or WPA3 security protocols for better protection. Think of your password as a lock to your information. The stronger the lock, the safer you are.
11. Battery Life Blues: Saving Your Laptop’s Power
Running your laptop as a repeater will drain its battery. Consider plugging it into a power outlet to ensure continuous Wi-Fi coverage. A drained battery is like a flat tire. It stops you in your tracks.
12. Beyond the Basics: Advanced Configuration Options (Optional)
For those who love to tinker, explore your operating system’s settings. Some systems offer advanced options like setting static IP addresses or adjusting the Wi-Fi channel for your repeater. But remember, these are purely optional, and the basic setup should work well for most users. Always be careful when dealing with advanced settings.
13. Pros and Cons: Weighing the Choices
Let's be real. It's essential to know both the advantages and the disadvantages.
Pros: Cost-effective, easy to set up, extends Wi-Fi range, promotes tech learning.
Cons: Drains laptop battery, impacts laptop performance, may not be as effective as a dedicated repeater in some cases. It's a trade-off, as with most things in life.
14. From Theory to Reality: Witnessing the Wi-Fi Revolution
So, what does success look like? Imagine moving from a Wi-Fi “dead zone” to enjoying seamless streaming, lag-free gaming, and blazing-fast downloads, all thanks to your trusty laptop. That's the power of this surprisingly simple trick. When it works, it feels like unlocking a superpower within your laptop.
15. When to Consider a Dedicated Repeater: Knowing the Limits
While this laptop trick is great, it does have limitations. For large homes, or those with thick walls
Lenovo Laptop WiFi Nightmare: The SHOCKING Fix You NEED!Turn your Laptop into a Wi-Fi repeater NETVN
By NETVN82 Turn your Laptop into a Wi-Fi repeater NETVN by NETVN82
How to transform your old laptop into a wifi repeater
By AK The Geek How to transform your old laptop into a wifi repeater by AK The Geek
Turn your Laptop into a Wi-Fi Hotspot or Repeater
By Tech Freaks Turn your Laptop into a Wi-Fi Hotspot or Repeater by Tech Freaks
Title: Turn your Windows 7 Laptop into a Wi-Fi Hotspot or Repeater
Channel: Len Farneth
Turn your Windows 7 Laptop into a Wi-Fi Hotspot or Repeater by Len Farneth
Laptop Wifi Connect
Laptop to WiFi Repeater: The Surprisingly Simple Solution
The modern world thrives on connectivity. We rely on our wireless networks for everything from streaming entertainment and remote work to staying in touch with loved ones. There are times when our existing Wi-Fi signal doesn't quite reach those crucial corners of our homes or offices. This can be intensely frustrating. Weak signal strength leads to buffering videos, dropped connections, and a general feeling of technological sluggishness. It can be as maddening as an old, sputtering engine on a long road trip!
But what if we told you there was a straightforward, often overlooked solution already within your grasp? A tool that can dramatically boost your wireless coverage, extending the reach of your existing network without requiring you to buy any extra hardware? Perhaps there is a way to transform your laptop into a powerful Wi-Fi repeater.
Understanding the Core Concepts: Wi-Fi Repeaters Demystified
Before diving into the mechanics, let's clarify the concept of a Wi-Fi repeater. A repeater essentially acts as a signal amplifier. It receives the wireless signal from your primary router, then rebroadcasts it, effectively extending your network's range. Think of it like a relay runner, carrying the baton – the internet signal – further down the course.
Traditional repeaters are dedicated devices. But the brilliance of using a laptop lies in its inherent versatility. Most modern laptops, equipped with robust Wi-Fi adapters, are fully capable of performing this repeating function. This is especially helpful when you are on the go, or perhaps do not have easy access to your router.
Configuring Your Laptop: A Step-by-Step Guide (Windows)
The process of turning your Windows laptop into a Wi-Fi repeater involves a few key steps. Here's how to get started:
Accessing the Mobile Hotspot Settings: The foundation for this functionality lies within Windows' built-in Mobile Hotspot feature. To access this, navigate to your Windows settings. You can typically do this by clicking the Windows icon in the taskbar and then on the gear-shaped "Settings" icon.
Network & Internet: Within Settings, locate and click on "Network & Internet." This crucial section houses all of your network-related configurations.
Mobile Hotspot: On the left-hand menu, select “Mobile hotspot”. This is where the magic begins.
Enabling the Mobile Hotspot and Choosing Your Source: Ensure the “Share my internet connection from” selection is accurately set to your active Wi-Fi connection. This will typically be the wireless network your laptop is currently connected to. Turn on the "Share my internet connection with other devices" switch.
Selecting the Network Name and Password: Click the “Edit” button to customize your hotspot's name (SSID) and password. Choose a name that reflects your preference. Most importantly, select a strong password to secure your network. Think of your network as your home; you'll want to keep it safe from unwarranted visitors.
Configuring the Band: Choose your band type. To maintain compatibility with a wide range of devices, using the 2.4 GHz band is the better choice, although the 5 GHz band offers generally faster speeds.
Saving Your Hotspot Settings
Connecting Your Devices: From other devices, search for the Wi-Fi network name and input the password you’ve created. This simple step allows those devices to access the extended Wi-Fi range, effortlessly.
Laptop as a Wi-Fi Repeater: Streamlining the Process (macOS)
Employing a MacBook as a wireless repeater offers a slightly different pathway, but the objective remains the same: expand network coverage. Here's a comprehensive walkthrough:
Accessing Internet Sharing: The core feature here is called “Internet Sharing.” Begin by opening System Preferences. You can find this application by clicking the Apple icon in the top-left corner of your screen and selecting “System Preferences.”
Selecting the Sharing Preference: Locate and click the "Sharing" icon. This panel is your control center for various sharing services on your Mac.
Enabling Internet Sharing: In the Sharing panel, check the box labeled "Internet Sharing." This activates the feature.
Choosing the Source of Internet: In the “Share your connection from” dropdown menu, select your primary Wi-Fi connection. Just as with Windows, this represents the network your MacBook is currently connected to.
Specifying How to Share: Click on the box labeled “To computers using” and select "Wi-Fi."
Configuring Wi-Fi Options: A prompt will appear, asking you to set up your Wi-Fi network, click on "Wi-Fi Options…".
Setting Up Your Network: Enter a unique and memorable name for your "Network Name” (SSID), and then select a security protocol for your network. WPA2 Personal provides robust security. Set a secure password, and click “OK."
Starting Internet Sharing: Click the box next to “Internet Sharing” again to activate the sharing functionality. A green dot will appear next to the checked box, indicating that the Internet Sharing is enabled.
Connecting Your Devices: On other Wi-Fi enabled devices, search for your newly created network name and enter the password you've set.
Troubleshooting Common Issues, and Mastering the Art of the Repeat
Even the most straightforward processes can present challenges. Here are some common issues you might encounter and their effective solutions:
Slow Speeds: If you experience diminished speeds compared to your primary network, the issue might stem from the laptop's positioning or the distance from the source Wi-Fi signal. Consider optimizing your laptop’s location. Experiment with placement. A central location can often provide the broadest coverage.
Connection Drops: Intermittent connectivity can be frustrating. This can be due to interference from nearby devices, or the signal strength of the primary Wi-Fi signal. Try switching to a less congested Wi-Fi channel on your main router to reduce interference.
Laptop Battery Drain: Running a Wi-Fi repeater will consume more battery power. Make sure your laptop is plugged in, or be mindful of your battery level.
Compatibility Considerations: While most modern laptops and Wi-Fi routers are compatible, there can be exceptions. Verify that your laptop's Wi-Fi adapter supports the required protocols and that your router isn't using an outdated security standard.
Beyond the Basics: Unleashing the Full Potential
Once you master the basic configuration, there are additional tips and tricks to elevate your Wi-Fi repeating capabilities:
Optimize Laptop Placement: Positioning plays a crucial role. Place your laptop in a strategic location where it can receive a strong signal from your primary router and still reach those dead zones. This could involve moving it to a higher elevation or closer to the areas with weak coverage.
Channel Selection on Your Router: Wi-Fi routers broadcast on different channels within the 2.4 GHz and 5 GHz bands. Certain channels may be less congested than others. You can access your router's settings and experiment with different channels to find the one with the best performance.
Regular Updates: Ensure that both your laptop's operating system and Wi-Fi drivers are updated to the latest versions. Software updates often contain performance improvements and address compatibility issues.
Monitoring and Evaluation: Use Wi-Fi analyzer apps on your phone to monitor signal strength in different areas of your home. This helps you evaluate the effectiveness of your laptop-as-repeater setup and make adjustments as needed.
The Advantages: A Clear Choice
Choosing your laptop as a Wi-Fi repeater has numerous benefits:
- Cost-Effectiveness: You can bypass the expense of buying a dedicated repeater. Use what you already own.
- Convenience: The setup process is straightforward and generally requires no additional hardware.
- Portability: Your laptop is mobile, so you can easily extend your Wi-Fi coverage wherever you go.
- Environmentally Friendly: Reducing the need for additional devices contributes to a lower carbon footprint.
Conclusion: Unlock Your Connectivity
Transforming your laptop into a Wi-Fi repeater is not just a clever trick; it's a practical solution to a common problem. By understanding the core principles, following our step-by-step guides, and troubleshooting potential issues, you can easily extend your network's reach and eliminate frustrating dead zones. Embrace this surprisingly simple solution to unlock the full potential of your wireless world. Get ready to enjoy a seamless and reliable online experience, wherever you are in your home or office. Now, you can boost your signal today, ensuring your connection is as strong as your ambition!
