create a wifi hotspot from laptop xp

Title: How to Create Wifi Hotspot in Windows 10 Tutorial
Channel: MDTechVideos
How to Create Wifi Hotspot in Windows 10 Tutorial by MDTechVideos
Unlock Your Laptop's WiFi Hotspot: XP Edition (Secret Trick!)
Unveiling Your Laptop's Hidden WiFi Hero: An XP-erience You Won't Forget!
It's time to dust off that trusty old laptop. You've probably got it tucked away somewhere. But before you do, let's embark on a journey. We're going to transform it into a WiFi hotspot. Ready? Then, let's dive in!
Cracking the Code: Why Your XP Laptop Still Matters
Believe it or not, Windows XP still holds its own. Sure, it's ancient. Nevertheless, for certain tasks, it's remarkably useful. Perhaps you need a secure network. Or, maybe you need a specific piece of software. Whatever the reason, we're here to help. In order to unlock your XP laptop’s WiFi potential, you will require this guide.
The Wireless Network Setup Wizard: Your First Step
Here's the exciting part. First, locate the "Network Connections" on your XP laptop. You can usually find this through the Control Panel. If you can't find it, don't worry! You can find it by searching through start menu. It's often conveniently located there. Secondly, right-click on your active network connection. Then choose "Properties." Look for the "Advanced" tab. Check the box that says "Allow other network users to connect through this computer's Internet connection."
Bridging the Gap: Creating a Network Bridge
Now, it's time to create a network bridge. This step is crucial for sharing your internet connection. Head back to your "Network Connections" window. Select both your active internet connection and your wireless network adapter. Right-click on both of them. Now select “Bridge Connections.”
Setting Up Your Wireless Network
Next, access your wireless network settings. Within the same window, click on “Wireless Network Connection Properties.” Select "Internet Protocol (TCP/IP)." Now, click on “Properties.” Select the "Use the following IP address" option. You will need to assign an IP address like 192.168.0.1. The subnet mask should be 255.255.255.0. Leave the default gateway blank. Subsequently, click “OK”.
Troubleshooting Tips and Tricks: Staying Connected
If you're facing any issues, don't panic. First, ensure your wireless adapter is enabled. Check the adapter's status. Verify that the SSID (network name) is correct. Then, check your security settings. Also, ensure you have a valid internet connection on your main network. If you're still having trouble, consider restarting your router and computer.
Securing Your WiFi Hotspot: Keeping Your Network Defended
Never neglect security! First, select a strong password. Use a WPA2-PSK encryption. Regularly change your password. Enable your firewall. Consider MAC address filtering. Also, keep your antivirus software up-to-date. Finally restrict the number of connected devices. Additionally, these steps will greatly enhance security.
The Joy of Connectivity: Beyond the Basics
Once your hotspot is running, the possibilities are endless. Moreover, you can connect any device. Share files with ease. Stream videos, browse the internet. It’s like having your own mini-network. Also, you could provide a secure connection. You can even access your home network remotely. It's a great way to share your internet.
Expanding Your Horizons: Further Exploration
Consider exploring advanced features. You should experiment with IP address ranges. You can also set up port forwarding. In addition, consider using a VPN for enhanced privacy. This will enable you to do much more. The choices are available for the inquisitive.
Conclusion: Embracing the XP-erience
Here’s the bottom line. Your Windows XP laptop isn’t just a relic. Indeed, it is a powerful tool. It’s capable of being a WiFi hotspot. It’s easy to configure. Therefore, give it a try. You will find yourself surprised. Also, you’ll be more connected than ever. It's time to unlock this secret trick!
HP Laptop Wifi Nightmare: Red Caps Lock Blinking! (Solved!)Unlock Your Laptop's WiFi Hotspot: XP Edition (Secret Trick!)
Alright, tech adventurers, buckle up! Remember the days of Windows XP? That trusty operating system that held our digital lives together, even when the internet felt like a faraway land? Well, believe it or not, that old workhorse still has a few tricks up its sleeve. One of the coolest? Turning your laptop into a WiFi hotspot! And, folks, let's be honest, it’s a bit of a secret trick, because it's not exactly intuitive. We'll dive deep, and I'll guide you through it. It's like finding a hidden passage in a classic adventure game!
1. The Nostalgic Appeal: Why Bother with XP in 2024?
Before we even begin, you might be thinking: “XP? Seriously? Isn't that ancient history?” And you’re not entirely wrong! But here's the thing: sometimes, for old hardware, or specific scenarios, XP can still be useful. Maybe you have an older device that only runs XP. Perhaps you're a collector, or you're involved in a project that requires it. Or, lets be honest, you enjoy the nostalgia! Plus, learning this method can be a fun little challenge. It's like learning a secret handshake – a skill that few others possess.
2. Understanding the "Why" Behind the WiFi Hotspot Hustle
Why would we want to create a WiFi hotspot with XP? Well, picture this: You're stuck at a friend’s house with no internet access, and your phone desperately needs to update its apps. Or, you need to connect a device that doesn't have its own direct internet connection. A hotspot bridges the gap. It's like having a personal internet router on the go, a digital umbilical cord providing connectivity to your devices.
3. Unveiling the Secret Ingredient: The Internet Connection Sharing (ICS)
The key to unlocking this WiFi hotspot magic lies within a feature called Internet Connection Sharing (ICS). It's a hidden gem buried within the depths of your XP settings. Think of it as a hidden portal, ready to be activated.
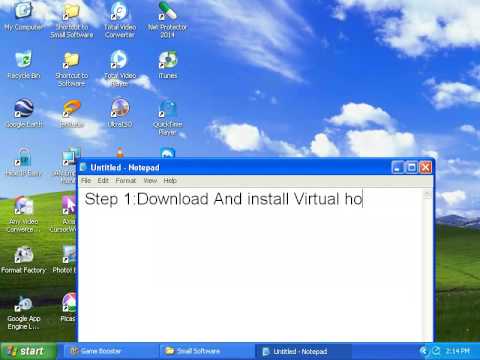
4. Step-by-Step: Preparing Your Connection for the Magic
Before we conjure the hotspot, we need to prepare our internet connection. This means configuring your internet connection, which is the most important part. This process involves a few setup steps that might not always connect smoothly because of settings. So, lets take a closer look!
- Connect to the Internet: Ensure your laptop's connected to the internet, either through a wired Ethernet connection or a built-in WiFi network. This is your primary source of internet, the foundation for our hotspot.
- Note Your Network Connection: If you're using WiFi to receive the internet, take note of the name of your wireless network.
5. The Grand Ritual: Enabling Internet Connection Sharing
Now for the fun part! Let’s dive into the actual setup of our WiFi hotspot:
- Open Network Connections: Go to your Control Panel and find "Network Connections." It'll be in different places based on your view, but normally a simple search can find it.
- Selecting Your Internet Connecion: Right-click on the internet connection you're using (Ethernet or WiFi - the one that receives the internet).
- Properties: Select "Properties" from the menu that comes up.
- Sharing Tab: Click on the "Sharing" tab at the top of the Properties window. This is our secret portal, remember?
- Tick the Box: Check the box that says "Allow other network users to connect through this computer's Internet connection." We're effectively telling XP, "Hey, share this internet with everyone!"
- Select a Network Connection: In the drop-down menu, choose the network adapter that you want to share your internet over. This will typically be your Wireless Network Connection.
- Confirm: Click on "OK."
6. Setting Up the WiFi Network (The Soft-AP)
After enabling Internet Connection Sharing, XP will create a virtual network, also known as a Soft-AP. However, it might need more configuration.
- Configure the Soft-AP: If you are using a wireless network connection (which is generally the case), you'll need to make sure that your network adapter is set up for ad-hoc networking.
- Network Settings: From the Network Connections (in Control Panel) right-click on your Wireless Network Connection, then "Properties."
- Wireless Networks Tab: On the properties window, click on the "Wireless Networks" tab.
- Default Setting: You'll see your available connections. Select "Use Windows to connect to the network".
- Advanced: You may need to click the "Advanced" button and select "Computer-to-computer (ad hoc) networks only".
- Click "OK".
7. Configuring Your Wireless Network: Name and Security
Now for the critical step. Let's configure our network, which will allow us to access your internet.
- Configure the network: Go to "Advanced Settings".
- Wireless Network Setup: Click "Add".
- Network Name (SSID): Give your network a name. This is how your other devices will "see" your hotspot. Think of it as your network's identity.
- Authentication: Select "Open" or "WEP".
- WEP Key: If you select WEP, you will need to create a key.
- Click "OK".
Note: Older security types like WEP are not as secure as newer ones. Make sure only to use this on trusted networks.
8. Troubleshooting the Techy Obstacles: When Things Go South
Not everything works on the first try. Here are some common problems, and how to fix them:
- No Internet Access on Connected Devices: Double-check the settings. Are all the steps followed? Have you correctly selected your incoming internet connection and the Wireless Network Connection? Is the firewall blocking the connection?
- Connection Issues: Your other devices might not be able to connect. Make sure the configuration is correct (especially the password).
- Slow Speeds: You're sharing your bandwidth. So expect a little slow down.
9. The Beauty of Simplicity: The Pros and Cons
Like any tech solution, our hotspot trick has its advantages and disadvantages.
Pros:
- Free: It costs no extra money, using existing hardware and software.
- Portable: You can bring your hotspot with you anywhere you take your laptop.
- Easy to set up (once you know how!):
Cons:
- Security: WEP is less secure than modern encryption methods.
- Limited Range: Your wireless signal range is limited to your laptop's abilities.
- Power Consumption: Running a hotspot drains your laptop's battery faster.
10. Beyond the Basic: Advanced Configurations
For those feeling adventurous, there are a couple of advanced tweaks you can explore:
- Static IP: Adjusting your network IP address to use one that's not assigned can open the doors for other possible settings.
- Changing IP settings in the Connection Sharing: You can manipulate settings to further personalize your experience, but it is not recommended for beginners.
11. The Digital Campground: Testing and Using Your Creation
Alright, you've done it! Now, test by connecting your phone, tablet, or another device to your newly created hotspot. If it works, congratulations! You've just built a digital campsite, where all your devices can gather around the internet fire.
12. Security Considerations: Keeping Your Data Safe
Remember the discussion with the "Old Security Types" we already mentioned? This is very important, so let's go over it! The risk of unsecured networks is real. Use strong passwords and consider the devices that connect to this network.
13. The Hotspot Renaissance: Modern Alternatives
Even with our secret trick, other tools make this approach even easier. Mobile hotspots on phones, and dedicated devices, offer more user-friendly experiences. But you've mastered XP, a fact that few can claim.
14. The Ultimate Takeaway: Is It Worth the Effort?
So, is it worth it? For a bit of tech history, a nostalgic journey, and the satisfaction of mastering a tricky task? Absolutely! Plus, it gives you a backup plan for when you're in a pinch.
15. Embrace the Challenge: Your XP WiFi Journey
We've unlocked the secret. Now, it's your turn to try it, and feel the nostalgia of the "good old days"! The journey may not be easy, but the reward is worth: unlocking the internet, one XP laptop at a time.
Closing Thoughts
So, there you have it! Turning your Windows XP laptop into a WiFi hotspot. It's a fun, slightly quirky, but ultimately useful skill that proves sometimes, the old dogs can learn new tricks. I hope this guide has helped you, and I wish you the best of luck on your digital adventures! Now go forth and connect!
FAQs
- **Can I use this on a modern
How to make your laptop to a wifi hotspot on windows xp788.1
By Arafatur Rahman Shimul How to make your laptop to a wifi hotspot on windows xp788.1 by Arafatur Rahman Shimul
Create Hotspot in Windows xp
By isoft Developer Create Hotspot in Windows xp by isoft Developer
Creating Wifi Hotspot in Windows Xp788.1 & 10 SomeTechStuff

By SomeTechStuff Creating Wifi Hotspot in Windows Xp788.1 & 10 SomeTechStuff by SomeTechStuff
Title: Wi-Fi Hotspot in Windows XP Step by Step
Channel: alexn1138
Wi-Fi Hotspot in Windows XP Step by Step by alexn1138
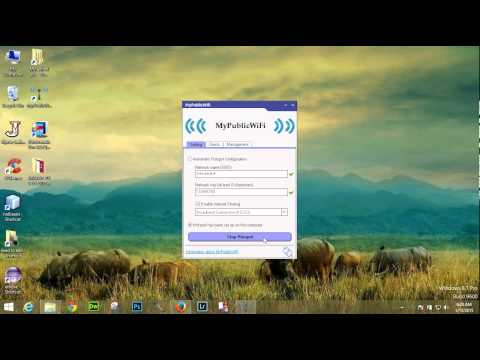
Laptop Wifi Hotspot
Unlock Your Laptop's WiFi Hotspot: XP Edition (Secret Trick!)
Ever wished you could share your laptop's internet connection with other devices, transforming it into a mobile hotspot? If you're still rocking Windows XP – a testament to its enduring utility – you might think this is a modern convenience beyond your reach. However, we are here to tell you that you are mistaken. We will unveil a simple, yet powerful, method to unleash your laptop's hidden potential and create a WiFi hotspot, right from your Windows XP machine. This method leverages built-in features of XP, bypassing the need for complicated software or external devices. Ready to get started? Let’s dive in!
Understanding the Basics: The Foundation of Your XP Hotspot
Before we begin the implementation, let's grasp the underlying principle. The core of this method revolves around the Internet Connection Sharing (ICS) feature embedded within Windows XP. This feature, often overlooked, allows your computer to act as a gateway, routing the internet connection from a single source (like your wired Ethernet connection or a connected USB modem) to other devices wirelessly, via your laptop’s Wi-Fi adapter. Essentially, your laptop becomes a bridge, sharing the wealth of the internet with your other devices. The only requirement is that your laptop has a functional wireless network adapter. Assuming you already have an internet connection, let us proceed to set up the shared connection.
Step 1: Setting the Stage – Enabling Internet Connection Sharing
The first step involves accessing the network connections settings. Here's how to get there:
Open the Control Panel: Navigate to the Windows XP Control Panel. You can usually find this by clicking on the Start menu and selecting Control Panel.
Access Network Connections: Depending on your Control Panel view, you may see an icon labeled “Network Connections” or you may need to click on “Network and Internet Connections” and then “Network Connections.” Double-click on the corresponding option.
Identify Your Internet Connection: Within the Network Connections window, you'll see icons representing your network adapters. You need to identify the adapter currently used to access the internet. This is typically a connection labelled “Local Area Connection” if you're using a wired Ethernet connection, or a connection with the name of your wireless network if you connect through Wi-Fi. It is also possible that your internet connection is from an external USB modem.
Access Properties: Right-click on your internet connection (the one you currently use to browse the web) and select “Properties.”
Navigate to the Sharing Tab: In the Properties window of your internet connection, click on the “Advanced” tab.
Enable Internet Connection Sharing: Under the “Internet Connection Sharing” section, check the box that says “Allow other network users to connect through this computer’s Internet connection.”
Select Your Private Network Adapter: A drop-down menu will appear below the sharing checkbox. This menu lists available network adapters on your laptop. If you're unsure, select your wireless network adapter - the one used for your laptop's Wi-Fi.
Confirm and Apply: Click “OK” to save the settings and close the properties window. Windows XP may restart or prompt you to restart for the changes to take effect.
Step 2: Configuring Your Wireless Network Adapter – The Key to the Hotspot
Now that the internet connection is enabled, we need to configure your wireless network adapter to function as the hotspot. This involves setting up the network name (SSID) and the security key that your other devices will use to connect.
Access Your Wireless Connection Properties: Repeat the procedure from Step 1 to bring up the Network Connections window. This time, locate the icon representing your wireless network adapter. Double click that icon to open the properties window.
Open the Wireless Networks Tab: Click on the “Wireless Networks” tab. This is where you'll create or modify the properties of your Wi-Fi network.
Add a Preferred Network: If there are no networks listed, or if you want to change your current settings, click the "Add" button. This will open the settings for a new wireless network, which is going create by you.
Enter Network Information: In the "Association" tab, you have to configure the details.
- Network Name (SSID): Enter a name for your wireless network. This is the name that will appear when other devices scan for available Wi-Fi networks. Choose a name that is easily identifiable by the other users.
- Network Authentication: Select "WPA-PSK" which stands for Wi-Fi Protected Access Pre-Shared Key.
- Data Encryption: Select "TKIP" or "AES". Both are decent and standard protocols.
- Network Key: Enter a strong password. This is the security key your other devices will use to connect to your hotspot. Your password should be at least 8 characters long and include a mix of letters, numbers, and symbols.
- Confirm the Network Key: Re-enter the network key to verify accuracy.
Ensure Automatic Connection: Ensure that the "Automatically connect to this network" box is checked. This allows other devices to connect automatically once they've entered the network key.
Save the Settings: Click "OK" to save the wireless network settings.
Restart Windows XP: Restart your Windows XP machine to allow the new settings to take effect.
Step 3: Connecting Your Devices to Your New XP Hotspot
With your laptop configured as a hotspot, it's time to connect your other devices.
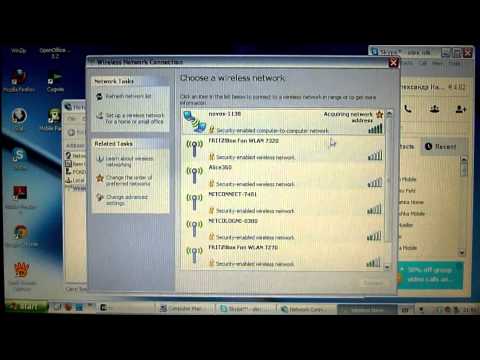
Scan for Available Networks: On your smartphone, tablet, or other Wi-Fi enabled device, go to the Wi-Fi settings and scan for available networks.
Select Your Hotspot: Identify and select the network name (SSID) you configured earlier.
Enter the Security Key: When prompted, enter the security key (password) you created in Step 2.
Connect and Browse: Once the device connects successfully, you should be able to browse the internet using the shared connection from your Windows XP laptop.
Troubleshooting Common Issues: Smooth Sailing for Your Hotspot
Even with these straightforward steps, you might encounter a few hiccups. Here's how to address some frequent problems:
No Internet Connection on Connected Devices:
- Verify Internet Sharing: Double-check that Internet Connection Sharing is enabled on your internet connection properties (Step 1).
- Check the Wireless Network Adapter: Confirm that the wireless network adapter is selected in the "Home networking connection" dropdown.
- Restart Devices: Restart both your laptop and the devices trying to connect.
- Firewall Interference: Sometimes, the Windows XP built-in firewall or a third-party firewall can block the shared connection. Temporarily disable your firewall (temporarily) to see if this resolves the issue. Remember to re-enable it afterward or configure it to allow the shared connection.
Unable to Find the Hotspot:
- Wireless Adapter Enabled: Make sure your laptop's Wi-Fi adapter is enabled. You may need to use the keyboard shortcut (e.g., Fn + Wi-Fi key) or a physical switch.
- Incorrect SSID: Verify you entered the correct network name (SSID) in the wireless network settings. Double-check for typos.
- Check for interference: Ensure that there are no obstructions between your wireless devices.
Slow Connection Speed:
- Distance from the Laptop: The further your devices are from your laptop, the weaker the signal, resulting in a slower connection. Keep your devices within a reasonable range.
- Interference: Devices like microwaves and cordless phones can interfere with the Wi-Fi signal. Move your laptop or the connecting device away from potential sources of interference.
- Number of Connected Devices: The more devices connected to the hotspot, the more the bandwidth is shared. If you have many devices, you may experience slower speeds.
Maximizing Your Hotspot Experience: Tips and Tricks
- Security is Paramount: Treat your password like a precious secret. Avoid using easily guessable passwords. Change your password frequently, especially if you are opening your laptop publicly.
- Monitor Your Data Usage: Keep track of your internet data allowance, particularly if you're using a metered connection. Heavy use can quickly deplete your data limits.
- Regular Updates: While Windows XP is outdated, ensure any available driver updates for your wireless network adapter are installed. Driver updates can improve performance and stability.
- Power Management: When using your laptop as a hotspot, consider adjusting your power settings to prevent the Wi-Fi adapter from turning off. Go to your laptop's power plan settings and make sure the Wi-Fi adapter doesn't turn off when the device is not in use.
Conclusion: Unleashing the Power of Your Windows XP Laptop
Creating a Wi-Fi hotspot on your Windows XP laptop is not just possible; it’s a straightforward process. By leveraging the built-in Internet Connection Sharing feature and properly configuring your wireless network adapter, you can transform your laptop into a reliable mobile hotspot. With the steps outlined, you can share your internet connection with other devices, expanding the versatility of your laptop and keeping you connected wherever you go. So, dust off your old
