laptop as wifi hotspot windows 8.1

Title: Turn Windows 8 Laptop into WiFi HotSpot How To
Channel:
Turn Windows 8 Laptop into WiFi HotSpot How To by
Windows 8.1 Hotspot: The Easiest Way to Share Your Laptop's WiFi!
Unleash Your Wi-Fi: Windows 8.1's Secret Weapon for Seamless Sharing
Alright, let's dive in! You have a laptop, and you have internet. However, you need to share that connection with other devices. Furthermore, you want it to be simple. Well, prepare to be amazed! Windows 8.1 offers a surprisingly easy way to turn your laptop into a Wi-Fi hotspot. This is a lifesaver.
Why Bother? The Perks of a Laptop Hotspot
Think about the possibilities! Imagine you're traveling. You're in a hotel. You have multiple devices. You're only paying for one internet connection. Now, imagine sharing that single connection wirelessly. This is a fantastic scenario. Moreover, think about those moments when a friend visits. They need quick internet access. You can easily provide it. Therefore, a laptop hotspot becomes incredibly useful. It's a versatile tool.
Setting the Stage: Before You Begin
Before we get started, a few things are vital. First, make sure your laptop has a Wi-Fi adapter. Surprisingly, most modern laptops do. Second, ensure you're connected to the internet. Thirdly, you should verify your Windows 8.1 is updated. These are basic, but crucial steps. Consequently, you will have a better experience. Also, consider your data plan. Sharing a connection consumes data. Keep track of your usage.
Step-by-Step Guide: Creating Your Hotspot
Now, for the main event: setting up the hotspot. Firstly, access the charms bar. You can do this by moving your mouse to the top or bottom-right corner of your screen. Secondly, click on "Settings". Next, select "Change PC settings". After that, navigate to "Network". There, you'll find "Mobile Hotspot". Furthermore, toggle the "Share my internet connection with other devices" switch to "On".
Customizing Your Hotspot: Making It Your Own
Don't settle for the default settings! You can customize your hotspot. Therefore, click on "Edit". You'll be able to change the network name (SSID). This is the name other devices will see. Next, choose a strong password. This will protect your connection. Then, decide on the band. 2.4 GHz is more compatible. 5 GHz offers faster speeds if supported. Finally, click "Save".
Connecting Your Devices: Bridging the Gap
Once your hotspot is set up, connecting devices is simple. Firstly, on your other device, open the Wi-Fi settings. Secondly, search for available networks. You should see the network name you created. Next, select your network. Then, enter the password you set. Finally, hit "Connect". This is the moment you've been waiting for!
Troubleshooting Tips: Fixing Common Hiccups
Sometimes, things don't go perfectly. Don't worry! Here are some troubleshooting tips. Firstly, make sure your laptop's Wi-Fi adapter is enabled. Secondly, remember to disable any firewalls. They might be blocking the connection. Thirdly, try restarting both your laptop and the connecting device. After, ensure entered the correct password. Indeed, you can try forgetting the network and reconnecting.
Security Matters: Protecting Your Connection
Security is important. Never forget this! Therefore, ensure you use a strong password. It should be at least eight characters long and contain a mix of letters, numbers, and symbols. Also, avoid open networks. They aren't secure. Moreover, consider setting up a data limit. This prevents accidental overage charges.
Beyond Windows 8.1: Looking Ahead
While Windows 8.1's hotspot feature is convenient, there are alternatives. For example, you might consider a dedicated mobile hotspot device. These devices offer more advanced features. They also provide better battery life. Furthermore, they can handle more connected devices. However, for quick, easy sharing, Windows 8.1's built-in option is excellent.
Embrace the Freedom: Sharing Your Wi-Fi with Ease
So, there you have it! You've learned how to use Windows 8.1 to share your laptop's Wi-Fi. This is a simple process. It unlocks greater flexibility and convenience. You can now connect multiple devices. You can also share your internet connection. Overall, this enhances productivity. Start sharing your internet with ease today! That's all for now.
Dell XPS 9350 WiFi Driver: Download the FIX NOW! (Guaranteed)Windows 8.1 Hotspot: The Easiest Way to Share Your Laptop's WiFi!
Hey everyone! Ever found yourself in a data pinch? You're out and about, desperately needing internet access on your phone, tablet, or maybe even a friend's device, but the Wi-Fi is nowhere to be found. Sound familiar? Well, if you're rocking a Windows 8.1 laptop, you're in luck! We're diving deep into the surprisingly simple world of creating a Wi-Fi hotspot directly from your trusty machine. Think of it as your personal internet portal, ready to beam connectivity wherever you go. Get ready to ditch the data worries and embrace the freedom of shared Wi-Fi!
1. The Need for Speed: Why a Windows 8.1 Hotspot Matters
Before we get our hands dirty with the how-to, let's talk about why. Why would you bother creating a hotspot from your laptop? Honestly, the reasons are plentiful!
- Data Conservation: Smartphones are data guzzlers. Streaming videos, social media scrolling, and even simple email checks can eat up your data plan in a heartbeat. A hotspot lets you offload those data-intensive activities onto your laptop's Wi-Fi connection, saving your precious mobile data for truly essential tasks.
- Device Connectivity: Got a tablet, a friend's phone, or a gaming console that needs the internet? A Windows 8.1 hotspot bridges the gap, allowing multiple devices to connect simultaneously. It's like having a mini Wi-Fi router in your pocket!
- Public Wi-Fi Woes: Public Wi-Fi, while convenient, can be a security minefield. By creating your own secure hotspot, you control the connection and protect your data from potential threats. Think of it as building your own digital fortress.
- Emergency Situations: Imagine you're stranded somewhere with no Wi-Fi, and you NEED to access the internet. Whether it’s for a quick Google search, checking directions, or calling for help, your laptop's hotspot can be a lifesaver.
2. Prerequisites: Gear Up Before You Get Connected
Alright, so you're sold on the idea. Great! But before we jump into the steps, let's make sure you have everything you need.
- A Windows 8.1 Laptop: This is pretty obvious, right? Without a Windows 8.1 laptop, this entire experiment is a no-go.
- An Active Internet Connection: This is the fuel that powers your hotspot. Whether you're connected via Wi-Fi or Ethernet, your laptop needs a working internet connection to share.
- A Pinch of Patience: While the process is simple, sometimes technology can be a little temperamental. Don't worry, we'll walk you through it.
3. Diving In: Setting Up Your Windows 8.1 Hotspot
Here's the fun part! The actual setup. Follow these straightforward steps, and you'll be sharing your Wi-Fi in no time.
Open the Command Prompt (Admin): This is the secret portal to the hotspot world. Press the Windows key + X to open the Power User menu, then select "Command Prompt (Admin)." This gives you the necessary permissions to make changes. Don’t fret, it’s not as scary as it sounds! Think of it as the cockpit of your Wi-Fi spaceship.
The Magical Commands: Type in the following commands, one at a time, pressing Enter after each. Don’t worry, we'll break them down in the next step!
netsh wlan set hostednetwork mode=allow ssid="YourHotspotName" key="YourPassword"netsh wlan start hostednetworknetsh wlan show hostednetwork
Decoding the Commands: Let's unravel the mystery of those seemingly alien commands.
netsh wlan set hostednetwork mode=allow ssid="YourHotspotName" key="YourPassword": This is the command that initiates the creation of the hotspot.mode=allow: Enables the hosted network functionality.ssid="YourHotspotName": This sets the name of your hotspot. Replace"YourHotspotName"with whatever you want to call it (e.g., "MyAwesomeHotspot"). Choose something memorable and easy to type!key="YourPassword": This sets the password for your hotspot. Replace"YourPassword"with a strong, secure password (at least 8 characters). Don’t use your birthday or the name of your pet!
netsh wlan start hostednetwork: This command starts the hotspot. It brings your creation to life!netsh wlan show hostednetwork: This shows you the current status of your hotspot. It will confirm whether it is active and show the information about connected devices.
Sharing Your Internet Connection: We're almost there! This critical step actually makes the connection available for other devices.
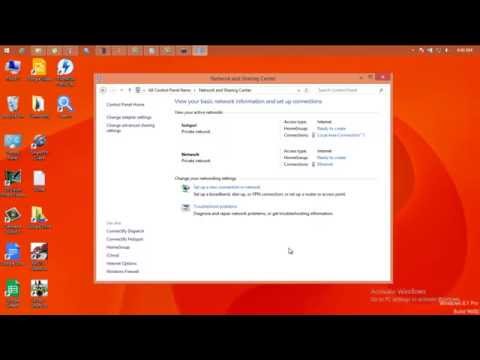
- Open the Network and Sharing Center. You can find this by searching for it in the Start Menu.
- Click on "Change adapter settings" on the left-hand side.
- You'll see a list of your network adapters. Identify the one that's currently connected to the internet (Wi-Fi or Ethernet).
- Right-click on that adapter and select "Properties."
- Go to the "Sharing" tab.
- Tick the box that says "Allow other network users to connect through this computer's Internet connection."
- In the "Home networking connection" dropdown, select the "Microsoft Hosted Network Virtual Adapter" (or something similar). This is the virtual adapter created by the commands we ran earlier, which is the virtual Wi-Fi.
- Click "OK."
Testing and Connecting: Now, take out your phone, tablet, or other device and search for Wi-Fi networks. You should see the hotspot name you created earlier (e.g., "MyAwesomeHotspot"). Select it, enter your password, and voila! You're connected.
4. Troubleshooting: When Things Don't Go as Planned
"Houston, we have a problem!" Sometimes, despite our best efforts, things don't work perfectly. Here are some common issues and how to fix them:
- Hotspot Won’t Start: Double-check your commands! Make sure you typed them correctly, including the spaces and quotation marks. Also, ensure you're running the Command Prompt as an administrator.
- Other Devices Can't Connect: Verify the password! It’s easy to mistype it. Also, make sure you've enabled internet sharing in the Network and Sharing Center (step 4 above). Check the status of your Hosted Network using 'netsh wlan show hostednetwork'.
- Internet Connection Slow: Your laptop's Wi-Fi card might be struggling to handle both receiving and transmitting data simultaneously. Try moving your laptop closer to the internet source or reducing the number of connected devices. Close any bandwidth-heavy applications on your laptop.
- "The Hosted Network Couldn't Be Started" Error: This can happen. Try restarting your computer. If that doesn't work, make sure your Wi-Fi adapter drivers are updated.
5. Security First: Protecting Your Shared Network
Sharing your Wi-Fi is amazing, but don't forget about security! Here's how to keep your hotspot safe:
- Strong Password: Use a robust, unique password. Avoid easily guessable passwords like your birthdate or the name of your pet.
- Encryption: Your hotspot should automatically use WPA2 encryption (the most secure option). This encrypts the data transmitted over your network, making it harder for hackers to intercept your information.
- Monitor Connected Devices: Use the
netsh wlan show hostednetworkcommand, or check the network settings on your laptop, to see which devices are currently connected to your hotspot. If you spot any unfamiliar devices, change your password immediately. - Disable When Not in Use: When you’re done sharing your Wi-Fi, make sure to stop the hosted network. You can do this using the command
netsh wlan stop hostednetworkin the Command Prompt (Admin).
6. Beyond the Basics: Advanced Hotspot Tweaks
Feeling techy? Here are some optional advanced settings to customize your hotspot:
- Changing the Channel: By default, your hotspot uses an automatic Wi-Fi channel, but you can change it to avoid interference from other networks. In the Command Prompt (Admin), use the command
netsh wlan set hostednetwork channel=6(replace "6" with your desired channel number). - Limiting the Number of Connections: You can limit the number of devices that can connect to your hotspot. However, Windows 8.1 doesn't provide a direct setting for this.
- Monitoring Data Usage: Use built-in Windows 8.1 features (like Task Manager) to monitor the bandwidth and see how much data is being used by connected devices.
7. Windows 8.1 vs. Windows 10 and beyond: The Hotspot Evolution
While Windows 8.1's built-in hotspot feature is solid, it's worth noting that Windows 10 and later versions offer a more user-friendly and streamlined approach. In newer versions, you can create a hotspot through the Settings app, making the process even easier. However, the underlying functionality is similar. The knowledge you gain here can be adapted to other operating systems!
8. Power Saving Considerations: Maximizing Battery Life
Creating a hotspot can drain your laptop's battery faster. Keep in mind a few strategies to extend your battery life.
- Enable Power Saving Mode: In Windows 8.1, go to the Control Panel and navigate to Power Options. Select a power plan to optimize for battery life.
- Dim the Screen: Lowering your screen brightness can save significant power.
- Close Unnecessary Apps: Running fewer applications minimizes the drain on your battery.
- Use a Power Adapter: If available, plug your laptop into a power outlet while using the hotspot. This is the best way to avoid battery issues.
9. Security Checks: Regular Maintenance For a Secure Hotspot
Think of your hotspot as a digital garden. It needs tending to keep it healthy and secure.
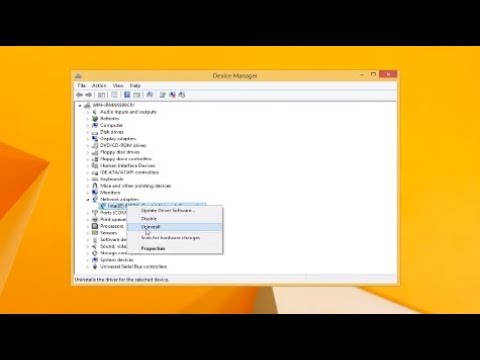
- Update Your Drivers: Ensure your Wi-Fi adapter drivers are up to date. Outdated drivers can create security vulnerabilities and can cause performance issues. You can update drivers through the Device Manager in Windows 8.1.
- Run a Malware Scan: Periodically run a scan with a reputable antivirus program to detect and remove any malware infections.
- Review Your Security Settings: Regularly check your hotspot's password, encryption settings, and the list of connected devices.
- Be Cautious Online: Even with a secure hotspot, practice safe browsing habits. Avoid clicking suspicious links, downloading files from untrusted sources, and be mindful of the websites you visit.
10. Making Life Easier: Automating the Hotspot Startup
Wouldn't it be amazing if your hotspot started automatically every time you boot up your laptop? You can do it with a simple trick!
- Create a Batch File: Open Notepad (or any text editor).
- Paste the following commands into the Notepad:
netsh wlan set hostednetwork mode=allow ssid="YourHotspotName" key="YourPassword"
netsh wlan start hostednetwork
(Remember to replace "YourHotspotName" and "YourPassword" with your actual hotspot details!)
- Save the File: Save the file with a
.batextension (e.g., "hotspot.bat"). Choose "All Files" in the "Save as type" dropdown. - Create a Shortcut: Right-click on the
.batfile and select "Create shortcut." - Move the Shortcut to the Startup Folder: Press the Windows key + R, type
shell:startup, and press Enter. This opens your Startup folder. Drag and drop the shortcut into this folder.
Now, every time you start your laptop, the hotspot will automatically start up (assuming your internet connection is active). Neat, isn’t it?
11. Beyond the Laptop: Extending the Hotspot's Reach
While the Windows 8.1 laptop is the hub, you can expand your hotspot's reach with a couple of tips!
- External Wi-Fi Adapters: If your laptop has a weak Wi-Fi adapter, you can use an external USB Wi-Fi adapter to boost the signal strength and coverage.
- Wi-Fi Extenders: Extend the range of your hotspot using a Wi-Fi extender, which can rebroadcast the signal to a wider area.
12. The Human Connection: Sharing and Community
Technology can be a solitary experience. The beauty of a hotspot: it allows you to share your internet with others. Let’s talk about that!
- Sharing with Family and Friends: Share your hotspot with family members, and friends, to provide connectivity when they’re without Wi-Fi.
- Helping Others: If you see someone struggling to connect, consider extending the offer of your hotspot. It can be a lifesaver in emergencies.
- Community Spirit: Being generous with your Wi-Fi can build stronger communities.
13. Ethical Considerations: Responsibility in Sharing
With great power (of the shared internet!) comes great responsibility. Let’s consider a few ethical points.
- Respect Data Caps: If you have a limited data plan, clarify its availability to the devices, so they don't blow through your data allocation.
- Avoid Illegal Activities: Just because you can share your internet doesn't mean you should facilitate illegal activities.
- Privacy Awareness: Remind everyone that their online activities might be visible to you, particularly if they are not using secure browsing or a VPN.
14. The Future is Connected: The Evolving Landscape of Hotspots
Hotspots have evolved, and will continue to do so!
- 5G and Beyond: With the emergence of 5G and other faster speeds, hotspots are growing even more.
- Mobile Hotspot Devices: Dedicated mobile hotspot devices are still a popular option.
- The Internet of Things: Expect to see hotspots play a more central role in connecting smart devices.
15. A Final Word: Embracing the Wi-Fi Wave
We've covered a lot of ground, from the basics to advanced modifications. Creating a Windows 8.1 hotspot is a surprisingly simple process that opens doors to connectivity, data conservation, and security. Go forth, share your Wi-Fi, and enjoy the freedom of staying connected in the world.
Conclusion
So, there you have it
HP Laptop WiFi Direct: The SHOCKING Secret to Blazing-Fast Wireless!Turn your Windows 8 Laptop into Wifi Hotspot

By Tricks That Make you Smart Turn your Windows 8 Laptop into Wifi Hotspot by Tricks That Make you Smart
Membuat Hotspot WiFi di Windows 8.1, 8, 7 LaptopPC
By ANDREW CRUZ Membuat Hotspot WiFi di Windows 8.1, 8, 7 LaptopPC by ANDREW CRUZ
Cara mengatasi Wifi adapter hilang windows 7,8,10
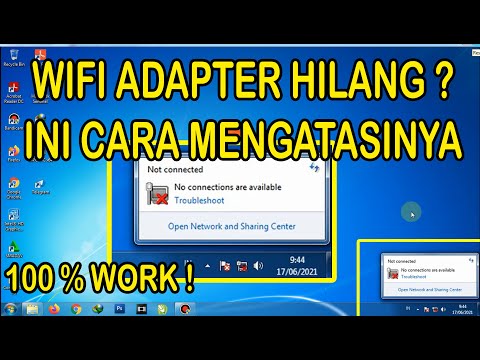
By Ani Saja Cara mengatasi Wifi adapter hilang windows 7,8,10 by Ani Saja
Title: Windows 8.1 - Tidak Tersedia Koneksi Internet
Channel: MDTechVideos
Windows 8.1 - Tidak Tersedia Koneksi Internet by MDTechVideos
Wifi On Laptop
Windows 8.1 Hotspot: Effortless WiFi Sharing from Your Laptop
Navigating the digital landscape requires connectivity, a fundamental need in our increasingly interconnected world. Whether you're on the go, in a location lacking readily available WiFi, or simply seeking to share your internet access with others, the built-in hotspot functionality of Windows 8.1 provides a convenient and surprisingly robust solution. We at [Your Company Name] are delighted to guide you through the process of harnessing this powerful feature, transforming your laptop into a mobile WiFi hub with ease and efficiency. Prepare to become a WiFi-sharing virtuoso!
Understanding the Windows 8.1 Hosted Network
The core technology underpinning Windows 8.1's hotspot capability is the "hosted network" feature. This feature leverages your laptop's existing WiFi adapter to create a virtual network interface. This virtual interface acts as a router, allowing other devices – smartphones, tablets, other laptops, and even certain smart home devices – to connect to the internet using your laptop's connection. The process, while straightforward, is imbued with a level of configurability that allows for a customized sharing experience.
The crucial element is your laptop's WiFi adapter. Not all adapters are created equal. Older or less capable adapters might not fully support the hosted network feature. The good news is that the vast majority of laptops produced in the era of Windows 8.1 are equipped with WiFi adapters that readily handle this functionality. If you're unsure, a quick driver update or a check of your device manager will illuminate your adapter's capabilities.
Setting Up Your Windows 8.1 Hotspot: A Step-by-Step Guide
Activating your Windows 8.1 hotspot is a relatively simple procedure, executed directly from the network settings. Here's a comprehensive, step-by-step guide to get you up and running:
Step 1: Accessing Network Settings:
Begin by navigating to the Charms bar (swipe in from the right edge of your screen, or move your mouse to the bottom right corner and move the mouse pointer upwards). Select "Settings," and then click on "Change PC settings." In the settings window that opens, choose "Network."
Step 2: Enabling Mobile Hotspot:
Within the "Network" settings, you'll find an option labeled "Mobile hotspot." Click on this option to access the hotspot configuration interface.
Step 3: Selecting Your Internet Connection:
Before activating the hotspot, one needs to specify the source of your internet connection. Below the "Share my internet connection from" heading, there will almost certainly be a drop-down menu. This menu will display your available internet connections. Select the specific connection you wish to share. This could be your primary WiFi connection, an Ethernet connection if you're connected to a wired network, or even a mobile broadband connection via a dongle or built-in modem.
Step 4: Customizing Your Hotspot:
Now it's time to personalize your hotspot. Click on "Edit" under where it says the network name. This will bring up a window where you can configure the following:
- Network name: Define the name (SSID) by which your hotspot will be identified by other devices. Choose something memorable, and unique.
- Password: Crucially, establish a strong password to secure your hotspot. This prevents unauthorized access and safeguards your internet connection. A strong password should be a minimum of 12 characters in length, incorporating a mix of uppercase and lowercase letters, numbers, and symbols.
- Network band: This enables the choice between 2.4 GHz and 5 GHz frequencies. The 2.4 GHz band offers wider coverage but can be susceptible to interference. The 5 GHz band offers higher speeds and less interference, but with reduced range. If supported by your adapter and the devices you plan to connect, the 5 GHz band is often the better choice.
Step 5: Turning on the Hotspot:
Once you’ve configured your network settings, toggle the "Share my internet connection with other devices" switch to "On." Your Windows 8.1 laptop will immediately begin broadcasting your hotspot, making it discoverable by nearby devices.
Connecting Devices to Your Windows 8.1 Hotspot
Connecting devices to your newly created hotspot is an intuitive and straightforward process:
- On the Connecting Device: Access the WiFi settings on the device you wish to connect. This process varies slightly depending on the operating system (Android, iOS, Windows, etc.), but generally involves navigating to the network settings and selecting "WiFi." Enable WiFi, and the device will begin scanning for available networks.
- Selecting Your Hotspot: Locate your hotspot’s network name (SSID) within the list of available networks. It will likely resemble the name you specified during the setup process. Tap or click on this network name.
- Entering the Password: You will be prompted to enter the password you established when configuring your hotspot. Carefully type in the password.
- Connecting: Once the password is entered correctly, the device will establish a connection to your laptop’s hotspot and gain access to the internet. The device should now be able to access the internet using your laptop's connection.
Troubleshooting Common Windows 8.1 Hotspot Issues
Even with the most straightforward technology, occasional hiccups are unavoidable. Here are some common issues and solutions to ensure a seamless experience:
- Hotspot Not Showing Up:
- Check Adapter Driver: Ensure that your WiFi adapter’s driver is up-to-date. Outdated drivers can sometimes prevent the correct functioning of the hosted network feature.
- Check Network Services: Verify that the "WLAN AutoConfig" service is running. To do this, access the Services window by searching for "Services" in the Windows search bar. Find the "WLAN AutoConfig" service in the list, right-click on it, and select "Properties." Ensure that the "Startup type" is set to "Automatic" and that the service is currently running. If the service isn't running, click "Start."
- Disable and Re-enable the Hotspot: Sometimes a simple toggle off, and back on of the hotspot feature can resolve the issue.
- Devices Unable to Connect:
- Incorrect Password: Double-check the password you're entering on the connecting device. Small mistakes can cause connection failure.
- Firewall Interference: Your laptop’s firewall (Windows Firewall or a third-party firewall) could be blocking connections to your hotspot. Check your firewall settings and ensure that it allows connections from other devices on the network.
- Maximum Connections: Your laptop may have a limit on the number of devices that can connect simultaneously. While Windows 8.1 doesn't explicitly enforce a hard limit, the number of connections can be limited by your laptop's hardware and the internet connection's bandwidth.
- Slow Internet Speeds:
- Bandwidth Overload: If multiple devices are connected and actively using the internet, the available bandwidth will be divided among them. Consider limiting the number of connected devices or reducing bandwidth-intensive activities.
- Distance and Interference: The distance between your laptop and the connected devices, along with any physical obstructions or sources of interference (microwaves, other WiFi networks, etc.), can negatively impact the WiFi signal strength and speed.
- Check Your Internet Connection's Bandwidth: Ensure that your primary internet connection (the one you're sharing) is functioning correctly and providing adequate bandwidth. A slow underlying internet connection will inevitably result in a slow hotspot.
Advanced Customization and Optimization
Beyond the fundamental setup, there are opportunities to fine-tune your Windows 8.1 hotspot for enhanced performance and control:
- Monitor Connected Devices: While not a built-in feature of the Mobile Hotspot settings, you can often view connected devices through the network connection settings or using third-party network monitoring tools. This allows you to monitor bandwidth usage by each connected device.
- Bandwidth Limiting: While Windows 8.1 doesn’t provide a native bandwidth limiting feature for the hotspot, you can sometimes employ third-party software to manage bandwidth allocation for individual devices.
- Scheduled Hotspot Activation: This feature is not natively available in Windows 8.1. However, you can explore the use of third-party software or scripting to automatically turn the hotspot on and off at specified times.
- Power Management: Ensure that your WiFi adapter isn’t being throttled by your laptop’s power management settings. Access the Device Manager, locate the WiFi adapter under "Network adapters," right-click it, select "Properties," and check the "Power Management" tab. Disable the option to "Allow the computer to turn off this device to save power" or adjust the settings to prevent excessive power saving.
Security Best Practices for Your Windows 8.1 Hotspot
While the implementation of a password protects your hotspot, it is worth outlining essential security measures:
- Strong Passwords are Paramount: Never underestimate the importance of a strong, unique password. Regularly change your password to reduce the risk of unauthorized access.
- Network Name (SSID) Obscurity: Consider disabling SSID broadcasting which will make it more difficult for threat actors to identify your hotspot. However, this requires users to know the network name to connect.
- Keep Windows Updated: Regularly update your Windows 8.1 operating system to patch security vulnerabilities.
- Monitor Network Activity: Keep an eye on connected
