laptop app to show available wifi networks windows 7 strength

Title: How to Improve Wi-Fi Signals in Windows Laptop Speedup Wi-Fi
Channel: MJ Tube
How to Improve Wi-Fi Signals in Windows Laptop Speedup Wi-Fi by MJ Tube
Unleash Your Windows 7 WiFi: Find the Strongest Signal INSTANTLY!
Conquering the Wi-Fi Wasteland: Snapping a Stellar Signal on Windows 7
Ah, Windows 7. That trusty old operating system, still humming along for many of us. It's a classic, isn't it? And while its age might show in certain aspects, like your old Wi-Fi connection, we can still breathe new life into it. Are you tired of a sluggish signal? Do you yearn for a faster connection? Then, prepare to boost your Wi-Fi on Windows 7 and find that elusive strong signal.
The Wi-Fi Whisperer: Decoding Your Signal Strength
First things first: are you truly getting the best connection possible? It’s often difficult to tell. Therefore, let's learn how to decipher those cryptic Wi-Fi signals. You could probably manually hunt around in your network settings. However, that’s often tedious. Indeed, there are easier ways. Consider a third-party tool. There are many. These tools can give a graphical representation of your signal strength. Hence, it is easier to comprehend. Some even offer a 'live' view. That is where you can see the fluctuating signals in real time. Consequently, you can pinpoint the strongest spot.
Unleashing Your Inner Antenna Guru: Hardware Hacks
Okay, so you’ve assessed your current setup. Now, let’s examine some hardware adjustments. However, don’t panic! It doesn't involve complex rewiring. Instead, you could try some simpler tests. Perhaps, your Wi-Fi router is in a less-than-ideal location. In that case, consider repositioning it. Placing it higher up can help. This can often improve signal propagation. Moreover, ensure that nothing is blocking the signal. Thick walls and metal objects can play havoc with your Wi-Fi.
Router Renaissance: Optimizing Your Wireless Hub
Your router is the heart of your Wi-Fi network. Consequently, its configuration is crucial. Consider updating your router's firmware. Consequently, this process often improves performance and security. Then, ensure your router is configured to use the proper channel. Typically, this is done within the router's settings. Find the Wi-Fi channel selection. Avoid congested channels, if possible. Ultimately, this can significantly improve your connection speed.
The Great Wi-Fi Clean Up: Eliminating Network Clutter
Your wireless network can be cluttered. Think of it as a busy highway. Too much traffic leads to congestion. Similarly, too many devices on your Wi-Fi can slow everything down. Thus, consider limiting the number of devices simultaneously connected. Temporarily disconnect unused devices. This often provides a noticeable boost in performance. On the other hand, make sure your password is secure. An unsecured network is open to unwanted traffic.
Signal Booster Bonanza: Exploring External Options
Sometimes, you simply need a little extra help. In that case, consider a Wi-Fi extender. These devices amplify your existing signal. They typically plug into a power outlet. Then, they rebroadcast your Wi-Fi signal. Furthermore, you may also consider upgrading your Wi-Fi adapter. This is the hardware in your computer. A newer, faster adapter can often make a significant difference.
Troubleshooting Troubles: Common Wi-Fi Woes and Solutions
Even with all these steps, you might still face issues. Therefore, let's address common Wi-Fi problems. First, try restarting your computer and your router. This simple act can often resolve temporary glitches. If that fails, then check your network drivers. Outdated drivers can cause connectivity problems. Also, confirm your modem is also functioning. Make sure everything is properly plugged in. In similar manner, check that your internet service provider is not experiencing any outages.
The Pursuit of Perfect Pixels: Wi-Fi for Video Streaming
Are you a streamer? A strong Wi-Fi signal is essential for uninterrupted viewing. Consider using a wired Ethernet connection. However, that’s not always possible. Consequently, you will need to optimize your Wi-Fi setup. Prioritize the device you are using for streaming. In addition, ensure you are getting the best possible speeds. Avoid using the Wi-Fi during peak hours.
Security First: Keeping Your Wireless Network Safe
Security is paramount. Therefore, always use a strong password for your Wi-Fi network. Also, enable WPA2 or WPA3 encryption. This ensures that your data is protected. Furthermore, keep your router's firmware updated. Outdated firmware can create security vulnerabilities. Remember, network security is crucial.
Final Flourish: Achieving Peak Performance
So, there you have it. Implementing these tips will undoubtedly help you improve your Windows 7 Wi-Fi. Remember, it requires a little patience. However, the results are worth it. In light of this information, you will be enjoying a stronger, more reliable connection. Hence, go forth and conquer the Wi-Fi wasteland! Now, go out there and get your signal!
Laptop Refuses to See Your Hidden WiFi? (Solved!)Unleash Your Windows 7 WiFi: Find the Strongest Signal INSTANTLY!
Hey there, fellow tech enthusiasts! Ever felt like your WiFi signal in Windows 7 was about as reliable as a politician's promise? One minute you're basking in the glow of lightning-fast downloads, and the next, you're staring at a spinning loading circle, wondering if the internet has decided to take a permanent vacation. We've all been there, haven't we? But fear not, friends! Today, we're diving deep into your Windows 7 WiFi woes and uncovering the secrets to snagging the strongest signal instantly. Trust me, by the end of this, you'll be navigating the digital world with the grace and speed of a digital cheetah.
1. The WiFi Woes: Why Is My Windows 7 Signal So Weak?
Let's be honest, Windows 7, while a classic, wasn't exactly designed for the modern, WiFi-saturated world. Think of it like trying to run a marathon in a pair of vintage, super-tight jeans – it's just not ideal. The reasons for weak WiFi signals in Windows 7 are as varied as the flavors of ice cream, but some culprits are more common than others. We're talking about things like distance from your router (the further away you are, the weaker the signal, like a whisper lost in a crowded room), physical obstructions (walls, furniture, even your fish tank can interfere!), and even the type of router you're using. Older routers often struggle to keep up with the demands of today’s internet.
2. Know Your Enemy: Understanding WiFi Signal Strength
Before we start the rescue mission, we need to understand the battlefield. Signal strength is typically measured in decibel milliwatts (dBm). The closer you are to 0 dBm, the stronger your signal. Usually, anything above -70 dBm is considered good, while anything below means you're flirting with digital tumbleweeds. You can find this information in your Windows 7 network settings.
3. The Built-in Detective: Using Windows 7's Network Troubleshooter
Believe it or not, Windows 7 has a built-in detective, a network troubleshooter, that can often sniff out the problem. Think of it as the Sherlock Holmes of your WiFi. To access it, right-click on the network icon in your system tray (the little bars in the bottom right corner) and select "Troubleshoot problems." It’ll walk you through some common fixes, like resetting your network adapter or updating drivers. It's a quick first step that sometimes does the trick!
4. Router Reset: The Digital Restart Button
Sometimes, the simplest solution is the best. A simple router reset can work wonders. Unplug your router from the power outlet, wait about 30 seconds, and plug it back in. Think of it like a digital nap for your router's brain – it clears out the cobwebs and often resolves temporary glitches.
5. Driver Dilemma: Keeping Your Network Adapter Updated
Outdated drivers are the digital equivalent of a rusty engine. They can significantly hinder your WiFi performance. Go to Device Manager (search for it in the Start Menu), expand "Network adapters," right-click on your WiFi adapter, and select "Update driver software." Let Windows search for the update automatically. This is crucial, like oiling your car engine regularly.
6. Location, Location, Location: Finding the Sweet Spot
Think of your router like a beacon of digital awesomeness. Its signal radiates outwards, but obstacles, like walls, can weaken it. Experiment with moving your router to a more central location in your home, away from walls and objects that might be blocking the signal. This can be a game-changer.
7. Channel Surfing: Choosing the Right WiFi Channel
Your WiFi router broadcasts on a specific channel, and if you're surrounded by numerous other WiFi networks, those channels can get crowded. This is like trying to have a conversation in a packed stadium. To find the least crowded channel, you'll need to access your router's settings (usually by typing its IP address into your web browser – check your router's manual for details). Look for a section on WiFi or wireless settings and find the channel you are using. Try switching to channels 1, 6, or 11, as these are usually the default and have less overlap with other channels.
8. The Antenna Angle: Optimizing Your Router's Direction
Believe it or not, the positioning of your router's antennas can affect signal strength. Try experimenting with different angles. If your router has multiple antennas, try pointing them in different directions. Experiment with vertical, horizontal, and even angled positions to see what works best. It is like adjusting the focus to enhance your WiFi strength.
9. Hardware Hacks: Upgrading Your WiFi Adapter (If All Else Fails)
Sometimes, the problem isn’t software; it’s the hardware itself. If you've tried everything, and your signal is still weak, consider upgrading your WiFi adapter. You can find external USB adapters or internal cards for your desktop. It's like upgrading from a bicycle to a sports car.
10. Network Congestion: Understanding Bandwidth Hoggers
Is someone in your house constantly streaming 4K movies or downloading massive files? These are bandwidth hoggers that can dramatically impact your WiFi performance. Limit the number of devices using your network simultaneously or consider prioritizing traffic for your specific device. It is akin to managing traffic flow on a crowded highway.
11. Security Settings: WPA2 vs. WEP
Ensure your router is using WPA2 or WPA3 encryption, which are more secure than the older WEP. WEP offers the safety of using a house door, but WPA2 and WPA3 are using iron security doors with electronic locks. It is essential to ensure the privacy and enhance the speed.
12. External Antennas: Supercharging Your Signal
For those who really want to boost their signal range, consider adding external antennas to your router. These antennas are like adding a supercharger to your car – they can dramatically increase the range and strength of your WiFi signal.
13. The Power of a WiFi Analyzer App (For the Tech-Savvy)
If you're feeling adventurous, explore WiFi analyzer apps. These apps scan for nearby WiFi networks and give you detailed information about their signal strength and channels they're using. This can help you identify the best channel for your router. You can find these as free or paid apps in your app store or online.
14. Avoiding Interference: The Wireless Battlefield
Microwaves, Bluetooth devices, and other electronic gadgets can interfere with your WiFi signal. Try to position your router away from these sources of interference. It's like removing the enemy from the battlefield to increase your chances of winning the war.
15. When to Call for Backup: Seeking Professional Help
If you’ve tried everything, don't be afraid to call in the professionals. A network specialist can assess your situation and provide personalized solutions, like a doctor diagnosing a complex medical case. They have the expertise to troubleshoot more in-depth problems.
Wrapping It Up: Ready to Conquer Your WiFi Woes?
So there you have it, folks! A comprehensive guide to wrestling your Windows 7 WiFi into submission and securing the strongest signal possible. We've covered everything from troubleshooting basics to advanced hardware upgrades. Remember, patience and persistence are key. Experiment with these tips, and you'll be streaming, browsing, and downloading with lightning-fast speed in no time. Now go forth and conquer those WiFi gremlins!
FAQs: Your Burning WiFi Questions Answered
Q1: My WiFi was working fine, but suddenly it's slow. What should I do?
A: Before anything else, restart your router and your computer. If that doesn't work, check for any recent software updates for your network adapter, and consider running the Windows 7 network troubleshooter (See section 3).
Q2: How do I find my router's IP address?
A: The IP address is usually found in your router's manual or on a sticker on the router itself. Alternatively, open the Command Prompt (search for it in the Start Menu), type "ipconfig," and look for "Default Gateway." That's often your router's IP address.
Q3: Can I improve WiFi speed by upgrading my internet plan?
A: Absolutely! While WiFi issues can decrease speeds, your internet plan dictates the maximum speed you can achieve. Upgrading your plan can significantly increase your internet speed.
Q4: My WiFi signal keeps dropping. What's the issue?
A: This could be due to a number of things: Interference (see section 14), a faulty router, a weak signal, or even a problem with your internet service provider. Try the troubleshooting steps outlined in this article, and if the problem persists, contact your ISP.
Q5: Is it safe to use a WiFi repeater?
A: WiFi repeaters can extend your WiFi range, but they can also reduce your overall speed. They're like a middleman: they rebroadcast the signal, but they also introduce some delay and, often, reduce the actual throughput speed. They can be useful, especially when you have a large home with dead spots.
- Principal Keywords: Windows 7 WiFi Signal Strength
Wireless Network Connection Enabled but Not connected Fix Windows 7
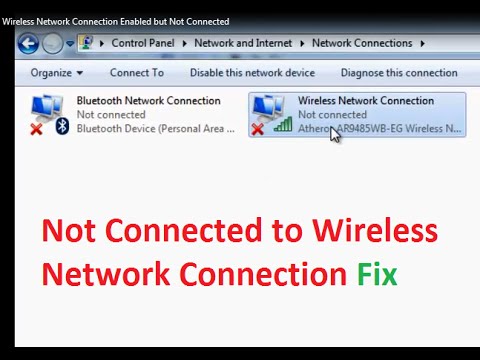
By troubleshooterrors Wireless Network Connection Enabled but Not connected Fix Windows 7 by troubleshooterrors
Fix any Internet and Network Issues with this simple trick

By HowtoInsider Fix any Internet and Network Issues with this simple trick by HowtoInsider
Boost WIFI On Your PC

By oMace Boost WIFI On Your PC by oMace

Title: Make Your Laptop's Wifi Signal Faster On Windows 1087 Tutorial
Channel: MDTechVideos
Make Your Laptop's Wifi Signal Faster On Windows 1087 Tutorial by MDTechVideos
Wifi On Laptop
Unleash Your Windows 7 WiFi: Find the Strongest Signal INSTANTLY!
We all know the annoyance. A flickering Wi-Fi signal, sluggish downloads, and the frustration of streaming a stuttering video. In the digital age, a robust and reliable internet connection is no longer a luxury; it's a necessity. If you're still navigating the digital landscape with Windows 7, the good news is you're not alone, and we're here to help you unlock the full potential of your Wi-Fi signal. This guide is specifically designed to help you optimize your Wi-Fi connection on your legacy operating system and get you the best possible performance, instantly. Forget the buffering. Forget the lagging. Let’s dive into how you can find that elusive, strong Wi-Fi signal.
Diagnosing Your Wi-Fi Woes: Initial Checks
Before we embark on a signal-strength expedition, let's perform some preliminary checks. These are crucial steps to isolate potential issues and ensure that the improvements you make are truly impactful. These initial diagnostic measures act as your digital detective work, helping to pinpoint the source of the problem.
The Obvious: Restart Your Devices. This may seem simplistic, but it's a surprisingly effective solution. Restart your Windows 7 machine – a full reboot, not just a shutdown and startup – and then restart your router and modem. This clears temporary files, refreshes network connections, and can often resolve minor glitches that are impacting your signal strength. Allow ample time for each device to fully restart before attempting to connect to your Wi-Fi network.
Physical Interference: A Common Culprit. Consider the physical environment surrounding your router. Thick walls, metal objects, microwaves, and even other electronic devices can interfere with your Wi-Fi signal. Try moving your router to a more central location in your home or office, away from obstructions. Experiment with different heights – sometimes, a slightly elevated position can improve signal propagation.
The Network Adapter: Driver Updates Are Key. Outdated network adapter drivers are a frequent cause of connectivity problems. In Windows 7, you can easily check for driver updates. Open the Device Manager (search for it in the Start menu), expand the "Network adapters" section, right-click on your Wi-Fi adapter, and select "Update driver software." Ensure your Windows 7 system has the current recommended driver for your system.
Unveiling the Secrets: Advanced Signal Strength Techniques
Now that we've addressed the basics, let's move on to powerful, more involved methods to locate the strongest Wi-Fi signal on your Windows 7 device. These techniques involve more than simple troubleshooting, delving into the specifics of signal analysis and network configuration to give you an advantage.
The Power of the Command Prompt: Analyzing Your Network. The Command Prompt in Windows 7 is a surprisingly versatile tool. We can use it to gain insights into your Wi-Fi network's performance. Open the Command Prompt (search for "cmd" in the Start menu) and type the following commands.
netsh wlan show interfaces: This command provides detailed information about your Wi-Fi adapter, including the signal strength (expressed as a percentage). Note this value – it is a direct indicator of the Wi-Fi’s performance. A higher percentage points to a stronger signal.netsh wlan show networks mode=bssid: This command lists the available Wi-Fi networks along with their BSSIDs (Basic Service Set Identifiers – unique identifiers for each router), signal strengths, and other critical information. This can help you identify which access point offers the strongest signal.
Free Third-Party Tools: Advanced Network Analysis. While the Command Prompt offers powerful insight, dedicated Wi-Fi analyzer tools provide a more user-friendly and visually engaging experience. There are several excellent free tools available for Windows 7, such as:
NetStumbler (or alternatives): This powerful tool scans for Wi-Fi networks and provides a comprehensive view of signal strength, channel usage, and other relevant data. It's a favorite among network professionals and provides information that facilitates informed decisions on where to optimize your Wi-Fi signal. It allows you to visually chart the signal strength of your Wi-Fi networks, which is particularly useful for identifying dead zones and optimal router placement.
InSSIDer: InSSIDer is another popular option, offering an intuitive interface and a wealth of information about your Wi-Fi network. It excels at visualizing channel interference, allowing you to choose the least congested channel for your router.
Channel Optimization: Choosing the Right Lane. Wi-Fi routers broadcast signals on different channels, similar to radio frequencies. Interference from other routers or devices sharing the same channel can severely impact your signal strength. Using a Wi-Fi analyzer tool, identify the channels with the least congestion and configure your router to use one of those channels. Most routers allow you to change the Wi-Fi channel in their settings, which can be accessed through your web browser by typing the router's IP address (usually 192.168.1.1 or 192.168.0.1). You then will need to provide your username and password to access the settings, for instance, go to Wireless settings or Wi-Fi settings.
Router Configuration: The Heart of Your Connection
Your router's settings are critical to optimal Wi-Fi performance. Many of these settings can be adjusted to improve signal strength and overall reliability.
Firmware Updates: Keeping it Current. Router firmware is the software that controls your router's functionality. Outdated firmware can lead to performance issues and security vulnerabilities. Regularly check your router manufacturer's website for firmware updates and install them promptly. The process varies depending on the router model, but it usually involves logging into your router's interface and navigating to the advanced settings.
Security Protocols: Balancing Security and Speed. Select the proper security protocol for your router. WPA2 or WPA3 are recommended for the highest security, while WEP can sometimes offer slightly better signal strength due to lower encryption overhead. However, WEP is highly vulnerable and should only be used as a last resort in situations where security is not critical. Ensure that you select a strong password. This is essential for protecting your Wi-Fi network.
Router Placement: Strategic Positioning. As mentioned earlier, your router's physical location significantly impacts signal strength. Experiment with different locations, aiming for a central position, away from obstructions, and at a reasonable height. Sometimes, moving your router just a few feet can make a substantial difference. Be sure to assess the areas of your home or office where you require the strongest signal.
Troubleshooting Specific Issues: Windows 7 Specifics
Windows 7 contains features that may be interfering with Wi-Fi performance. Here are some specific things to check.
Power Management Settings: Windows 7's power management settings can sometimes throttle your Wi-Fi adapter's performance to conserve battery life (especially on laptops). You can adjust these settings by going to the Control Panel, selecting "Hardware and Sound," and then "Power Options." Choose your power plan and then select "Change plan settings." Click on “Change advanced power settings” and navigate to "Wireless Adapter Settings." Set the "Setting" to "Maximum Performance" to ensure your adapter isn't being throttled.
Wireless Adapter Settings: Within the Device Manager, you can delve deeper into your wireless adapter's settings. Right-click on your Wi-Fi adapter, select "Properties," and then go to the "Advanced" tab. Here, you'll find various configuration options, such as:
802.11 Mode: Choose the latest standard supported by your router (e.g., 802.11n or 802.11ac) for optimal performance.
Transmit Power: Maximize the transmit power to increase your signal's reach. Be mindful of the potential for increased power consumption.
Roaming Aggressiveness: Adjust this setting to improve the speed at which Windows 7 roams between Wi-Fi access points.
Conclusion: Maximizing Your Windows 7 Wi-Fi Experience
By following these steps, you can significantly improve your Wi-Fi signal strength on your Windows 7 machine. Remember, the key is a combination of methodical troubleshooting, smart configuration, and a bit of experimentation. Take the time to understand your specific network environment, and you'll be well on your way to experiencing a fast, reliable internet connection that will meet your digital necessities. Don't let the age of your operating system hold you back. With a little effort, you can unlock the full potential of your Wi-Fi and enjoy a seamless online experience.
