how to turn wifi back on lenovo laptop

Title: How to Fix Wi-Fi is Not Connecting to Lenovo Laptops Problem in Windows 1087 2025
Channel: FIXsage
How to Fix Wi-Fi is Not Connecting to Lenovo Laptops Problem in Windows 1087 2025 by FIXsage
how to turn wifi back on lenovo laptop, where is the wireless switch on a lenovo laptop
Lenovo WiFi Dead? Get It Back ON Now!
Here's the text you should rewrite: Lenovo WiFi Dead? Get It Back ON Now!.
Lenovo WiFi Woes? Conquer Your Connectivity Crisis!
We've all been there. You're poised for online glory, ready to conquer the digital realm. Suddenly, a chilling realization: your Lenovo laptop refuses to connect. Your Wi-Fi has mysteriously vanished. But before you succumb to tech despair, take a deep breath. Let's get that connection back online!
The Sudden Silence: Diagnosing the Disconnect
First, don't panic. A dead Wi-Fi connection on your Lenovo can result from many things. It might be a simple software glitch or a more stubborn hardware issue. However, before calling in the cavalry, let's perform some basic troubleshooting. So, take a few preliminary steps for optimal results.
Check the Obvious: Quick Fixes First!
Begin with the most straightforward solutions. Firstly, ensure your Wi-Fi switch (often found on the side or front of your laptop) is flipped to the "on" position. Then, reboot your Lenovo. Sometimes, a simple restart can work wonders. In fact, it's a surprisingly effective fix. Next, examine your Wi-Fi settings within the operating system. Make sure Wi-Fi is enabled there too. For instance, double-check your network connection. Ultimately, these basic steps are often the solution.
Delving Deeper: Software Shenanigans and Driver Drama
If simple solutions don't work, the problem may lie deeper. Now, let’s explore further. Then, consider a potential software conflict. In this case, a recent software update could have caused the problem. Furthermore, outdated or corrupted network drivers are a frequent culprit. Because of this, update your drivers without delay. To do this, navigate to the Device Manager. Locate your network adapter. Right-click on it. Select "Update driver." Choose "Search automatically for drivers." Windows will hunt for the latest updates. Once the process is done reboot your Lenovo. This process often resolves many connectivity problems.
Troubleshooting the Router: Your Gateway's Gatekeeper
Your Lenovo might be innocent. Sometimes, the issue originates elsewhere. So, let's look at your router. Is it even functioning? Check the router's power and ensure it’s connected to the internet. Examine the lights. Do they indicate a connection? Try restarting your router. This is very common. Try unplugging it for a few minutes and plugging it back in. If you still experience issues, you may need to reset your router to its factory settings. Be aware that this will require reconfiguring your network.
Network Troubles? Peering into Network Settings
Occasionally, the problem extends beyond the router. After that, explore your network settings on your Lenovo. Often these are the key to unlock access. Open network settings. Examine your IP address settings. Ensure they are set to "Obtain an IP address automatically." Furthermore, check the DNS settings. If you aren't sure, use your ISP's default DNS servers or try Google's public DNS (8.8.8.8 and 8.8.4.4). However, manually configuring these can sometimes help.
Hardware Hiccups: When the Problem Persists
If you've exhausted all software and network solutions, consider hardware. Unfortunately, problems can stem from internal hardware. Your Wi-Fi adapter may have failed. You can start with a visual inspection. Look for any obvious signs of damage. Next, open your laptop (if you feel comfortable doing so) and check the Wi-Fi card's connections. Loose connections will also cause trouble. Consider consulting a professional repair service. They can diagnose and replace the faulty hardware safely.
The Power of Persistence and Alternative Solutions
Don't give up just yet. There are always more avenues to explore. Try creating a mobile hotspot using your phone. If your Lenovo connects, you can rule out a problem with the laptop itself. Alternatively, a wired Ethernet connection can serve as a workaround. Connect your laptop directly to the router. You’ll be back online in no time.
Preventative Measures: Safeguarding Your Connection
Once you’ve resolved the issue, take steps to prevent future problems. Regularly update your network drivers. Frequently scan your system for malware. Keep your operating system up-to-date. These simple actions can save you headaches. Furthermore, a strong password for your Wi-Fi network is essential. Finally, keep your router firmware updated.
Conquering Connectivity: Stay Connected!
Losing Wi-Fi can be frustrating, so stay calm as you work through these solutions. By methodically troubleshooting, you can usually restore your Lenovo's connection. Remember, you’re not alone. Many face the same challenges. Armed with these insights, you're now well-equipped. With patience and perseverance, you’ll be back online in no time. Embrace these techniques!
Download Acer Laptop WiFi Drivers for Windows 8.1 NOW! (Solved!)Lenovo WiFi Dead? Get It Back ON Now!
Hey, we’ve all been there, right? That moment of pure, unadulterated panic when you realize your Lenovo laptop has decided to go radio silent on the Wi-Fi front. One minute you're scrolling through cat videos (don't judge!), the next, the little Wi-Fi signal icon in the corner looks like a sad, limp flag. Suddenly, you're adrift in a sea of digital disconnection, cut off from the world – or at least, from your favorite streaming service. Fear not, seasoned Lenovo users and newbies alike! We're diving headfirst into the deep end of Wi-Fi woes and coming up with a solid plan to get your internet connectivity back in action. Consider this your Wi-Fi rescue guide, packed with troubleshooting tips and tricks to banish the "no internet" blues.
1. The Dreaded "No Internet" Sign: Understanding the Problem
Before we start tossing around troubleshooting jargon, let’s get one thing straight: a dead Wi-Fi connection is a frustrating experience, like a perfectly good pizza with no cheese. The good news is, it's usually a problem with a fix, not a terminal illness for your laptop. Often, the issue boils down to a few common culprits: a simple software glitch, a misconfigured setting, a hardware hiccup, or a problem with your internet router. We're aiming to target those sneaky culprits!
2. Is It Truly Your Lenovo? Ruling Out the Obvious Culprits
Before tearing your hair out, let's do a quick sanity check. Sometimes, the problem isn't even your Lenovo. It's like blaming the oven for a burnt cake; the real issue is usually the cook (or the router!).
- Check Your Other Devices: Does your phone, tablet, or another laptop connect to the Wi-Fi? If they can, the problem likely lies with your Lenovo, and we’re in the right place! If they can't, reboot the router, call your ISP, or go apologize to the oven (kidding… mostly).
- Restart Your Router and Modem: This is the classic IT Crowd solution for everything. Unplug your modem and router from the power source, wait about 30 seconds, plug the modem back in first (let it fully boot), and then plug in the router. This simple step often works miracles.
3. The "Airplane Mode": A Simple Check for the Most Common Error
Airplane mode. The bane of the accidentally-clicked, Wi-Fi-blocking button. This is the digital equivalent of forgetting your keys inside the house. Making sure airplane mode is off is the first step in getting your WiFi back running.
- Check the System Tray: Look for the airplane icon (a little plane shape). If it’s on, click it to turn it off. Boom! You're one step closer.
- Keyboard Shortcut: Many Lenovo laptops have a dedicated key for airplane mode (often with an airplane symbol). Try pressing this key.
4. The Hidden Switch: Physical Wi-Fi Buttons on Lenovo Laptops?
Some Lenovo laptops are equipped with a physical, hardware switch for disabling Wi-Fi. This hidden gem can be found on the side or front of the device. It might be a sliding switch or a tiny button. If you stumble upon one, make sure it’s switched on. This can cause so much anxiety!
5. Driver Dilemmas: Updating Your Wi-Fi Driver
Think of drivers as digital translators that let your computer communicate with its hardware. Outdated or corrupted drivers can lead to Wi-Fi woes.
- Update Drivers Through Device Manager:
- Right-click the Start button and select "Device Manager."
- Expand "Network adapters."
- Right-click your Wi-Fi adapter (it might be called something like "Intel Wireless-AC" or "Realtek Wireless LAN").
- Select "Update driver."
- Choose "Search automatically for drivers." Windows will try to find the best driver for your computer.
- Download Drivers from the Lenovo Website: Visit the Lenovo support website, enter your laptop's model number, and download the latest Wi-Fi drivers. These are usually the most reliable option.
6. Software Conflicts: Troubleshooting Potential Security Conflicts
Sometimes, your antivirus software or firewall might be a little too protective, blocking the Wi-Fi connection.
- Temporarily Disable Antivirus/Firewall: Try temporarily disabling your antivirus software or firewall to see if they are interfering with your connection. If disabling them solves the problem, you'll need to adjust their settings to allow Wi-Fi connections.
- Check Firewall Settings: Ensure your firewall isn’t blocking your Wi-Fi adapter.
7. The Wireless Network Troubleshooter: Let Windows Try
Windows has a built-in troubleshooter. It's like having a digital tech support person in your computer.
- Run the Network Troubleshooter: Right-click on the Wi-Fi icon in your system tray and choose "Troubleshoot problems." Follow the on-screen instructions. Let the computer do its thing.
8. Forget and Reconnect: Clearing the Old & Starting New
Sometimes, your Lenovo remembers the Wi-Fi network but has a bad memory of the password or some wonky settings. Forgetting and reconnecting is like hitting the reset button for your Wi-Fi connection.
- Forget the Network: Go to your Wi-Fi settings (usually found in the system tray). Click on your network name and select "Forget."
- Reconnect: Search for your network, select it, and re-enter your Wi-Fi password.
9. Network Reset: Hitting the Big Reset Button
If all else fails, performing a network reset can restore your network settings to their default state, so it can be like starting over.
- Network Reset: Go to Settings > Network & Internet > Advanced network settings > Network reset. This will wipe out all the settings you already have, but it can be a very effective solution.
10. Hardware Check: Is Your WiFi Card Physically Okay?
Very rarely, your Wi-Fi adapter itself might be the issue.
- Open Device Manager: Go to Device Manager (as described in step 5).
- Check for Errors: Look for any yellow exclamation marks next to your Wi-Fi adapter. If you see one, it indicates a problem.
- Consider a Repair: If you suspect a hardware issue, it might be time to consult a professional repair technician.
11. Run The CMD Commands [Advanced Solution]
If everything has failed, you can try running some advanced solutions. Open the command prompt as an administrator.
- Flush DNS:
ipconfig /flushdns - Reset TCP/IP:
netsh int ip reset - Release and Renew:
ipconfig /releaseandipconfig /renew
12. Check Your Network Adapters Settings
Sometimes, your settings in this area are changed without you knowing. This is usually a quick and easy solution.
- Revisit Device Manager: Go to your network adapter, and then click on 'properties.'
- Set it to on: Make sure the adapter is enabled, and try changing some settings as required.
13. What About WiFi Range?
Sometimes the problem can't be from settings, but from the environment. Make sure you're not too far from the router.
- Move closer: Try moving closer to the router, to ensure it's within WiFi range.
- Test other locations: Other locations might work better, depending on the environment.
14. The Final Reboot: Restarting Your Lenovo
After implementing all of the above steps, rebooting your Lenovo is a great idea. A simple restart can often resolve many software glitches.
- Restart: Give your Lenovo a full reboot.
15. Contact Lenovo Support: The Final Resort
If you've tried everything, and the Wi-Fi is still dead, it's time to reach out to Lenovo support.
- Contact Lenovo Support: Contact them with your model number and the problems.
Closing Thoughts: Triumph Over Technology
So, there you have it! A comprehensive guide to resurrecting your Lenovo’s Wi-Fi connection. Remember, troubleshooting Wi-Fi issues often involves a process of elimination – be patient, try each step, and don't be afraid to experiment. Just like a detective piecing together a puzzle, you'll eventually identify the culprit and restore your connection. We hope this guide has helped you get back online. Wishing you happy browsing!
FAQS
1. My Wi-Fi worked yesterday, but not today. What happened?
This is a common occurrence! The culprit is usually an outdated driver, a software update conflicting with your Wi-Fi, or a simple glitch that can be resolved with a reboot. Start with the troubleshooting steps, and be patient.
2. I've tried everything, and nothing works! Is my Wi-Fi adapter broken?
It's possible, but before assuming the worst, contact Lenovo support or take your laptop to a qualified technician who can diagnose the issue. A hardware problem is less common than a software glitch.
**3. Can I improve my Wi-Fi signal strength?
Use Your Laptop as a Wireless Second Monitor: The SHOCKINGLY Easy Trick!Turn WiFi Back On Manually Windows 10 Method 26

By vHub Turn WiFi Back On Manually Windows 10 Method 26 by vHub
Cara mengatasi wifi yang hilang atau turned of dengan mudah
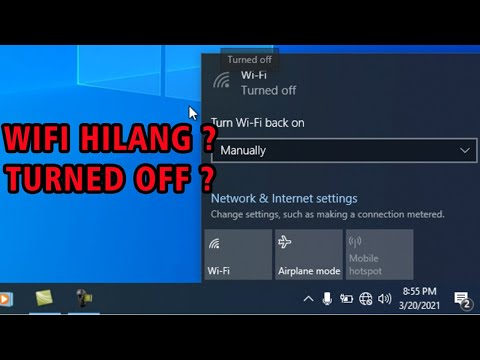
By Abdul Rohman Cara mengatasi wifi yang hilang atau turned of dengan mudah by Abdul Rohman
Cara Mengatasi Wifi Turn Back On

By Agus Hariansyah Cara Mengatasi Wifi Turn Back On by Agus Hariansyah

Title: How to Turn on Wifi on Window 10 in Laptop Wifi Not Turning on Problem Solved Wifi Turned Off
Channel: Zeeshan Awan
How to Turn on Wifi on Window 10 in Laptop Wifi Not Turning on Problem Solved Wifi Turned Off by Zeeshan Awan
Laptop Wifi Connect
Lenovo WiFi Dead? Get It Back ON Now!
Is your Lenovo laptop stubbornly refusing to connect to the Wi-Fi? The frustration is palpable, the silence of a disconnected world deafening. Fear not! We've all been there. And just as surely as the internet connects us to the world, we're here to help you reconnect your Lenovo to the web. This isn't a vague troubleshooting guide; this is a deep dive, a comprehensive exploration into the common culprits and their precise solutions, meticulously crafted to get you back online, fast.
Initial Diagnosis: Pinpointing the Problem
Before diving into solutions, let's clarify the where and the what. Is the problem your Lenovo specifically, or is it affecting other devices as well? Testing this is the crucial first step. Try connecting other devices—your phone, tablet, another laptop—to the same Wi-Fi network.
- If other devices are also unable to connect: The problem is likely with your router or internet service provider. Contact your ISP for assistance, or try restarting your router and modem. This can often resolve temporary glitches.
- If other devices are connected, but your Lenovo is not: The issue resides within your Lenovo or its interaction with the Wi-Fi network. This is where our guide comes in.
Restarting the Basics: The Power of a Reboot
It seems simple, almost too obvious, but a full system reboot is often the first and most effective solution. This forces the system to clear temporary files, refresh network connections, and re-establish communication with the Wi-Fi adapter.
- Shutdown and Reboot: Completely shut down your Lenovo laptop. Allow it to sit for at least 60 seconds. Then, power it back on. This helps ensure all processes are terminated and restarted fresh.
- Router Reboot: While your Lenovo is off, reboot your router. Unplug the power cable, wait 30 seconds, then plug it back in. Allow the router to fully boot up before turning on your Lenovo.
Checking the Physical Wi-Fi Switch and Function Keys
Lenovo laptops often have a physical Wi-Fi switch, or a function key combination, to enable or disable the wireless adapter. This is a fundamental step, yet easily overlooked.
- Physical Wi-Fi Switch: Some Lenovo models have a physical switch on the side or the front of the laptop. Ensure it's in the "on" position.
- Function Key Combination: Typically, the Wi-Fi toggle is accessed by pressing the "Fn" (Function) key, located near the bottom left of the keyboard, along with a key displaying a Wi-Fi icon (usually, a small curved antenna radiating signals). It often shares a key with other functions like screen brightness or volume control. Pressing "Fn" and the Wi-Fi function key combination turns the Wi-Fi on and off. Experiment by doing so.
- Visual Confirmation: Check the system tray (bottom right corner of your screen). Look for the Wi-Fi icon. If it's grayed out or crossed out, your Wi-Fi is disabled. If it shows a symbol of a connection, then it is working.
Driver Dilemmas: Updating and Reinstalling Your Wireless Adapter Driver
Outdated or corrupt drivers are a common cause of Wi-Fi connection problems. The driver is the software that enables your Lenovo to communicate with your Wi-Fi adapter.
- Access Device Manager: Right-click on the Windows Start button, then select "Device Manager." Alternatively, type "Device Manager" in the Windows search bar and select it from the results.
- Locate the Network Adapters: In Device Manager, expand the "Network adapters" section. You should see your Wi-Fi adapter listed (e.g., "Intel Wireless-AC 9260," "Realtek Wireless LAN 802.11ac PCI-E NIC").
- Updating the Driver: Right-click on your Wi-Fi adapter and select "Update driver." Choose "Search automatically for drivers." Windows will search for the latest driver and install it if found.
- Reinstalling the Driver (if updating fails): If updating doesn't work, right-click on the Wi-Fi adapter, select "Uninstall device." In the confirmation dialog box, check the box to "Delete the driver software for this device" (if available), then click "Uninstall." Restart your laptop. Windows should automatically reinstall the driver on startup. If it doesn't, go back to Device Manager, click "Action" then “Scan for hardware changes.”
Network Troubleshooters: Leveraging Windows' Built-in Tools
Windows includes built-in troubleshooters designed to diagnose and fix common network issues.
- Run the Network Troubleshooter: Right-click on the Wi-Fi icon in the system tray and select "Troubleshoot problems." Windows will attempt to automatically identify and resolve any network connectivity issues. Follow the on-screen prompts.
- Run the Internet Connections Troubleshooter: In the Windows search bar, type "Troubleshooting settings" and select them. Then, click on "Network and Internet". Click on "Internet Connections" and then click "Run the troubleshooter". Follow the on-screen prompts.
Checking Your Network Settings: IP Address, DNS, and More
Sometimes, the problem isn't with the adapter itself, but how your Lenovo is configured to connect to the network.
- Access Network Connections: Open "Network and Sharing Center" (search in the Windows search bar). Then, click on "Change adapter settings."
- Check Your Wi-Fi Connection Properties: Right-click on your Wi-Fi connection and select "Properties".
- Verify TCP/IP Settings: Double-click on "Internet Protocol Version 4 (TCP/IPv4)".
- Obtain an IP address automatically: Ensure that "Obtain an IP address automatically" is selected. Your router will automatically assign an IP address to your laptop.
- Obtain DNS server address automatically: Ensure that "Obtain DNS server address automatically" is selected. This allows your computer to use your ISP's DNS servers. If these settings are incorrect, change them to these settings and click "OK".
- Flush DNS Cache (if problems persist): Open the Command Prompt as an administrator (search "Command Prompt" in the Windows search bar, then right-click and select "Run as administrator"). Type the following commands, pressing Enter after each:
ipconfig /flushdnsipconfig /registerdnsipconfig /releaseipconfig /renew- Restart your Lenovo.
Router Configuration Review: Interference and Compatibility
Your router's settings can affect your Lenovo's ability to connect.
- Check the Router's Wi-Fi Settings: Access your router's configuration page by typing its IP address (usually 192.168.1.1 or 192.168.0.1) into your web browser. You'll need your router's username and password (check your router's documentation if you don't know them).
- Verify the Wi-Fi Network's Name and Password: Ensure the Wi-Fi network name (SSID) and password are correct.
- Channel Interference: Wi-Fi networks operate on different channels. Neighboring Wi-Fi networks can interfere with each other. Try changing the Wi-Fi channel on your router. (Experiment with channels 1, 6, and 11, as they are typically less crowded).
- Wi-Fi Mode Compatibility: Ensure your router supports the Wi-Fi standards your Lenovo uses (e.g., 802.11ac, 802.11n). Older devices might not be compatible with newer standards.
Firewall and Antivirus Interference: Allowing Wi-Fi Traffic
Your firewall or antivirus software could be blocking your Lenovo from accessing the internet.
- Temporarily Disable Firewall: Disable your Windows Firewall (or your third-party firewall) to see if it resolves the issue. If it does, you'll need to configure the firewall to allow Wi-Fi traffic.
- Check Antivirus Settings: Check your antivirus software's settings to ensure it's not blocking your network connection. Some antivirus programs have their own firewall. You might need to create an exception for your Wi-Fi network.
Hardware Inspection: The Wireless Adapter Itself
In rare cases, the Wi-Fi adapter itself might have a hardware problem.
- Open your Lenovo's Device Manager: (as described in the driver update section).
- Check for Errors: Look for any error symbols (e.g., a yellow exclamation mark or red cross) next to your Wi-Fi adapter in Device Manager. These indicate a hardware problem.
- Consider Replacement (if all else fails): If the adapter is consistently malfunctioning and troubleshooting steps haven't helped, the adapter might need to be replaced. This is more complex and might require professional help.
Factory Reset: A Last Resort (Use with Caution!)
As a last resort, you can reset your Lenovo to its factory default settings. This will erase all your data, so backup your important files before proceeding.
- Access Recovery Options: There are several ways to access the recovery options, which varies by Lenovo model. Often, you can
