how to use laptop as wifi hotspot using command prompt

Title: How To Use Your Laptop As WiFi Hotspot Using Command Prompt
Channel: Sami Ullah
How To Use Your Laptop As WiFi Hotspot Using Command Prompt by Sami Ullah
how to use laptop as wifi hotspot using command prompt, use laptop as wifi hotspot, can i use my laptop as a wifi hotspot, use laptop as mobile hotspot
Laptop WiFi Hotspot: Command Prompt Trick (INSANE Speed!)
Unleash WiFi Fury: The Command Prompt Secret (Seriously Fast!)
Ever felt your laptop's WiFi hotspot was slower than a snail in molasses? You’re not alone. Many users experience frustratingly slow speeds. However, there's a hidden power within your Windows machine. I'm about to unveil a Command Prompt trick. Prepare to experience an insane speed boost!
The Problem: Your Laptop, The Bottleneck?
We rely heavily on our laptops for work and play. Therefore, a solid WiFi connection is vital. You might think your internet service provider (ISP) is the culprit. However, sometimes, the issue lies elsewhere. Your laptop might be the bottleneck. It's often the default settings that choke the speed.
Enter the Command Prompt: Your Secret Weapon
Don’t worry, you don’t need to be a tech guru. This solution is simpler than you think. Command Prompt might seem intimidating. But it's a powerful tool. It lets you tweak settings. Consequently, you can optimize your hotspot's performance. Follow these steps, and you'll be amazed.
Step-by-Step: Turbocharge Your Hotspot
First, locate the search bar in your Windows. Begin typing “Command Prompt”. Right-click on the “Command Prompt” result. Select "Run as administrator". This is crucial. Otherwise, these tweaks won't work.
Next, you’ll see a black window appear. This is where the magic happens. Carefully type in the following command: netsh wlan set hostednetwork mode=allow ssid="YourHotspotName" key="YourPassword". Now, let’s break down this command.
netsh wlan: This tells the system you're interacting with the WLAN settings.set hostednetwork mode=allow: This enables the hosted network feature.ssid="YourHotspotName": Replace “YourHotspotName” with the name you want for your hotspot. Choose something memorable.key="YourPassword": Replace "YourPassword" with a strong password. This protects your network.
After writing the command, press Enter. You might see a confirmation message. It states the hosted network has been set. But, we're not done yet.
Activating the Hidden Power
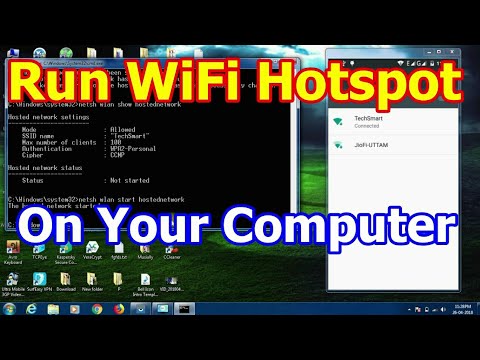
The hosted network is now set. Yet, it isn't active. So, we need to start it. Type the following command: netsh wlan start hostednetwork. Press Enter. You should receive a message. It will confirm the hosted network has started.
Sharing Your Internet Connection
Now, we need to share your internet connection. This allows other devices to connect. Go to your Network Connections settings. You can find it in the Control Panel or Settings app.
Find your primary internet connection. This is usually your Ethernet or WiFi adapter. Right-click on the connection. Select "Properties". Go to the "Sharing" tab. Check the box that says “Allow other network users to connect through this computer’s internet connection”. Choose the hosted network. This should have the SSID name you created earlier. Click “OK”.
Testing the Speed: The Moment of Truth
Now, connect a device to your newly created hotspot. Grab your phone or tablet. Check the WiFi signal strength. Test its speed. You should experience a noticeable improvement. In fact, the difference can be staggering.
Troubleshooting Tips: Because Things Occasionally Go Wrong
Sometimes, things don't go as planned. Don't panic! First, ensure you ran Command Prompt as an administrator. Second, double-check your commands for typos. A small error can make a big difference. Thirdly, try restarting your laptop. This can often resolve minor glitches. However, if you still face issues, consider updating your network drivers. You can find drivers on your laptop manufacturer’s website.
Why This Works: Unveiling The Behind-the-Scenes Magic
The default settings on your laptop can limit hotspot performance. The Command Prompt commands optimize these settings. They ensure faster data transfer. They prioritize speed over other features. The sharing settings then allow traffic. This process unlocks your laptop’s full potential. Moreover, these commands often remove any artificial throttling.
Beyond the Basics: Further Optimization
You can explore other commands in Command Prompt. For instance, you can adjust the channel your hotspot uses. This can help avoid interference from other WiFi networks. Also, consider the number of devices connected to your hotspot. The more devices, the more bandwidth is split. Thus, this will affect the speed.
Is This Trick Safe?: Security Considerations
Absolutely! This method is safe. You are not installing any software. You are simply altering existing Windows settings. However, always use a strong password. This protects your network.
The Final Verdict: Faster WiFi, Happier You
This Command Prompt trick offers a significant boost. It transforms your laptop into a powerful hotspot. It's simple to implement. The results are impressive. So, ditch the slow speeds. And embrace the power of the Command Prompt! Now, you can enjoy faster internet. You will also experience a smooth connection. You could also try this tip.
Unlock ANY WiFi Password Instantly: Simple Laptop Trick!Laptop WiFi Hotspot: Command Prompt Trick (INSANE Speed!)
Hey tech enthusiasts! Ever felt the agonizing slow crawl of your laptop's Wi-Fi hotspot? You’re trying to share that precious internet connection, maybe for your phone, your tablet, or a friend, and it feels like you're watching paint dry. We've all been there! But what if I told you there's a little-known command prompt trick that can turbocharge your hotspot speed? Think of it as giving your Wi-Fi a shot of adrenaline, a caffeine boost for your data. Today, we're diving deep into this hidden gem, unraveling the magic behind this speed-boosting marvel. Prepare to be amazed!
1. The Frustration: Slow Hotspots & Why They Drive Us Crazy
Let's be honest, a slow hotspot is a modern-day torture device. It's like trying to swim through molasses. You're expecting to download a simple email attachment and it takes an hour. You're trying to stream a video, but it buffers more than it plays. The frustration mounts, the hair starts thinning (kidding… mostly!), and you start eyeing your router with suspicion. We’ve all experienced the agonizing lag, the dropped connections, the general feeling of technological inadequacy. The simple act of sharing your internet becomes a source of unending annoyance. But why is this hotspot so often a bandwidth black hole? Let's dissect the usual suspects.
2. Usual Suspects: What’s Dragging Your Hotspot Down?
Before we unleash the command prompt power, let’s look at the potential culprits. Your slow hotspot could be blaming your device, your internet, or the setup.
- Overloaded Network: Too many devices hogging the bandwidth. Imagine trying to share a pizza with a small group vs. a giant party!
- Weak Wi-Fi Signal: Distance and obstructions like walls can cripple your signal strength. Think of it like trying to shout across a crowded room; only some of the message gets through.
- Old or Inefficient Hardware: Outdated Wi-Fi cards or drivers can create a bottleneck. Like a rusty pipe trying to handle a surge of water.
- Hidden Software Conflicts: Background processes or conflicting software might be eating up precious bandwidth.
- Internet Service Provider (ISP) Limitations: You're only as fast as your internet connection allows!
3. Introducing the Command Prompt Superhero: Your Secret Weapon
Okay, enough with the problems! Let's get to the good stuff. The command prompt. It sounds intimidating, but trust me, this is easier than baking a frozen pizza. We're talking about a few simple commands that can significantly optimize your hotspot’s performance. It's like giving your Wi-Fi a performance tune-up, a little nudge to help it run at its peak. Are you intrigued yet?
4. Step-by-Step Guide: Unleashing the Speed Boost
Alright, grab your virtual wrenches and let’s get started. Follow these steps carefully, and you'll be well on your way to a super-fast hotspot.
- Open Command Prompt (Admin): Search for "cmd" in your Windows search bar. Right-click "Command Prompt" and select "Run as administrator." This is crucial! Think of this as your key to the engine room.
- The Network Command: Type the following command and press Enter:
netsh wlan set hostednetwork mode=allow ssid="YourHotspotName" key="YourPassword"(Replace "YourHotspotName" and "YourPassword" with your desired hotspot name and password, respectively.). This command sets up the virtual Wi-Fi adapter. It’s like building the infrastructure for your hotspot. - Start the Hotspot: In the command prompt, type:
netsh wlan start hostednetworkand press Enter. (A "The hosted network started" message will appear). This activates your hotspot, making it available for connecting devices. - Share Your Internet Connection: Go to "Network Connections" (search for it in Windows). Right-click on your active internet connection (e.g., your Ethernet connection or your primary Wi-Fi connection) and select "Properties."
- Enable Sharing: Go to the "Sharing" tab. Check the box that says "Allow other network users to connect through this computer’s Internet connection." In the dropdown menu, select the virtual Wi-Fi adapter you just created (it will likely be something like "Microsoft Hosted Network Virtual Adapter"). Click "OK." Think of this as directing the flow of data to your newly created hotspot.
5. Troubleshooting Tips: When Things Go Wrong
Sometimes, even the best-laid plans go awry. Don’t panic! Here are a few common issues and how to fix them:
- "The hosted network couldn't be started": This usually means your Wi-Fi adapter doesn't support hosted networks. Check your Wi-Fi card's specifications. You might need to update your network drivers.
- Connection Issues: Devices connected but no internet? Double-check step 5 - internet sharing. Ensure your network settings are correct. Restarting your laptop can often magically fix things.
- Slow Speeds: Remember that your hotspot speed is limited by your internet connection’s speed! Try running a speed test on your laptop before enabling the hotspot. Also, reduce the number of connected devices.
6. Beyond the Basics: Optimizing Your Setup
Once you have the basic hotspot running, you can tweak a few settings for even more speed.
- Choose the Right Channel: Your Wi-Fi router and hotspot both broadcast on channels. Sometimes, a channel is crowded. Use a Wi-Fi analyzer app (there are many free ones) to find a less congested channel and manually set it in your router's settings.
- Driver Updates: Keep your network drivers up-to-date. Outdated drivers can bottleneck performance. Regularly check for updates from your laptop manufacturer or the Wi-Fi card manufacturer.
- Prioritize Devices: Some routers allow you to prioritize certain devices. If you have a particular device that needs the fast connection, set it as a priority.
7. Speed Test Time: Measuring Your Success
Now, let's see if our efforts have paid off. Before you start the command prompt setup, test your internet speed. Then, create your hotspot (following the steps above). Connect a device (like your phone) and run a speed test on that device. Compare the results! You should see a noticeable improvement. If you do, high five yourself! You’ve successfully hacked your hotspot.
8. The Benefits: Why This Trick Matters
So, why bother with this command prompt trick? What’s in it for you?
- Faster Speeds: The primary benefit! Downloads, streaming, and browsing become significantly smoother.
- Improved Stability: A well-configured hotspot is less likely to drop connections.
- Increased Convenience: Sharing your internet becomes a breeze, no more waiting…
- Cost Savings: You might save on data costs if you’re tethering to your phone’s hotspot.
9. Security First: Protecting Your Data
Let's not forget about security. It's vital! Your hotspot shares your internet connection, so you need to protect it.
- Use a Strong Password: This is crucial! Don't use easily guessable passwords (like your birthday or your pet's name).
- Enable Encryption: WPA2/WPA3 encryption is recommended. Check your router settings.
- Monitor Connected Devices: Keep an eye on which devices are connected to your hotspot. If you see an unknown device, block it.
10. Command Prompt vs. Built-in Hotspot: Why the Difference?
You might be thinking, "Why not just use the built-in hotspot feature in Windows?". That's a valid question. The command prompt method often bypasses some of the limitations of the built-in feature. It offers more control over the settings and can sometimes provide better underlying optimization. Think of it as the professional-grade version of your internet sharing.
11. Advanced Tweaks: Take Your Hotspot to the Next Level
For the more adventurous among us, there are a few other tweaks you can apply.
- Limit Bandwidth: You can use Group Policy Editor (type
gpedit.mscin the search) to limit the bandwidth consumed by the hotspot. This is especially useful if you have multiple devices connected. - Network Adapter Settings: Go to "Network Connections," right-click on your hosted network adapter, and go to "Properties." You might find further optimization options here (e.g., disabling power-saving modes).
- Consider Third-Party Software: There are a few third-party software programs that offer more advanced hotspot customization options. But proceed with caution, and always download from a reputable source.
12. Practical Applications: Where This Trick Shines
Where can you really put this command prompt trick to work?
- Travel: Share your hotel Wi-Fi with all your devices (without having to pay for multiple connections).
- Remote Work: Create a reliable connection for your work devices when you're on the go.
- Guest Access: Share your internet with guests, securely, without giving them access to your main network password.
How to Setup a WiFi Hot-spot in Windows using CMD Command Prompt

By SASI How to Setup a WiFi Hot-spot in Windows using CMD Command Prompt by SASI
How to Create a WiFi Hotspot Using CMD
By Tricknology How to Create a WiFi Hotspot Using CMD by Tricknology
How To Create a WiFi Hotspot Using Command Prompt In Windows
By TechSmart How To Create a WiFi Hotspot Using Command Prompt In Windows by TechSmart

Title: CMD Enable Disable Wi-Fi Windows 1087 NETVN
Channel: NETVN82
CMD Enable Disable Wi-Fi Windows 1087 NETVN by NETVN82
Working With Laptop
Laptop WiFi Hotspot: Unleash Blazing Speeds with the Command Prompt
Are you tired of sluggish internet speeds on your laptop’s Wi-Fi hotspot? Do you crave a connection that's as vibrant and responsive as your favorite online experiences? Look no further. We're about to unlock a hidden potential within your Windows operating system, turning your laptop into a mobile powerhouse capable of delivering breathtaking internet speeds. Prepare to leave the competition in the digital dust. Forget the limitations; say hello to a hotspot experience that's truly exceptional.
The Command Prompt: Your Secret Weapon for Superior Hotspot Performance
The key to unlocking this speed lies within the often-overlooked Command Prompt. This powerful tool, a staple within Windows, allows for meticulous control over your network settings. By leveraging specific commands, we can optimize your laptop’s Wi-Fi hotspot, making it a true champion of connectivity. Forget the limitations of default settings; we're taking control.
Step-by-Step Guide: Configuring Your Laptop's Wi-Fi Hotspot for Maximum Velocity
Ready to embark on this exhilarating journey? Follow these meticulously crafted steps to transform your laptop into an internet speed demon. Each command and setting has been carefully chosen to maximize performance and stability.
1. Accessing the Command Prompt with Administrative Privileges
First, we will need to get into the Command Prompt. Locate the search bar on your Windows taskbar (usually at the bottom left of your screen). Type "cmd" or "command prompt" into the search field. Right-click on "Command Prompt" in the search results and select "Run as administrator." This is absolutely crucial, as it grants the necessary permissions to modify network configurations. A window with a black background will appear.
2. Crafting Your Virtual Network Adapter
Now, we'll create a virtual network adapter, which acts as the foundation for your Wi-Fi hotspot. This is where the magic truly begins. Type the following command and press Enter:
netsh wlan set hostednetwork mode=allow ssid="YourHotspotName" key="YourPassword"
Replace "YourHotspotName" with your desired hotspot name (e.g., "MySuperHotspot") and "YourPassword" with a strong, secure password. Make sure your password is at least eight characters long and contains a mix of letters, numbers, and symbols for optimal security.
3. Initiating Your Virtual Hosted Network
With the foundation in place, let’s bring your hotspot to life. Enter this command and press Enter:
netsh wlan start hostednetwork
This activates the virtual network adapter you just created, making your hotspot visible to other devices.
4. Sharing Your Internet Connection: The Gateway to Connectivity
Now, the pivotal stage: sharing your primary internet connection through your newly activated hotspot.
- Open the "Network Connections" window. You can find this by typing "view network connections" in the search bar or by pressing the Windows key + R, typing "ncpa.cpl," and hitting Enter.
- Identify the network adapter providing your internet access (e.g., "Wi-Fi" if you're connected via Wi-Fi, or "Ethernet" if you're using a wired connection).
- Right-click on your internet-connected adapter and select "Properties."
- Navigate to the "Sharing" tab.
- Check the box that says "Allow other network users to connect through this computer's Internet connection."
- From the "Home networking connection" dropdown menu, select the virtual Wi-Fi adapter you created in step 2 (likely named "Microsoft Virtual Wi-Fi Miniport Adapter").
- Click "OK" to save the changes.
5. Fine-Tuning Your Configuration for Peak Performance (Optional, Yet Highly Recommended)
We're not stopping at the basics; we're pushing for unparalleled performance. These advanced steps will further optimize your hotspot:
Prioritize Bandwidth (QoS): While not directly accessible via the Command Prompt, you can prioritize the traffic flowing through your hotspot in your router settings, if available. This ensures that your hotspot devices receive the bandwidth they need. Carefully review your router's documentation for "Quality of Service" (QoS) settings.
Channel Selection (if applicable): Understand your Wi-Fi environment. Use a Wi-Fi analyzer app (available on your smartphone or laptop) to scan for channel congestion. Choose the least congested channel for your hotspot to minimize interference, maximizing your connection speed. This can also be managed within your router's settings.
Driver Updates: Always ensure your network adapter drivers are up-to-date. Outdated drivers can dramatically limit performance. Search for driver updates through Device Manager (search for "Device Manager" in the Windows search bar). Expand "Network adapters," right-click on your wireless network adapter, and select "Update driver."
Troubleshooting: Navigating Potential Pitfalls
Even with detailed instructions, you may encounter slight challenges. Here's how to address them:
- Hotspot Not Appearing: Double-check your configuration. Verify you completed all steps, including enabling the hosted network and sharing your internet connection. Ensure your laptop's Wi-Fi adapter is enabled.
- Slow Speeds: Verify your internet speed through a speed test. If speeds are significantly slower than your plan, there might be issues outside the hotspot itself. Also, consider potential interference from other wireless devices in the area, and try changing the wireless channel.
- Connection Drops: Ensure your password is correct and your devices are within range of your hotspot. If problems continue, check for driver updates and consider restarting your laptop.
Advantages of Using the Command Prompt Method
Why is this method so effective? Here's what sets it apart:
- Direct Control: The Command Prompt gives you direct access to network settings, bypassing the limitations of graphical user interfaces.
- Customization: You can fine-tune the settings to suit your specific needs and environment.
- Performance Optimization: This method promotes a more efficient and streamlined connection.
- No Third-Party Software Required: Everything you need is built into Windows.
Beyond the Basics: Advanced Techniques to Consider
Automation with Batch Files: If you use your hotspot frequently, automate the setup process. You can create a batch file (.bat) containing the Command Prompt commands. Double-clicking the batch file will run all the commands, automatically setting up your hotspot instantly.
Monitor Network Usage: Use the Resource Monitor (search for "Resource Monitor" in the Windows search bar) to monitor network traffic and identify bandwidth bottlenecks within your hotspot.
Static IP Addresses (Advanced): If you want more detailed control, you can assign static IP addresses to devices connected to your hotspot, which is useful for certain advanced network configurations.
The Verdict: Experience the Difference
By embracing the power of the Command Prompt, you're no longer just setting up a Wi-Fi hotspot; you're building a high-performance connectivity hub. Get ready to elevate your online experience: download faster, stream smoother, and browse with a newfound sense of speed. Your laptop is now a powerhouse. Enjoy the superior speeds!
