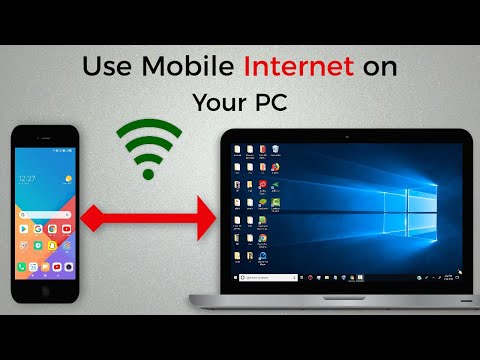
transfer wifi from phone to laptop

Title: How to Transfer files from Android to PC Wirelessly 2024
Channel: Tweak Library
How to Transfer files from Android to PC Wirelessly 2024 by Tweak Library
transfer wifi from phone to laptop, send wifi from phone to laptop, transfer internet from phone to laptop, transfer wifi password from phone to laptop, transfer united wifi from phone to laptop, can you transfer wifi from phone to laptop, can i transfer wifi from phone to laptop, how to transfer wifi from phone to laptop wirelessly, send wifi password from phone to laptop, how to transfer wifi from mobile to laptop
Unlock Your Laptop's Wi-Fi: Free & Easy Hotspot Trick!
Unleash Your Laptop's Hidden Power: Become a Wi-Fi Wizard!
Ever found yourself stranded, desperate for a Wi-Fi signal? You are not alone. We've all been there, staring blankly at our laptop screens, yearning for the digital world. But what if I told you the solution to this common predicament resided within your very own laptop? Yes, you read that right. Prepared to become a Wi-Fi guru? It’s shockingly simple.
The Secret Weapon: Your Laptop's Built-In Hotspot
Forget expensive mobile hotspots or agonizing searches for open networks. Your laptop holds the key. It possesses the ability to transform into a personal Wi-Fi hotspot. Consequently, you can share your internet connection with other devices, allowing you internet access. Think of it as your personal Wi-Fi fortress. It protects your valuable data, while sharing your internet.
Setting the Stage: Prerequisites for Success
First things first: you need a working internet connection on your laptop. So, be sure you have a wired Ethernet connection or an existing Wi-Fi connection. The second requirement is a laptop running a relatively modern operating system. Windows or macOS will work perfectly fine. Moreover, you should have admin access to the laptop. It is pivotal to make changes successfully.
Windows: Your Step-by-Step Hotspot Guide
Let's unlock the magic on a Windows machine. First, navigate to your settings menu. Then, click on "Network & Internet." Next, select "Mobile Hotspot." Now, toggle the "Share my Internet connection with other devices" switch to "On." You will discover options for configuring the hotspot. This includes setting a network name (SSID) and a password. Choose a strong, memorable password to secure your network. Afterward, click "Edit" below "Share my Internet connection from." Select which internet connection the hotspot will share. Finally, click "Save." And boom! Your hotspot is now active.
macOS: Effortless Hotspot Creation
Mac users, rejoice! The process on macOS is equally straightforward. First, go to "System Preferences." Next, click on "Sharing." Then, on the left-hand side, select "Internet Sharing." Now, from the "Share your connection from" dropdown, select your internet source. This is the connection your laptop uses to connect to the internet. From the "To computers using" area, check "Wi-Fi." Click on "Wi-Fi Options…" to configure your hotspot settings. This is similarly to Windows, where you will set the name and password. Once configured, click "OK." Check the "Internet Sharing" box to enable the hotspot. That’s it, you are good to go.
Connecting Your Devices: The Grand Finale
Now that your hotspot is alive, it's time to connect other devices. On your phone, tablet, or another laptop, go to your Wi-Fi settings. You will find the name of your new hotspot from the Wi-Fi networks list. Select it. Then, enter the password you previously created. You should be connected in moments. The internet is now at your fingertips, shared from your laptop.
Troubleshooting Common Snags
Sometimes, things don't go as planned. Consequently, it’s useful to know the common hurdles. First, ensure your laptop's internet connection is stable. If your laptop loses its connection, your hotspot won’t work. Additionally, double-check your hotspot settings. Re-enter your password to reconnect. If still facing problems, consider restarting your laptop. It frequently solves minor glitches. Also, ensure your firewall isn't blocking the hotspot functionality. Disable it temporarily to test it if you suspect this is the problem. Don’t forget to re-enable it afterward for adequate security.
Beyond the Basics: Elevating Your Hotspot Game
Once you master the basics, you can take things further. Consider investing in a more robust Wi-Fi adapter, particularly for older laptops. It might improve performance. Moreover, be mindful of data usage. Hotspots can consume data quickly, especially if you're streaming videos or downloading large files. Monitoring your data usage is crucial. Another tip: Keep your laptop plugged in while using it as a hotspot. This will protect your battery. Consider creating different SSIDs for different devices with different priorities. However, this will make management more complicated. Thus, it depends on your use case.
Security First: Protecting Your Hotspot
Security is paramount when using a public hotspot. Always utilize a strong password. Furthermore, consider using a VPN (Virtual Private Network). It protects your online activity by encrypting your internet traffic. Doing this will prevent others from observing all your data. Update your laptop’s software regularly. This protects against security flaws. Furthermore, avoid accessing sensitive information. It is always best on a secure, known network.
The Wrap-Up: Embracing the Power Within
You are now equipped to create your own Wi-Fi hotspot. Therefore, you are taking control of your internet access. No longer will you be at the mercy of public networks. Instead, embrace the freedom and convenience. Now you can share your connection whenever and wherever you need it. It is a simple trick that will change the way you access the internet. Use this knowledge responsibly. Happy surfing!
Laptop WiFi Mysteriously Dying? (This SHOCKING Trick Fixes It!)Unlock Your Laptop's Wi-Fi: Free & Easy Hotspot Trick!
Alright folks, let's talk about something we all need these days: reliable internet access. Forget struggling with spotty public Wi-Fi or burning through your mobile data. We're diving into a super simple, completely free trick that turns your trusty laptop into a Wi-Fi superhero, capable of creating its own hotspot! Sounds cool, right? This isn't some complicated tech jargon fest. We're keeping it real, keeping it easy, and making sure you can share that sweet, sweet internet connection with anyone in need. Buckle up, because we're about to unlock your laptop's Wi-Fi potential!
1. Why Bother with a Laptop Hotspot? The Internet, Everywhere!
Think about it: you're at a friend's house, and their Wi-Fi is down. Or maybe you're on a road trip, and everyone is clamoring for internet access during those long stretches of highway. These are precisely the moments when your laptop, transformed into a hotspot, becomes a lifesaver. It's like having your own personal internet portal, right there in your backpack. It's about convenience, sharing, and staying connected, wherever your adventure takes you. We're talking about streaming movies, video calls, and staying connected to social media, all without racking up those data charges. This is the freedom of a personal, portable Wi-Fi network.
2. Understanding the Magic: How Hotspots Work, Briefly.
Before we get our hands dirty, let's demystify this hotspot thing. Essentially, your laptop’s Wi-Fi adapter—the same one it uses to connect to Wi-Fi—is being repurposed to broadcast Wi-Fi. It’s like your laptop changes hats, from receiver to transmitter. In simple terms, if your laptop already has an internet connection (through Ethernet, another Wi-Fi network, or a USB tethering from your phone), it can share that connection with other devices like phones, tablets, or even another laptop. It’s like a digital daisy chain, sharing the internet love.
3. The Windows Method: Turning Your Laptop into a Wi-Fi Generator.
Let's get to the good stuff! If you're rocking a Windows laptop (and let's be honest, a lot of us are), this is your golden ticket. We’re going to create a virtual hotspot using Windows' built-in features. It's a breeze, I promise.
- Step 1: Digging into Settings. Click on that familiar Windows icon in the bottom-left corner, and then click the gear-shaped "Settings" icon. It’s the gateway to your digital kingdom!
- Step 2: Network & Internet. In the Settings window, select "Network & Internet." This is where the magic happens.
- Step 3: Mobile Hotspot. On the left-hand side, you'll see a menu. Click on "Mobile hotspot." This is where we configure our Wi-Fi sharing secret.
- Step 4: Toggle On. See the "Share my internet connection from" dropdown? That’s where you select the connection your laptop is using (Wi-Fi or Ethernet). Then, flip the "Share my internet connection with other devices" switch to "On." Boom! You're almost there.
- Step 5: Customize Your Network. Click "Edit" to personalize your hotspot's name (SSID) and password. Choose something memorable but secure – nobody wants their neighbors mooching off their Wi-Fi!
- Step 6: Connect! Take your phone, tablet, or other device, search for Wi-Fi networks, and look for the name you created. Enter the password, and you're connected! You’ve just created your own personal Wi-Fi oasis.
4. The Mac Way: Sharing Wi-Fi on Your Apple Laptop.
Apple users, don’t feel left out! The process is equally straightforward on a Mac. Think of it as a more elegant, Apple-esque solution.
- Step 1: Open System Preferences. Click on the Apple icon in the top-left corner of your screen, and select "System Preferences." This is where you tweak all your Apple settings.
- Step 2: Sharing. In System Preferences, click on the "Sharing" icon.
- Step 3: Internet Sharing. On the left side of the Sharing window, select "Internet Sharing."
- Step 4: Share Your Connection From. In the "Share your connection from" dropdown, select the internet source your Mac is using (e.g., Wi-Fi or Ethernet).
- Step 5: To computers using. Check the box next to "Wi-Fi."
- Step 6: Wi-Fi Options. Click the "Wi-Fi Options…" button. Here, you can configure your network name, security (WPA2 Personal is recommended), and password. Choose wisely!
- Step 7: Start Sharing. Check the "Internet Sharing" box on the left side to enable the shared connection. Now, other devices can connect to your Mac's Wi-Fi network.
5. Troubleshooting Common Hotspot Hiccups.
Sometimes, things don't go as planned. Don't worry, even the best of us run into snags. Here's a quick troubleshooting guide:
- No Internet Connection: Ensure your laptop itself has a working internet connection. Check your Ethernet cable, your Wi-Fi connection to another network, or your USB tethering. Without internet access on your laptop, you can't share it.
- Can't Connect: Double-check the password you entered on the connecting device. Case sensitivity is key! Also, make sure your firewall isn't blocking the connection.
- Slow Speeds: Hotspots share bandwidth. The more devices connected, the slower the overall connection. It's like sharing a pizza: the more people, the smaller the slices. Consider limiting the number of devices connected for better performance.
6. Why This Trick is a Total Game-Changer.
Think about the times you've been stranded with terrible Wi-Fi, right? Maybe you're in a coffee shop with a flaky connection and you need to quickly upload a file, or maybe your internet provider is down, and you have an important call. A laptop hotspot changes that narrative. It’s about being prepared, resourceful, and in control of your own internet destiny. It's empowering!
7. Security First: Protecting Your Hotspot.
While sharing is caring, security is paramount. Always use a strong password for your hotspot. Think of it as the lock on your digital front door. Avoid using easily guessable passwords like birthdays or pet names. Choose a combination of uppercase and lowercase letters, numbers, and symbols. A strong password will keep strangers out, and your connection safe.
8. Bandwidth Blues: Managing Your Data Usage.
Be mindful of your data usage, especially if you’re using a limited data plan. Streaming videos, downloading large files, or running software updates will consume a lot of bandwidth. It's like pouring water in a container, it fills up! Keep an eye on your data usage through your mobile provider or monitor your laptop's data consumption within the operating system settings, and limit certain activities when sharing.
9. When to Not Use a Hotspot: Situations to Avoid.
Although this trick is extremely helpful, there are times when it’s best to abstain from using it. If you’re in a public place with free Wi-Fi, it would be better to let your laptop connect to this network, or when you're dealing with extremely sensitive data. Public Wi-Fi is often less secure. When dealing with sensitive information, prioritize a wired connection or a secure VPN.
10. Mobile Hotspot vs. Laptop Hotspot: What's the Difference?
You may be thinking, "Hey, my phone has a hotspot feature too!" And you're right! Both laptop and mobile hotspots serve the same purpose, but there are some key differences. Generally, a laptop hotspot can often be more powerful and stable, especially if it's connected to a wired internet connection. Your phone’s hotspot will be limited by its battery life and any data limits from your mobile plan.
11. Boost Your Hotspot's Range: Extend the Reach.
Sometimes, your hotspot's signal range might not be ideal. Think of it like a radio antenna – you want to maximize the signal. Position your laptop in a central location. Try to remove any obstructions like walls or metal objects between your laptop and the devices that are connecting to it. Make sure that you’re not too further from the device. In some cases, you can even use a Wi-Fi range extender, a device that is meant to improve your wireless network range.
12. The Power of Offline Access: Preloading Content.
Plan ahead! Download essential files, documents, movies, or anything else you might need before you go offline or hit the road. This way, you can still access the content, even if your hotspot isn’t working perfectly. It’s like having a digital emergency kit.
13. Beyond the Basics: Advanced Hotspot Customization (Optional).
If you're feeling adventurous, there are further configuration tweaks you can make. You can
5G WiFi Nightmare? Get Your Laptop Connected NOW!How to share Internet from Ethernet to WiFi Share internet from Laptop to Mobile

By TECH NETWORXX How to share Internet from Ethernet to WiFi Share internet from Laptop to Mobile by TECH NETWORXX
How to connect internet from mobile to laptop with usb cable

By IT Magics How to connect internet from mobile to laptop with usb cable by IT Magics
How To Connect Internet from Mobile to PC or Laptop via hotspot
By WebbyFan How To Connect Internet from Mobile to PC or Laptop via hotspot by WebbyFan

Title: how to connect internet from mobile to Laptop via Bluetooth tethering android to pc
Channel: WebbyFan
how to connect internet from mobile to Laptop via Bluetooth tethering android to pc by WebbyFan
Working With Laptop
Unlock Your Laptop's Wi-Fi: Free & Easy Hotspot Trick!
In today's hyper-connected world, the ability to share your internet connection on the go is no longer a luxury – it’s a necessity. Imagine you’re at a park with spotty cellular service, a friend's device needs a connection, or your tablet requires an internet signal. What if you could transform your laptop into a powerful Wi-Fi hotspot, effortlessly broadcasting your internet access to nearby devices, and all without spending a single penny? We’re going to explain precisely how we can do just that.
Understanding the Power of a Laptop Hotspot
Before we dive into the "how," let's acknowledge the "why." A laptop-generated Wi-Fi hotspot provides a versatile solution for a range of scenarios. Primarily, it grants the flexibility to share your existing internet connection, whether it's from a wired Ethernet connection, a Wi-Fi network you're already logged onto, or even a mobile broadband connection via a USB dongle. This eliminates the need to separately purchase a portable Wi-Fi router, offering a cost-effective alternative.
Think of it: a student working on a group project in a library with limited Wi-Fi access can now use their laptop to share the internet connection with their partners. Or, picture a family on a long car journey, using the laptop as a mobile hotspot to keep everyone entertained with online movies and games. The possibilities are vast. It's a practical tool for travel, work, and leisure.
The Windows Ecosystem: Building Your Hotspot
The vast majority of laptop users operate within the Windows environment. Thankfully, Windows offers an intuitive, built-in method for creating a Wi-Fi hotspot, negating the need for third-party software in most cases. We'll walk you through the steps with precision.
Navigating to Network & Internet Settings: The first step is to access your network settings. This is easily achieved by clicking the Windows Start button, then the settings cogwheel. Alternatively, you can right-click the network icon often found in the bottom-right corner of your taskbar and select "Open Network & Internet settings."
Mobile Hotspot Selection: Once in the Network & Internet settings, locate and click on the "Mobile hotspot" option. This will lead you to the core settings controlling the hotspot functionality.
Sharing Your Internet Connection: In the "Mobile hotspot" settings, you'll find the "Share my internet connection from" drop-down menu. This is the critical setting. Select the internet connection your laptop is currently using. This could be Wi-Fi, Ethernet, or a mobile broadband connection.
The Wireless Password and Network Name: Now, it's time to set up your hotspot's security. Click the "Edit" button beneath "Share my internet connection from". This will allow you to change essential details.
Network Name: Choose a unique and easily recognizable name for your Wi-Fi network. This is what will appear on the devices trying to connect. For example, "MyLaptopHotspot" or "FamilyTravelWi-Fi."
Password: Create a strong password; this is your first line of defense against unauthorized access. Utilize a combination of uppercase and lowercase letters, numbers, and symbols for maximum security. Aim for a passphrase that is at least 12 characters long.
Activating The Hotspot: After configuring your network name and password, save the changes and toggle the "Mobile hotspot" switch to the "On" position. Your laptop is now broadcasting a Wi-Fi signal.
The MacOS Approach: Hotspot Creation on Apple Devices
Users of Apple MacBook and MacBook Pro laptops will appreciate the intuitive methods available for creating a personal hotspot. The process is straightforward, allowing you to easily share your internet connection.
Accessing System Preferences: Click on the Apple menu in the top-left corner of your screen and select "System Preferences." This is where you'll manage your Mac's settings.
Sharing Your Connection: Within System Preferences, click on the "Sharing" icon. This section lets you configure various sharing options, including the internet connection.
Internet Sharing Configuration: In the left sidebar of the "Sharing" window, you'll see a list of available sharing services. Select "Internet Sharing."
Selecting Your Internet Source After checking the "Internet Sharing" box, you will see a drop-down menu labeled "Share your connection from:". Choose the internet connection your Mac is currently using – Wi-Fi, Ethernet, etc.
Choosing Devices to Share With: Check the box next to "Wi-Fi" to enable Wi-Fi hotspot functionality. Then, click on the "Wi-Fi Options…" button. This is where you'll customize your hotspot's settings.
Network Name: Enter a name for your hotspot in the "Network Name" field. This is the name that will be visible to other devices.
Security: Select a security protocol, such as WPA2 Personal, and create a strong password for your network to protect your data.
Channel: While the default channel selection is generally fine, you can manually select between different channels in the dropdown menu to avoid interference. It is advisable to leave this option unchanged unless you have experience managing wireless networks.
Starting Your Hotspot: Click "OK" to save your Wi-Fi settings, and then check the box next to "Internet Sharing" to activate your Mac's hotspot. Your Mac is now a fully functioning Wi-Fi access point.
Troubleshooting Common Hotspot Issues
Even with these simple instructions, you might encounter some minor hurdles. Here's how to tackle them:
Connection Issues: If devices can't connect, double-check the network name and password you entered. Ensure the password has been entered correctly on the connecting device. Also, make sure that the hotspot is turned "On" in the settings.
Limited or No Internet Access: This is often caused by the source internet connection. Make sure your laptop itself has a working internet connection. Try restarting the source connection, such as your router or modem. Consider disabling and enabling the connection from the computer's settings, if necessary.
Slow Speeds: Multiple devices connected to the hotspot will share the bandwidth. Try disconnecting some devices or running speed tests on the laptop itself if the original internet connection is slower than usual.
Firewall Interference: Some firewalls can block the hotspot functionality. Temporarily disable your laptop's firewall or add an exception for the hotspot software.
Power Management Settings: Make sure that your laptop is not set to turn off the Wi-Fi adapter to save power. This can interrupt the hotspot connection. Go to the Device Manager (search for it in the Windows search bar), find "Network adapters," right-click your Wi-Fi adapter, select "Properties," go to the "Power Management" tab, and uncheck "Allow the computer to turn off this device to save power." For MacOS, this is not a standard setting.
Extending Your Hotspot’s Reach and Capabilities
Once you've mastered the basics, you can further customize and enhance your Wi-Fi hotspot experience.
Bandwidth Management: Some operating systems and third-party software allow you to set data limits, preventing a single device from consuming all available bandwidth. This helps maintain fair access for all connected devices.
Monitoring Connected Devices: See the devices connected to your hotspot, and monitor their data usage directly from your settings. This helps with troubleshooting and managing bandwidth.
Using Third-Party Applications (Use with Caution): Several third-party applications offer advanced hotspot features, such as more robust security options, detailed bandwidth monitoring, and even scheduling capabilities. However, always download software from trusted sources and read user reviews before installing any additional programs. This is especially important given that the native mobile hotspot feature in Windows and Mac provides excellent functionality.
Security Best Practices: Keeping Your Hotspot Safe
Creating a hotspot also brings about the requirement to prioritize security. Always implement the following to enhance your security:
- Strong Passwords: Use a complex and unique password for your Wi-Fi network.
- Regular Password Updates: Change your Wi-Fi password regularly for security.
- Enable Firewall: Keep your laptop's firewall active to protect your device from unauthorized access.
- Disable Hotspot When Not in Use: Turn off your hotspot whenever you're not actively using it to prevent potential misuse.
- Monitor Connected Devices: Regularly review the devices connected to your hotspot and remove any suspicious or unknown devices.
Knowing how to transform your laptop into a Wi-Fi hotspot is an invaluable skill in today's world. Whether you're a frequent traveler, a student, or simply someone who wants to stay connected in areas without a strong Wi-Fi connection, this simple trick can save you time, money, and frustration. The best part? It's free, easy, and readily available on almost every modern laptop. So the next time you find yourself in need of a Wi-Fi signal, remember that your laptop holds the key to unlocking this convenient solution.
