how to connect my laptop windows 7 to wifi network

Title: How To Enable WiFi Internet Connection In Windows 7
Channel: MDTechVideos International
How To Enable WiFi Internet Connection In Windows 7 by MDTechVideos International
Windows 7 Wi-Fi Nightmare? Solved! (Easy Fix Inside)
Windows 7 Wi-Fi Woes? Conquer the Connectivity Chaos!
Remember those frustrating days of struggling to connect your Windows 7 machine to the internet? The spinning wheels of despair, the dropped connections, the sheer exasperation? Well, breathe a sigh of relief. Because you are about to embark on a journey toward Wi-Fi serenity. These problems were a common headache, especially during Windows 7’s heyday. It was a trial that many users faced. However, the good news is that you don't have to suffer any longer. This article is your guide to resolving those irritating Windows 7 Wi-Fi issues.
Unmasking the Wi-Fi Gremlins: Identifying the Culprits
First, let's identify the usual suspects when it comes to Wi-Fi difficulties. Your wireless adapter, the device that allows your computer to "see" Wi-Fi signals, might be the root cause. Sometimes, it's a simple software glitch. Other times, it's a driver issue. Possibly, your router is misconfigured. Maybe, the signal strength is too weak. It could even be interference from other devices. So, begin by checking the basics. Make sure your Wi-Fi adapter is enabled. Also, double-check your router is working correctly. If all seems well, we can dig a little deeper.
The Driver Dilemma: Your First Line of Defense
Drivers are the unsung heroes of your computer's functionality. They act as the communication bridge between your hardware and your operating system. Outdated or corrupted drivers cause serious connectivity problems. Therefore, updating your Wi-Fi adapter driver is often the crucial first step. To get started, go to the Device Manager. You can easily find it by searching in the Start menu. In the Device Manager, look for "Network adapters." Expand the list. Find your Wi-Fi adapter, right-click on it, and choose "Update driver." Windows will then search for the latest driver automatically. If that fails, you can manually download the current driver from your computer manufacturer's site. Installing the latest driver can frequently resolve many problems.
Router Reboot Ritual: A Simple Yet Powerful Solution
Sometimes, the simplest solutions are the most effective. A router reboot is often the magic trick. It clears its memory and re-establishes a clean connection. Unplug your router from the power supply. Wait patiently for about 30 seconds. Plug it back in and give it a few minutes to boot up. Then, try connecting to your Wi-Fi again. You might be surprised at how often this works.
Signal Strength Shenanigans: Boosting Your Wireless Reach
Weak signal strength leads to dropped connections and slow speeds. In other words, it’s a Wi-Fi experience. If you're experiencing these issues, consider your router's location and your distance from it. Ensure your router is in an open space, free from obstructions like walls and furniture. Relocate your router to a more central location. This improves signal coverage. Also, consider using a Wi-Fi extender. They can significantly boost your signal in areas with weak coverage.
Security Protocol Ponderings: Choosing the Right Encryption
Incorrect security settings can certainly prevent your Windows 7 computer from connecting. Check your router's security settings. A common misconception is that WEP is still secure. It's crucial to select a more robust protocol. WPA2 or WPA3 is the recommended choice. Furthermore, ensure that the correct password is used. Incorrect credentials are a very common reason for connection issues.
Troubleshooting Tools: Your Digital Detective Kit
There are diagnostic tools that can aid in your troubleshooting efforts. Windows 7 offers a built-in troubleshooter. It can automatically detect and fix common Wi-Fi problems. You can find it by right-clicking the Wi-Fi icon in your system tray and selecting "Troubleshoot problems." Additionally, third-party network diagnostic tools are available. They provide more detailed insights into your network configuration.
Advanced Tactics: Delving Deeper into the Code
If the basic troubleshooting steps don't resolve the issues, you may need more advanced tactics. Consider checking your IP address settings. Make sure your computer is configured to obtain an IP address automatically. Also, try flushing the DNS cache. This can help resolve issues related to website access.
The Final Farewell: Embracing Wi-Fi Bliss
By systematically addressing these potential issues, you can likely conquer your Windows 7 Wi-Fi woes. In conclusion, don't let connectivity problems ruin your online experience. Instead, try these troubleshooting steps. In the end, you'll finally have stable Wi-Fi. This will allow you to enjoy seamless browsing, streaming, and downloading. Armed with these solutions, you can confidently reclaim your digital freedom. Say goodbye to frustrating dropouts and embrace the tranquility of a smoothly functioning network. You’ve got this!
Laptop WiFi IP Conflict? This SHOCKING Trick Fixes It INSTANTLY!Windows 7 Wi-Fi Nightmare? Solved! (Easy Fix Inside)
Let's face it, Windows 7, bless its heart, can sometimes feel like a relic from a bygone era. It's like that trusty old car that almost always starts, even if it takes a bit of cajoling. And when it comes to Wi-Fi, many of us have experienced that heart-stopping moment – the dreaded "Limited Access" message. We've all been there, haven't we? Staring blankly at the screen, cursing the invisible forces of the internet gods, and desperately wishing for a working connection. But fear not, weary traveler! We're going to dissect this Wi-Fi woe and, more importantly, show you how to banish it. Consider this your personal Wi-Fi rescue mission.
1. The Mysterious Case of the Disappearing Internet: Unveiling the Wi-Fi Woes
Before we jump into solutions, let’s establish a shared understanding. The problem often presents itself in a few familiar ways. Your Wi-Fi signal might show full strength, looking as robust as a champion weightlifter. But when you try to browse, you’re met with a frustrating "No internet access" message. Or maybe it's "Limited Access," a sign that your connection is about as useful as a chocolate teapot. This can manifest in several ways, and the cause could range from simple driver issues to more complex network conflicts. It's like trying to diagnose a mystery illness – you need to look at the symptoms (the error messages) to narrow down the potential culprits.
2. Why Windows 7 and Wi-Fi Sometimes Don't Play Nice: Common Culprits
Think of your Wi-Fi as a long-distance runner. It needs its equipment (your network card and driver), its fuel (the internet signal), and a clear path (no interference). When any of these elements are off, you have a problem. Let's look at some of the most common culprits that can turn your Windows 7 Wi-Fi experience into a headache:
- Driver Issues: This is often the root of the problem. Imagine your driver as the translator between your computer and your Wi-Fi adapter. Outdated, corrupted, or incompatible drivers can create serious communication breakdowns.
- Incorrect Network Settings: Maybe you've entered the wrong password, or your network settings aren't configured correctly. It’s like trying to unlock a door with the wrong key.
- Router Glitches: Routers, like all technology, can get moody. They may need a simple reboot – imagine it as a digital time-out.
- Interference: Think of your Wi-Fi signal as rays of sunshine. Anything that gets in its path, like a microwave or even a neighbor's Wi-Fi signal, can disrupt its flow.
- IP Address Conflicts: In some cases, two devices on your network might be accidentally using the same IP address, creating a digital tug-of-war.
3. The Simple Reboot Cure: The First Line of Defense
Before we get fancy, let’s try the digital equivalent of turning it off and on again. Restarting your computer and your router is often the simplest, quickest solution. Think of it as a system reset – it can magically resolve many minor issues. Power off your router, wait about 30 seconds, and then power it back on. Let it fully boot up (a couple of minutes), and then restart your computer. Often, this alone will do the trick.
4. Driver Detective: Updating Your Network Adapter Driver
This is where we get our detective hats on. Outdated drivers are perhaps the biggest cause of Wi-Fi woes in Windows 7. We need to update the driver for your network adapter. Here’s how:
- Open Device Manager: Click the Start button, type "Device Manager" in the search bar, and press Enter.
- Find Your Network Adapter: Expand the "Network adapters" section. You should see your Wi-Fi adapter listed by name (e.g., "Intel Wireless-N 7260").
- Update the Driver: Right-click on your adapter and select "Update driver."
- Choose Your Method: You'll have two options:
- "Search automatically for updated driver software": Windows will try to find and install the latest driver.
- "Browse my computer for driver software": If you've downloaded a driver from the manufacturer's website (which is often a good option), you can point Windows to the file.
- Restart Your Computer: Once the driver is installed, you'll likely need to restart your computer.
5. The Network Troubleshooter: Your Built-in Helper
Windows 7 includes a built-in network troubleshooter. It's like a digital handyman that attempts to automatically diagnose and repair common network problems.
- Access the Troubleshooter: Right-click on the Wi-Fi icon in your system tray (the little icons in the bottom-right corner of your screen).
- Select "Troubleshoot problems": The troubleshooter will then scan your network configuration for issues.
- Follow the Prompts: The troubleshooter will often suggest fixes, such as resetting your network adapter or resolving IP address conflicts.
6. Is Your Password the Problem? Double-Checking Your Wi-Fi Credentials
It sounds simple, but we’ve all done it: mistakenly entering the wrong Wi-Fi password. Take a deep breath and re-enter your network password to ensure you have the correct credentials. Pay close attention to capital letters, small letters, and special characters.
7. Router Configuration Check: Understanding Your Gateway
Sometimes, the issue isn't with Windows 7 but with your router's settings. Review the following settings:
- Check SSID Broadcast: Ensure that your Wi-Fi network (SSID) is being broadcast. It should be visible when searching for available networks.
- Verify Security Type: Confirm the appropriate security protocol (WPA2 or WPA3) is set.
- Review Channel Settings: Investigate channel interference by switching it to a less crowded channel.
8. IP Address Configuration: Static vs. Dynamic
Your computer obtains an IP address either dynamically (automatically) or statically (manually). Incorrect settings here can lead to connectivity woes.
- Dynamic IP (Recommended): Usually, your computer should automatically obtain an IP address from your router. This is the simplest setup.
- Static IP: If you are using a static IP, be sure you've configured all details (IP address, subnet mask, gateway, and DNS servers) correctly.
9. Flush the DNS Cache: Clearing Out the Digital Clutter
Your computer stores a DNS cache to speed up web browsing. If this cache becomes corrupted, it can cause connectivity issues. You need to flush the DNS.
- Open Command Prompt: Click Start, type "cmd" in the search bar, and press Enter.
- Run the Command: Type
ipconfig /flushdnsand press Enter.
10. Consider Network Card Interference: Eliminating Physical Disruptions
As we stated earlier, sometimes, real-world interference is the issue. Consider these sources:
- Microwaves, wireless phones, and other devices that use similar frequencies.
- Physical barriers like thick walls. Try moving the Wi-Fi device.
11. Disabling Power Saving Mode: Maximizing Performance
Your network adapter might be set to save power, potentially causing intermittent connection problems.
- Access Device Manager: Follow the steps in section 4, but this time, expand "Network adapters."
- Open Properties: Right-click on your Wi-Fi adapter and select "Properties."
- Check Power Management: Go to the "Power Management" tab and uncheck "Allow the computer to turn off this device to save power."
12. Reinstalling Your Network Adapter: A Fresh Start
Sometimes, completely removing and reinstalling the network adapter driver is the best solution.
- Uninstall the Device: In Device Manager, right-click on your Wi-Fi adapter and select "Uninstall."
- Restart your computer: Windows will detect the missing adapter on startup and attempt to reinstall it automatically.
13. Check Your Antivirus: It Can Interfere
Some antivirus programs have firewalls that might (unintentionally) block your internet connection. Temporarily disable your antivirus software to see if it's the culprit.
14. The Nuclear Option: System Restore
If everything else has failed, consider using System Restore. Think of it as a digital time machine that reverts your computer to a previous state when your Wi-Fi was working.
- Open System Restore: Click Start, type "System Restore" in the search bar, and press Enter.
- Choose a Restore Point: Select a restore point from a time when your Wi-Fi was working correctly.
- Follow the Prompts: System Restore will revert your system to that previous state.
15. Seeking Expert Help: When to Call In the Professionals
If you've tried all these steps and still can't get connected, it's time to admit defeat (for now) and seek expert help. Contact your internet service provider, or a local computer technician.
Alright, we've covered a lot of ground! Wi-Fi issues in Windows 7
Laptop WiFi Dead Zone? This ONE Trick Will SHOCK You!Connecting your Windows 7 Computer to the Wi-fi Network.
By Academic Algonquin Connecting your Windows 7 Computer to the Wi-fi Network. by Academic Algonquin
Computer me wifi kaise connect kare computer me wifi kaise connect kare windows 7

By Deepak Computer Gyan Computer me wifi kaise connect kare computer me wifi kaise connect kare windows 7 by Deepak Computer Gyan
How to enable your network connection in Windows 7

By MHELP2U How to enable your network connection in Windows 7 by MHELP2U

Title: Not connected no connections are available windows 7 laptop
Channel: IT Magics
Not connected no connections are available windows 7 laptop by IT Magics
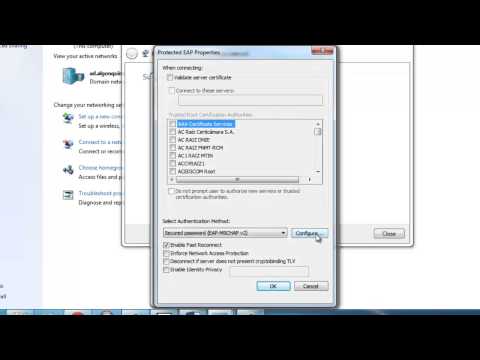
Change Wifi Settings
Windows 7 Wi-Fi Woes Vanquished: A Simplified Solution
We understand. The frustration. The flickering Wi-Fi icon, the dropped connections, the endless troubleshooting that seems to lead nowhere. These are the hallmarks of a Windows 7 Wi-Fi nightmare. But relax. Today, we are going to illuminate the path to a stable, reliable wireless connection. We're not going to bore you with technical jargon, just provide you with a streamlined, effective solution that, in most cases, will restore your Wi-Fi and banish those connectivity demons. This specifically targets the most common issues that plague Windows 7 users, providing a clear roadmap to wireless bliss.
Diagnosing the Distress: Pinpointing the Root of Your Wi-Fi Problems
Before we dive into the solution, it’s crucial to briefly assess the common culprits behind a faltering Wi-Fi connection in Windows 7. While the specific issue can vary, several factors often contribute to a problematic wireless experience. Identifying the source can save precious troubleshooting time and ensure the fix is tailored to your system's specific needs.
Firstly, consider the wireless adapter. This is the hardware that your computer uses to communicate with the Wi-Fi router. Outdated or corrupted drivers are often the primary cause of Wi-Fi problems. The driver acts as a translator, enabling the operating system to talk to your wireless adapter. When the translator becomes corrupted or is out of date, communication breaks down, manifesting as intermittent connectivity, slow speeds, or complete disconnections.
Secondly, the router itself can be a source of trouble. Routers, like any electronic device, can experience glitches or become overloaded. An outdated router firmware, or a router configuration that is not ideally suited to your hardware, may contribute to Wi-Fi malfunctions. Routers have settings, and these settings can drastically affect compatibility with various devices.
Thirdly, the network configuration within Windows 7 can be a hurdle. Incorrect settings, such as the wrong security type or password, can prevent the computer from joining your network. Additionally, conflicts with other network devices using the same IP address can lead to connection instability. This also incorporates the possibility of incorrect or corrupted network profiles.
Finally, the physical environment can interfere with wireless signals. Obstacles such as thick walls, metal objects, and other electronic devices can weaken your Wi-Fi signal, resulting in reduced speeds and dropped connections. Proximity to the router is also a major factor.
Step-by-Step Solution: Resurrecting Your Windows 7 Wi-Fi Connection
Now, onto the core of the matter: the solution. We will now walk through a proven, reliable method to resolve most Windows 7 Wi-Fi issues. This method involves updating the wireless adapter drivers. This step has been proven time and again to get you back online.
1. Identifying Your Wireless Adapter:
Before updating the drivers, you must first identify the brand and model of your wireless adapter. This information helps you download the correct drivers from the manufacturer’s website. You can easily find this information by performing the following actions:
- Open Device Manager: Click on the Start button. Type "Device Manager" in the search box, and select it from the results.
- Expand Network Adapters: In the Device Manager window, locate and double-click the "Network adapters" category.
- Identify Your Adapter: A list of network adapters will appear. Your wireless adapter will likely be listed with a name that includes "Wireless," "Wi-Fi," or "802.11." Note the full name and model.
For example, you might see entries such as "Intel(R) Centrino(R) Wireless-N 1000" or "Realtek RTL8188CE Wireless LAN 802.11n PCI-E NIC."
2. Downloading the Latest Drivers:
Once you have identified your wireless adapter, the next step is to download the latest drivers from the manufacturer’s website.
- Visit the Manufacturer’s Website: Open your web browser and go to the website of the manufacturer of your wireless adapter.
- Examples include: Intel, Realtek, Broadcom, TP-Link, etc.
- Navigate to the Support or Drivers Section: Look for a "Support," "Downloads," or "Drivers" section on the website.
- Search for Your Adapter Model: Use the search function to locate the drivers for your specific wireless adapter model.
- Select Your Operating System: Ensure you select "Windows 7" as the operating system.
- Download the Driver: Download the latest driver package. It will often be a self-extracting executable file.
3. Installing the New Driver:
After downloading the driver, you move on to the installation process.
- Run the Driver Package: Double-click the downloaded driver file to run it.
- Follow the Installation Wizard: A setup wizard will guide you through the installation process. Follow the on-screen instructions. This often includes accepting the license agreement and then choosing an installation location.
- Restart Your Computer: Once the installation is complete, you may be prompted to restart your computer. If not, restart your computer manually.
4. Verifying the Fix
After the restart, your Windows 7 computer should automatically connect to your Wi-Fi network. Verify that the problem has been corrected by attempting the following:
- Check the Wi-Fi Icon: Check the system tray (bottom right corner of your screen) for the Wi-Fi icon. It should show a full signal strength.
- Browse the Internet: Open your web browser and attempt to browse websites.
- Test other Applications: Check to verify your connectivity.
- Monitor Connection Stability: Observe the Wi-Fi connection for a while to ensure it remains stable.
Advanced Troubleshooting: Addressing Persistent Wi-Fi Challenges
While driver updates often resolve most problems, certain Wi-Fi issues might require additional troubleshooting steps.
1. Router Reset and Firmware Update
If the initial driver update did not fully resolve the Wi-Fi issues, the router firmware may be outdated. Resetting the router to its factory default settings can resolve configuration errors. Before doing this, write down your current Wi-Fi password and settings. Then, follow these steps:
- Locate the Reset Button: This is usually a small recessed button on the back or bottom of the router. You will need a paperclip to press it.
- Press and Hold: Press and hold the reset button for about 30 seconds. The router's lights will blink, indicating it is resetting.
- Reconfigure Your Router: After the router restarts, access its configuration settings (usually by typing the router's IP address into a web browser – you can find this address in your router's documentation or by searching online for a guide). Then, configure your Wi-Fi settings, including your network name (SSID) and password.
- Update Firmware (if applicable): In the router's configuration settings, look for a "Firmware Update" or "Upgrade" section. Follow the instructions to update the router's firmware to the latest version.
2. Checking for Interference
As mentioned previously, interference from other devices can impact Wi-Fi performance. Identify the sources of interference and try to mitigate them:
- Change the Wi-Fi Channel: In your router's configuration settings, you can try selecting a different Wi-Fi channel. Some channels are less crowded than others, which can improve performance. Try channels 1, 6, or 11, as they are non-overlapping.
- Move the Router: Place the router in a central location, away from walls, metal objects, and other electronic devices.
- Minimize Other Wireless Signals: Reduce the number of other devices that are using the 2.4 GHz band (like microwaves, cordless phones, and Bluetooth devices).
3. Network Adapter Power Management
Sometimes, the Windows power management settings for your wireless adapter might cause connectivity problems. Access the settings this way:
- Access Device Manager (as described above).
- Right-Click on Your Wireless Adapter. Select “Properties.”
- Go to the "Power Management" Tab.
- Uncheck the Box: Uncheck the box that says "Allow the computer to turn off this device to save power."
4. Utilizing Network Troubleshooter
Windows 7 has a built-in network troubleshooter that can automatically diagnose and fix some Wi-Fi problems. Here is how you can use it:
- Open the Network and Sharing Center: Click the Wi-Fi icon in the system tray, then click "Open Network and Sharing Center."
- Click “Troubleshoot Problems”.
The Path to Wi-Fi Reliability
By following these steps, we hope to have assisted you in conquering your Windows 7 Wi-Fi woes. Remember patience, persistence, and methodical troubleshooting are your best allies. If you implement these strategies, the goal of stable, reliable Wi-Fi on your Windows 7 system is easily within reach. Enjoy your enhanced, frustration-free online experience.
