cara membuat wifi sendiri di laptop windows 7

Title: Cara Cepat Mengaktifkan Wifi di Windows 7
Channel: HandleCustom
Cara Cepat Mengaktifkan Wifi di Windows 7 by HandleCustom
Unlock Your Laptop's Hidden WiFi Hotspot: Windows 7 Secret Revealed!
Unleash Your Digital Nomad: Turning Your Laptop into a WiFi Powerhouse
Ever felt the sting of a sluggish internet connection? Picture this: you're stranded, cafe Wi-Fi is down, and that urgent email needs sending. Frustration mounts. However, your laptop may hold the key. It is a powerful, often-overlooked secret: a hidden WiFi hotspot. This isn't simply a 'how-to' guide. Instead, it's a journey. We will explore the potential lurking within your Windows 7 machine. Furthermore, we will navigate the complexities of creating your personal WiFi haven.
The Unseen Power: Understanding Your Laptop's Capabilities
Your laptop isn't just a means of browsing. Indeed, it's a versatile device. It's a portal to connect with the world. Consequently, it’s a mobile office, entertainment hub, and a digital lifeline. Windows 7, though an older operating system, still boasts remarkable features. Amongst these features lies the ability to share your internet connection. Think of it as a hidden superpower. Moreover, this is accessible right at your fingertips. Therefore, understanding this is crucial. You can transform your laptop into a wireless router.
Conquering the Setup: A Step-by-Step Expedition
Setting up a WiFi hotspot might sound daunting. Nonetheless, it's more straightforward than you imagine. First, open the "Network and Sharing Center". It’s found in your Control Panel. Then, click "Set up a new connection or network". Choose "Set up a wireless ad hoc network". This is important. After that, follow the on-screen prompts. Give your new network a name. Choose a security type. WPA2-Personal is typically a solid option. Create a strong password. Subsequently, you need to share your internet connection.
Deciphering the Connection: Sharing Your Internet's Bounty
Assuming you have an existing internet connection, you’ll need to share it. Primarily, right-click the network icon in your system tray. Selected “Open Network and Sharing Center”. Next, click "Change adapter settings". Then, right-click on the network connection you're using to access the internet. This involves the wired connection or your existing WiFi. Choose "Properties". Navigate to the "Sharing" tab. Allow other network users to connect through this computer's internet connection. Furthermore, select the new ad-hoc network. Essentially, this allows the new hotspot to share the internet.
Troubleshooting Trailblazing: Smoothing the Bumps
Not everything runs smoothly. Sometimes, you may encounter issues. Because of this, knowledge of troubleshooting is vital. For instance, if you can't connect, double-check your password. Verify your security settings. Also, ensure your sharing settings are correct. If your hotspot isn't broadcasting, reboot your laptop. Moreover, confirm your WiFi adapter is enabled. You may need to update your network drivers. Thus, you should visit your laptop manufacturer’s website. Download the latest drivers for your WiFi card. Additionally, interference can be a concern. Move your laptop away from other electronics.
Security Sentinel: Fortifying Your WiFi Fortress
Securing your hotspot is paramount. Since your personal information could be at risk. Therefore, always use a strong password. Moreover, make sure the WPA2-Personal encryption is active. Regularly update your Windows 7 system. This includes security patches. After that, limit the number of devices allowed to connect. Also, monitor your connection. Consequently, spot any suspicious activity. A secure hotspot protects your data and privacy. Finally, be mindful of the websites you visit.
Beyond the Basics: Expanding Your Horizons
This isn’t just about setting up a connection. Instead, it's about transforming your computing experience. Therefore, consider the possibilities. For example, imagine sharing your internet with other devices. Furthermore, you could stream movies. You could even play games online. Additionally, explore different configurations. Experiment with different network names. Learn about various security settings. Hence, you will discover even more features.
The Legacy of Windows 7: A Foundation For Future Connectivity
Windows 7 may be a legacy operating system. Nevertheless, it's still a capable system. Consequently, the WiFi hotspot feature is helpful. Indeed, it is a testament to Windows 7’s adaptability. This approach allows you to maintain your internet wherever you are. It is a valuable tool. This feature equips you for a world of connectivity.
Conclusion: Embracing the Freedom of Wireless
You now have the power to create your own WiFi hotspot. Consequently, you have gained control. Moreover, you are less reliant on public networks. Finally, you can experience the freedom of truly mobile computing. Because of this, Windows 7 offers a valuable service. Embrace the simplicity. Then, enjoy the convenience. Ultimately, you are now ready to explore the world. Venture forth and connect with confidence.
Windows 10 Wi-Fi Nightmare? Grab Your Connection Back NOW!Let's get cracking!
Unlock Your Laptop's Hidden WiFi Hotspot: Windows 7 Secret Revealed!
Hey tech adventurers! Ever been in a sticky situation where you desperately need internet access, but the Wi-Fi signal is as elusive as a unicorn? Been there, done that! We all have. Remember that time I was stuck at a remote cabin, miles from civilization, with a deadline looming? My phone had data, but my laptop was utterly disconnected from the digital world. Frustrating, right? Well, what if I told you your Windows 7 laptop might just hold the key to unlocking its very own hidden Wi-Fi hotspot? Buckle up, because we're about to dive deep!
1. Why Bother? The Wi-Fi Hotspot Advantage
Before we jump into the how, let's talk about the why. Why should you even care about turning your Windows 7 laptop into a Wi-Fi hotspot? Think of it like this: your laptop is a Swiss Army knife of connectivity. It's versatile!
- Sharing Your Internet: Got a mobile hotspot on your phone? Awesome! But what if you want to share that connection with your laptop and your tablet simultaneously? Boom! Hotspot on the laptop.
- Connecting Devices Without Wi-Fi: Think about gaming consoles, smart TVs, or even older devices that lack built-in Wi-Fi. You can connect them to your laptop's created hotspot.
- Emergency Situations: Stranded without Wi-Fi access? Your laptop, with a mobile data connection (via a USB dongle, for example) becomes a lifeline.
- Cost Savings: In some instances, it might be cheaper or more convenient to use your mobile data plan through your laptop's hotspot than purchasing a dedicated Wi-Fi plan.
It’s like having a personal Wi-Fi router wherever you go, only this one's portable – a super convenient companion.
2. First Steps: Checking Your Hardware and Software
Before you get too eager, let's make sure your laptop is ready for this tech party. It's like preparing ingredients before you start cooking.
- Network Adapter: Your laptop must have a Wi-Fi adapter. Most modern laptops do, but double-check your specifications. You can usually find this information in your laptop's user manual or by searching online for your laptop's model.
- Windows 7: Obviously, we're talking about Windows 7. However, keep in mind that the methods outlined here might vary a little bit depending on your specific Windows 7 build and any specific patches you have installed. Although, the core concepts remain the same.
- Administrative Privileges: You’ll need administrator rights on your laptop. Essentially, you need to be able to make changes to the network settings.
Don’t worry, checking those aspects is simpler than you think. A quick peek at your device manager will often reveal your network adapters.
3. The Magic Command: The Command Prompt's Role
Okay, here's where the fun begins! We're going to tap into the power of the Command Prompt. Think of it as the secret handshake into your laptop's network capabilities.
Open Command Prompt: Click the Windows "Start" button and type “cmd” (without the quotes) in the search bar. Right-click on "cmd.exe" (or "Command Prompt") and select "Run as administrator." This is crucial.
The First Command (Checking Availability): In the Command Prompt, type the following command and press Enter:
netsh wlan show driversThis command checks if your Wi-Fi adapter supports the "hosted network" feature. If "Hosted network supported: Yes" appears, you're golden! If it says "No," unfortunately, your Wi-Fi adapter might not be compatible. However, If it says "No," you can often resolve this with updated Wi-Fi drivers.
4. Setting Up the Hosted Network: A Step-by-Step Guide
Assuming your hardware is up to the task, let's configure your hotspot. It’s like assembling IKEA furniture – a few steps and you're good to go!
The Second Command (Creating the Network): In the Command Prompt (as administrator), type and run this command:
netsh wlan set hostednetwork mode=allow ssid="YourHotspotName" key="YourPassword"- Replace
"YourHotspotName"with the name you want your Wi-Fi hotspot to broadcast (e.g., "MyLaptopHotspot"). - Replace
"YourPassword"with a strong password (at least 8 characters). Write it down. You'll thank me later!
- Replace
The Third Command (Starting the Network): Now, type and run this command:
netsh wlan start hostednetworkThis will start your Wi-Fi hotspot, and you'll see a message like "The hosted network started."
5. Sharing Your Internet Connection: The Crucial Link
Creating the hotspot is only half the battle. You need to share your existing internet connection with it. This is the bridge that connects your laptop's hotspot to the outside world.
- Open Network Connections: Go to the Control Panel. You can usually find it by clicking the Windows "Start" button and typing "Control Panel" in the search bar. Then, click on "Network and Internet" and then "Network and Sharing Center."
- Change Adapter Settings: In the left-hand sidebar, click on "Change adapter settings."
- Identify Your Internet Connection: You'll see a list of network connections. It could be labeled "Ethernet" (if you're using a wired connection) or "Wireless Network Connection" (if you're connected to a Wi-Fi network).
- Share the Connection: Right-click on your internet connection and select "Properties."
- Sharing Tab: Click on the "Sharing" tab.
- Allow Other Network Users: Check the box that says "Allow other network users to connect through this computer's Internet connection."
- Select Your Hosted Network: Use the dropdown menu under "Home networking connection" to select your hosted network (it will likely have the name you gave it earlier).
- Click "OK."
There! You've shared your internet connection!
6. The Firewall Factor: Avoiding Potential Roadblocks
Windows Firewall can sometimes block the hotspot's traffic. It's like a security guard at your virtual internet party, and sometimes it needs a little coaxing.
- Check Your Firewall Settings: In the Control Panel, go to "System and Security" and then "Windows Firewall."
- Allow the Hotspot: In the left-hand sidebar, click on "Allow an app or feature through Windows Firewall."
- Locate and Allow: Find the "Hosted Network" or "Virtual Hosted Network" in the list. Make sure both "Private" and "Public" are checked. If not, click the "Change settings" button (you might require administrator permissions) and check the boxes.
- Click "OK."
This step helps make sure that your hotspot traffic isn’t being inadvertently blocked.
7. Troubleshooting Common Hiccups: When Things Go Wrong
Even the best-laid plans can sometimes go awry. Here are some common issues and how to fix them.
- Can't Connect to the Hotspot: Double-check your password! Also, ensure your firewall isn't blocking the connection or that the hosted network is running (check using the
netsh wlan show hostednetworkcommand). - No Internet Access After Connecting: Make sure you correctly shared your internet connection (as described in Section 5). Also, try restarting your entire setup – your laptop and the connected devices.
- Hotspot Keeps Stopping: Verify that the “hosted network” is started, re-run command
netsh wlan start hostednetwork. And, make certain that your Wi-Fi driver are up to date. - Slow Speeds: Just like any wireless connection, the speed can be affected by distance, obstacles, and other devices. Move closer to your laptop, and limit the number of devices using the hotspot simultaneously.
Sometimes it's a simple oversight – a forgotten password, a missed step. Don't get discouraged!
8. Fine-Tuning Your Hotspot: Beyond the Basics
Once you've got the basics down, you can tweak your hotspot for optimal performance.
- Change the Name and Password: You can change your hotspot's name and password using the same
netsh wlan set hostednetworkcommand as before. Just remember to stop the hosted network first, then change the settings and restart. - Security Type: While setting up your hotspot, you might be able to configure the security type (e.g., WPA2-PSK). WPA2-PSK is considered a robust security standard, so ensure you are using a security type.
- Channel Selection: You can also try to adjust the Wi-Fi channel your hotspot uses to avoid interference, but this is a more advanced setting.
These details allow you to tailor your hotspot to your specific needs.
9. Stopping and Restarting Your Hotspot: The On-Off Switch
You don't need your hotspot running all the time. Here’s how to
HP Laptop Wifi Printer Nightmare? FIX IT NOW!CARA MENGAKTIFKAN WIFI DI WINDOWS 7

By Rdn Channel CARA MENGAKTIFKAN WIFI DI WINDOWS 7 by Rdn Channel
Cara Atasi Wifi Mati, Wifi Tidak Mau Konek Not Connected Wifi Pada Windows 7
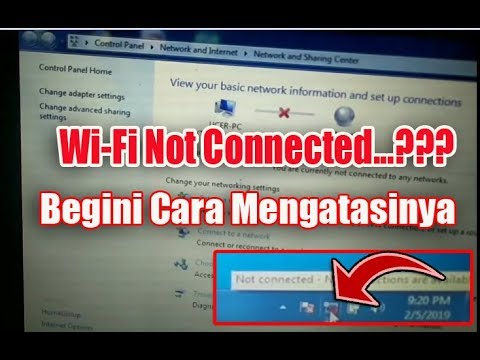
By asal ngelik Cara Atasi Wifi Mati, Wifi Tidak Mau Konek Not Connected Wifi Pada Windows 7 by asal ngelik
Cara Mengaktifkan Hotspot Wifi Laptop Windows 7

By LAPTOP TUTORIAL Cara Mengaktifkan Hotspot Wifi Laptop Windows 7 by LAPTOP TUTORIAL

Title: Cara Membuat Hotspot di KomputerLaptop tanpa Software Windows 7, 8 dan 10
Channel: Tech Coffee
Cara Membuat Hotspot di KomputerLaptop tanpa Software Windows 7, 8 dan 10 by Tech Coffee
Change Wifi Settings
Unlock Your Laptop's Hidden WiFi Hotspot: Windows 7 Secret Revealed!
The digital age demands constant connectivity. We rely on the internet for everything, from staying in touch with loved ones to managing our professional lives. Yet, the modern nomadic lifestyle often finds us grappling with limited access to reliable WiFi. Public hotspots are frequently unreliable, and tethering to our smartphones can quickly drain our data plans. But what if your trusty Windows 7 laptop held the key to unlocking a personal WiFi hotspot, a hidden power source readily available to share your internet connection? This article unveils precisely that secret, providing a detailed, step-by-step guide to transforming your laptop into a wireless access point.
Understanding the Core Concept: The Hosted Network in Windows 7
Before launching into the practical steps, it’s crucial to grasp the underlying mechanism. Windows 7, for all its perceived age, possessed the inherent ability to create a hosted network, effectively turning your laptop into a WiFi router. This wasn't a feature actively promoted or readily apparent; rather, it was a hidden capability cleverly integrated directly into the operating system. This hosted network leverages Windows 7's built-in capabilities by utilizing your laptop’s existing WiFi adapter and sharing its internet connection. The beauty of this approach lies in its simplicity and affordability. You’re utilizing hardware you already own.
Step-by-Step Activation: Bringing Your Hidden Hotspot to Life
Activating this hidden gem requires a few precisely executed commands through the command prompt. It’s not difficult, but accuracy is paramount. Let's launch into the process.
Accessing the Command Prompt as Administrator: The command prompt houses the keys. Begin by opening the Start Menu. Within the search field, type "cmd" and, when the "cmd.exe" application appears in the search results, right-click it and select "Run as administrator." This elevated privilege is essential for the commands to take effect, so you can't skip this step. A black window will appear, ready to receive your instructions.
Initiating the Hosted Network: The “netsh” Command: Now, we'll employ the "netsh" command-line utility, a powerful Windows network configuration tool. Type the following command precisely as shown, paying close attention to spacing to avoid errors, then press Enter:
netsh wlan set hostednetwork mode=allow ssid="YourNetworkName" key="YourPassword"Replace "YourNetworkName" with your preferred network name (SSID), which will be visible to other devices. Choose a unique and memorable name. “MyLaptopHotspot” or “TravelWiFi” would be examples, but be creative! Use a strong, meaningful password, replacing “YourPassword” with a passphrase of at least eight characters. This password will protect your network from unauthorized access. A good password should include uppercase and lowercase letters, numbers, and special characters to prevent your data from being compromised. Do not share this password with anyone!
Starting the Hosted Network: The Activation Command: After setting up your network parameters, it's time to start the housed network. Enter the following command and hit Enter. Pay close attention to spelling here as well:
netsh wlan start hostednetworkIf the commands execute successfully, you should see a confirmation message. If there were an error, verify the spelling of your commands, particularly the network name and password. Make sure you have entered the correct syntax.
Sharing Your Internet Connection: The Crucial Bridge: The hosted network is now established, but it won't be useful until we configure the internet connection sharing. Navigate to the "Network and Sharing Center." You can access this by clicking the network icon located in your system tray in the bottom right corner of your screen, right-clicking on the connection icon, and selecting "Open Network and Sharing Center."
In the Network and Sharing Center, click on "Change adapter settings". This will bring up a window displaying your network adapters. Right-click on the internet connection that you are using (e.g., your Ethernet connection when using a wired connection, or your WiFi connection if connected to another WiFi network). Select “Properties”.
In the properties window, click on the “Sharing” tab. Check the box labelled “Allow other network users to connect through this computer’s internet connection.” You'll be prompted to select the home network connection; choose your wireless hosted network adapter, which will typically have the name you assigned in Step 2, and then click "OK."
This step configures your primary internet connection to be shared with the hosted network, allowing other devices to connect. You are now the proud owner of a personal WiFi hotspot.
Troubleshooting Common Issues and Solutions
Even with precise execution, issues may arise. Let's address common problems you might encounter.
"The hosted network couldn't be started" Error: This is a frequent error. Verify that your wireless adapter is enabled in the Network Connections window. Also, ensure that your wireless adapter driver is up to date by going to the Device Manager (accessed by searching for "Device Manager" in the Start Menu search). Look for any yellow exclamation marks next to your wireless adapter, which indicates a driver issue. Update the driver if necessary. Restarting your laptop can often resolve this.
"The wireless network adapter is not connected to the internet" Error: This is a common issue. Double-check that your laptop is successfully connected to a working internet connection. The internet connection sharing configuration (Step 4) is crucial; that is what makes the connection possible. Another potential reason is the antivirus or firewall might be blocking the connection, so disable it temporarily.
Slow Internet Speeds: The speed of your hosted network is directly tied to the speed of your original internet connection. Furthermore, the performance can be impacted by several factors, including the number of connected devices, the distance between the connected devices and your laptop, and the presence of physical obstructions, such as walls or furniture, in between your laptop and the device. If speed is an issue, experiment with moving the laptop to a more central location. Reduce the number of connected devices to free up bandwidth.
Incorrect Network Name or Password: If you can't connect, double-check the network name and password you entered when setting up the hosted network on your other devices, and make sure you have typed them exactly as they appear in your notes. Remember that capitalization matters for your password.
Extending Your Laptop's WiFi Hotspot: Tips and Enhancements
Now that you've successfully created your WiFi hotspot, consider these tips for optimal performance and further customization.
Prioritize Security: Always use a strong, unique password. Regularly change your password to further enhance security.
Monitor Connected Devices: While the interface of Windows 7 does not provide an easy way to monitor connected devices, it is possible to know the IP addresses of connected clients. You will be able to restrict these devices.
Optimize Placement: Position your laptop in an open, central location to maximize coverage. Avoid obstructed placement, such as inside a cabinet.
Save Battery Power: Running a hosted network will consume more battery power. When using the hotspot on battery power, consider adjusting the power settings to conserve energy.
Experiment with Channels: The hosted network, by default, picks a channel for your WiFi connection to use. If you experience interference, there are applications that can scan the surrounding area to see which channels are less crowded. However, changing the wireless channel in Windows 7 requires more complex configuration.
Beyond Windows 7: Relevance and Modern Considerations
While this article focuses on Windows 7, the principles of creating a hosted network are fundamentally the same for most operating systems. The specific commands and interface elements may change, but the underlying mechanics remain consistent. For example, Windows 10 and 11 have simplified the process further by including a “Mobile Hotspot” feature in the Settings app.
The Enduring Value of the Hosted Network
Transforming your laptop into a WiFi hotspot offers a readily available solution for sharing your internet connection. By understanding the underlying mechanism and following these precise steps, you can unlock this hidden Windows 7 capability and enjoy the convenience of a personal wireless access point. Whether you're traveling, working remotely, or simply need to share your internet connection with friends and family, this simple technique provides a practical solution.
