laptop wifi hotspot windows 8.1 software

Title: Turn Windows 8 Laptop into WiFi HotSpot How To
Channel:
Turn Windows 8 Laptop into WiFi HotSpot How To by
Unlock Blazing-Fast WiFi Hotspot on Your Windows 8.1 Laptop!
Supercharge Your Windows 8.1 Laptop: Turn it into a Lightning-Fast WiFi Hotspot!
Ever wished you could share your internet connection on the fly? You know, create a personal WiFi hotspot right from your laptop? Well, your Windows 8.1 laptop is a hidden powerhouse, practically begging to be unleashed. Fortunately, with just a few clicks, you can transform that laptop into a blazing-fast WiFi hotspot. The result? Instant internet access for all your devices. Prepare to discover the secrets!
Setting the Stage: Why a Hotspot Matters
Think about it. You're at a café, but the WiFi is painfully slow. Or, perhaps you’re on a train with spotty service. Then you might be at a friend's place. Your phone, tablet, or any other device could be left stranded. A personal hotspot saves the day. It’s an absolute necessity for keeping connected. In short, it’s pure convenience. It bridges the gap and keeps you online, wherever you roam.
Unveiling the Hidden Power: The Microsoft Hosted Network
Windows 8.1 actually has the capability built in. It's a feature called the "Hosted Network". However, be aware that it's not always immediately obvious. This tool allows your laptop to act as a WiFi router. It is easy to use after you know the steps. We’ll walk you through each one.
Step-by-Step: The WiFi Hotspot Setup
Ready to dive in? Let's get started. First, we need to access the command prompt. Click on the Windows key and the "X" key simultaneously. And, subsequently, you’ll see a menu. Select "Command Prompt (Admin)". You might have a slightly different option, such as "Windows PowerShell (Admin)." Either option works. This opens the door to the configurations.
Now, here is where things get interesting. You will have to enter a specific command. This command is paramount to your system. Type netsh wlan set hostednetwork mode=allow ssid=YourHotspotName key=YourPassword into the command prompt. Replace "YourHotspotName" with your preferred network name. Next, replace "YourPassword" with a secure password. Remember, this is case-sensitive. Make sure the password is something you can remember. After entering the command, press Enter.
The Second Phase: Enabling the Hotspot
So, you’ve set the basic parameters. Great. Now it is time to enable the hotspot. We need to start the hosted network. Type netsh wlan start hostednetwork in the command prompt. Press Enter. You should see a confirmation. It's now enabled.
Sharing Your Connection: The Final Piece
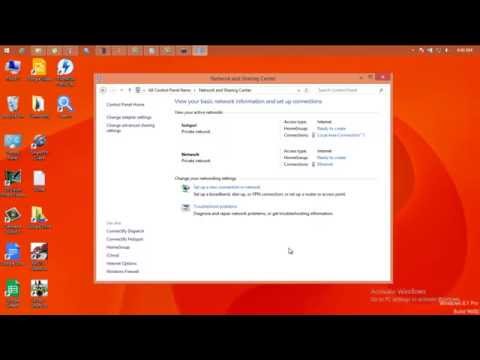
Almost there! Next, you have to share your current internet connection. Go back to your desktop. Right-click on the network icon in the system tray. This is usually in the bottom right corner. Select "Open Network and Sharing Center". Then, click "Change adapter settings."
You will now see a list of network connections. Locate your primary internet connection. This might be labeled "Ethernet" if you're using a wired connection. However, it can be labeled "Wi-Fi" if you’re connected wirelessly. Right-click on your connection and select "Properties."
In the "Sharing" tab, check the box that says "Allow other network users to connect through this computer's Internet connection." Then, select the hosted network you just created from the dropdown. This will normally be the one you named with the SSID command. Click "OK" to save the changes.
Troubleshooting Common Issues
Occasionally, issues can arise. Don't panic, however. First, verify the commands were typed correctly. A single typo can prevent setup. Double-check your network name and password. Next, ensure your WiFi adapter is enabled. Sometimes, a simple restart of your laptop can resolve issues. Finally, update your network drivers if problems persist.
Maximizing Your Experience: Tips and Tricks
For the best experience, consider these key points. Select a strong, hard-to-guess password. This secures your network. Also, keep your laptop close to your devices. This ensures strong signal strength. Furthermore, monitor your data usage. Using a hotspot can consume data quickly. Finally, turn off the hotspot when you are not using it. This preserves battery life.
Beyond the Basics: Advanced Customization
Want to fine-tune your settings? You can. The command prompt offers more options. For example, you can adjust the maximum number of users allowed. Or, you can specify the type of security used. These tweaks can optimize your network.
Conclusion: Embrace the Freedom
You've done it! You've successfully transformed your Windows 8.1 laptop into a WiFi hotspot. Now, you have freedom. You can connect all of your devices. You can share your internet wherever you are. That's the power of being connected. Enjoy your newfound WiFi independence! So, go forth and share the internet!
Unlock Your Laptop's WiFi: Phone-to-Laptop Connection, Password-Free!Unlock Blazing-Fast WiFi Hotspot on Your Windows 8.1 Laptop!
Alright, let's be honest, we've all been there. You're in a coffee shop with Wi-Fi that crawls at a snail's pace, or maybe you're at a friend's place, desperately needing to share your internet connection from your Windows 8.1 laptop. And the burning question arises: How on earth do I create a decent hotspot without pulling my hair out? Fear not, fellow tech enthusiasts! We're about to delve into the wonderfully accessible world of setting up a blazing-fast WiFi hotspot right from your vintage, yet still capable, Windows 8.1 laptop. Think of it like transforming your trusty steed into a wifi-sharing knight, ready to rescue anyone from the slow internet abyss!
Why Bother Creating a WiFi Hotspot on Windows 8.1?
Before we dive into the nitty-gritty, let's briefly explore why this is such a fantastic skill to have in your tech arsenal. It's not just about sharing your internet; it's about freedom.
- Sharing the Love: Got multiple devices? Your phone, tablet, gaming console, all needing the golden elixir of the internet? Boom! Hotspot to the rescue!
- Travel Buddy: Stuck in an airport? Hotel fees for Wi-Fi are highway robbery. Your hotspot becomes your personal internet fortress.
- Emergency Backup: Main internet down? Use your smartphone's data as a lifeline. Now, you can connect your laptop and get back to work.
- Learning is Powerful: It provides an avenue to teach your peers.
Prepping Your Windows 8.1 Laptop: The Essentials
Before we unleash the power of the hotspot, let's ensure we're ready for the digital battle. This is like checking you have all the parts before assembling a Lego set.
- The Internet Connection: This is a bit obvious, but let's ensure we are connected to the internet. Whether it's Ethernet, Wi-Fi, or a 4G/5G dongle, make sure your laptop has a working internet connection.
- A Working Wireless Adapter: Your laptop needs a functioning wireless adapter. This is the magic portal that broadcasts the Wi-Fi signal. Check in your device manager.
- Sufficient Battery Life: This is crucial, folks. Creating a hotspot can drain your battery a bit faster. So, plug in that charger, or have a decently charged battery with you.
Method 1: The Built-in WiFi Host Feature
Windows 8.1 has a hidden gem, a feature that helps to create a hotspot. It's like discovering a secret recipe handed down through generations.
Step 1: Accessing the Command Prompt (Admin Mode)
We're going to interact with the operating system directly. First, search for "cmd" in the search bar located in the bottom right corner of your screen, then right-click on "Command Prompt" and select "Run as administrator". This grants us the necessary power.
Step 2: Unveiling the Secret Codes - The Magic Commands
Now, it's time for the secret handshake. Type (or copy and paste to avoid those pesky typos): netsh wlan set hostednetwork mode=allow ssid="YourHotspotName" key="YourPassword" and press Enter. Replace "YourHotspotName" with your desired hotspot name (e.g., "MyAwesomeHotspot") and "YourPassword" with a strong password (at least eight characters, please!). This is like crafting the name and security code for your personal wireless castle.
Step 3: Starting the Hotspot - Commanding the Network
Next, to get the hotspot up and running, use another command: netsh wlan start hostednetwork and press Enter. Your laptop is now broadcasting its Wi-Fi signal!
Step 4: Sharing Your Internet - Bridging the Magic
Finally, this is where the internet sharing happens. Follow these steps:
- Open the "Network and Sharing Center". You can usually find it by searching using the search bar in the settings.
- Click on "Change adapter settings".
- Right-click on your active internet connection (the one the laptop is currently using to access the internet).
- Select "Properties".
- Go to the "Sharing" tab.
- Check the box that says "Allow other network users to connect through this computer's Internet connection".
- In the "Home networking connection" dropdown menu, select the "Microsoft Hosted Network Virtual Adapter" (or something similar).
- Click "OK".
Method 2: The Wireless Hosted Network Technique
This is the more sophisticated, more "techy" way of doing it, but it gives you more control, so the result is very rewarding.
Step 1: The Command Prompt Again, But Now With a Twist
Back to the command prompt (running as administrator). This time, we’ll use a command to check if your network card supports the hosted network feature. Type netsh wlan show drivers and press Enter. Look for a line that says "Hosted network supported: Yes." If you see this, perfect. If not, you might need to update your network adapter drivers (which, surprisingly, can often be found on the manufacturer's website).
Step 2: Setting Up Your Network with Precision
Similar to the first method, we must tell Windows how we want our network to function. This command creates the connection, but you can change the ssid and key to your desired name and password: netsh wlan set hostednetwork mode=allow ssid="YourHotspotName" key="YourPassword".
Step 3: Enabling the Virtual Adapter
Now, we activate the virtual adapter, where the magic begins. We simply start the hosted network where it broadcasts the Wi-Fi. Type netsh wlan start hostednetwork and press Enter.
Step 4: Sharing Your Connection
Similar to the first method, we are going to enable internet sharing;
- Open the "Network and Sharing Center". You can usually find it by searching through the search bar.
- Double-click on the active network connection (the one that itself has internet).
- Go to Properties, and make sure that the Sharing tab is selected.
- Check the box that says "Allow other network users to connect through this computer's Internet connection".
- In the "Home networking connection" dropdown menu, select the "Microsoft Hosted Network Virtual Adapter" and apply the appropriate settings, this way you can connect.
- Click "OK".
Troubleshooting Common Hotspot Headaches
Ah, the inevitable bumps in the road. Let's address a few common issues:
- "The network is not functioning": Double-check that you've entered your commands correctly, that your internet connection is active, and that your network adapter is enabled, and that the appropriate configuration is set up.
- "Unable to start the hosted network": Ensure your network adapter drivers are up to date. Run the command shown above to confirm support.
- Devices Can Connect, But No Internet: This usually indicates a problem with internet sharing. Review the sharing steps above and ensure you've selected the correct connection.
- Slow speeds: Distance from the laptop. Try to be close, and ensure that no other devices are utilizing the internet.
Maximizing Speed and Security: Wise Words
To ensure your hotspot is as blazing-fast and secure as possible, remember these key points:
- Strong Password: Use a robust password to protect your connection.
- Frequency Band: If your wireless adapter has the option, choose the 5 GHz band over the 2.4 GHz band for potentially faster speeds (assuming your other devices support it).
Beyond the Basics: Advanced Hotspot Tweaks
If you are looking for more advanced settings, you can consider the following:
- Change Your MAC Address: Modify the Media Access Control (MAC) address of your virtual adapter for an additional layer of security and privacy.
- Limit Bandwidth: You could control the amount of data being given to the devices using the hotspot.
The WiFi Hotspot Lifestyle: Embracing Freedom
Mastering the Windows 8.1 hotspot is more than just a technical skill; it's a gateway to a more flexible, connected life. You can work from anywhere, share your internet with friends and family, and stay entertained on the go. It's about taking control of your digital life.
Fine-Tuning the Experience: Make it your Own!
The beauty of these methods is the customization they offer. Feel free to experiment with different hotspot names, passwords, and even tweak your network settings to perfectly suit your needs.
Windows 8.1: Is It Still Relevant?
Yes, despite its age, Windows 8.1 still provides a reliable platform for creating Wi-Fi hotspots. The built-in functionality is efficient, and with a little care, your Windows 8.1 laptop can remain a valuable tech tool, just like a trusty old friend.
In Conclusion:
There you have it—a comprehensive guide to unlocking a blazing-fast WiFi hotspot on your Windows
**Windows 8 Asus WiFi: The SHOCKINGLY Easy Fix!**Make your Laptop as a WIFI Hotspot Using Windows 8.1

By Smartt TechD Make your Laptop as a WIFI Hotspot Using Windows 8.1 by Smartt TechD
Membuat Hotspot WiFi di Windows 8.1, 8, 7 LaptopPC
By ANDREW CRUZ Membuat Hotspot WiFi di Windows 8.1, 8, 7 LaptopPC by ANDREW CRUZ
Ubah Laptop Windows 8 menjadi HotSpot WiFi Cara

By TechEmpty Ubah Laptop Windows 8 menjadi HotSpot WiFi Cara by TechEmpty
Title: Cara mengaktifkan wifi di windows 8
Channel: AW Tutorial
Cara mengaktifkan wifi di windows 8 by AW Tutorial
Laptop Working
Unlock Blazing-Fast WiFi Hotspot on Your Windows 8.1 Laptop!
We've all been there: stranded in a coffee shop, desperately needing to connect a tablet, or perhaps traveling with colleagues reliant on a single internet connection. Windows 8.1, while perhaps not the newest operating system on the block, remains a capable platform, and fortunately, it boasts a robust, built-in feature that allows you to transform your laptop into a powerful WiFi hotspot. This is not just about convenience; it's about staying connected, sharing resources, and creating a mobile network wherever you go. Let’s delve into the specifics of how to create a fast, reliable, and secure WiFi hotspot using your Windows 8.1 laptop.
Setting the Stage: What You'll Need
Before we begin, let's ensure you have everything at the ready. You'll need a Windows 8.1 laptop with an active internet connection. This connection can originate from a wired Ethernet cable, a pre-existing WiFi network, or even a mobile broadband connection via a USB dongle or cellular modem. Furthermore, you must have administrative privileges on your laptop – essentially, you must be logged into an account that has the ability to modify network settings. Finally, ensure that your laptop's WiFi adapter is enabled and functioning correctly. With these prerequisites met, you're well-equipped to proceed.
The Command Prompt Approach: A Deep Dive
This guide centers on the Command Prompt, a powerful tool that provides granular control over your network settings. While graphical interfaces are often convenient, the Command Prompt allows for a more precise and efficient configuration of your WiFi hotspot.
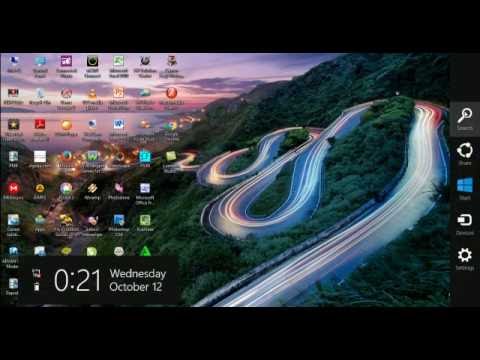
Launching the Command Prompt: To initiate the Command Prompt, navigate to the Start screen (typically, clicking the Windows key will do the trick). Begin typing "cmd." In the search results that appear, right-click on "Command Prompt" and select "Run as administrator." This grants the necessary permissions to execute the commands we’ll be using.
Initiating the Hosted Network: The first command is the cornerstone of our hotspot configuration. Type the following, being meticulous about capitalization and spacing:
netsh wlan set hostednetwork mode=allow ssid="YourHotspotName" key="YourPassword"- Replace
"YourHotspotName"with your desired network name (the SSID). Choose something memorable and descriptive. Avoid using spaces in your network name. - Replace
"YourPassword"with a strong, complex password. This is crucial for security; use a combination of uppercase and lowercase letters, numbers, and symbols (at least eight characters long). - Press Enter. If the command executes successfully, you'll see a confirmation message indicating that the hosted network mode has been set.
- Replace
Starting the Hosted Network: Now that the hosted network is configured, we need to start it. Execute this command:
netsh wlan start hostednetworkPress Enter. The system should confirm that the hosted network has started. If you encounter an error here, double-check the previous step for any typos in the initial command.
Sharing Your Internet Connection: The hosted network is now running, but it isn't yet sharing your internet connection. For this, you will need to perform the following steps:
- Open the Network and Sharing Center. You can typically access this by right-clicking on the network icon in your system tray (located in the lower-right corner of your screen) and selecting "Open Network and Sharing Center."
- In the Network and Sharing Center, click on the "Change adapter settings" link. This will open a window displaying your network adapters.
- Locate the adapter that is currently connected to the internet (e.g., your Ethernet adapter or your primary WiFi adapter). Right-click on this adapter and select "Properties."
- In the Properties window, click on the "Sharing" tab.
- Check the box that says "Allow other network users to connect through this computer’s Internet connection."
- In the "Home networking connection" dropdown menu, select the "Microsoft Hosted Network Virtual Adapter" (or a similar name that refers to your hosted network).
- Click "OK" to save the changes.
Troubleshooting Network Sharing: If you encounter any issues with internet sharing, such as devices failing to connect or reporting "limited connectivity," there are a few common troubleshooting steps. First, ensure that your firewall isn't blocking the connection. You can temporarily disable your firewall (but re-enable it immediately after testing) to see if that resolves the problem. If so, you need to configure your firewall to allow traffic on the required ports for your hotspot. These ports will vary depending on the services you're using. Secondly, verify that the network adapter drivers are up to date. Outdated drivers can cause compatibility problems. Finally, explore the settings of your router.
Fine-Tuning Your Connection
While the basic setup provides a functional hotspot, there are additional steps you can take to optimize performance and security.
Choosing the Correct Security Type: By default, the hosted network might use a less secure security type. You can consider configuring WPA2-Personal which offers a more robust encryption. To do this, you can explore third-party software that allow for more advanced configuration.
Monitoring Connected Devices: Once your hotspot is active, it's very important to know and monitor the devices connected to your hotspot. This can be particularly helpful not only for diagnostics, but also to safeguard the connection. You can use a Command Prompt command for looking at the connected devices. It also shows you the IP address, MAC address, and status of the devices that are connected to your hotspot.
Performance Enhancement: While WiFi performance depends on many factors, the channel your hotspot uses can significantly impact its speed. Newer WiFi routers often automatically select the optimal channel. However, on your laptops, you may want to determine the best channel. Consider using WiFi analyzer apps on your smartphone or tablet, to determine the best channel to minimize interference.
Important Considerations and Caveats
- Power Management: Be mindful of your laptop's power settings. The WiFi hotspot consumes battery power. Ensure your laptop is plugged in or configured to optimize battery life.
- Driver Updates: Regularly update your network adapter drivers. Outdated drivers can lead to performance issues, connectivity problems, and security vulnerabilities.
- Security Best Practices: Always use a strong, unique password for your hotspot. Avoid easily guessable words or phrases. Change your password periodically.
- Legality: Be aware of the terms of service of your internet service provider (ISP). Some ISPs may restrict or prohibit the use of tethering or WiFi hotspots.
Advanced Techniques and Beyond
For those seeking deeper customization, there are advanced techniques that can further refine your WiFi hotspot.
Using Third-Party Software: Several third-party applications offer enhanced features for WiFi hotspot management. These applications can provide a user-friendly interface for configuring the hotspot, managing connected devices, and monitoring network traffic. Some offer features like bandwidth limiting, parental controls, and advanced security options.
Scripting for Automation: If you frequently utilize the WiFi hotspot feature, you can automate the setup and teardown process using command scripts. This eliminates the need to manually enter commands each time, streamlining the process.
Understanding Network Protocols: A fundamental understanding of network protocols, such as TCP/IP and DHCP, can be useful in troubleshooting connection issues and optimizing your hotspot’s performance. DHCP dynamically assigns IP addresses to connecting devices.
Conclusion: Unleashing the Power of Your Windows 8.1 Laptop
Creating a fast and reliable WiFi hotspot on your Windows 8.1 laptop is a valuable skill in today's interconnected world. Whether you're a frequent traveler, a student, or someone who needs to share an internet connection, this guide has equipped you with the knowledge to create a robust mobile network. By following the steps outlined here and implementing the suggested optimization techniques, you can transform your laptop into a powerful WiFi hotspot, empowering you to connect and share your internet access with ease. This gives you a way to quickly connect your devices to the internet without having to connect to a new network for each device. It's more than just sharing your internet connection; it's about staying connected, sharing resources, and managing your connectivity in a way that is reliable and easy. So, go forth, and unlock the potential of your Windows 8.1 laptop!
