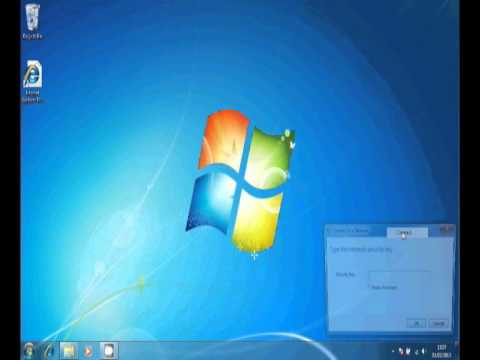
how to connect to wifi from a laptop

Title: Cara atasi WiFi tidak bisa connect di laptop not connected
Channel: ijal tutorial
Cara atasi WiFi tidak bisa connect di laptop not connected by ijal tutorial
how to connect to wifi from a laptop, how to connect wifi to a laptop windows 7, how to connect wifi to a laptop windows 10, how to connect to wifi from hp laptop, how to connect to wifi laptop windows 11, how to connect to the internet from a laptop, how to connect to wifi printer from laptop, how to connect to wifi from phone to laptop, how to connect to united wifi from laptop, how to connect to hotel wifi from laptop
Laptop WiFi: The SHOCKINGLY Easy Trick You NEED to Know!
Unleash Lightning-Fast WiFi: The Secret Your Laptop's Been Hiding!
The digital age demands speed. We all crave seamless browsing, streaming, and connecting. Are you tired of frustratingly slow laptop WiFi? It’s an everyday annoyance. However, brace yourself. There exists a simple trick. This trick can dramatically improve your online experience. You’ll be amazed at the difference.
The WiFi Wasteland: Are You Stuck in the Slow Lane?
Think about your daily laptop usage. Do you frequently endure lagging video calls? Does buffering become your unwelcome companion? These problems are unfortunately common. Many users accept slow WiFi as inevitable. Yet, are we truly accepting? We shouldn't. Slow WiFi steals precious time. It ruins productivity and disrupts enjoyment. In fact, you deserve better. You deserve a connection that keeps pace with you. Fortunately, escaping this digital wasteland is easier than you think.
Unveiling the Hidden WiFi Power-Up: The Magic Key
Prepare for a revelation! The solution to your WiFi woes might be staring you in the face. It's often overlooked. We are all guilty of this oversight. We're referring to your laptop's wireless adapter settings. Specifically, changing one simple setting. This tweak can unleash previously untapped WiFi potential. First, this may sound technical. Don't worry. It's actually incredibly straightforward. I guarantee you can do it.
Step-by-Step Guide: Turbocharge Your WiFi in Minutes
Ready to supercharge your connection? Let's dive in!
Navigate to Your Device Manager: This is your central control panel. You can find it easily. Search for "Device Manager" in your Windows search bar. Alternatively, right-click on the Start button. Then, select "Device Manager" from the menu.
Locate Your Network Adapters: Expand the "Network adapters" section. You will see a list of different adapters. This includes your WiFi adapter.
Identify Your WiFi Adapter: The name will probably include "Wireless" or "WiFi." Right-click on this adapter. Then, choose "Properties."
Dive into Advanced Settings: In the Properties window, click on the "Advanced" tab. You'll see a list of properties. Different adapters will show different options.
Find the "Wireless Mode" Property: Scroll through the list. Look for a property that says "Wireless Mode" or something similar. It's usually a dropdown menu.
Unlock the Speed: The exact options will vary depending on your adapter. However, the goal is to select the highest possible mode. For example, choose 802.11ac or 802.11ax if available. These are the latest, fastest standards.
Apply and Restart: Click "OK" to apply the settings. You may also need to restart your laptop. This ensures the changes take full effect.
Explaining the Why: The Science Behind the Speed Boost
Why does this trick work so well? Basically, you’re optimizing your connection. You are setting your adapter to utilize the latest wireless standards. These standards support faster speeds. They also offer enhanced stability. Moreover, older settings could be restricting your potential. This simple adjustment unlocks what your hardware can truly do. In addition, think of it like upgrading your car's engine. You’re not getting a new car. You’re simply unleashing its hidden power.
Troubleshooting Tips: Smooth Sailing Ahead
Sometimes, things don’t go perfectly. No worries! Here are some troubleshooting tips.
- Can't Find "Wireless Mode?" Not all adapters have this setting. Check your adapter's manual for alternative optimization settings.
- Still Slow After the Change? Consider your router. Is it also a newer standard? Old routers can bottleneck speed.
- Interference Issues: Other devices can interfere. Move your laptop closer to the router. Try the 2.4GHz and 5GHz bands.
Beyond the Trick: Maximizing Your WiFi Experience
Beyond this setting, other factors influence WiFi. Consider these extra steps.
- Router Placement: Place your router in a central, elevated location. Avoid obstructions like walls and metal objects.
- Keep Your Router Updated: Router firmware updates include performance improvements. Check for updates regularly.
- Secure Your Network: Always use a strong password. Encrypt your network with WPA2 or WPA3.
- Manage Connected Devices: Too many connected devices can slow things down. Limit unnecessary usage.
The Verdict: Faster WiFi, Happier You!
So, there you have it. The "shockingly easy trick" to faster WiFi. This is within your grasp. Take action today. You'll experience a noticeable difference. Moreover, your laptop will thank you! Say goodbye to buffering. Hello to seamless streaming. Embrace the speed you deserve. Finally, enjoy a much smoother online experience. You will not regret it.
Laptop WiFi Nightmare? FIX Your Weak Signal NOW!Laptop WiFi: The SHOCKINGLY Easy Trick You NEED to Know!
Hey everyone! Ever stared at that little WiFi icon on your laptop, the one that’s supposed to be your magical portal to the internet, and felt… well, more like you were gazing into a black hole? We’ve all been there. That infuriating moment when your connection decides to take a vacation, leaving you hanging, whether you're in the middle of a crucial video call, trying to stream your favorite show, or desperately trying to meet a deadline. But what if I told you there’s a ridiculously easy trick – a surprisingly simple fix – that could banish those WiFi woes for good? Prepare to be amazed because today, we're diving deep into a problem that plagues millions, but the solution is easier than making instant noodles (and arguably more satisfying!).
1. The WiFi Witch's Brew: Why Your Laptop’s Connection Gets Spooked
Let's be honest, WiFi can be a fickle beast. It's like a temperamental cat; purring and content one minute, then hissing and scratching the next. There are a myriad of reasons why your laptop's WiFi might be acting up. Interference from other devices, distance from the router, outdated drivers, and even that quirky neighbor with a super-powered signal booster can all throw a wrench in the works. Think of it like a crowded party where everyone is trying to shout at once. Your laptop's signal is trying to be heard, but the noise is overwhelming!
- Interference Fiends: Microwaves, cordless phones, and other electronic devices can all interfere with your WiFi signal, creating dead zones and sluggish speeds.
- The Distance Dilemma: The further you are from your router, the weaker the signal becomes. Think of it like shouting across a canyon; the sound simply fades.
- Driver Drama: Outdated or corrupted network adapter drivers can cause all sorts of connectivity chaos. It's like having a rusty engine in a brand-new car.
2. The Secret Weapon: What You Should Be Doing Right Now
So, what's this secret weapon I'm talking about? Well, here it is: Restarting your router and your laptop. (Yes, really! I told you it was easy!). I know, I know, it sounds ridiculously basic. But trust me, it's often the most effective solution, and it’s something most people completely overlook. I've lost count of the number of times I've fixed a colleague's internet woes with this simple step. It’s like the internet's version of turning it off and on again.
3. The Router Reset: Your First Line of Defense
Here’s how you do it. First, unplug your router from the power outlet. Give it a good 30 seconds to a minute to fully reset. This gives it a chance to clear its memory and start with a clean slate. If you're like me, you might find yourself pacing during this time, a little internet-withdrawal-induced anxiety creeping in. Next, plug your router back in and wait for it to fully power up. This can take a few minutes as it re-establishes connection with your internet provider.
4. The Laptop Reboot: A Fresh Start for Your Digital Pal
While your router is getting its act together, go ahead and restart your laptop. This closes all running programs and gives your operating system a chance to refresh its network settings. It’s like hitting the reset button on your brain after a long day of processing information. After your laptop has fully rebooted, your WiFi is usually back in action.
5. Beyond the Basics: Troubleshooting Tips for More Stubborn Problems
Okay, so restarting might not always be the magic bullet. Sometimes, the WiFi gremlins are a bit more persistent. If the simple reset doesn't cut it, here are a few more troubleshooting steps to try:
- Check Your Physical Connection: Ensure your laptop is actually connected to the WiFi network. Sounds obvious, I know, but sometimes we overlook the simplest things. Double-check that you've selected the correct network and entered the password accurately. This is the digital equivalent of ensuring your shoelaces are tied before you attempt to run a marathon.
- Move Closer to the Router: Distance is often the enemy of a strong WiFi signal. If possible, move your laptop closer to the router. This could be the difference between a stuttering video call and a smooth streaming experience.
- Run the Network Troubleshooter: Both Windows and macOS have built-in network troubleshooters that can identify and fix common connectivity issues. It's like having a tech support expert right at your fingertips.
- Update Your Network Drivers: Outdated drivers can cause all sorts of network problems. You can find the latest drivers on your laptop manufacturer's website. Think of it like giving your car a tune-up to improve performance.
6. The Router's Radio Waves: Understanding Your WiFi Signal
Your router broadcasts a WiFi signal using radio waves. These waves travel through the air and are received by your laptop's WiFi adapter. The strength of the signal is measured in decibels (dBm). The closer you are to your router, the stronger the signal. Think of it like speaking at a concert; the closer you are to the stage, the clearer you hear the band's music.
7. The 2.4 GHz vs. 5 GHz Showdown: Choosing the Right Band
Most modern routers broadcast WiFi signals on two different frequency bands: 2.4 GHz and 5 GHz. The 2.4 GHz band has a longer range but offers slower speeds. The 5 GHz band has a shorter range but offers faster speeds. Choose the band that best suits your needs. This is like choosing the best lane on the highway: use the slower lane for cruising and the faster lane for speeding.
8. Channel Surfing: Finding the Least Congested WiFi Channel
WiFi routers broadcast on different channels within each frequency band. If many routers are using the same channel, it can lead to congestion and slower speeds. You can use a WiFi analyzer app to identify which channels are the least congested in your area. This is like finding the best parking spot; a little competition is inevitable, but some spots are clearly better than others.
9. The Antennas' Alignment: Optimizing Your Router's Position
The position of your router's antennas can affect signal strength. If your router has external antennas, try adjusting their position to optimize signal coverage. Experiment with vertical and horizontal positions to find the best configuration for your home. Think of it like adjusting the satellite dish to fine-tune the signal.
10. Securing It: Protect Your WiFi with a Strong Password
Protecting your WiFi with a strong password is crucial. This prevents unauthorized access to your network and keeps your data secure. Use a strong, unique password that is difficult to guess. This is like locking your front door to protect your home.
11. Router's Location, Location, Location: Where to Place Your Router
The location of your router is just as important as its settings. Place your router in a central location in your home, away from solid walls and obstructions. Elevated placement can also improve signal propagation. Think of it like giving your router a good view of its surroundings.
12. Interference Detectives: Recognizing And Reducing Signal Interference
As we mentioned, interference is a major enemy of WiFi. Reduce interference by moving electronic devices away from your router, such as microwaves, Bluetooth speakers, and cordless phones. This is like cleaning up the noise in your environment to enjoy peace and quiet.
13. Router Firmware Updates: The Importance of Staying Updated
Keeping your router's firmware updated is essential for security and performance. Router manufacturers release updates to patch security vulnerabilities and improve performance. Think of it like getting a software update for your phone.
14. Speed Test Time: Measuring Your WiFi Speed
Use a speed test website or app to measure your WiFi speed. This helps you identify if you're getting the speeds you are paying for. You can use this information to pinpoint issues and compare the performance of different network settings. This is like checking the speedometer in your car to determine the speed.
15. When All Else Fails: Consider Upgrading Your Hardware
If you've tried everything and your WiFi is still struggling, it might be time to upgrade your router or network adapter. Newer hardware offers improved performance and better compatibility with modern devices. This is like upgrading your car to a more powerful and modern model.
Closing Thoughts: Your Digital Freedom is Within Reach!
So there you have it! The surprisingly simple secret to banishing those laptop WiFi woes is, most often, the humble restart! But now, you're armed with a whole arsenal of troubleshooting tips and tricks to tackle any connectivity challenge that comes your way. Remember, the internet is your oyster, and a strong, reliable WiFi connection is the key to unlocking its wonders. Go forth, connect with confidence, and let me know in the comments if these tips helped you out!
FAQs: Your Burning WiFi Questions Answered
1. Why does my WiFi disconnect randomly on my laptop?
Random disconnections can be caused by a variety of factors, including interference, outdated drivers, router issues, or even your internet service provider (ISP). Start by restarting your router and laptop. If the problem persists, troubleshoot further by updating drivers and checking for interference.
2. My WiFi signal is weak, even when close to the router. What can I do?
If you have a weak signal
Laptop WiFi: The SHOCKING Reason It Keeps Dropping!How to connect your Laptop to Wifi
By Wanstor How to connect your Laptop to Wifi by Wanstor
How to Add Wireless Wifi Network Manually in Windows 10 PC or Laptop

By Discover You How to Add Wireless Wifi Network Manually in Windows 10 PC or Laptop by Discover You
How to Connect WiFi in Laptop

By Gadget Lover How to Connect WiFi in Laptop by Gadget Lover

Title: Windows laptop not connecting to Wi-Fi Method 1 shorts windows laptop wifi fix
Channel: Tuto2Info Videos
Windows laptop not connecting to Wi-Fi Method 1 shorts windows laptop wifi fix by Tuto2Info Videos
Laptop Wifi Hotspot
Laptop WiFi: Unlock Lightning-Fast Speeds With This Simple Hack
It's the digital age, and reliable, speedy WiFi is no longer a luxury—it's a necessity. We rely on it for everything from crucial work tasks to streaming our favorite shows. But how many times have you been stuck staring at a buffering screen, or frantically refreshing a webpage, all due to frustratingly slow laptop WiFi? We've all been there. The good news? You might be just a few tweaks away from experiencing a dramatically improved online experience. In this comprehensive guide, we'll walk you through a surprisingly simple, yet often overlooked, trick to supercharge your laptop's WiFi performance. Prepare to bid farewell to lag and embrace a world of seamless connectivity.
Understanding the WiFi Weaknesses: Why Your Laptop Might Be Slower Than it Should Be
Before we dive into the solution, let's briefly explore the common culprits behind underperforming laptop WiFi. Understanding these issues is key to appreciating the power of the simple trick we’re about to reveal.
The Blame Game: Interference and Congestion: Your WiFi signal is a radio wave, and like any radio wave, it’s susceptible to interference. This can come from a multitude of sources, including other WiFi networks sharing the same frequency, microwave ovens, Bluetooth devices, and even physical obstructions like walls and furniture. Imagine a crowded room where many people are trying to speak at the same time; it's difficult to hear any single conversation clearly. That's essentially what happens with WiFi interference.
The Distance Dilemma: Signal Strength Degradation: The further your laptop is from your WiFi router, the weaker the signal becomes. The signal strength diminishes over distance, leading to dropped packets, slower speeds, and an overall degraded user experience. Thick walls and multiple stories in a building can exacerbate this.
The Hardware Headaches: Outdated Equipment: Your laptop's built-in WiFi adapter might be older and less capable than the current generation of routers. Older adapters may not support the latest WiFi standards (like Wi-Fi 6 or Wi-Fi 6E), which provide faster speeds, improved efficiency, and better performance in crowded environments.
The Software Setbacks: Driver Issues: Outdated or corrupted network drivers can also hinder your WiFi performance. These are the software components that allow your laptop to communicate with your wireless adapter. Outdated drivers can lead to compatibility problems, dropped connections, and slower speeds.
The Hidden Champion: Optimizing Your Router's Channel Selection
The solution we're offering lies in a fundamental aspect of your WiFi network: the channel selection. Think of your WiFi router as a radio station, broadcasting its signal on a specific channel. Just like radio stations, these channels can experience congestion, leading to interference and slower speeds. The key is to identify and switch to a less congested channel. This simple adjustment can yield astonishing results.
Step-by-Step Guide: Finding the Optimal WiFi Channel for Peak Performance
Let's go through this process step by step, ensuring you get it right.
Accessing Your Router's Configuration: You'll need to access your router's settings to change the WiFi channel. This typically involves entering your router's IP address into your web browser. Finding your router’s IP address can be tricky. It commonly is something like 192.168.1.1 or 192.168.0.1. Check your router’s documentation or the manufacturer's website for the correct IP address. You will also need your router's username and password, which are usually listed on the router itself or in its documentation.
Identifying the WiFi Settings: Once logged in, look for a section labeled "Wireless," "WiFi," or something similar. Inside this section, you should find options related to your WiFi network's settings.
Discovering the Current Channel: Within the "Wireless" settings, you'll find an option for the "Channel." This is the channel your router is currently using. Usually, the default setting is "Auto," but this doesn’t always translate to optimal performance.
Analyzing the WiFi Environment: Before blindly switching channels, it's wise to analyze the WiFi landscape surrounding your home or office. This is where apps on your smartphone or laptop become invaluable. Download a WiFi analyzer app (Android: WiFi Analyzer by farproc; iOS: WiFi Scanner by IP Tools) to scan the surrounding WiFi networks. The app will show you the channels in use by other networks and how congested each channel is. The most congested channels are the ones you want to avoid.
Choosing the Best Channel: Based on the analysis, choose a channel that is the least congested. Channels 1, 6, and 11 are often recommended because they are spaced far enough apart to avoid overlapping, but using a WiFi analyzer is most important here. If you are on a 2.4GHz network, use channels 1, 6, and 11, but if you are on a 5GHz network, pick the available channel with the least amount of congestion.
Saving the Settings and Restarting: After selecting the new channel, save the changes in your router's settings. Your router may require a restart to apply the new settings. Allow a few minutes for your router to reboot and establish a new connection.
The Moment of Truth: Testing the Results: Once your router has restarted, reconnect your laptop to your WiFi network and run a speed test (like the one found at speedtest.net) to see the difference. You should notice a significant improvement in your WiFi speeds, including faster download and upload speeds. If you don’t notice improvements, try a different channel. This can take some trial and error, especially in highly populated areas.
Advanced Tips: Maximizing Your WiFi Speed and Reach
The channel selection is the primary trick, but here are a few other things to consider for optimal performance:
Router Placement is Key: Ensure your router is centrally located and free from obstructions. Elevate your router off the floor and away from walls and metal objects that can interfere with the signal.
Upgrade Your Router: Consider upgrading to the latest WiFi standard (like Wi-Fi 6 or Wi-Fi 6E) if your current router is outdated. This will increase speeds, improve range, and offer better performance in crowded environments.
Keep Your Router Updated: Always keep your router's firmware updated. Firmware updates often include performance improvements, bug fixes, and security patches. These updates can significantly improve your WiFi performance.
Prioritize Bandwidth with Quality of Service (QoS): Many routers offer QoS settings that allow you to prioritize certain devices or types of traffic. You can prioritize your laptop or activities like video streaming to ensure they receive more bandwidth.
Consider a WiFi Extender: If you have a large home or office and experience poor signal in certain areas, consider using a WiFi extender to boost your signal. Place the extender in a location where it can receive a good signal from your router and rebroadcast it to areas with weak coverage.
Troubleshooting Common WiFi Issues
Even with these tips, problems can arise, so let's cover a few troubleshooting steps:
Restart Everything: If your WiFi is not working, start by restarting your router and modem. This simple step often resolves temporary issues. Next, try restarting your laptop.
Check Your Network Drivers: Outdated or corrupted network drivers on your laptop can cause problems. Update your drivers through Windows Update or by downloading the latest drivers from your laptop manufacturer's website.
Contact Your Internet Service Provider (ISP): If you have persistent connectivity issues or consistently slow speeds, contact your ISP. They can check for issues with your internet connection and provide support.
The Bottom Line: Taking Control of Your WiFi Experience
Slow WiFi can be a significant source of frustration in today's digital world. Fortunately, boosting your laptop's WiFi speed doesn't have to be a complicated or expensive endeavor. By understanding the factors that affect your WiFi performance, employing the simple trick of channel optimization, and taking a few additional steps, you can significantly improve your online experience. From streaming your favorite shows to completing work projects, you'll find that a faster, more reliable connection makes all the difference. Start implementing these tips today and unlock the full potential of your laptop's WiFi!
