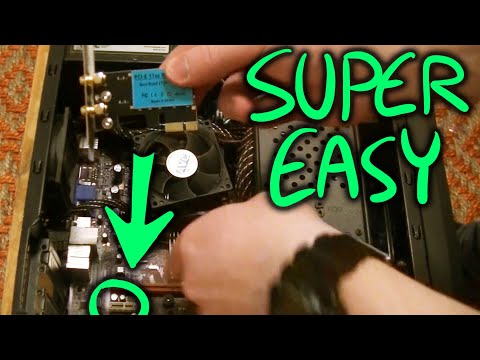
how to install a wifi card in a laptop

Title: Pasang WiFi di PC.
Channel: Rez Tech
Pasang WiFi di PC. by Rez Tech
how to install a wifi card in a laptop, how to install laptop wifi card in desktop, how to install new wifi card laptop, how to put laptop wifi card in desktop, how to install a wifi card on pc, can i use any wifi card in my laptop
WiFi Card Install SHOCK: Get Online NOW! (Easy Laptop Guide)
Blazing Fast WiFi: Conquer Your Laptop's Connection Chaos!
Ever felt the frustration of a sluggish internet connection? Perhaps your laptop’s WiFi is acting up, leaving you stranded. Don't despair! This guide will help you navigate the sometimes-daunting world of WiFi card installation. It will get you back online faster than you can say "streaming marathon." Let's dive in together.
The Initial Setup: Diagnosing the Digital Dilemma
Before we begin, a little detective work is necessary. First, consider this. Is your current WiFi connection consistently slow, or does it flicker in and out? Maybe other devices connect flawlessly, highlighting an isolated problem. Consequently, the issue is likely within your laptop. However, the problem could simply be a driver issue or a faulty card. Therefore, it is vital to assess the situation.
Tools of the Trade: Gathering Your Arsenal
You’ll need a few essential tools. These crucial items will ensure a smooth WiFi card installation. First, locate a Phillips head screwdriver. It needs to be the correct size. Next, have a small, non-magnetic container to store tiny screws. This prevents losing these vital components. Also, make sure you have an anti-static wrist strap. This protects sensitive electronics from electrostatic discharge. Finally, keep your laptop’s manual close by. It provides specific instructions for your model.
Power Down: Safety First
Before you even think about touching any internal components, the first step is crucial: unplug your laptop. Furthermore, remove the battery. Safety is paramount. You should always disconnect everything. This minimizes the risk of electrical shock.
Unveiling the Secrets: Locating the WiFi Card
Now for the exciting part! Refer to your laptop’s manual. It will show you precisely where the WiFi card resides. Often, it is tucked away beneath a small access panel on the laptop's underside. Alternatively, it might be accessible after removing the keyboard. Therefore, consult your manual for specifics. Once you locate the compartment, unscrew the access panel. Carefully set the screws aside in your non-magnetic container.
The Swap: Replacing the Old with the New
Gently touch a grounded metal object. This is to discharge any static electricity. Once you are grounded, you are ready. Remove the old WiFi card. Usually, small wires connect it to the laptop. These are antennae. Very carefully disconnect the wires. Now, remove the card itself. It might be secured by a small screw or clip. Next, take the new WiFi card and align it precisely. Secure it in place. Reconnect the antennae wires. Double-check everything to ensure everything is connected correctly.
Reassembly: Putting It All Back Together
Carefully replace the access panel. Secure it with the screws. Now, return the battery. Ensure it is properly seated. At this point, double-check that everything is in order.
The Moment of Truth: Powering Up and Connecting
Plug your laptop back in. Then, power it on. Your operating system should automatically detect the new WiFi card. Often, Windows will install the necessary drivers. However, you might need to install drivers from the manufacturer’s website. Thus, check your device manager. If everything goes smoothly, you should see your WiFi networks listed. Select your network. Enter your password. Then, connect!
Troubleshooting Tango: Dancing Through Potential Hiccups
What if things don't go quite as planned? Don't panic! Therefore, let’s troubleshoot. First, ensure the card is seated correctly. Next, double-check the antenna connections. Also, verify that the drivers are installed correctly. If you continue to experience problems, consult the manufacturer's website for support. Alternatively, try searching online for your particular laptop model.
Conclusion: Embracing the Wireless World
Congratulations! By following these steps, you’ve successfully installed a new WiFi card. Now, you can enjoy a faster and more reliable internet connection. So, go forth and conquer! Enjoy seamless browsing, streaming, and connecting. Your laptop is now ready to fully embrace the wireless world.
WiFi Nightmare: Why Your Laptop's Speed is CRASHING & How to FIX IT!WiFi Card Install SHOCK: Get Online NOW! (Easy Laptop Guide)
Alright, folks, let's be real. Getting your laptop connected to the internet is as essential as breathing these days. We rely on it for everything – work, entertainment, staying in touch with loved ones, the list goes on. But what happens when your trusty WiFi card decides to take a vacation, leaving you staring at a blank screen, feeling completely isolated? That, my friends, is a WiFi Card Install SHOCK! But don't panic! We're going to walk you through, step-by-step, how to get back online, fast. This isn't rocket science – it's more like baking a delicious cake; follow the recipe, and you'll be enjoying the sweet rewards in no time.
1. The Dreaded Diagnosis: Why Ain't My WiFi Working?
First things first: You need to figure out if the problem is indeed your WiFi card. It could be a simple software glitch. Think of it like a bad hair day for your laptop – easily fixable! Before diving into the install, let's rule out the obvious.
- Check the Basics: Is the WiFi switch on? (Yes, seriously! We've all done it.) Is your WiFi router broadcasting a signal? Are other devices connecting without a hitch?
- Software Shenanigans: Sometimes, a quick reboot of your laptop and router can work wonders. It's like hitting the "reset" button on your brain after a long day.
- Driver Drama: Outdated or corrupted drivers can be sneaky culprits. We'll touch on updating drivers later, but consider it a potential suspect in the WiFi-less mystery.
If you've tried these simple fixes, but your laptop is still stubbornly refusing to connect, then chances are, the WiFi card itself is the problem. Time to roll up our sleeves!
2. What Exactly is a WiFi Card, Anyway?
Imagine your laptop is a car, and your WiFi card is the radio. It receives signals (internet) and translates them into something you can understand (websites, emails, cat videos). It's a tiny but mighty piece of hardware, typically residing inside your laptop.
- Internal vs. External: Most laptops have an internal WiFi card. However, you can also use external WiFi adapters (USB dongles) – like an aftermarket radio for your car. We will focus on the internal card install process since they tend to be the more reliable and streamlined solution.
- The Importance: It's the gateway to the digital world. Without it, you're basically stranded in the middle of the digital desert.
3. Gearing Up for the Mission: What You'll Need
Before we even think about cracking open that laptop, let's gather our supplies. This is crucial. Imagine trying to fix a flat tire without a spare – frustrating, right?
- A New WiFi Card: Obvious, but essential! Make sure it's compatible with your laptop model. Check your laptop's manual, search online using your laptop's model name, or contact the manufacturer for the right fit.
- A Phillips Head Screwdriver (Small): Most laptop screws are tiny, so a precision screwdriver set is your best bet. Think of it as your surgeon's scalpel.
- A Static-Free Environment (Optional, But Recommended): Static electricity can fry sensitive electronics. A static wrist strap, or working on a non-carpeted surface, can help. It’s like protecting your precious cargo from a cosmic storm.
- Patience and a Steady Hand: This isn't a race! Take your time, and don't force anything. We're going for success, not speed.
- The Laptop's Manual: Always, always refer to your laptop's manual for specific instructions. It's like having a GPS guiding you through tricky terrain.
4. The Laptop Autopsy: Opening Up the Machine
Okay, this is where things get real! Don't be intimidated. With care and attention, opening your laptop is a manageable feat.
- Power Down and Unplug: The absolute first step. No power, no risk of shocks.
- Find the Access Panel: This is where the magic happens. Often located on the bottom of your laptop, usually indicated by a panel secured with a few screws. Refer to your manual here!
- Unscrew and Remove: Carefully unscrew the panel and gently set the screws aside in a safe place (a small dish or magnetic tray is ideal).
- Gently Pry: Use a plastic pry tool (if you have one) or your fingernails to carefully lift the panel. Avoid using metal tools that could potentially short-circuit internal components.
5. Locating the Culprit: Identifying the WiFi Card
Inside your laptop, you'll see a collection of components. Your WiFi card will typically be a small, rectangular circuit board.
- Look for Antennas: You'll see small wires (antennas) connected to the card. They're usually thin and come in black and white. Think of them as the card's ears, picking up the WiFi signal.
- The Connection: The card is usually held in place by one or two small screws and connected to a slot on the motherboard.
- Documentation is Key: Consult your manual or search online for your laptop's model to pinpoint the exact location.
6. Disconnecting the Old Card: Preparation for Removal
Before we take the old card out, be sure to gently disconnect the antenna wires.
- Gentle Tug: The antenna wires are usually clipped onto the card. Gently pull them straight up; avoiding excessive force is crucial.
- Unscrew the Card: Remove the screw(s) holding the WiFi card in place.
- Carefully Slide It Out: The card will likely slide out of its slot. Gently wiggle it if it's stubborn.
7. Installing the New Card: The Rebirth of WiFi
Now, the exciting part! Installing the new WiFi card.
- Align and Insert: Carefully align the new card with the slot on the motherboard.
- Gently Press Down: Press the card into the slot until it's firmly seated – like a key fitting perfectly into a lock.
- Secure the Card: Screw the card back in.
- Reconnect the Antennas: Reconnect the antenna wires ensuring they are in place.
8. Closing Up Shop: Putting Your Laptop Back Together
Now that the new card is in, it's time to put things back the way they were.
- Replace the Access Panel: Carefully align the panel and screw it back into place.
- Double-Check Screws: Ensure all screws are securely tightened, but don't overtighten – you don't want to strip the threads!
9. Software Setup: Bringing the Card to Life (Drivers)
The hardware is installed, but now your laptop needs instructions (drivers) to work properly.
- The Boot Up: Power on your laptop.
- Driver Magic: Your laptop might automatically detect the new card and install the drivers. If not, you'll need to install them manually.
- Manufacturer's Website: Go to the manufacturer's website (e.g., Intel, or find the brand of your WiFi card on the card itself), search for your specific laptop model or WiFi card model and download the latest driver. It's like giving your laptop its superpowers!
- Installation Instructions: Follow the on-screen instructions to install the driver. It's usually a straightforward process.
10. Connection Confirmed: Testing Your WiFi
Time to see if all your hard work paid off!
- Check Your WiFi Icon: Does the WiFi icon in your system tray (bottom right corner of your screen) show a connection?
- Connect to Your Network: Select your WiFi network and enter your password.
- Browse Away! Open a web browser and start surfing the web!
11. Troubleshooting Tips: When Things Don't Go Smoothly
Sometimes, things go wrong. Don't worry; it's normal! Here's what to do.
- No Connection: Double-check the antenna connections, and ensure you've installed the correct drivers.
- Slow Speeds: Consider your internet plan, router placement, and signal strength.
- Still Stuck: Contact the manufacturer's tech support or consult online forums for your specific laptop model.
12. Preventative Care: Keeping Your WiFi Card Happy
Once you get your WiFi back up and running, you need to take preventative measures.
- Software Updates: Regularly update your drivers and operating system to ensure optimal performance.
- Clean Regularly: Use compressed air to gently remove dust from the inside of your laptop.
- Avoid Extreme Temperatures: Keep your laptop away from extreme heat or cold.
13. WiFi Card Alternatives: Exploring Other Options
If you're hesitant about installing a new card, consider alternatives.
- USB WiFi Adapters: These are external devices that plug into a USB port. They're easy to install and don't require opening your laptop.
- Ethernet Cable: For a reliable
How to Install a Wi-Fi Card into a Desktop PC
By Torqcx How to Install a Wi-Fi Card into a Desktop PC by Torqcx
WiFI Card vs USB WiFi Adapter Check out this comparison

By ADVANTI WiFI Card vs USB WiFi Adapter Check out this comparison by ADVANTI
Wi-Fi & Bluetooth Card Installation in Mini PC High Speed Internet Install in Lenovo Mini PC

By Baba Tech Review Wi-Fi & Bluetooth Card Installation in Mini PC High Speed Internet Install in Lenovo Mini PC by Baba Tech Review

Title: How To Install M.2 E Key WiFi & Bluetooth Card In Desktop PC
Channel: Mike's unboxing, reviews and how to
How To Install M.2 E Key WiFi & Bluetooth Card In Desktop PC by Mike's unboxing, reviews and how to
Wifi On Laptop Phone
WiFi Card Install SHOCK: Get Online NOW! (Easy Laptop Guide)
The digital realm beckons, a symphony of instant communication, boundless knowledge, and captivating experiences. Yet, the gateway to this vibrant world hinges on a single, often overlooked component: your laptop's WiFi card. When this crucial piece of hardware malfunctions, the frustration is palpable, the connection to everything you need — from crucial work emails to streaming your favorite shows — vaporized. Fortunately, resurrecting your online presence doesn't require a degree in computer science. This guide is designed to take you step-by-step through the installation process, transforming a potential tech nightmare into a straightforward triumph. Let’s dive in and get you back online in record time.
Understanding Your Wireless Landscape: Identifying the Problem
Before embarking on any installation, a thorough assessment is paramount. The first step is to diagnose the root cause of your wireless connectivity issues. Is your laptop simply refusing to connect to any network, even those it has previously accessed? Or is it dropping connections intermittently, causing frustrating disruptions while you’re working or playing? Some symptoms point to a faulty WiFi card, like the complete absence of WiFi signals, the appearance of error messages related to network adapters, or a slow or unstable connection despite a strong signal from the router.
Checking Your Existing WiFi Card Status:
Begin by verifying the current state of your laptop’s WiFi card within your operating system.
- Windows: Press the Windows key and the "R" key simultaneously to open the "Run" dialog box. Type
devmgmt.mscand press Enter. This will open the Device Manager, where you can view all installed hardware. Expand the "Network adapters" section. If your WiFi card is listed with a yellow exclamation mark or a red "X" symbol, it indicates a problem. Right-clicking on the adapter will provide options to update the driver or troubleshoot the issue. - macOS: Click the Apple icon in the top-left corner of your screen, then select "About This Mac." Click "System Report…" In the sidebar, under "Hardware," select "Wi-Fi." Here you can see details about your WiFi card, including its status. Any errors will be apparent.
If the Device Manager or System Report indicates a malfunctioning or missing card, it's time to consider a replacement. If your existing card isn't recognized, examine the physical card inside your laptop. Sometimes, the card might have simply become dislodged.
Prepping for the Upgrade: Essential Tools and Parts
The good news is that upgrading your laptop’s WiFi card is a surprisingly accessible task, requiring only a handful of readily available tools and components. Having these items prepared beforehand ensures a smooth and efficient installation.
Gathering Your Supplies:
- A New WiFi Card: Selecting the correct WiFi card is crucial. Ensure that the new card you purchase is compatible with your laptop model. Check your laptop’s documentation or search online using your laptop’s model number to identify the compatible WiFi card types. Consider the latest Wi-Fi standards (802.11ax or Wi-Fi 6) for improved speed and reliability, and ensure that the form factor of the new card matches your laptop's slot (e.g., M.2 or Mini PCI-e).
- Small Phillips Head Screwdriver: This is the primary tool for opening your laptop and securing the WiFi card. Precise sizes vary; a set offering multiple sizes is ideal. A magnetic tip can prevent dropping small screws inside your laptop.
- Anti-Static Wrist Strap (Optional but Highly Recommended): Protects sensitive electronic components from static electricity, which can damage them.
- Plastic Pry Tools or Spudger (Optional but Helpful): For carefully opening the laptop's chassis without damaging it. Avoid using metal tools, which could short-circuit components.
- A Well-Lit, Clean Workspace: A clear and well-lit workspace is essential. Ensure sufficient room to lay out your laptop and all its components.
Laptop Disassembly: A Delicate Dance
This section is the most crucial part of the process. Take your time, work methodically, and treat your laptop with care.
- Power Down and Disconnect: Turn off your laptop completely and unplug the power adapter. Remove the battery as an extra precaution.
- Locate the Access Panel: Consult your laptop’s manual or search online for instructions specific to your model to identify the location of the access panel. This panel generally provides access to the hard drive, memory, and WiFi card.
- Remove the Panel: Carefully remove the screws securing the access panel. Some panels are secured with clips; use your plastic pry tool or spudger to gently release them. Keep the screws organized in a safe location, perhaps on a magnetic tray or in a small container.
- Ground Yourself (Recommended): Before handling any internal components, attach your anti-static wrist strap to your wrist and connect the other end to a metal part of your laptop's chassis to discharge any static electricity.
- Locate the WiFi Card: Once the access panel is open, identify the WiFi card. It is typically a small rectangular card, usually near the edge of the laptop. It will have two or three antenna wires connected to it.
- Disconnect the Antenna Wires: The WiFi card will have two or three small antenna wires connected to it. These are delicate and snap on. Gently detach these wires by carefully pulling them straight up and off of the card. Note their positions to make re-attachment easier.
- Remove the Securing Screw: The WiFi card is usually secured with a single screw. Unscrew this screw. It is often captive, meaning it won't fully detach from the laptop.
Installing the New WiFi Card: A Precise Replacement
Now it’s time to install the new WiFi card, a step-by-step process of careful replacement.
- Remove the Old WiFi Card: Carefully remove the old WiFi card from its slot. It may be held in place by a small bracket. Once the screw is removed, the card should lift slightly. Then, gently slide it out.
- Prepare the New Card: Before inserting the new card, ensure it’s the correct model and orientation.
- Insert the New Card: Carefully align the new WiFi card with the slot and gently slide it in. Press it down until it’s securely seated.
- Secure the Card: Replace the securing screw to hold the new card in place. Ensure the card sits firmly within the slot.
- Reattach the Antenna Wires: This part requires careful attention. Reconnect the antenna wires to the new WiFi card. Ensure that the wires are connected to their original positions. The connections are usually color-coded. Press the connectors firmly onto the card until they snap securely into place.
Reassembly, Testing, and Troubleshooting
With the new WiFi card installed, now is the time to return your laptop to its original state.
- Replace the Access Panel: Carefully align the access panel and secure it with its screws.
- Reinsert the Battery (If Removed): Reinsert the laptop battery.
- Power Up and Test: Plug in the power adapter and turn your laptop on. Allow the operating system to boot.
- Check for WiFi: Once the operating system has fully loaded, check for WiFi connections. An icon in your system tray will likely indicate connectivity status. Click on the WiFi icon and select your desired network. Enter the password if required.
- Test the Connection: Verify your connection by browsing the internet or opening your email. Confirm that you can access websites and send and receive emails.
- Driver Installation (If Necessary): Some operating systems will automatically install drivers for the new WiFi card. If not, you may need to install them from a provided CD/DVD or download them from the manufacturer’s website.
- Troubleshooting Guide: If you are running into issues, double-check all connections. Ensure that your WiFi card drivers are up-to-date.
Troubleshooting Tips:
- No WiFi Signals: Double-check the antenna wire connections and ensure the card is seated properly.
- Slow or Unstable Connection: Try restarting your router and laptop. Move closer to your router to check signal strength.
- Driver Issues: Reinstall the drivers for your WiFi card. Download the latest drivers from the manufacturer's website.
- Card Not Recognized: Check your laptop's BIOS settings to ensure the WiFi card is enabled.
- Antenna Connection: Remember the placements of your antenna wires.
This guide provides a comprehensive, step-by-step method to installing a new WiFi card. While the process may appear daunting at first, the rewards of a stable and reliable online connection are well worth the effort. With patience, care, and adherence to the procedures, you can restore your online connectivity, unlocking all the digital world offers.
