gopro 4 session wifi to laptop
Title: How to connect GoPro Hero Session 4 cameras over WiFi
Channel: MobileCameraApps
How to connect GoPro Hero Session 4 cameras over WiFi by MobileCameraApps
GoPro 4 Session to Laptop: Wireless Transfer HACK You NEED!
Unleash Your GoPro 4 Session: The Wireless Transfer Secret You Crave!
Ever wrestled with transferring those epic GoPro 4 Session videos to your laptop? You are not alone. We all know the frustration. The cable wrangling, the waiting… it’s a pain. But what if I told you there's a simpler way? A wireless transfer hack that'll change everything? You're probably thinking, "Show me the magic!" Well, prepare to be amazed.
Ditch the Wires: Your GoPro's Wireless Liberation
Let's face it, wires are so last decade. Therefore, we are going to banish them. Instead of fumbling with cables, imagine seamlessly transferring your adventures. Think about it, a swift, effortless process. Before we dive in, let's set the scene. You're back from a surf trip. You have hours of footage. The sun is setting. You’re craving a quick view. Now, with this technique, you can have it. Quickly share your epic ride!
Step 1: Connecting Your GoPro to the Wi-Fi Universe
First things first, your GoPro 4 Session needs to chat with your laptop. Consequently, you will embrace Wi-Fi. Your GoPro has a Wi-Fi function. Access the GoPro’s settings menu. Navigate to the Wi-Fi options. Choose your home network. Enter your password. Secure your connection. Voila! Your GoPro now speaks the same language as your laptop.
Step 2: Introducing the GoPro App: Your Remote Control
Next, we need a bridge. This is where the GoPro app steps in. You can get it for free. Download the GoPro app on your phone or tablet. However, some prefer the desktop version. Choose the version that fits you. Make sure your device and GoPro are on the same Wi-Fi network. Afterwards, the app should recognize your camera. If not, ensure Wi-Fi is enabled on both devices. Then, connect!
Step 3: The Magical Transfer: Unleashing Your Footage
Here comes the good part. Once connected, the app gives you access. You can view your files. You can manage your content. Select the videos you want on your laptop. Initiate the transfer process. The app works its magic. The transfer begins. Now, be patient. The speed depends on your Wi-Fi. So, find a fast connection. Because faster is better!
Step 4: Laptop Liberation: Accessing Your Transferred Treasures
Where do your videos go? Find the videos in the GoPro app's downloads folder. However, you can also choose the file destination. Select your preferred storage location. Thus, you determine where the videos land on your laptop. Finally, you have your prized videos! View, edit, share, and relive the memories.
Beyond the Basics: Mastering the Wireless Workflow
This is just the beginning. Experiment with different transfer destinations. Consider organizing your files for effortless access. Explore the app's capabilities. Utilize the sharing features. Share those epic moments with the world. Furthermore, remember that the GoPro app offers editing tools. These tools allow you to edit on the go. Make video editing simple.
Troubleshooting Tips: Bumps in the Wireless Road
Occasionally, issues arise. If you face Wi-Fi connection problems, revisit the steps. Consequently, make sure both devices are correctly connected. Check your Wi-Fi signal strength. Sometimes, a weak signal leads to interrupted transfers. Close other apps that might be using Wi-Fi bandwidth. Furthermore, restart your devices if needed. This will often clear small glitches. Lastly, ensure your GoPro's firmware is up to date.
Elevate Your Content: From Session to Stardom
Now you have successfully transferred your videos. But what next? Use this content to create something special. Edit your footage with stunning software. Add music, effects, and titles to your footage. Furthermore, consider sharing your work on social media platforms. Engage with your audience. Let them experience your adventures.
The Verdict: Wireless Freedom Awaits!
Wireless GoPro 4 Session transfers are simple and effective. It frees you from cable constraints. It streamlines your workflow. Embrace the convenience, the speed, and the ease. You will never go back! So cast off those wires and start enjoying your content. Capture, transfer, and share your awesome stories.
Acer Laptop WiFi Nightmare? Solved in 60 Seconds!GoPro 4 Session to Laptop: Wireless Transfer HACK You NEED!
Hey action cam enthusiasts! Remember the days when transferring footage from your GoPro HERO4 Session felt like, well, wrestling a digital kraken? The SD card shuffle, the cable clutter, the sheer waiting? We’ve all been there. But guess what? We’re saying “sayonara” to that hassle! We're diving headfirst into a super handy, super simple wireless transfer hack that'll have your GoPro 4 Session footage on your laptop faster than you can yell "Action!" This isn't just about copying files; it's about reclaiming our time and unleashing our inner content creators with minimal friction. Let's get started!
1. The Frustration: Remembering the Old Ways
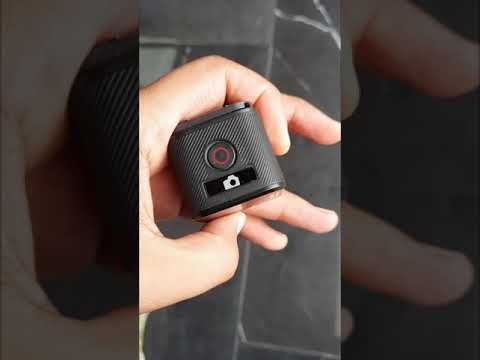
Let's face it, the GoPro HERO4 Session was a game-changer. Small, square, and ready for anything. I remember taking it biking through the mountains, diving under waterfalls, and capturing epic moments. But the transfer process? Not so epic. The SD card always felt like a tiny island I had to rescue from the vast ocean of my laptop’s file system. And let's be honest, who actually enjoys fiddling with those tiny SD card adapters? It's like trying to thread a needle blindfolded while your cat is attacking your feet! We needed a better way.
2. Why Wireless Transfer Is a GAME CHANGER
Think about it: no more fumbling with cables, no more worrying about corrupt cards, and no more wasted time! Wireless transfer offers a level of convenience that's truly transformative. It frees us up to focus on the real fun: editing, sharing, and reliving those amazing adventures. It's like upgrading from a horse-drawn carriage to a spaceship – you’re covering the same terrain, but with so much more speed and style!
3. Understanding the HERO4 Session's Wi-Fi Capabilities
The HERO4 Session, despite its small size, possessed a Wi-Fi system. This little nugget of technology is our secret weapon. It allows the camera to connect to your laptop wirelessly, making the transfer process a breeze. The key lies in understanding how to activate and utilize it effectively. It's the key to our wireless treasure chest!
4. The Hidden Treasure: Setting Up Your GoPro 4 Session’s Wi-Fi
Okay, here’s where the real magic happens. The first step involves setting up your GoPro's Wi-Fi. This is simpler than you think.
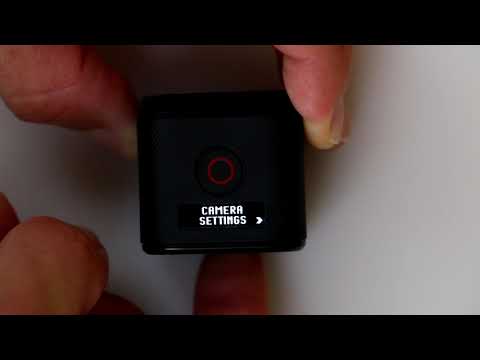
- Step 1: Access the GoPro Settings: Power on your HERO4 Session and access the settings menu. This usually involves a combination of button presses. Refer to your GoPro’s manual for the exact steps (or a quick Google search will do the trick!).
- Step 2: Enable Wi-Fi: Find the Wi-Fi option within the settings menu and enable it. You’ll likely be prompted to create a Wi-Fi network name and password. Choose something memorable!
- Step 3: Note the Credentials: Write down the Wi-Fi network name and password (you'll need it later!). Treat them like the secret code to unlock your content.
Alright, that's the initial setup. Now we'll be ready to get to the laptop.
5. Connecting Your Laptop to the GoPro's Wi-Fi Network
Alright, your GoPro is broadcasting its sweet, sweet Wi-Fi signal. Now, let's connect your laptop.
- Step 1: Find the Wi-Fi Icon: On your laptop, click the Wi-Fi icon, usually found in your system tray (bottom right corner on Windows, top right on macOS).
- Step 2: Select Your GoPro's Network: Locate the Wi-Fi network you created for your GoPro in the list of available networks. It will likely be named something you chose.
- Step 3: Enter the Password: Enter the password you created during the GoPro setup.
- Step 4: Confirmation: Once connected, your laptop is now part of the same Wi-Fi "family" as your GoPro.
See? Simple as that! Now the next step brings the treasure closer to you.
6. The Chosen App: Exploring Transfer Options
Now, the HERO4 Session isn't exactly designed to be a file server itself. This means we need a vehicle to drive the content to your laptop. There are two main ways you can accomplish this, one way is the GoPro app and the other is to use the file browser on your computer.
- Option 1: The GoPro App: The official GoPro app, while often used for control/setup of your GoPro, also enables simple transfer. It's available for both macOS and Windows. It establishes a direct connection to your GoPro, making the transfer quick and easy. This is usually the easiest way.
- Option 2: File Browsing (Less Common): Some laptops can access the HERO4 session directly as a media storage device. You may be able to view the SD card’s contents through your laptop's file browser (e.g., Windows Explorer, macOS Finder) once the Wi-Fi connection is established. I’ve found reliability of this to be spotty, and often suggests using the GoPro app instead.
Choose the option that best fits your needs and the type of content you're dealing with.
7. Using the GoPro App (The Preferred Method)
If you've decided to use the GoPro App (and I strongly recommend it!), here's the breakdown.
- Step 1: Download and Install: Download the GoPro App from your computer's app store (or the GoPro website depending on your computer type) and install it.
- Step 2: Launch the App: Open the GoPro App on your laptop.
- Step 3: Connect to Your GoPro: The app should automatically detect your HERO4 Session, assuming it's powered on and connected to the same Wi-Fi network. Follow any on-screen prompts to connect.
- Step 4: Browse and Select: The app will display the content on your SD card. Browse through your videos and photos and select the items you want to transfer. You can usually select individual files or download entire batches.
- Step 5: Initiate Transfer: Click the "Download" or "Transfer" button. The app will begin copying the selected files to your laptop.
- Step 6: Find Your Files: The downloaded files are typically stored in a designated folder (you can usually choose the folder during the download process).
It's seriously easy! Now let's move on to some common issues.
8. Troubleshooting Common Transfer Issues
Not everything is buttercups and sunshine, sometimes you might run into issues. Here's a quick guide to troubleshooting the most common problems.
- Connection Issues: Double-check that both your GoPro and your laptop are connected to the same Wi-Fi network. Make sure your GoPro's Wi-Fi is enabled. Try restarting both devices.
- Slow Transfer Speeds: Wi-Fi speeds can fluctuate. Move everyone in your household off the router, and try again to avoid any slow-downs.
- App Errors: If the app crashes or freezes, try restarting the app and your computer.
- Firmware Updates: Ensure your GoPro has the latest firmware installed. Outdated firmware can sometimes cause compatibility issues.
These are pretty common issues. If you are still having issues a quick search online will probably solve the problem!
9. The Power of Cloud Storage (Optional, But Awesome!)
Once your videos are on your laptop, consider backing them up to the cloud. Services like Google Drive, Dropbox, or Amazon Photos offer convenient storage solutions, protecting your precious memories from accidental deletion or hard drive failures. It's like having an insurance policy for your adventures! Plus, cloud storage makes it super easy to share your videos with friends and family.
10. Optimizing Your Workflow
Now that you've mastered the wireless transfer, let's optimize your workflow.
- Organize Your Files: Create a clear folder structure on your laptop (e.g., "GoPro Footage/2024/Trip Name").
- Name Your Files: Give your files descriptive names (e.g., "WaterfallDiveSunrise.MP4") to make them easier to find later.
- Back Up Regularly: Don't wait until it's too late! Back up your footage regularly to the cloud or an external hard drive.
- Edit and Share: Once your footage is on your laptop, unleash your inner editor! Use software like Adobe Premiere Pro, Final Cut Pro, or even free options like DaVinci Resolve or OpenShot to create your masterpieces. Share your adventures with the world!
Organizing your content is critical to a seamless video editing experience.
11. Mastering the Basics of Video Editing
So, the footage is transferred, and you're staring at a blank timeline. Where do you start? Don't worry – it's easier than you think.
- Choose Your Software: Select a video editing program that suits your skill level and budget.
- Import Your Footage: Import the videos and photos you want to use into your editing software.
- Cut and Arrange: Trim your clips, arrange them in the desired order, and build your visual story.
- Add Transitions: Use transitions (e.g., fades, dissolves)
Reset And Connect GoPro Hero Session Camera How To Reset And Connect Gopro Camera

By Tech Master Reset And Connect GoPro Hero Session Camera How To Reset And Connect Gopro Camera by Tech Master
GoPro Session conection problem
By Facebook EGM GoPro Session conection problem by Facebook EGM
Hero4 Session - How To Use Buttons Wi-Fi Power Record - GoPro Tip 491 MicBergsma
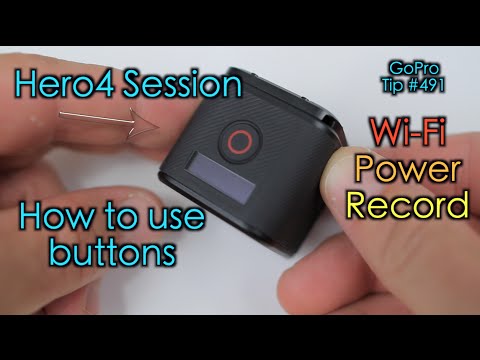
By MicBergsma Hero4 Session - How To Use Buttons Wi-Fi Power Record - GoPro Tip 491 MicBergsma by MicBergsma

Title: How to reset GoPro Hero 4 Session WiFi Password
Channel: MobileCameraApps
How to reset GoPro Hero 4 Session WiFi Password by MobileCameraApps
Change Wifi Settings
GoPro 4 Session to Laptop: Wireless Transfer HACK You NEED!
The allure of the GoPro 4 Session remains undiminished even years after its release. Its compact form factor, coupled with its surprisingly potent capabilities, continues to make it a favorite among adventurers, vloggers, and anyone seeking to capture life's moments in stunning detail. But the charm of this little cube hinges on one crucial aspect: the seamless transfer of its captured footage to your laptop. This is where we introduce a game-changing hack – a method to make the wireless transfer of your GoPro 4 Session video files as effortless as breathing. Forget tangled cables and the frustration of lengthy download times. Prepare to unlock a workflow that's as swift and intuitive as your adventurous spirit.
Understanding the GoPro 4 Session's Wireless Capabilities
While the GoPro 4 Session boasts robust wireless connectivity, understanding its full potential is key to maximizing its efficiency. The camera primarily utilizes Wi-Fi to connect to devices, including your laptop, facilitating both control via the GoPro app and wireless file transfer. This built-in feature significantly simplifies the process of offloading your captured footage, freeing you from the constraints of physical connections. However, the default transfer methods, while functional, often leave much to be desired in terms of speed and user-friendliness. We aim to refine and optimize this inherent capability.
Setting Up Your GoPro 4 Session for Wireless Triumph
The foundation of a successful wireless transfer lies in proper setup. Begin by ensuring your GoPro 4 Session is fully charged. This initial step prevents interruptions and ensures a smooth transfer process. We recommend having the latest firmware installed as well. Head to the GoPro website and check for any recent updates for your Session model. This often includes performance improvements and bug fixes that directly influence wireless capabilities.
Next, power on your GoPro 4 Session and navigate to the settings menu using the camera's small but efficient controls. Locate the "Wireless" or "Connectivity" settings. Here, you will find options to enable Wi-Fi and pair the camera with your laptop. Take note of the Wi-Fi network name (SSID) and password that your camera generates. You'll need these credentials to connect your laptop.
Now, on your laptop, locate your Wi-Fi settings. Search for and connect to the Wi-Fi network broadcast by your GoPro 4 Session. Enter the password provided by your camera. Your laptop is now wirelessly connected to your GoPro.
The Secret Weapon: The GoPro App and Your Laptop
The GoPro app, available for both iOS and Android devices, is a potent tool, and it's the key to a faster, more streamlined wireless transfer workflow. While many users focus on its phone-based capabilities, the app also works in tandem with your laptop – even without a direct USB connection.
Here's the core sequence:
- Install the GoPro App: Download and install the GoPro app on your smartphone or tablet (or even using an Android emulator on your laptop if you desire). The app connects to your GoPro through the same wireless network you've established.
- Connect to Your GoPro: Open the GoPro app and select "Connect your camera." The app should automatically detect your GoPro 4 Session. If not, manually select your camera model from the list.
- Browse and Select: Once connected, browse the media library on your GoPro 4 Session using the app. Select the videos and photos you want to transfer.
- Initiate the Transfer: Tap the download or transfer icon within the app. The selected files will begin transferring wirelessly to the device running the GoPro app (your tablet or phone, or, ideally, the emulator running on your laptop).
Transferring Files to your Laptop:
Once the files are on your companion device, (phone, tablet, or emulator), the files can then be transferred onto your Laptop seamlessly.
- Use Cloud storage: Upload the files to a cloud storage solution like Google Drive or Dropbox directly from your phone, tablet, emulator or from the GoPro app.
- Login and Download: On your laptop, visit google drive or dropbox and then download the files.
This method bypasses the direct transfer bottleneck, resulting in significantly faster transfer times compared to the built-in camera transfer protocol.
Optimizing Wi-Fi Performance for Peak GoPro 4 Session Transfers
The speed of your wireless transfer hinges on the strength and stability of the Wi-Fi connection. Here are several tips to maximize performance:
- Proximity: Position your GoPro 4 Session and your laptop in close proximity during the transfer process. Obstacles, such as walls and furniture, can impede the Wi-Fi signal.
- Interference reduction: Minimize interference from other electronic devices, like microwaves and Bluetooth devices. These can operate on the same frequencies as Wi-Fi, causing signal degradation.
- Channel Selection: If possible, manually select a less congested Wi-Fi channel on your router to minimize interference from neighboring networks. Consult your router's documentation for instructions.
- Router Quality: A high-quality Wi-Fi router can make a significant difference in transfer speeds. Consider upgrading your router if you consistently experience slow transfer times.
- Background Processes: Shut down any bandwidth-intensive applications running on your laptop during the transfer. This includes streaming services, large downloads, and cloud backups.
Troubleshooting Common Wireless Transfer Issues
Even with these optimized settings, occasional hiccups might arise. Here's how to address the most common transfer problems:
- Connection Failure: If your laptop fails to connect to the GoPro 4 Session's Wi-Fi network, double-check the network name and password. Ensure that airplane mode is not enabled on your laptop.
- Slow Transfer Speeds: If transfers are slow, revisit the optimization tips above, paying particular attention to proximity, interference, and router performance.
- Interrupted Transfers: If the transfer abruptly stops, ensure that both the GoPro 4 Session and your laptop have sufficient battery power. Also, check for any dropped Wi-Fi coverage.
- App Malfunctions: In the rare event of an app fault, try restarting the GoPro app, your laptop, and your GoPro 4 Session. Reinstalling the app can also resolve persistent issues. Make sure your device is compatible with the latest version of the GoPro app.
Alternative Transfer Options and When to Use Them
While the wireless transfer method described is often ideal, certain situations may call for alternative approaches:
- USB Connection: If wireless transfer speeds are consistently poor or if you require a faster transfer for large video files, a direct USB connection is the fastest. Connect your GoPro 4 Session directly to your laptop using a USB cable. Your laptop should treat the camera as a removable storage device, allowing drag-and-drop file transfers. Using a USB 3.0 port on your laptop and a compatible USB cable can significantly improve transfer speeds.
- SD Card Adapter: For maximum speed, consider removing the microSD card from your GoPro 4 Session and inserting it into an SD card adapter connected to your laptop. This method bypasses any camera-side bottlenecks. Ensure you have a fast, high-capacity microSD card for your GoPro 4 Session to maximize read and write speeds.
Maximizing Your Workflow: Beyond the Transfer
Once your video files are safely on your laptop, consider these tips to optimize your post-transfer workflow:
- File Organization: Create a logical file structure on your laptop to organize your GoPro footage. Name your files and folders consistently for easier retrieval.
- Video Editing Software: Familiarize yourself with video editing software like Adobe Premiere Pro, Final Cut Pro, or DaVinci Resolve. Mastering these tools allows you to transform your raw footage into polished masterpieces.
- Backup Strategy: Implement a comprehensive backup strategy to protect your precious video files. Consider cloud storage, external hard drives, and multiple backup locations.
Conclusion: Unlocking the Full Potential of Your GoPro 4 Session
The GoPro 4 Session remains a powerful tool for capturing stunning video and photos. The wireless transfer hack described in this guide empowers you to streamline your workflow, saving precious time and eliminating the frustration of slow transfers. By mastering these techniques and optimizing your wireless setup, you'll be well-equipped to focus on what matters most: capturing your adventures and sharing your unique perspective with the world. Embrace the freedom and speed of wireless transfer, and unlock the true potential of your GoPro 4 Session.
