can i set my mac laptop as a wifi hotspot

Title: Enable WiFi Hotspot on Mac Share Internet Connection from Mac
Channel: Techy Druid
Enable WiFi Hotspot on Mac Share Internet Connection from Mac by Techy Druid
Mac WiFi Hotspot: The Ultimate Guide (Secret Trick Inside!)
Unlocking Your Mac's Hidden WiFi Powerhouse: The Ultimate Guide (Plus a Sweet Secret!)
Ever wished you could share your Mac's internet connection with your other devices? Are you tired of juggling multiple Wi-Fi networks? Well, fret no more! You've stumbled upon the ultimate guide. We’re about to unlock your Mac's built-in capabilities and transform it into a robust Wi-Fi hotspot.
Why Your Mac is a WiFi Wizard (and You Didn't Know It!)
Your Mac is much more than just a beautiful computer. In fact, it houses a powerful feature. This hidden superpower lets you create your own personal Wi-Fi network. It’s like having a portable router in your bag. This functionality allows other devices, like your phone or tablet, to connect. Therefore, you're always connected, virtually anywhere. This is incredibly useful, especially when traveling or in areas with spotty Wi-Fi.
Setting Up Your Mac as a WiFi Hotspot: The Basics
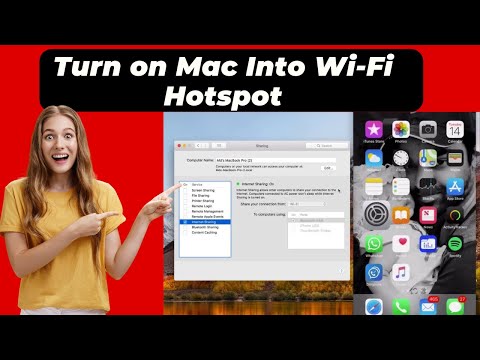
Creating a Wi-Fi hotspot is easy. It's surprisingly intuitive. First, make sure your Mac is connected to the internet. This connection could be through Ethernet, Wi-Fi, or even tethering via your phone. Then, navigate to System Preferences. Alternatively, you can find it in your Mac's Dock or the Apple menu. Now, locate the "Sharing" preference pane. Click on it. A new window with various sharing options will open. You'll notice a sidebar on the left; click on "Internet Sharing."
Configuring Internet Sharing: Making it Your Own
Once you’re in the Internet Sharing panel, you’ll see several key settings. Check the box next to "Internet Sharing" to enable the feature. Next, choose the connection you want to share. It is typically the internet source. In other words, the connection your Mac uses to get online. Then, the "Share your connection from" dropdown menu should already display your active internet connection.
Select the "Using" option. This is where you choose how to share your internet. Consequently, select "Wi-Fi." Click the "Wi-Fi Options…" button. This opens a window allowing you to customize your hotspot. Here, you’ll define your network’s name (SSID). Choose a strong password to protect your connection. Finally, select your desired security method. WPA2 Personal is generally the most secure and recommended option. Once you’ve configured your Wi-Fi options, click "OK." Now, click "Start" to begin sharing your internet connection. You are essentially creating your own wireless network.
Connecting Your Devices: A Seamless Experience
With your hotspot running, connecting other devices is a breeze. On your phone, tablet, or other computer, open the Wi-Fi settings. Scan for available Wi-Fi networks. You should see the network name (SSID) you created. Select your network and enter the password. Consequently, your device will connect to your Mac's internet connection.
Troubleshooting Common Hotspot Issues
Occasionally, you might encounter a few hiccups. Don’t worry; it’s usually an easy fix.
- No Internet Connection: Double-check that your Mac has a working internet connection. Also, confirm that the "Share your connection from" option is set correctly.
- Devices Can't Connect: Ensure the password is correct. Restart your Mac and the device. Try turning Wi-Fi off and on.
- Slow Speeds: Remember, your Mac is sharing its existing connection. The speed will depend on the original internet connection. Too many connected devices can also slow things down.
The Secret Trick: Extending Your Range
Here's the secret trick! You can improve your Wi-Fi hotspot's range. However, this depends on your environment and setup. Consider using a Wi-Fi range extender. Place it strategically to broaden your network's reach. Therefore, you’ll get a stronger signal for all your devices. Another option is to optimize your Mac's placement. Position it in an open, central location. This can help maximize signal coverage.
Beyond the Basics: Advanced Tips for Power Users
For the more adventurous, there are advanced features. Explore these options.
- Monitoring Connected Devices: The Sharing pane shows connected devices. You can monitor who is using your hotspot.
- Firewall Considerations: Your Mac's firewall might interfere with some devices. Adjust it as necessary.
- Battery Life Awareness: Running a hotspot drains your battery faster. Keep your Mac plugged in.
Final Thoughts: Embrace Your Portable WiFi Powerhouse
Your Mac is a versatile tool. It also has great abilities. Now, you can harness its hidden potential. We’ve walked through the setup and usage. Also, we've touched on troubleshooting and advanced techniques. This is all about using your Mac as a Wi-Fi hotspot. This easy-to-use function will revolutionize how you stay connected. Instead of struggling with unreliable Wi-Fi, you can always have your own personal network. Start creating your hotspot today. Enjoy seamless connectivity wherever you are!
Windows 8.1 Wi-Fi Nightmare? Solved! (Secret Trick Inside!)Mac WiFi Hotspot: The Ultimate Guide (Secret Trick Inside!)
Hey there, fellow digital nomads and Wi-Fi wanderers! Ever found yourself in a pickle, stranded without internet access but with a Mac brimming with connectivity potential? We’ve all been there, staring longingly at our shiny Apple laptops, wishing we could share that precious internet connection with our other devices. Well, guess what? You absolutely can! And setting up a Mac WiFi hotspot is easier than baking a virtual pie (which, let's be honest, is almost as satisfying). Today, we're diving deep into everything you need to know about turning your Mac into a personal Wi-Fi haven, and we’ll even share a secret trick that’ll make your hotspot experience smoother than a freshly oiled keyboard. Ready to unlock your Mac's hidden Wi-Fi superpower? Let’s get started!
1. Why Bother with a Mac WiFi Hotspot? The Perks!
Think of your Mac as a versatile Swiss Army knife in the tech world. Its ability to create a Wi-Fi hotspot is just one of its many incredible functionalities. But why would you even want to do this? Let's break down the undeniable perks:
- Emergency Internet Savior: Imagine this: you're on a train, and your phone’s data is depleted. Or, you're at a friend's place, and their Wi-Fi is playing hide-and-seek. Your Mac, connected to a wired Ethernet connection or using its own cellular data (if you have the right setup), can become your lifeline.
- Sharing is Caring (Especially Wi-Fi): Got a tablet, a gaming console, or another device that needs internet access? Your Mac hotspot is like a digital bridge, connecting all your devices to the online world.
- Cost-Effective Connectivity: Sometimes, tethering your phone to your Mac is cheaper and more practical than paying for extra Wi-Fi access. It's like getting an all-access pass without breaking the bank!
- Enhanced Privacy: When using a Mac hotspot, you have a degree of control over the connected devices. You choose who gets access, offering a layer of security that's not always available with public Wi-Fi.
2. The Prerequisites: What You’ll Need Before You Begin
Before we dive into the nitty-gritty, let's ensure you're prepared for the adventure. You'll need a few key ingredients:
- A Mac: Obviously! Any MacBook, iMac, Mac Mini, or Mac Pro running a recent version of macOS will do the trick.
- An Internet Connection: This is the source of your hotspot’s power. This could be a wired Ethernet connection, another Wi-Fi network your Mac is already connected to, or even your iPhone’s personal hotspot (tethering).
- Sufficient Battery Life (Or a Power Source): Creating a Wi-Fi hotspot can drain your battery. Unless you're plugged in, monitor your battery level to avoid any unexpected shutdowns. Think of it like this: you wouldn't run a marathon on an empty stomach, right? Same principle applies!
3. The Straightforward Setup: Creating Your Mac WiFi Hotspot (The Classic Method)
This is the basic, tried-and-true method. Here’s how you can get your Mac’s Wi-Fi hotspot up and running in a matter of minutes:
- Open System Preferences: Click the Apple icon in the top-left corner of your screen and select "System Preferences" (or "System Settings" on newer macOS versions).
- Navigate to Sharing: Click on the "Sharing" icon.
- Select "Internet Sharing": In the sidebar, you'll find a service called "Internet Sharing." Click on it.
- Choose Your "Share your connection from" Source: This is where you select where your internet access is coming from. If you're using Ethernet, choose "Ethernet." If you're tethering to your iPhone, select it from the dropdown menu.
- Select "Using Wi-Fi": Under "To computers using," check the box next to "Wi-Fi."
- Click "Wi-Fi Options": A window will pop up, allowing you to configure your hotspot's name (Network Name) and password. (Think of this as your password-protected door to the internet.) Choose a strong, unique password to safeguard your connection.
- Start Sharing: Click the checkbox next to "Internet Sharing" to activate the hotspot. You should see a green dot indicating that the sharing is on.
And voila! Your Mac is now broadcasting its own Wi-Fi network. Grab your other devices, search for the network you named your hotspot, enter the password, and connect. You're ready to browse, stream, and share!
4. Testing Your Hotspot: Ensuring Everything Works Smoothly
Once you've set up your hotspot, it's time to put it to the test. Grab your phone or tablet and connect to the network you just created. Then, head over to a website or two. Is everything loading properly? Are you getting the speeds you expect? If so, congratulations! You've successfully created a functional Mac WiFi hotspot. If not, don’t fret! We'll troubleshoot any common problems shortly.
5. The Secret Trick: Boosting Your Hotspot's Performance
Alright, now for the good stuff: the secret trick! This one can significantly improve your hotspot's performance and stability. The trick is to choose a less congested Wi-Fi channel.
Here’s how to perform it:
- Go Back to Wi-Fi Options: In the "Sharing" settings, click the "Wi-Fi Options" button.
- Locate the "Channel" Option: You might not see it directly. Modern Macs often try to manage this in the background. Sometimes it can be found through some third-party applications that provides more intricate controls over your network's channel. If your macOS allows you to change the channel, try selecting a channel that is less utilized.
- Apply Adjustments: After making your changes, click "OK" in the Wi-Fi Options window, and then "Start" or “Enable” on your new hotspot.
Why does this work? Wi-Fi channels are like lanes on a highway. If too many networks are using the same lane (channel), you'll experience traffic jams (slower speeds). By switching to a less congested channel, you're essentially giving your devices a clearer path to the internet.
6. Troubleshooting Common Hotspot Headaches
Sometimes, things don't go as planned. Here are some common problems and their quick fixes:
- "No Internet Connection": Double-check your Mac's internet source (Ethernet cable, tethered connection). Ensure it's actually connected and online. Also, confirm that the Wi-Fi sharing is enabled.
- Slow Speeds: Experiment with a different Wi-Fi channel (as we discussed in the secret trick). Also, remember that the hotspot's speed will be limited by the speed of your internet source.
- Devices Can't Connect: Make sure you’re entering the correct password. Also, check your Mac's firewall settings, as they might be blocking connections.
- "Sharing Not Available": Ensure your Mac is connected to an internet source and the "Internet Sharing" service is enabled in System Preferences. Sometimes, a simple restart of both your Mac and the device trying to connect can do wonders.
7. Advanced Customization: Taking Your Hotspot to the Next Level
Want to fine-tune your hotspot? Here are some advanced options:
- Firewall Settings: You can use your Mac's built-in firewall (in System Preferences -> Security & Privacy) to control the incoming and outgoing traffic. This can help enhance the security of your hotspot.
- Monitoring Connected Devices: Utilize Activity Monitor (found in /Applications/Utilities/) to view the network activity of connected devices. This can help you identify bandwidth hogs.
- Automated Activation: Some third-party applications can automate the process of turning on your hotspot when you connect to a specific network or plug in an Ethernet cable.
8. Security First: Protecting Your Mac and Devices
Security is paramount! Always use a strong, unique password for your hotspot. Consider enabling your Mac's firewall. And be mindful of the websites you're visiting and the files you’re downloading, just as you would on any public Wi-Fi network. Think of your hotspot as a miniature fortress; you want to make sure all the guards are in place.
9. The Impact of macOS Updates: Staying Up-to-Date
Apple constantly updates macOS, and these updates can sometimes affect how features like Internet Sharing function. Always keep your system updated to ensure you have the latest security patches and bug fixes. This is like regularly tuning up your car – it keeps everything running smoothly.
10. When to Avoid Using a Mac Hotspot
While incredibly useful, there are times when using a Mac hotspot might not be the best idea:
- Public Wi-Fi with Sensitive Data: If you're dealing with sensitive information (banking, personal details) on public Wi-Fi, tethering on your Mac can add an extra layer of security. However, always verify the security of your internet source before sharing access.
- Battery Life Concerns: As
How to share internet connection from Mac

By Mac2iPhone How to share internet connection from Mac by Mac2iPhone
How to Turn Your Mac Into a Wi-Fi Hotspot

By thecoderworld How to Turn Your Mac Into a Wi-Fi Hotspot by thecoderworld
How to Turn Your Mac Into a Wi-Fi Hotspot How To Enable Wifi Hotspot On Mac

By Technical Fix How to Turn Your Mac Into a Wi-Fi Hotspot How To Enable Wifi Hotspot On Mac by Technical Fix
Title: How to Turn Your Mac into a Wi-Fi Hotspot and Share Internet Connection
Channel: Research Rocks
How to Turn Your Mac into a Wi-Fi Hotspot and Share Internet Connection by Research Rocks
Laptop Wifi Connect
Here's the article:
Mac WiFi Hotspot: The Ultimate Guide (Secret Trick Inside!)
The digital landscape thrives on connectivity. Whether you're a digital nomad, a student navigating campus, or someone simply needing a backup internet solution, the ability to transform your Mac into a personal WiFi hotspot is invaluable. This comprehensive guide delves deep into the practicalities, advantages, and some incredibly clever techniques that allow you to harness the full potential of this often-overlooked feature. Forget patchy public WiFi and embrace the freedom of a secure, readily available internet connection, powered by your Mac.
Understanding the Basics: What is a Mac WiFi Hotspot?
At its core, a Mac WiFi hotspot, also known as Internet Sharing, allows your Mac to broadcast its internet connection to other devices. This connection can originate from various sources: a wired Ethernet connection, a WiFi network you’re already connected to, or even a cellular connection through a connected iPhone or iPad. Think of it as a personal base station, extending your internet access to smartphones, tablets, laptops, and other WiFi-enabled gadgets within range. It’s a powerful tool for bridging connectivity gaps and ensuring seamless internet access wherever you go.
Why Use a Mac WiFi Hotspot? Unveiling the Benefits
The advantages of establishing a Mac WiFi hotspot are manifold. Primarily, it provides a reliable and secure internet connection when other options are limited or untrustworthy. Consider these scenarios:
- Travel: While traveling, this feature becomes a lifeline, providing internet access when hotel WiFi is unreliable, expensive, or simply unavailable.
- Remote Work: Working from a remote location? A Mac hotspot transforms your Mac into your own personal WiFi access point.
- Emergency Situations: In times of internet outages or emergencies, your Mac can act as a backup, especially if you have a cellular connection.
- Sharing with Others: Need to share your internet with a friend, a family member, or colleagues? Your Mac becomes a convenient sharing solution.
- Security: By creating your own hotspot, you control the security settings and can avoid connecting to potentially risky public WiFi networks.
Setting Up Your Mac as a WiFi Hotspot: A Step-by-Step Guide
Setting up a Mac WiFi hotspot through Internet Sharing is surprisingly straightforward, even for those less tech-savvy. Here's a detailed, step-by-step walkthrough:
Open System Settings: Locate and click the Apple menu in the upper-left corner of your screen. Select "System Settings."
Navigate to Network Settings: In the System Settings window, click on "Network." It's typically located within the main panel.
Select "Internet Sharing": Within the Network settings window, you will find the option of "Internet Sharing," this option might be on the left side or on the right side of the screen. Click on it.
Share Your Connection From: In the "Internet Sharing" settings, the first crucial step is to specify the source of your internet connection. If your Mac is connected to the internet via Ethernet, choose "Ethernet." If you're using WiFi, choose "Wi-Fi." If using a cellular data connection, select your iPhone or iPad.
Share Your Connection to Computers Using: Under "Share your connection from," select how you want to share your internet connection. In this case, select "Wi-Fi."
Click on "Wi-Fi Options": This is where you customize your hotspot's settings. Click the "Wi-Fi Options…" button.
Configure Your Wi-Fi Hotspot: This is the most critical step. You’ll create the name (SSID) and password for your hotspot.
- Network Name: Give your hotspot a recognizable name. Choose a name that is easy to identify for your devices.
- Security: Select the security type. WPA2 Personal or WPA3 Personal are recommended for robust security. Choosing these options will encrypt the data transmitted through your hotspot.
- Password: Create a strong, secure password for your hotspot. Make it complex, with a combination of uppercase and lowercase letters, numbers, and symbols.
- Then click "OK."
Enable Internet Sharing: Once you have configured your Wi-Fi options, check the box next to "Internet Sharing" on the main "Internet Sharing" settings window. A dialog box might appear asking if you confirm turning on Internet Sharing. Click "Start."
Connecting Your Devices: Your Mac is now broadcasting a WiFi signal. On your other devices (phone, tablet, etc.), find the WiFi settings and select your newly created hotspot name from the list of available networks. Enter the password you created, and you're connected.
The Secret Trick: Optimizing Your Mac WiFi Hotspot Performance
Here's the secret trick to get the most out of your Mac WiFi hotspot, one that often gets overlooked: Optimize your channels and frequencies. By default, your Mac will often choose a channel automatically. This can sometimes lead to slower speeds or interference, especially in areas with many other WiFi networks.
Here's how to optimize your hotspot's performance:
Download a WiFi Analyzer App (Recommended): There are a number of free and paid WiFi analyzer apps available for macOS such as NetSpot or WiFi Explorer. These apps scan your surroundings and show you the WiFi channels in use by nearby networks. This will help you identify the least congested channel for best performance.
Check Wi-Fi Channel Optimization: After you've downloaded and opened your WiFi analyzer app of choice, let it scan the nearby networks. You can generally see the used channels. Select the channel that is the most unused.
Go back to System Settings: Go back to the setup interface. In the “Share your connection to computers using” section, Click “Wi-Fi Options”.
Change the Channel: When you are setting up the hotspot, change the channel of use. Choose the channel to be used by the hotspot, based on your findings from the WiFi analyzer app. Make sure to select a channel that is not as busy as the others.
Select the Appropriate Band: Modern Macs support both 2.4 GHz and 5 GHz WiFi bands. The 5 GHz band generally offers faster speeds and less interference, but it also has a shorter range. The 2.4 GHz band offers a wider range but can be more susceptible to interference. If you're located in an area with many WiFi networks, consider using the 5 GHz band to boost performance. But if you're far from your hotspot, use the 2.4 GHz band.
Save and Reconnect: Save your changes by clicking "OK." Disconnect and reconnect all of your devices, and you should experience improved speeds and a more stable connection.
Troubleshooting Common Mac WiFi Hotspot Issues
Even with careful setup, occasional issues can arise. Here's how to troubleshoot common problems:
- Hotspot Not Showing Up:
- Check Internet Sharing Status: Ensure Internet Sharing is enabled in System Settings.
- Restart Your Mac: Restarting your Mac can resolve temporary glitches.
- Check WiFi Hardware: Make sure your Mac's WiFi hardware is functioning correctly.
- Distance and Obstacles: Ensure you are within range of the hotspot and that there are no significant obstructions (walls, metal objects) between your Mac and the connecting devices.
- Slow Speeds:
- Optimize Channel: As discussed in "The Secret Trick", ensure you've optimized your WiFi channel.
- Reduce Connected Devices: More connected devices mean slower speeds. Limit the number of devices using your hotspot if performance suffers.
- Check Your Source Internet Connection: If your source internet connection (e.g., WiFi, Ethernet, cellular) is slow, your hotspot will also be slow. Test your source connection separately.
- Bandwidth Usage: Consider the bandwidth usage of the devices connected to your hotspot. Streaming video, downloading files, and online gaming all consume significant bandwidth.
- Connection Dropouts:
- Signal Strength: Ensure a strong signal. Move closer to your Mac if necessary.
- Interference: Minimize interference from other devices such as microwaves, Bluetooth devices, or other WiFi networks.
- Update macOS: Ensure your Mac has the latest macOS updates.
- Authentication Errors:
- Double-Check Password: Ensure you're entering the correct hotspot password.
- Security Type: Make sure your device supports the security type (WPA2 or WPA3 Personal) selected for your hotspot.
Beyond the Basics: Advanced Tips and Tricks
- Create a Dedicated Hotspot Profile: If you frequently use your Mac as a hotspot, consider creating a separate user profile specifically for hotspot use. This keeps your primary user profile organized and secure.
- Use Power Saving Mode: To conserve battery life, especially when running on battery power, enable power-saving features within System Settings. This could slightly impact performance but extend battery life.
- Monitor Data Usage: Keep track of data consumption, especially if using a cellular connection, to avoid exceeding your data plan limits. Many apps can help with this like TripMode.
- Automate Hotspot Activation (Advanced): In order to activate the hotspot at startup, use third-party applications or AppleScript to automate the Internet Sharing process. This helps save
