create wifi hotspot using laptop windows xp
Title: How to make your laptop to a wifi hotspot on windows xp788.1
Channel: Arafatur Rahman Shimul
How to make your laptop to a wifi hotspot on windows xp788.1 by Arafatur Rahman Shimul
Unlock Your XP Laptop's Hidden WiFi Hotspot: The Ultimate Guide!
Unleash the WiFi Beast: Your XP Laptop's Secret Hotspot Revealed!
Do you still have that trusty old Windows XP laptop? It might seem outdated, but it possesses a hidden power! Believe it or not, it can function as a WiFi hotspot. This guide is your key to unlocking this capability. You can share your internet connection with other devices. It is a fantastic way to breathe new life into an older machine. Let's dive into the magic!
Cracking the Code: Preparing Your XP Machine
First, ensure your XP laptop has a working wireless adapter. That's the cornerstone of this whole operation. Check your Device Manager. You can access it through the Control Panel. Look for a "Network adapters" section. Your wireless adapter should be listed there. Also, make sure your laptop is connected to the internet. You need an active internet connection. This could be through an Ethernet cable or existing WiFi. Without it, there's nothing to share, obviously. Consequently, you're ready for the next step.
The Software Shuffle: Free Tools to the Rescue!
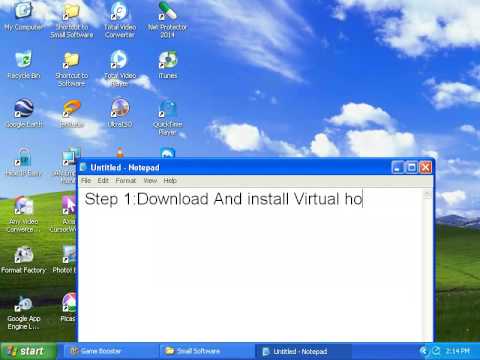
While XP itself doesn't boast a built-in hotspot feature, don't fret! Several free software options make it happen. We will explore some of the easiest ones. One popular choice is Connectify. It's user-friendly. Another very good option is Virtual Router Manager. These programs essentially create a virtual WiFi adapter. It acts as the hotspot. Download and install your chosen software. Follow the on-screen instructions. This is usually a simple process.
Configuring Your Hotspot: The Crucial Steps
Now comes the setup phase. Open your hotspot software. Typically, you'll need to configure a few key settings. First, choose a name for your new WiFi network. Think of a catchy name. Next, pick a strong password. This is crucial for security. Select your internet connection to share. This might be your Ethernet connection or an existing WiFi. Eventually, the software will start the hotspot.
Troubleshooting Time: Squashing the Bugs
Sometimes, things don't go perfectly. Don't worry; troubleshooting is part of the game. If your other devices can't connect, check a few things. First, verify the password. Enter it correctly on the connecting device. Ensure the hotspot software is running. Firewall settings can block connections. Temporarily disable your firewall. Furthermore, check if your wireless adapter's driver is up-to-date. Outdated drivers can cause problems. In addition, consider restarting your laptop and trying again. Usually, these steps resolve most issues.
Security First: Protecting Your Network
Security is extremely important; Therefore, take the necessary precautions. Always use a strong password. This makes it difficult for unauthorized users to access your network. Consider enabling WPA2 encryption. This is a robust security protocol. Regularly update your hotspot software. Software updates often include security patches. Because they address potential vulnerabilities.
Beyond the Basics: Enhancing Your Experience
Furthermore, consider some advanced tips. Some software allows you to manage connected devices. You can monitor data usage. You can also limit bandwidth. Experiment with different hotspot software. Each one has unique features. Moreover, keeping your XP laptop in good condition helps. Clean out any unnecessary files. Optimize its performance for a reliable WiFi hotspot.
Reaping the Rewards: The Benefits of a WiFi Hotspot
Why bother with all this? Well, a WiFi hotspot has many advantages. You can share your internet. You can connect multiple devices. This is perfect for travel. It's useful when you need a temporary WiFi solution. Additionally, it's a great way to reuse an older laptop. You can extend the life of your XP machine. Indeed, it's a win-win situation.
Final Thoughts: Your XP Laptop's New Legacy
Your old XP laptop has new purpose. You have unlocked its hidden WiFi hotspot capabilities. Therefore, get ready to share your internet connection. Don't be afraid to experiment with various software options. Enjoy the convenience of a personal WiFi network. This guide provides everything you need. Embrace the challenge. You're now equipped with the knowledge to transform your XP laptop. Go forth and connect!
Unlock Your Dell's WiFi NOW! (Windows 7 Secret Trick)Unlock Your XP Laptop's Hidden WiFi Hotspot: The Ultimate Guide!
Hey there, tech adventurers! Ever found yourself in a Wi-Fi wilderness, desperately needing internet on a device that’s stubbornly refusing to connect? Well, you're in the right place. We're diving headfirst into the often-overlooked world of your trusty old Windows XP laptop, and guess what? It’s got a secret weapon – a hidden WiFi hotspot capability, just waiting to be unleashed. Think of it like this: your XP laptop is a slightly dusty, vintage car, but with a hidden turbocharger. Ready to rev your engines and connect? Let’s get started!
1. Why Bother? The Allure of an XP Hotspot
Before we get our hands dirty, let’s talk about why. Why would you even want to turn your old XP laptop into a WiFi hotspot? Aren't there newer, slicker gadgets that can do the same thing? Absolutely! But here’s the beauty of it:
- Emergency Backup: Let's say your main internet connection craps out or your phone's hotspot is acting up. Your XP laptop can swoop in and save the day! It's like having a spare tire for your digital life.
- Sharing with Older Devices: Imagine you have an older tablet or a gaming console that doesn't play well with modern security standards. An XP hotspot can bridge the gap, letting you connect those devices.
- The Nostalgia Factor: There's a certain charm to resurrecting old tech and making it work for you. It's a fun project, a digital archaeology dig, and a great conversation starter.
- Cost-Effective Solution: It's a free solution if you already have a working XP laptop and a wired internet connection. No need to buy a dedicated hotspot device!
2. The Tools of the Trade: What You'll Need
Alright, let's gather our digital tools. This isn't a complicated project, but you’ll need a few things:
- A Windows XP Laptop: Obviously! Make sure it can boot up and connect to the internet via an Ethernet cable or another working WiFi connection.
- An Ethernet Connection: This is ideal for feeding your XP laptop internet. If you have a wired connection, fantastic!
- Administrative Rights: You’ll need to log in as an administrator on your XP laptop to make the necessary changes.
- Patience: Sometimes, things don't work perfectly the first time. Don't worry; we’ll get there!
- A Network Adapter (If Needed): While most XP laptops have a built-in WiFi adapter, you might need an external one if yours is broken or missing.
3. Configuring Your XP Laptop as an Ad-Hoc Network: The Classic Method
This is the OG method. It's a tried-and-true technique, but it can be a little finicky. Think of it as the vintage recipe for a delicious cake – it might require a few extra steps, but the results are worth it.
- Open Network Connections: Go to your Control Panel and select "Network Connections."
- Set Up a Wireless Network Connection: Click on "Create a new connection" and follow the setup wizard. Choose "Set up an advanced connection."
- Ad-Hoc Networking: Select "Set up a wireless network for home or small office." Then, select "Ad hoc: computer-to-computer (for direct connection to other computers)."
- Name Your Network: Give your new hotspot a name (SSID) – something memorable!
- Security Settings: Choose your security type (WEP is the easiest but least secure, WPA/WPA2 is recommended if your other devices support it). Create a strong password.
- Share Your Internet Connection: Go back to your "Network Connections" and right-click on your internet connection (the one connected to your Ethernet cable or the already established WiFi). Select "Properties."
- Enable Internet Connection Sharing: Go to the "Advanced" tab and check the box that says "Allow other network users to connect through this computer's Internet connection." Select your ad-hoc network from the "Home networking connection" dropdown.
4. Troubleshooting Ad-Hoc Networks: When Things Get a Little Messy
Sometimes, despite our best efforts, ad-hoc networks can be a bit stubborn. Here's how to troubleshoot common issues:
- Can’t See the Network: Double-check the network name and security settings on your XP laptop and on the device you are trying to connect. Are you sure you typed the password correctly?
- Limited or No Connectivity: Make sure the "Internet Connection Sharing" is correctly enabled. Also, make sure your firewall isn’t blocking connections. You may need to disable it temporarily for testing. Check IP address configurations.
- Slow Speeds: Ad-hoc networks aren’t known for blistering speeds. Proximity matters – the closer you are to the laptop, the better the connection.
5. The Magic of Third-Party Software: Easier Solutions
If the ad-hoc method is giving you a headache, don't despair! There are third-party software solutions that can make the process much easier. Think of them as pre-made icing for your cake – quicker, easier, and potentially tastier!
- Connectify Hotspot (Free Version): This is one of the most popular choices. It’s user-friendly and simplifies the hotspot creation process.
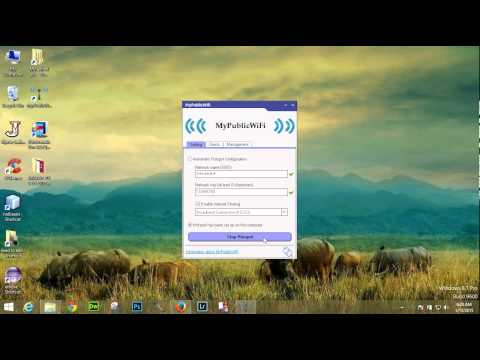
- MyPublicWiFi: Another solid option, offering a straightforward interface and easy management.
These programs generally automate the setup process, making it a breeze to create a hotspot. Just download, install, and follow the on-screen instructions. They often offer advanced features, too, like bandwidth monitoring.
6. Using Connectify: A Step-by-Step Guide
Let's use Connectify as an example. Here's a quick rundown:
- Download and Install: Get Connectify from their official website and install it on your XP laptop.
- Run the Program: Open Connectify.
- Name and Password: Choose a name for your hotspot (SSID) and a password.
- Internet to Share: Select the internet connection you want to share (usually your Ethernet connection or the existing WiFi connection).
- Start the Hotspot: Click the "Start Hotspot" button!
7. Securing Your XP Hotspot: Safety First!
Creating a hotspot is cool, but security is even cooler. You wouldn’t leave your front door wide open, would you? Here’s how to keep your hotspot safe:
- Strong Password: Use a strong, complex password. Avoid easy-to-guess phrases or personal information.
- Choose the Right Security Type: WPA2 is generally recommended for its stronger encryption.
- Keep Your XP Laptop Updated: Ironically, even though XP is ancient, keep the few remaining security patches up to date.
- Monitor Connected Devices: Most hotspot software allows you to view connected devices. Keep an eye on who's using your hotspot! If you see an unfamiliar device, you can block it.
8. Optimizing Your Hotspot's Performance: Speed Matters!
You want a fast, reliable connection, right? Here are some tips:
- Proximity: The closer you are to your XP laptop, the better the signal.
- Avoid Obstacles: Walls, metal objects, and other electronics can interfere with the signal.
- Minimal Interference: Try to keep your laptop away from other wireless devices that may be hogging the bandwidth.
- Manage Connected Devices: Fewer connected devices mean more bandwidth for everyone. Tell your friends and family not to stream 4K videos while you're trying to work.
9. Sharing With Your Other Devices: Connecting the Dots
Connecting other devices is the easy part. Here's how, generally:
- Scan for Networks: On your device (phone, tablet, etc.), go to the WiFi settings and scan for available networks.
- Select Your Network: Find your XP laptop’s hotspot name (SSID) and select it.
- Enter the Password: Type in the password you created.
- Connect! You should be online!
10. Troubleshooting Device Connections: Gotchas to Watch Out For
Sometimes, devices can be picky. Here's what to check:
- Compatibility: Ensure your receiving device is compatible with the security type.
- Signal Strength: Make sure the device is close enough to the laptop.
- Network Name and Password: Double-check that you entered the correct details.
11. Beyond the Basics: Advanced Tweaks
Want to get fancy? Here are some advanced tips:
- Static IP Addresses: Assigning static IP addresses to connected devices can sometimes improve stability.
- MAC Address Filtering: You can restrict access to specific devices by their MAC addresses, enhancing security.
12. The Legal Stuff: Be a Responsible User
Always be mindful of your internet usage and the terms of service of your internet provider. Don't violate any laws or regulations.
13. When Things Go Wrong: Common Problems and Solutions
Even with the best preparation,
Unlock Free WiFi on Your Laptop: The Secret App Revealed!Creating Wifi Hotspot in Windows Xp788.1 & 10 SomeTechStuff

By SomeTechStuff Creating Wifi Hotspot in Windows Xp788.1 & 10 SomeTechStuff by SomeTechStuff
Create Hotspot in Windows xp
By isoft Developer Create Hotspot in Windows xp by isoft Developer
how to create wifi hotspot using cmd command prompt in windows xp 7 8 10
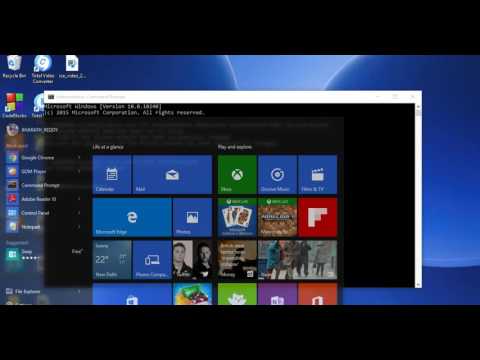
By Next Emperor how to create wifi hotspot using cmd command prompt in windows xp 7 8 10 by Next Emperor
Title: Wi-Fi Hotspot in Windows XP Step by Step
Channel: alexn1138
Wi-Fi Hotspot in Windows XP Step by Step by alexn1138
Laptop Wifi Connect
Unlock Your XP Laptop's Hidden WiFi Hotspot: The Ultimate Guide!
We understand the frustrations of spotty Wi-Fi, limited connectivity, and the constant need for a reliable internet connection, especially when you're on the go. If you're still clinging to the venerable Windows XP operating system and find yourself yearning for a portable Wi-Fi hotspot, you've come to the right place. Forget expensive mobile broadband plans or the hassle of constantly searching for public Wi-Fi networks. This guide will unveil the secrets to transforming your XP laptop into a fully functional Wi-Fi hotspot, allowing you to share your internet connection with other devices – smartphones, tablets, other laptops – with ease.
Understanding the Basics: XP's Built-In Capabilities
Contrary to common misconceptions, Windows XP does possess the underlying capabilities to function as a wireless hotspot. Microsoft, in its early days, included functionalities that enable wireless networking to be shared among several devices. While the user interface may not be as streamlined as in later Windows versions, the core functionality remains. We'll walk through the necessary steps to harness this hidden potential and ensure your XP laptop can effectively broadcast a Wi-Fi signal.
Prerequisites: What You'll Need to Get Started
Before we begin, let's ensure you have everything required for a successful implementation. The following items are essential:
- A Windows XP Laptop: This is, of course, the foundation of our project. Ensure your laptop is updated with the latest service packs and security patches.
- A Wireless Network Adapter: This is the hardware responsible for creating the Wi-Fi signal. Most laptops have internal Wi-Fi adapters, but if yours doesn't, you'll need a compatible USB wireless adapter. Make sure the drivers are installed and up to date.
- An Active Internet Connection: The XP laptop needs to be connected to the internet, either through a wired Ethernet connection (preferred for stability) or an existing Wi-Fi network. This will be the source of the internet connection you share.
- Administrative Privileges: You'll need administrator rights on your XP laptop to configure network settings.
- Sufficient Battery Life or AC Power: Creating a Wi-Fi hotspot can be power-intensive. Ensure your laptop is fully charged or plugged into a power source during the setup process and when actively using the hotspot.
Step-by-Step Guide: Configuring Your XP Laptop as a Hotspot
Now let's dive into the practical steps, guiding you through the process of transforming your XP laptop into your personal Wi-Fi haven:
1. Accessing the Network Connections:
- Navigate to the "Start" menu.
- Click on "Control Panel."
- Double-click on "Network Connections." This will open a window displaying your network adapters, including your wireless adapter (if you have one) and any active Ethernet connections.
2. Enabling Internet Connection Sharing (ICS):
- Right-click on the network connection that currently provides your internet access (e.g., your Ethernet connection if you’re using a wired connection, or your active Wi-Fi connection).
- Select "Properties" from the context menu.
- Go to the "Advanced" tab.
- Under "Internet Connection Sharing," check the box that says: "Allow other network users to connect through this computer's Internet connection."
- In the "Home networking connection" dropdown, select your wireless network adapter. This is the adapter that will broadcast the Wi-Fi signal.
- Click "OK" to save the changes.
3. Configuring Wireless Network Settings:
Go back to the "Network Connections" window.
Right-click on your wireless network adapter. This is the adapter that will be broadcasting your hotspot.
Select "Properties" from the context menu.
In the "General" tab, confirm that the "Connect using" area properly recognizes your wireless network adapter.
On the "Wireless Networks" tab, we will now create the network settings.
- Click the “Add” button under the “Preferred networks” to create a new network profile.
- In the "Association" tab, enter the network name (SSID). This will be the name that other devices will see when searching for Wi-Fi networks. Choose a name that’s easy for you to identify (e.g., "MyXP_Hotspot").
- In the "Network Authentication" section, select the security type. We highly recommend using WPA-PSK or WPA2-PSK for security. These are more secure options than WEP.
- If you selected WPA-PSK or WPA2-PSK, enter a strong passphrase (password) in the "Network key" field. Choose a password that is complex and difficult to guess.
- Check the box next to "The key is provided for me."
- Click "OK" to save the wireless network settings. You should be able to see your network now under "Preferred networks."
- Click "OK" to close the properties window.
4. Dealing with Firewalls
Windows XP’s built-in firewall can sometimes interfere with the proper functioning of your hotspot. We recommend adding exemptions and adding the necessary settings to avoid any issues. Open the firewall settings within the Control Panel and allow inbound traffic on TCP ports 80 and 443, which are commonly used for web browsing and secure web traffic. Also, you may need to allow inbound traffic for UDP ports 53 (DNS) and 52 (DHCP). By doing so, you allow other devices to connect to your internet in an orderly and secure fashion.
5. Testing the Connection:
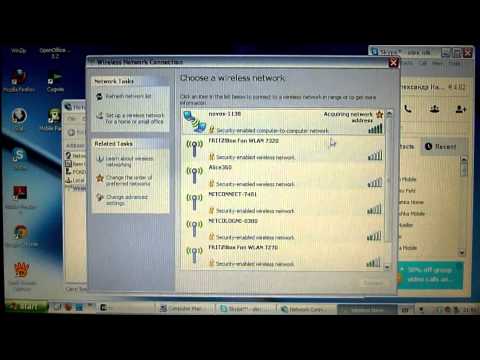
- On your smartphone, tablet, or another device, search for available Wi-Fi networks.
- You should see the network name (SSID) you created earlier.
- Select the network and enter the passphrase you set up.
- Once connected, try to access the internet on the other device. If the internet is working, congratulations! Your XP laptop is successfully acting as a Wi-Fi hotspot.
Troubleshooting Common Issues
Sometimes, even with the above steps, things can go wrong. Here are some troubleshooting tips:
- Connection Issues: If devices can't connect, ensure the passphrase entered on the connecting device exactly matches the one set up on your XP laptop. Also, double-check that the correct wireless adapter is selected and that Internet Connection Sharing is enabled.
- Slow Speeds: Make sure your XP laptop isn't too far from the device trying to connect. The signal strength can drop significantly with distance. Also, be mindful that all connected devices share the bandwidth available from your internet connection.
- Limited Connectivity: If devices connect but can't access the internet, check your firewall settings. Make sure you have allowed the required ports for internet traffic. Disable the XP internal firewall temporarily to test if it is blocking. You can also try restarting your laptop and the connecting devices.
- Driver Conflicts: Ensure your wireless adapter drivers are up to date. Outdated drivers can cause connectivity issues. Visit the manufacturer's website for your wireless adapter to download the latest drivers, if necessary.
Enhancing Security and Performance
While the steps above provide a functional hotspot, consider these measures to enhance security and optimize performance:
- Enable WPA2-PSK Encryption: Always use WPA2-PSK encryption to protect your network from unauthorized access. It is significantly more secure than WEP encryption.
- Create a Strong Passphrase: Choose a strong, complex password for your Wi-Fi network to prevent unauthorized access. Avoid using easily guessable information like birthdays or names.
- Monitor Connected Devices: Keep an eye on the devices connected to your hotspot and disconnect any unknown or unwanted devices.
- Limit Connections: If possible, limit the number of devices that can connect to your hotspot to optimize bandwidth.
- Regularly Update Your XP System: While XP is no longer supported, ensure you have installed all available security updates and patches to mitigate potential vulnerabilities.
Conclusion: Unleashing the Power of Your XP Laptop
By following this guide, you've successfully transformed your Windows XP laptop into a versatile mobile Wi-Fi hotspot. You can now share your internet connection with ease, providing connectivity for all your devices. Whether you're traveling, in a café, or simply need a backup internet solution, your XP laptop is now equipped to meet your connectivity needs. Embrace the power that resides within your reliable XP system, and enjoy the convenience of a personal Wi-Fi hotspot!
