hot to make a wifi hotspot with my laptop

Title: How to Create Wifi Hotspot in Windows 10 Tutorial
Channel: MDTechVideos
How to Create Wifi Hotspot in Windows 10 Tutorial by MDTechVideos
how to make a wifi hotspot with laptop, can i create a wifi hotspot with my desktop, can you turn your laptop into a wifi hotspot
Unlock Your Laptop's Hidden Hotspot: Free WiFi in 60 Seconds!
Unleash Your Laptop's Secret Weapon: Instant WiFi Freedom!
Ever craved internet access beyond the confines of your home or office? Imagine: a park, a cafe, or even a train, all transformed into your personal digital workspace. We're talking about free WiFi, accessible in mere seconds, right from your trusty laptop. Forget expensive mobile hotspots. This is about unlocking a built-in superpower.
The WiFi Whisperer: Your Laptop's Hidden Talent
Did you know your laptop likely possesses a hidden talent? It’s the ability to share its internet connection. Think of it as a digital chameleon. Consequently, it adapts and provides solutions. However, this isn't some advanced technical feat. It's a simple, often overlooked feature. So, prepare to transform your laptop into a personal WiFi hub. We will explain this process.
Setting the Stage: Checking Your Operating System
Before we dive in, ensure your laptop supports this feature. The process varies slightly depending on your operating system. Therefore, identifying your OS is your initial mission. Is it Windows or macOS? The good news is, the core principles are the same. However, the specific steps can differ.
Windows Warriors: Creating Your Personal Hotspot
For Windows users, it's remarkably straightforward. Firstly, navigate to your settings. Locate the "Network & Internet" section. Then, select "Mobile Hotspot." You're almost there! Turn on the "Share my Internet connection with other devices" toggle. Then, ensure your laptop connects to the internet. Finally, configure your network name (SSID) and password. Consequently, this is how others will connect.
macOS Mavericks: Sharing Your Internet Connection
MacOS users follow a similar path. To begin, access "System Preferences" from the Apple menu. Next, choose "Sharing." In the left-hand pane, select "Internet Sharing." Then, choose "Share your connection from." Select your current internet connection. After that, select the method (e.g., Wi-Fi). Configure your network name and password. Finally, enable the “Internet Sharing” checkbox. As a result, you've created your hotspot.
Security First: Protecting Your WiFi Fortress
Security is paramount. So you must implement strong password protection. A weak password is an open invitation to unwanted guests. Therefore, choose a complex password. Use a mix of uppercase and lowercase letters, numbers, and symbols. Change your password regularly too. Doing so adds an extra layer of security. Moreover, avoid sharing your password publicly.
Troubleshooting Tango: When Things Go Awry
Sometimes, things don't work perfectly on the first try. Do not fret! First, ensure your internet connection functions. Also, confirm you're within range of the hotspot. Furthermore, check your firewall settings. Sometimes, firewalls block hotspot functionality. In addition, restarting your laptop can resolve many issues. If problems persist, consult your operating system's support documentation.
Beyond the Basics: Advanced Customization
Once you master the basics, consider advanced customization. Moreover, explore options like limiting bandwidth. With this, you can manage data usage. Furthermore, explore the ability to connect a limited number of devices. This will prevent network congestion. Also, investigate other networking settings.
The Benefits: Freedom Reimagined
The benefits of a personal hotspot extend far beyond convenience. Firstly, consider the freedom of working remotely. Secondly, access the internet from any location. Furthermore, eliminate the need for unreliable public WiFi. So you can stay connected, no matter where you are. Thus, you gain control.
Ethical Considerations: Responsible WiFi Usage
While enabling a hotspot is readily available, consider ethical implications. Respect data limits. Avoid excessive bandwidth usage. Furthermore, never share your connection without permission. Always be mindful of internet usage policies. So use your hotspot responsibly.
The Future is Connected: Embrace the Power
Your laptop holds incredible power. It's a gateway to instant WiFi freedom. Now you have a versatile tool at your fingertips. Therefore, embrace the power of your laptop's hotspot. Enjoy the freedom of instant connectivity. Now, venture forth and explore!
Steal Your Neighbor's Wi-Fi: The Secret Laptop Trick They Don't Want You To Know!Unlock Your Laptop's Hidden Hotspot: Free WiFi in 60 Seconds!
Hey tech adventurers! Ever been caught in a digital desert, craving a Wi-Fi oasis but finding only tumbleweeds of connectivity? We've all been there. Picture this: stranded at a coffee shop with a crippling data plan, or perhaps traveling and utterly reliant on unreliable hotel Wi-Fi. What if I told you your laptop could become your personal, always-on internet provider, ready to unleash free Wi-Fi on demand? Sounds like magic, right? Well, it’s not; it’s just a clever little trick we’re about to unlock. Get ready to transform your laptop into a Wi-Fi hotspot in a flash!
1. Craving Connectivity? Your Laptop Just Became Your Savior
Let's be honest, in today’s world, being disconnected is like trying to navigate a maze blindfolded. From streaming our favorite shows to staying connected with loved ones, the internet is the invisible thread that weaves our lives together. And sometimes, finding a reliable connection is like searching for a unicorn – rare, elusive, and often disappointing. But fear not, digital nomads! We’re here to equip you with the knowledge to combat the connectivity blues.
2. Why Bother? Unveiling the Perks of a Laptop Hotspot
So, why should you even bother turning your laptop into a Wi-Fi hotspot? The answer is simple: convenience and control. Imagine this:
- Instant internet anywhere: Transform any location into your Wi-Fi zone.
- Cost savings: Ditch those data-guzzling mobile plans.
- Share the love: Share your connection with friends, family, or colleagues.
- Security: You have more control over the connection and its security settings.
It's like having a personal Wi-Fi router in your pocket, ready to deploy at a moment's notice.
3. Before We Begin: Checking Your Compatibility
Before we dive into the nitty-gritty, let's make sure your laptop is ready for the Wi-Fi party. The good news is, most modern laptops, running Windows 10 or 11, have the built-in capability to create a hotspot. If you're running an older operating system, or a system not supporting the hotspot feature, you may need to explore other solutions. But honestly? The chances are good.
4. The Windows 10/11 Secret: Easy Hotspot Activation
This is where the magic really happens. We’re going to walk through the straightforward steps to create a hotspot on Windows 10 or 11. Think of it as learning a secret handshake to unlock a world of free Wi-Fi.
- Step 1: Open Settings: Click the Windows button (the little square in the bottom-left corner) and then click the Settings icon (the gear).
- Step 2: Navigate to Network & Internet: Click on "Network & Internet."
- Step 3: Find Mobile Hotspot: In the left-hand pane, click on "Mobile hotspot."
- Step 4: Turn it On: Toggle the "Share my internet connection with other devices" switch to "On."
- Step 5: Customize (Optional, but recommended!): Click "Edit" to change your network name (SSID) and password. Choose a strong password to keep things safe and secure! Make sure you select the internet connection you want the hotspot to use.
- Bask In Wi-Fi Glory: Your hotspot is now active!
See? Sixty seconds (or less!) and you're connected. It's simpler than making a decent cup of coffee.
5. Mac Users: A Slightly Different Approach
While Windows offers a quick and easy solution, Mac users have their own method, though it is similar in essence. Don't worry, it's not rocket science.
- Step 1: Open System Preferences: Click the Apple icon in the top-left corner of your screen and select "System Preferences."
- Step 2: Find Sharing: Click on "Sharing."
- Step 3: Select Internet Sharing: In the left-hand pane, click "Internet Sharing."
- Step 4: Configure Sharing From: Choose the internet connection you want to share (e.g., Wi-Fi, Ethernet).
- Step 5: Share it with Devices Using: Select "Wi-Fi."
- Step 6: Configure Wi-Fi Options: Click "Wi-Fi Options…” and set a network name (SSID) and password. Again, choose a strong password!
- Step 7: Check the Box: Check the box next to "Internet Sharing" in the left-hand pane to turn it on.
Voilà! Your Mac is now happily broadcasting Wi-Fi.
6. Fine-Tuning: Customization for Maximum Performance
So, you've got your hotspot running, but can we crank things up a notch? Absolutely! Let's look at some ways to optimize your hotspot for speed and reliability.
- Choose the Right Band: If your laptop supports it, use the 5 GHz band instead of the 2.4 GHz band. The 5 GHz band is generally less congested and offers faster speeds.
- Keep It Secure: Always use a strong password to protect your hotspot.
- Monitor Data Usage: Be mindful of your data consumption, especially if you're tethering to a mobile connection.
- Placement Matters: Position your laptop in an open area for the best signal coverage.
7. Troubleshooting Troubles: Common Wi-Fi Woes and Their Solutions
Sometimes, things don't go according to plan. Here are a few common issues and how to troubleshoot them:
- No Internet Connection: Double-check that your laptop has an active internet connection.
- Slow Speeds: Try moving your laptop to a better location.
- Devices Won't Connect: Make sure you've entered the correct password. Also, check that the device's Wi-Fi is turned on and that it is within range of your laptop.
- The Hotspot Keeps Dropping: Ensure your laptop's power settings aren't causing the Wi-Fi adapter to turn off to save energy. Adjust these settings in your power plan configuration.
8. Tethering vs. Hotspot: What’s the Difference?
Although often used interchangeably, tethering and creating a hotspot are slightly different. Tethering typically refers to sharing your phone's cellular data connection with another device. Creating a laptop hotspot, on the other hand, shares your laptop's internet connection. While the outcome is similar (internet access for multiple devices), the source of that internet differs.
9. Staying Safe: Wi-Fi Security Essentials
Whenever you're sharing your internet connection, security is paramount. Protecting your personal information is crucial, so follow these simple rules:
- Use a Strong Password: Don't use easily guessable passwords.
- Enable Encryption (WPA2/WPA3): Make sure your hotspot is using a secure encryption protocol.
- Keep Your Software Updated: Regularly update your operating system and security software.
- Be Aware of Public Wi-Fi Risks: When using public Wi-Fi, avoid entering sensitive information.
10. Laptop Battery Life: Can Your Hotspot Drain It?
Yes. Creating a hotspot will inevitably drain your laptop's battery faster. It's like asking your laptop to run a marathon while simultaneously juggling chainsaws. To mitigate this:
- Plug In When Possible: Connect your laptop to a power outlet whenever you can.
- Optimize Power Settings: Adjust your power plan to conserve energy.
- Monitor Battery Usage: Keep an eye on your battery life and adjust your usage accordingly.
11. Beyond the Basics: Advanced Hotspot Configurations
For the more advanced tech-savvy users, there are ways to extend your hotspot’s capabilities:
- Third-Party Software: Explore software that allows you to customize your hotspot with more advanced features.
- Command Line Magic: If you relish a challenge, you can utilize the command line to tweak your hotspot settings.
- Consider Hardware Alternatives: For frequent hotspot use, consider investing in a dedicated mobile hotspot device.
12. Legal Matters: Understanding Data Policies
Before diving in, it's essential to understand the legal and policy aspects. Some internet service providers (ISPs) have specific terms and conditions regarding hotspot usage. Always review your service agreement to ensure you're not violating any rules.
13. The Mobile Hotspot vs. the Laptop Hotspot: Which Wins?
Which one is better? It depends. Mobile hotspots are designed for this specific purpose, making them smaller, more portable, and often offering better battery life. However, laptop hotspots are free if you already have a laptop and can tap into an existing internet connection. It's a trade-off between convenience and cost.
14. Unleashing the Power: Real-World Applications of Your Laptop Hotspot
The applications of your laptop hotspot are as vast as the internet itself. Here are some ideas to get your mind ticking:
- Supporting the Family: Share internet with friends and relatives.
- Remote Work: Stay productive when traveling or working from anywhere.
- Entertainment on the Go: Stream your favorite
How to use Your Laptop as WiFi Hotspot

By Ricardo Gardener How to use Your Laptop as WiFi Hotspot by Ricardo Gardener
We Can't setup Mobile Hotspot Windows 10 SOLVED

By Nam Anh Cap We Can't setup Mobile Hotspot Windows 10 SOLVED by Nam Anh Cap
How to Create WiFi Hotspot on Your Laptop Turn Your Laptop into Wifi Hotspot

By BLAIR TECH 256 How to Create WiFi Hotspot on Your Laptop Turn Your Laptop into Wifi Hotspot by BLAIR TECH 256
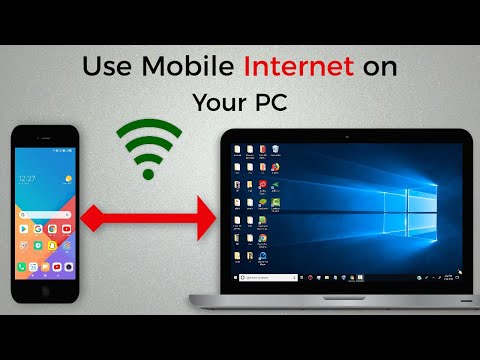
Title: How To Connect Internet from Mobile to PC or Laptop via hotspot
Channel: WebbyFan
How To Connect Internet from Mobile to PC or Laptop via hotspot by WebbyFan
Working With Laptop
Unlock Your Laptop's Hidden Hotspot: Free WiFi in 60 Seconds!
Are you tired of paying exorbitant fees for WiFi access, especially when you're on the go? Do you find yourself stranded in a digital desert, yearning for connectivity but unwilling to compromise your budget? Well, fret no more! We’re about to unveil a remarkably simple, yet incredibly effective, method for transforming your laptop into a personal WiFi hotspot, providing you with free internet access in a mere minute. Prepare to reclaim your digital freedom.
Understanding the Underlying Mechanics: The SoftAP Revelation
Before we dive into the practical steps, let's delve into the core concept that makes this all possible: the Software Access Point, or SoftAP. Modern laptops, equipped with integrated WiFi adapters, possess the inherent capability to broadcast a WiFi signal. Think of it like this: your laptop isn't just a passive receiver of WiFi; it's also a potential transmitter. The SoftAP functionality leverages this capability, allowing your laptop to act as a mobile router, sharing its internet connection with other devices. This connection can originate from a variety of sources: a physical Ethernet cable, a wired connection, or, crucially, a pre-existing WiFi connection.
Requirements: What You'll Need Before You Begin
The beauty of this method lies in its simplicity. You don't need any specialized hardware or software downloads beyond what's already included within your operating system. Here's a checklist to ensure you're ready to proceed:
- A Laptop: Any laptop running a modern operating system (Windows 10 or 11, macOS) will suffice.
- An Active Internet Connection: This is the source you'll share. This could be via Ethernet, or your existing WiFi connection.
- Basic Computer Literacy: You should be comfortable navigating your operating system's settings.
Step-by-Step Guide: Creating Your Personal WiFi Hotspot
Now, let's get into the meat of the matter: the step-by-step instructions for creating your hotspot. We will provide detailed guidance for both Windows and macOS users.
For Windows Users: The Built-in Mobile Hotspot Feature
Windows has incorporated a built-in mobile hotspot feature, making this incredibly easy.
- Accessing Hotspot Settings: Navigate to your Windows Settings. You can do this in several ways: Click on the Start menu and select the "Settings" gear icon, or press the Windows key + I.
- Network & Internet: Within Settings, click on "Network & Internet".
- Mobile Hotspot: Select "Mobile Hotspot" from the left-hand menu.
- Enable the Hotspot: Toggle the "Share my Internet connection with other devices" switch to the "On" position.
- Configure Your Hotspot: Click the "Edit" button to configure your hotspot settings. Here, you can:
- Network Name: Choose a name for your WiFi network (SSID). Something easy to remember is suggested.
- Network Password: Set a secure password. This is crucial to protect your connection from unauthorized access. Use a strong password containing a mix of uppercase and lowercase letters, numbers, and symbols.
- Network Band: If your adapter supports it (and most modern ones do), consider selecting 5GHz instead of 2.4Ghz. The 5GHz band generally offers faster speeds and less interference but has a shorter range.
- Share your Connection From: Select the source from where you will share the internet.
- Connect Your Devices: Once configured, your hotspot will be active. On your other devices (phones, tablets, other laptops), search for available WiFi networks and connect to your newly created network. Enter the password you set, and you're connected.
For macOS Users: Sharing Your Internet Connection via WiFi
macOS provides a straightforward method that involves sharing your existing internet connection.
- Open System Preferences: Click on the Apple menu () in the top-left corner of your screen and select "System Preferences". In newer versions of macOS, this is labelled "System Settings".
- Sharing: Click on "Sharing".
- Internet Sharing: Select "Internet Sharing" from the left-hand menu.
- Share Connection From: In the "Share your connection from:" dropdown menu, select the source of your internet connection (e.g., "Wi-Fi" if you're connected to WiFi, or "Ethernet" if you're connected via a cable).
- To Computers Using: Check the box next to "Wi-Fi".
- Wi-Fi Options: Click on the "Wi-Fi Options…" button. Here, you can configure:
- Network Name: Give your hotspot a name (SSID).
- Channel: Leave on Automatic for optimal performance.
- Security: Choose a security protocol (WPA2 Personal is recommended for most devices).
- Password: Set a strong password for your network.
- Start Sharing: Check the "Internet Sharing" option to enable the hotspot. You might be prompted to confirm.
- Connect Your Devices: On your other devices, search for available WiFi networks and connect to your hotspot, entering the password you created.
Troubleshooting Common Issues: Ensuring Your Network is Up and Running
While the process is generally straightforward, you may encounter some challenges. Here are some common issues and their solutions:
- Hotspot Not Appearing:
- Reboot Your Laptop: A simple restart often resolves minor software glitches.
- Check Network Adapter Drivers: Ensure your WiFi adapter drivers are up to date. (In Windows, see Device Manager; in macOS, driver updates are typically handled automatically.)
- Disable and Re-enable the Hotspot: Turn off the hotspot feature, wait a few seconds, and then turn it back on.
- Slow Internet Speeds:
- Distance from Laptop: The further away from your laptop, the slower the speed.
- Interference: Other devices emitting WiFi signals or physical obstructions (walls, metal objects) can interfere with the signal.
- Limited Bandwidth: Your laptop shares the internet connection, but if the primary connection itself is slow, the shared speeds will be too.
- Security Concerns:
- Strong Passwords: Always use strong passwords to protect your network.
- Encryption: Ensure your network uses WPA2 or WPA3 encryption to secure data transmission. Never use WEP, as it's easily cracked.
- Monitor Connected Devices: Check which devices are connected to your hotspot and disconnect any unrecognized devices.
Maximizing Your Hotspot Experience: Tips and Tricks
To get the most out of your newly created hotspot, keep these tips in mind:
- Monitor Data Usage: Be mindful of your primary internet connection's data usage, especially if you are using a limited data plan. Streaming videos or downloading large files can quickly consume your data allowance.
- Battery Life: Creating a hotspot can drain your laptop's battery faster. Consider plugging your laptop into a power source when using the hotspot for extended periods.
- Range: The range of your hotspot is typically limited by the capabilities of your laptop's WiFi adapter. Position your laptop in a central location to maximize coverage.
- Optimize Your Connection: Close unnecessary applications and background processes on your laptop to free up bandwidth.
Security Considerations: Keeping Your Connection Protected
While free WiFi is liberating, it's essential to prioritize security.
- Use a VPN: A Virtual Private Network (VPN) encrypts your internet traffic, adding an extra layer of protection. This is particularly important when using public or unsecured Wi-Fi networks.
- HTTPS: Ensure websites you visit use HTTPS (indicated by the padlock icon in your browser’s address bar). HTTPS encrypts the communication between your device and the website, protecting your data.
- Firewall: Keep your operating system's firewall enabled to block unauthorized access.
- Be Wary of Public Networks: Never use public or free WiFi to access sensitive information like bank accounts or enter credit card details.
Conclusion: Embracing Digital Freedom
By following these simple steps, you've unlocked the power to create your own personal WiFi hotspot in under a minute. You now possess the means to enjoy free internet access wherever you go, empowering you to stay connected, productive, and entertained without breaking the bank. Embrace this digital freedom and continue to explore the endless possibilities that connectivity offers.
