laptop wifi hotspot windows 8.1 software download

Title: Cara Download & Install Driver WIFI & ETHERNET Manual untuk Windows 781011
Channel: inprez id
Cara Download & Install Driver WIFI & ETHERNET Manual untuk Windows 781011 by inprez id
Unlock Blazing-Fast WiFi Hotspot on Your Windows 8.1 Laptop NOW!
Ignite Your Windows 8.1 Laptop: Supercharge Your WiFi Hotspot for Lightning-Fast Connectivity!
Alright, let's get started! We're diving into a fantastic journey. It's all about unleashing the hidden potential of your Windows 8.1 laptop. We'll transform it into a powerful WiFi hotspot. This transformation will deliver blazing-fast internet speeds. Ready to experience internet on steroids? Let's begin!
Why a WiFi Hotspot Matters: Your Digital Freedom Unleashed
Think about this scenario. You are on the go. You need to connect multiple devices. Perhaps your phone, tablet, and another laptop all need internet access. What if you could create a central hub? That's precisely where a WiFi hotspot comes in handy. It's your personal internet router, right in your pocket. It offers freedom and flexibility. Furthermore, you can share your connection easily. This is especially helpful in a world of constant connectivity.
Mastering the Basics: Preparing Your Windows 8.1 Laptop
Before we jump into specifics, let's ensure everything is ready. Make sure your Windows 8.1 laptop has a working internet connection. This connection could come from an Ethernet cable. Alternately, it might be a pre-existing WiFi network. Next, double-check your network adapter. Make sure it’s enabled. Check for driver updates. This step ensures optimal performance. We don’t want any hiccups along the way. Also, ensure you have Administrative access on your laptop. This will be especially necessary for changing network settings.
Creating the Magic: Easy Steps to Activate Your Hotspot
Now, for the moment of truth. We'll enable the hotspot feature. It's much easier than you think.
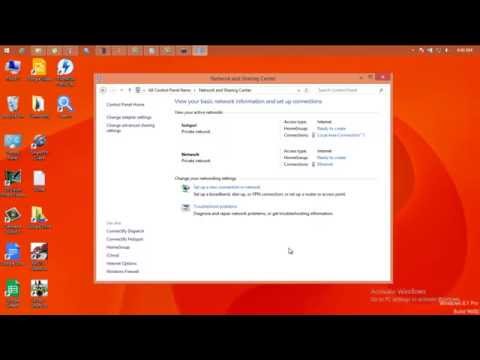
Navigate to Network and Sharing Center: First, locate the Network and Sharing Center. You can find this in your Control Panel. It’s your gateway to network management.
Set Up a New Connection or Network: Within the Network and Sharing Center, look for “Set up a new connection or network.” Click it. This initiates the setup wizard.
Choose “Set up a wireless ad hoc network”: You'll want to select “Set up a wireless ad hoc network”. However, note that Windows 8.1 doesn't explicitly use "ad hoc" anymore, as it's outdated. Instead, you'll create an infrastructure network using these next steps.
Follow the Wizard’s Instructions: The wizard will guide you. You'll need to provide a network name (SSID). Think of a memorable name. Select a security type. WPA2-Personal is generally a good choice. Next, create a strong password. This keeps your network secure.
Share Your Internet Connection: After you've set up your network, you will need to share your existing internet connection. Go back to the Network and Sharing Center. Click "Change adapter settings." Right-click on the adapter that connects to the internet (e.g., your Ethernet or existing WiFi). Choose "Properties." Go to the "Sharing" tab. Check the box that says "Allow other network users to connect through this computer's Internet connection." Select the network you just created (the hotspot). Click "OK."
Troubleshooting Triumph: Conquering Common Challenges
Sometimes, things don't go perfectly. Let's cover some potential issues. Firstly, if you can't seem to connect, double-check your security configurations. Verify the password. Make sure the SSID is correct. Secondly, consider your firewall settings. It might be blocking traffic. You may need to adjust those accordingly. Thirdly, keep your network adapter drivers up-to-date. Fourthly, ensure that your laptop's WiFi adapter is enabled. With these solutions, you should be back to enjoying the internet in no time.
Unleashing Unrivaled Speed: Optimizing Your Hotspot Performance
Now for the good stuff. You want a fast hotspot. You want it now! There are a few quick tips to boost performance. Firstly, the location of your laptop matters. Place it in a central location. This maximizes coverage. Secondly, minimize the number of connected devices. Too many devices can slow things down. Thirdly, check for interference. Other electronic devices may interfere with your signal. Fourthly, update your WiFi adapter drivers which will help.
Security Savvy: Protecting Your Virtual Fortress
Safety first! It's important to protect your hotspot. You especially need a strong password. Use a complex one with numbers and special characters. Secondly, use WPA2-Personal encryption. This is the standard for security. Thirdly, keep an eye on connected devices. You can often see them in your network settings. Lastly, regularly update your Windows 8.1. Updates often include security patches. This ensures your hotspot remains secure.
Beyond the Basics: Advanced Hotspot Customization
Feeling adventurous? Let’s explore advanced options. You can manually set the IP address. You can also configure the DNS server settings. However, these are more complex. They might require some advanced networking knowledge. Moreover, you can consider using third-party hotspot software. These offer extra features. Remember to research them carefully.
The Grand Finale: Your Faster, More Connected World
You did it! You've successfully transformed your Windows 8.1 laptop into a blazing-fast WiFi hotspot. You’ve unlocked a new level of connectivity. Furthermore, you are now equipped to confidently share your internet connection. Enjoy the freedom and flexibility. Embrace your newfound digital power. Go forth and connect!
Laptop WiFi Nightmare? This ONE Trick Gets You Blazing-Fast Speeds!Unlock Blazing-Fast WiFi Hotspot on Your Windows 8.1 Laptop NOW!
Hey tech enthusiasts! Ever felt like your Windows 8.1 laptop was a sluggish snail when you needed a speedy Wi-Fi hotspot? We've all been there, tethered to a slow connection, watching our data allowance tick down like a runaway clock. But hold on to your hats, because we're about to unlock a secret - a way to create a blazing-fast Wi-Fi hotspot on your trusty old Windows 8.1 machine, right now! Forget those frustrating lag times and embrace the freedom of a seamless internet experience. Ready? Let's dive in!
1. The Wi-Fi Hotspot Conundrum: Why is My Windows 8.1 So Slow?
Ah, the age-old question. Why does setting up a simple Wi-Fi hotspot feel like launching a rocket ship? Well, the truth is, Windows 8.1, while still a solid operating system, wasn’t exactly designed with the speed and efficiency of modern devices in mind. Think of it like this: your laptop is a powerful engine, but the road it's traveling on might be a bit bumpy. This bumpy road could be your drivers, your network adapter settings, or even simply the way Windows 8.1 handles shared internet connections. We'll iron out those bumps together.
2. Before We Begin: Prerequisites and Essentials
Before we rev up the engine, let's make sure we have everything we need.
- A Windows 8.1 Laptop: Obviously!
- An Active Internet Connection: This could be a wired Ethernet connection, a USB dongle with internet access, or a Wi-Fi network you are already connected to.
- Administrative Privileges: You'll need to be logged in as an administrator on your laptop to make the necessary changes.
- Patience and a Positive Attitude: Trust me, it's easier than it seems!
3. The Built-in Solution: Using the Hosted Network Feature
Windows 8.1 actually has a built-in feature for creating a Wi-Fi hotspot. It’s like having a hidden superpower that many people don’t know about! Here's how to access it:
- Open Command Prompt as Administrator: Search for "cmd" in your Windows search bar, right-click Command Prompt, and select "Run as administrator." This is crucial. Think of it as unlocking the hidden panel that controls everything.
- Enable the Hosted Network: Type the following command and press Enter:
netsh wlan set hostednetwork mode=allow ssid="YourHotspotName" key="YourPassword"(Replace "YourHotspotName" with your desired hotspot name – be creative! And "YourPassword" with a strong password. Aim for something memorable to you but not guessable by others.) - Start the Hosted Network: Type
netsh wlan start hostednetworkand press Enter. This activates your hotspot!
4. The Network Connection Dance: Sharing Your Internet
Now that you've created the hotspot, you need to share your existing internet connection. It's like telling the highway to allow other cars to use your lane.
- Open Network Connections: Press the Windows key + R, type
ncpa.cpl, and press Enter. This opens the Network Connections window. - Identify Your Internet Source: Locate the connection you're using for internet access (e.g., Ethernet, Wi-Fi).
- Share the Connection: Right-click on your internet connection and select "Properties."
- Go to the "Sharing" Tab: Check the box that says "Allow other network users to connect through this computer's Internet connection."
- Select Your Hosted Network: In the dropdown menu, choose your hosted network (likely named something like "Microsoft Hosted Network Virtual Adapter").
- Click "OK."
5. Troubleshooting Is Our Friend: Common Hiccups and Fixes
Sometimes, things don't go as planned. That’s okay! Let's tackle some common issues:
- Hotspot Not Starting: Double-check that you ran Command Prompt as an administrator and that you typed the commands correctly. Typos can be sneaky ninjas!
- No Internet Access on Connected Devices: Ensure you've properly shared the internet connection (steps in section 4). Also, make sure your laptop is connected to the internet itself. Think of it like supplying power to the house before you can use the electricity.
- Slow Speeds: This could be due to various factors: the strength of your initial internet connection, the distance between devices and your laptop, or interference from other devices. Try moving closer to your laptop or reducing the number of devices connected.
6. Driver Dilemmas: Keeping Your Network Adapters Up-to-Date
Outdated drivers are like having a clogged pipe – they restrict the flow. Regularly updating your network adapter drivers can drastically improve hotspot performance.
- Open Device Manager: Press Windows key + X and select "Device Manager."
- Expand "Network adapters."
- Right-click your Wi-Fi adapter: (the one you're using to create the hotspot) and select "Update driver."
- Choose "Search automatically for updated driver software."
7. Optimize, Optimize, Optimize: Tweaking Your Settings
Let's fine-tune your settings for peak performance.
- Power Options are Key: Make sure your laptop isn't set to turn off your Wi-Fi adapter to save power. Go to Control Panel > Hardware and Sound > Power Options > Change plan settings (for your current power plan) > Change advanced power settings. Expand "Wireless Adapter Settings" and set "On battery" and "Plugged in" to "Maximum Performance."
- Check Background Apps: Close any bandwidth-hungry applications running in the background that might be slowing things down.
8. Bandwidth Blitz: Understanding Data Consumption
Be mindful of data usage, especially if you're on a limited data plan. Streaming videos, downloading large files, and playing online games consume a lot of data. Think of it like a toll booth – you have to pay a "fee" for each vehicle (data) that passes through.
9. Security Savvy: Keeping Your Hotspot Secure
A strong password is your first line of defense. Consider using WPA2 or WPA3 encryption for optimal security. It's like installing a robust lock on your front door.
10. Speed Test Showdown: Proving Your Hotspot's Power
Once you've set up your hotspot, run a speed test on the connected devices to see how fast the connection is. Websites like Speedtest.net or Fast.com are great for this. It's like measuring how quickly your car can accelerate.
11. The Alternative Approach: Third-Party Software Options
While the built-in solution is fine, some third-party software offers more features and control. Programs like Connectify Hotspot or Virtual Router Manager can provide a user-friendly interface and advanced settings. Consider this like using a more sophisticated GPS to navigate.
12. The Case for Wired Connections: Hardwiring Your Laptop for Internet
For the absolute fastest speeds and most stable connection, especially if you're stationary, consider a wired Ethernet connection. This bypasses the wireless bottleneck and delivers a direct connection to your internet source, like having a direct pipeline.
13. Mobile Hotspot Alternatives: Exploring Other Gadgets
Your smartphone can also be a mobile hotspot! Check your phone settings.
14. Maximizing Your Range: Boosting Your Wi-Fi Signal
The distance between your laptop and the connected devices will impact the signal strength. Minimizing obstructions like walls and furniture can help, and consider experimenting with your laptop's position.
15. Beyond the Basics: Advanced Tweaks for the Tech-Savvy
For the more advanced users out there, explore the settings of your network adapter in Device Manager. You might be able to tweak things like the wireless mode and channel to optimize performance. It is like tuning the engine of your car and enhancing performance.
Closing Thoughts: Your Blazing-Fast Hotspot Awaits!
Congratulations! You've now armed yourself with the knowledge to create a blazing-fast Wi-Fi hotspot on your Windows 8.1 laptop. Remember to tweak those settings, troubleshoot any issues, and keep your drivers updated. Embrace the freedom of a reliable, speedy internet connection wherever you go. Now go forth and share the Wi-Fi love!
Frequently Asked Questions (FAQs):
1. Can I use this on any Windows 8.1 laptop?
Yes, as long as your laptop has a Wi-Fi adapter and you have an active internet connection, you should be able to create a hotspot on Windows 8.1.
2. Why does my hotspot keep disconnecting?
This could be due to several reasons, including weak Wi-Fi signal, outdated drivers, power-saving settings, or interference. Refer to the troubleshooting tips above.
3. Is it safe to share my internet connection through a hotspot?
Yes, as long as you use a strong password and encryption (WPA2 or WPA3), your connection is secure.
4. How many devices can connect to my hotspot?
The number of devices that can
WiFi Nightmare Solved? Download the PERFECT Laptop Driver NOW!How to create wifi hotspot in windows 7,windows 8,windows 8.1,windows 10
By 00 Editing How to create wifi hotspot in windows 7,windows 8,windows 8.1,windows 10 by 00 Editing
Cara Download Dan Instal Driver Wifi Laptop & Komputer Bisa Untuk Windows 7,8,10,11

By logistech ID Cara Download Dan Instal Driver Wifi Laptop & Komputer Bisa Untuk Windows 7,8,10,11 by logistech ID
Ubah Laptop Windows 8 menjadi HotSpot WiFi Cara

By TechEmpty Ubah Laptop Windows 8 menjadi HotSpot WiFi Cara by TechEmpty
Title: Membuat Hotspot WiFi di Windows 8.1, 8, 7 LaptopPC
Channel: ANDREW CRUZ
Membuat Hotspot WiFi di Windows 8.1, 8, 7 LaptopPC by ANDREW CRUZ
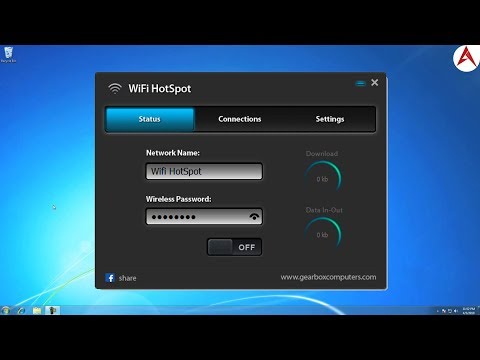
Change Wifi Settings
Unlock Blazing-Fast WiFi Hotspot on Your Windows 8.1 Laptop NOW!
Introduction: Your Gateway to Seamless Connectivity
We understand the frustration of slow or unreliable internet access. In today's hyper-connected world, a stable and speedy internet connection isn't just a luxury; it's a necessity. Whether you're a student collaborating on a project, a professional working remotely, or simply someone who enjoys streaming movies, a reliable WiFi hotspot is paramount. Windows 8.1, while perhaps not the newest operating system, still possesses powerful capabilities, and setting up a lightning-fast WiFi hotspot on your laptop is entirely achievable. This guide is meticulously crafted to help you transform your Windows 8.1 laptop into a high-performance WiFi hotspot, providing seamless connectivity for all your devices and ensuring a consistently superior online experience.
Understanding the Foundation: Network Adapters and Their Impact
Before diving into the setup process, let's briefly examine the core components that make a WiFi hotspot function: your network adapters. Your Windows 8.1 laptop has at least one, likely two, network adapters. One is your wired Ethernet connection (if applicable), and the other is your wireless adapter, the critical piece of hardware for creating a WiFi hotspot. The built-in wireless adapter dictates the speeds and capabilities of your hotspot. Ensure that your wireless network adapter supports the 802.11n or 802.11ac standard (or the newer 802.11ax standard, if supported by your hardware). These standards offer significantly faster speeds than older 802.11b/g standards. Review your laptop's specifications or device manager to identify your wireless adapter model. Knowing this will permit you to check its capabilities and ensure that you're utilizing the best features. Outdated drivers can often limit your adapter's potential, so always ensure your drivers are up-to-date. Visit the manufacturer's website to grab the latest drivers for your specific model; this simple step makes a huge difference.
The Built-In Solution: Setting Up a Hosted Network
Windows 8.1 offers a robust, built-in feature to create a WiFi hotspot: the hosted network. This method is straightforward and requires no third-party software. Here's how to set it up, step by step:
Open Command Prompt as Administrator: Initiate by right-clicking the Start button or by pressing the Windows key + X simultaneously. Select "Command Prompt (Admin)" or "Windows PowerShell (Admin)." This is absolutely essential; the commands we'll be employing require elevated privileges.
Enable the Hosted Network: In the Command Prompt, type the following command and press Enter:
netsh wlan set hostednetwork mode=allow ssid="YourHotspotName" key="YourPassword"Replace"YourHotspotName"with the desired name for your WiFi hotspot (SSID). Replace"YourPassword"with a strong, secure password (minimum of 8 characters). The password is case-sensitive, so be mindful of the characters. This command configures the hotspot's name and password.Start the Hosted Network: Execute this command in the Command Prompt and hit Enter; this one activates your hotspot.
netsh wlan start hostednetworkShare Your Internet Connection: Open the Network and Sharing Center. You can access it through the Control Panel or by right-clicking the network icon in your system tray and selecting "Open Network and Sharing Center." Next, click "Change adapter settings" on the left side. Right-click on the network adapter you're using to connect to the internet (e.g., your wired Ethernet connection or your primary WiFi connection). Select "Properties."
Enable Internet Connection Sharing: Go to the "Sharing" tab. Check the box that says "Allow other network users to connect through this computer's Internet connection." In the "Home networking connection" drop-down menu, select the name of your hosted network (the one you created earlier in Step 2). Click "OK."
Your WiFi hotspot is now active, and other devices should be able to connect using the SSID and password you provided.
Troubleshooting Common Issues: Addressing Connection Problems
Even with a perfect setup, issues can arise. Here's how to address some common problems:
- "The hosted network couldn't be started": This often occurs if your wireless adapter drivers are outdated or if the adapter itself doesn't support hosted network functionality. Update your drivers, as previously mentioned, and consult your laptop's specifications to ensure compatibility. Running the Command Prompt as an administrator is also crucial.
- Slow Speeds: If your speeds are slower than expected, first ensure that your laptop is close to the device connecting to your wireless hotspot. The distance will affect the speed. Then, check the congestion on your wireless channel. Consider switching to a less congested channel. Also, check if your internet connection is the limiting factor. Run a speed test on your laptop to determine your base internet speed.
- Devices Can't Connect: Double-check the SSID and password for any typos. Ensure that your hotspot is started (run the
netsh wlan show hostednetworkcommand to verify the status). Also, verify that your firewall isn't blocking connections. Temporarily disable your firewall to see if that resolves the issue. If it does, add an exception for the hosted network in your firewall settings. - Interference: Wireless signals are susceptible to interference from other devices, such as microwaves, Bluetooth devices, and other WiFi networks. Try positioning your laptop and connected devices away from these sources of interference. You may also try to adjust the channel your hotspot is using; this can be found in the wireless adapter settings.
Optimizing for Peak Performance: Advanced Configuration
For the most efficient and effective WiFi hotspot, consider these advanced optimization techniques:
- Channel Selection: Your wireless adapter broadcasts on a specific channel. If there are many other WiFi networks in your area, they could be competing for the same channels, leading to congestion and slower speeds. Use a WiFi analyzer app (available on smartphones and tablets) to identify the least congested channels in your area and manually change your adapter settings to use that channel. This can notably improve your speeds.
- Update Your Wireless Adapter Driver: Keep your wireless adapter's drivers updated. Visit your laptop manufacturer's website or the website of the wireless adapter manufacturer (e.g., Intel, Broadcom, or Atheros) to grab the most up-to-date drivers. Regular driver updates typically include performance enhancements and security patches.
- Consider a USB WiFi Adapter (Optional): If your laptop's built-in wireless adapter is older or doesn't perform well, you could consider investing in an external USB WiFi adapter. These adapters can often provide faster speeds and better range, depending on the model. Ensure your chosen adapter supports the 802.11ac or 802.11ax standard.
- Power Management Settings: Sometimes, power management settings can throttle your wireless adapter's performance to conserve battery life. Go to Device Manager, locate your wireless adapter, right-click on it, and select "Properties." Then, go to the "Power Management" tab. Uncheck the box labeled "Allow the computer to turn off this device to save power." This will keep the adapter running at full power when active.
- Security Protocol: Always utilize the most robust WiFi security protocol available. When configuring your hotspot, consider selecting WPA2-PSK (or WPA3-PSK, if supported by your adapter) for the best security. Avoid using WEP, which is significantly outdated and vulnerable. Also, be sure to create a strong, unique password for your Wi-Fi hotspot.
Third-Party Alternatives: Exploring Additional Options
Although the built-in Windows 8.1 hosted network is generally sufficient, you may want to explore third-party software.
- Virtual Router Plus: This free, open-source program provides a user-friendly interface for creating and managing a WiFi hotspot. It offers similar functionality to the built-in hosted network with a more straightforward interface.
- Connectify Hotspot: This paid application offers more advanced features, such as the ability to bridge your internet connection through both wired and wireless adapters, customize network settings, and monitor data usage.
Conclusion: Your Guide to Superior Wireless Connectivity
Creating a fast and stable WiFi hotspot on your Windows 8.1 laptop is far from a complex undertaking. By following this comprehensive guide, you can utilize the built-in hosted network feature, troubleshoot common problems, and implement advanced optimization techniques. We've detailed everything from enabling the hosted network to offering tips on boosting performance and exploring third-party alternatives. With the right setup and configuration, your Windows 8.1 laptop will become a powerful and reliable WiFi hotspot, permitting you to experience seamless internet access wherever you go. So, put these steps into action, ensure your drivers are updated, and experience the joy of blazing-fast WiFi connectivity right at your fingertips.
