diy wifi antenna for laptop

Title: Make Long range Wifi Antenna, Increase Wifi, Extend Wifi Range shorts short
Channel: Smrity Computer
Make Long range Wifi Antenna, Increase Wifi, Extend Wifi Range shorts short by Smrity Computer
diy wifi antenna for laptop, how to make wifi antenna for laptop, homemade wifi antenna for laptop, how to make a usb wifi antenna for laptop, diy wifi antenna
Laptop WiFi Nightmare? This DIY Antenna's a Game Changer!
Boost Your Laptop's WiFi: Ditch the Frustration, Embrace the DIY Magic!
Have you ever wrestled with a laptop's anemic WiFi signal? You are not alone. That frustrating buffering wheel, the constant disconnects – they're the bane of our modern existence, aren't they? But, believe it or not, a solution might be closer than you think. Indeed, it could be within reach. Forget pricey upgrades. Ignore complicated tech jargon. We're talking about a simple, yet stunningly effective, DIY antenna. Prepare to be amazed, because it's a game changer.
The Wireless Weakness: Why Your Laptop Suffers
Laptops, though portable marvels, often sport mediocre WiFi antennas. These antennas are often small because of space constraints. Consequently, they struggle to grab a strong signal, especially in areas with interference. The built-in antenna is a real disadvantage. Consequently, your connection suffers. Walls, other electronic devices, and the overall distance from your router all play a part. Actually, numerous elements contribute to its weakness. As a result, you end up battling a sluggish connection.
Unleashing the Potential: The DIY Antenna Revelation
Here's where the fun begins. Now, imagine enhancing that weak signal. Picture yourself effortlessly streaming without interruption. This DIY antenna promises precisely that. The beauty of this lies in its simplicity. Moreover, it's a project anyone can tackle. For this project, you'll need a few common items. Gather some readily available materials: a USB extension cable, a few bits of wire, and a bit of creativity. Therefore, prepare to optimize your WiFi experience.
Building Your Own WiFi Superhero: The Step-by-Step Guide
Let's build that stronger WiFi. First, strip the end of the USB extension cable. Expose the wires inside. Next, carefully identify the positive and negative wires within the cable. After that, take your wire segments. Attach them to the positive and negative leads, forming a simple antenna shape. Now, the key is to experiment. Try different lengths and configurations. You can tailor this for your needs. Also, think about the direction it faces.
Next, the crucial part: the connection. However, you’ll plug the USB cable into your laptop. The antenna then works to receive the signal. Afterwards, secure everything with tape or glue. Furthermore, you can use a small box. This helps to protect your DIY antenna. Position it strategically. Finally, test your newfound WiFi strength. You may see a dramatic increase.
Troubleshooting Your Way to Wireless Bliss
Sometimes, things don’t work instantly. If your DIY antenna isn't delivering instant performance, don't panic. Initially, double-check your connections. Ensure everything fits securely. Try adjusting the antenna's position. The optimal placement may vary. Also, experiment with different antenna shapes and sizes. Furthermore, remember to minimize obstructions. Then, re-check your router settings. Finally, reboot your devices. These are easy fixes.
Beyond the Basics: Optimizing for Ultimate Speed
You can also enhance your antenna's performance. Consider using a reflector. Doing so can boost your signal. An easy reflector could be a piece of aluminum foil. Simply place it behind your antenna. Therefore, the foil directs the frequencies. Moreover, try elevating your antenna. Place it as high as possible. Then, experiment with different angles. Ultimately, you want to maximize your signal. Always be ready to experiment.
The Rewards of a Strong WiFi Signal
Suddenly, think of the possibilities. Faster downloads, seamless streaming, and lag-free online gaming are now within reach. Furthermore, enjoy a more productive work experience. No more interruptions. Also, you gain more freedom. You can connect from anywhere in your home. Ultimately, a reliable WiFi connection gives you peace of mind. You're worth it.
Conclusion: Embrace the DIY WiFi Revolution
You’ve now entered the world of better WiFi. This DIY antenna project is not about complex tech. It is about taking control. It is about improving your digital life. So, embrace this project. Therefore, enjoy the satisfaction. You'll experience the true power of a strong, reliable WiFi connection. Prepare to say goodbye to those frustrating connection issues. Prepare to embrace the possibilities. Now go forth and amplify your WiFi!
Is Your Laptop SECRETLY Wifi-less? (Find Out NOW!)Laptop WiFi Nightmare? This DIY Antenna's a Game Changer!
Let's be honest, folks – we've all been there. That frustrating cycle of buffering videos, dropped video calls, and the agonizingly slow loading times that make you want to throw your laptop out the window. Yep, we're talking about the dreaded laptop WiFi nightmare. It's a modern-day plague, isn't it? Thankfully, we're not doomed to suffer in silence. We're diving deep into a solution today, a surprisingly simple one: a DIY antenna that can be a genuine game-changer. Ready to supercharge your connection? Let's get started!
1. The WiFi Woes: Why Is My Laptop Connection So Terrible?
Before we get our hands dirty with wires and tin foil (yes, really!), let's pinpoint the villain. Why is your laptop WiFi acting up? There are a few usual suspects:
- Distance from the Router: The further you are, the weaker the signal. Think of it like a shout; it loses volume over distance.
- Obstacles in the Way: Walls, furniture, and even your neighbor's microwave can interfere. Imagine trying to hear someone talking through a crowded stadium.
- Router Congestion: Too many devices connected to the same router can cause bottlenecks, slowing everything down. Like rush hour, but for data.
- Internal Antenna Weakness: Some laptop antennas are… well, let's just say they're not the strongest. They’re like tiny whispering devices trying to communicate across the digital ocean.
2. Understanding the Basics: How WiFi Antennas Actually Work
So, what is an antenna, anyway? In simple terms, an antenna is a device that sends and receives radio waves. Your router blasts out these invisible waves, and your laptop's antenna picks them up, translating them into the data you need to browse the internet. A good antenna is like a good ear – it picks up the faintest signals. A bad antenna? Well, it's like having one ear blocked with cotton.
3. The DIY Advantage: Why Build Your Own Antenna?
Why bother with DIY when you can just… buy a new router? Here's the beauty of a DIY antenna:
- Cost-Effective: It's ridiculously cheap. We're talking pennies compared to the price of a new router or a fancy external antenna.
- Easy to Make: No technical wizardry required! Honestly, if you can fold paper, you can probably build this.
- Improved Signal Strength: Even a basic DIY design can significantly boost your WiFi signal, especially if you're struggling with a weak connection.
- Customizable: You can tailor the antenna to your specific needs and environment. Need a signal boost in a specific direction? No problem!
4. The Materials You'll Need: Gathering Your WiFi Savior Ingredients
Here's what you'll need. Don’t worry, the supply list is super relaxed :
- A USB WiFi Adapter (essential!)
- Aluminum Foil (the star of the show!)
- Scissors or utility knife.
- Ruler (for precise measurements)
- Pencil or marker
- A plastic or cardboard base (a cereal box works great!)
- Tape (masking tape or electrical tape)
- Optional: Hot glue gun for added stability
- Optional: Cable Ties (to tidy things up)
5. The Construction: Step-by-Step Guide to Crafting Your Antenna
Alright, let's get to the fun part! This is the step-by-step guide, ensuring even the most technically challenged among us can build a WiFi-boosting antenna:
- Prepare the Base: Cut a piece of cardboard or plastic to whatever size you want your antenna. It's a foundation!
- Measure and Cut the Foil: This is where the magic happens. Measure and cut two rectangles of aluminum foil.
- Fold the Foil Rectangles: This creates the antenna surface.
- Attach the Foil to the Base: Tape or hot glue the foil rectangles to your cardboard or plastic base, ensuring the connection is in a secure manner.
- Connecting to the Adapter: Plug the USB WiFi adapter into the USB port on your laptop. Secure the antenna to the USB adapter. Alternatively, keep the antenna separate and position it to improve reception.
6. Optimizing Your Antenna: Placement, Placement, Placement!
Building the antenna is only half the battle. Where you place it is crucial:
- Elevate It: Get the antenna up off the floor. Higher ground often means better reception.
- Direction Matters: Experiment with the antenna's orientation. Point it towards your router for maximum signal.
- Eliminate Obstructions: Make sure the antenna has a clear line of sight to your router, clear of any walls, metal, or devices.
- Experiment: Wireless connection? Sometimes you must play around to ascertain what works best.
7. Troubleshooting: Common Problems and Solutions
Even with the best intentions, things can go wrong. Don't worry! Here are some common issues and how to fix them:
- Weak Signal Still: Reposition the antenna. Try multiple orientations and locations.
- Unstable connection: Ensure everything is attached well. Consider using a more powerful USB wifi adapter if the original one isn't up to par.
- No WiFi at all: Double-check the USB connection. Ensure the adapter is recognized by your laptop and that the WiFi is enabled.
8. Beyond the Basics: Advanced DIY Antenna Techniques
Once you've mastered the basic design, you can explore more advanced techniques:
- The Cantenna: A popular design using a tin can! (Watch out for sharp edges!)
- Yagi Antenna: More directional, ideal if you want to focus the signal.
- Reflectors: Adding a reflector behind the antenna can concentrate the signal.
9. The Magic of Trial and Error: Tweaking Your Antenna for Peak Performance
This isn’t a one-size-fits-all solution. Your environment is unique, so experiment! Try different shapes, sizes, and placements. It can be a bit of a scavenger hunt, but the payoff is worth it. Adjust, test, and repeat until you find the sweet spot.
10. Comparing DIY to Commercial Antennas: Is the Difference Noticeable?
How does a DIY antenna stack up against those fancy commercial ones? Honestly, for the cost, the difference is surprisingly small in most cases. Unless you need a super-powerful, long-range signal, a DIY solution can be just as effective.
11. Protecting Your Investment: Best Practices for Antenna Longevity
Your DIY antenna will last a while, but a few precautions will help:
- Keep it Dry: Electronics and water don't mix. Avoid moisture.
- Handle with Care: These are delicate devices, so treat them gently.
- Regular Checks: Inspect for damage or loose connections.
12. WiFi Security Considerations: Keeping Your Network Safe
Boosting your signal is great, but security is paramount. Protect your network!
- Use a Strong Password: Make it long, complex, and unique.
- Enable Encryption: WPA2 or WPA3 are the preferred security protocols.
- Keep Your Router Updated: Security vulnerabilities are often fixed in firmware updates.
13. Real-World Success Stories: How DIY Antennas Are Changing Lives (and Streaming Habits)
You might think this is some pie-in-the-sky technology, but people are experiencing real results.
- The Gamer's Savior: Lag-free gaming and no more dropped connections have many gamers hooked on DIY antennas.
- The Remote Worker's Friend: Enhanced reliability in the home office keeps productivity up and stress levels down.
- The Budget Booster: Saving money while still getting the service of a reliable network.
14. Beyond the Antenna: Other Ways to Improve Your WiFi
While your antenna will significantly improve your WiFi, consider these other tips:
- Router Placement: Position your router in a central location, away from obstacles.
- Channel Selection: Use a WiFi analyzer app to choose the least congested channel.
- Router Upgrades: If your router is old, consider an upgrade to the latest standards (like Wi-Fi 6 or Wi-Fi 6E) for increased speed and better performance.
15. Unleashing Your Inner Geek: Embrace the DIY Spirit
Building a DIY antenna is more than just getting a better WiFi signal; it’s about embracing the spirit of innovation. You're taking control of your technology and solving a problem with creativity and minimal expense. It’s empowering!
Closing Section
So, there you have it! We've gone from buffering screens to DIY triumphs. We hope this guide empowers you to conquer your laptop WiFi nightmares. Now go forth, build your antenna, and enjoy the speed and stability you deserve! Don't be afraid to experiment, and above all, have fun!
Frequently Asked Questions
1. Will this antenna work on my laptop?
Yes, as long as your laptop has a USB port, this antenna can be used. The instructions are simple and the materials easy to acquire.
**2. How much will it cost
WiFi Speed Killer: Turbocharge Your Laptop's Internet NOW!WIFI ANTENNAS WORTH USING pcrepair pc gamingpc pcgaming egirl gamerguy howtotech nvme

By GamerTechToronto WIFI ANTENNAS WORTH USING pcrepair pc gamingpc pcgaming egirl gamerguy howtotech nvme by GamerTechToronto
Laptop External Antenna Mod 61
By andrew mcneil Laptop External Antenna Mod 61 by andrew mcneil
How to Add an External Antenna to ESP32 & CYD DIY Wi-Fi Range Booster Solder a External Antenna

By Yellow Purple How to Add an External Antenna to ESP32 & CYD DIY Wi-Fi Range Booster Solder a External Antenna by Yellow Purple

Title: Do Wifi antennas do anything for your pc
Channel: Elijahs Lab
Do Wifi antennas do anything for your pc by Elijahs Lab
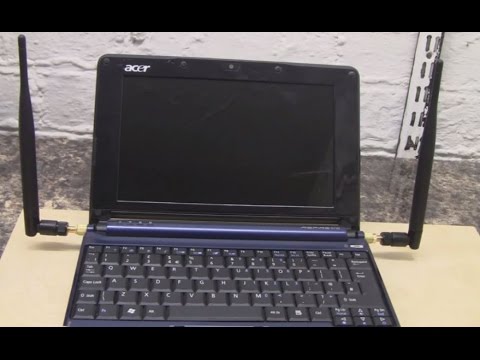
Laptop Working
Laptop WiFi Nightmare? This DIY Antenna's a Game Changer!
We’ve all been there. That frustrating moment when our laptop’s Wi-Fi decides to take an unscheduled vacation. The buffering wheel of doom spins endlessly, vital work grinds to a halt, and the digital world feels a million miles away. Living with a weak or intermittent Wi-Fi signal is a modern-day plague. But before you throw your laptop out the window or cave in to the crippling demands of a new router, consider a simple, cost-effective solution: a DIY Wi-Fi antenna. This isn't some esoteric black magic; it's a practical project that can dramatically improve your laptop’s Wi-Fi reception, often using materials you already have on hand. We're ready to dive into how this works and, more importantly, how it can turn that Wi-Fi nightmare into a dream.
Understanding the Wi-Fi Signal Struggle: Why Your Laptop Suffers
Before we construct anything, recognizing the enemy is crucial. Laptop Wi-Fi woes stem from several factors, all of which the DIY antenna seeks to address. First, the tiny antennas typically found within laptops are notoriously limited in their ability to capture weak signals. They are often small, poorly positioned, and easily obstructed by the laptop's own components or external materials. Moreover, distance and physical barriers, such as walls and furniture, degrade the Wi-Fi signal strength. Even the frequency your router uses (2.4 GHz or 5 GHz) can impact its range and ability to penetrate obstacles. The 2.4 GHz band, while offering broader coverage, is also more susceptible to interference. Finally, environmental factors like microwave ovens and cordless phones can further clutter the airwaves, worsening signal quality. A DIY antenna directly tackles these challenges by providing a larger, more optimized means of receiving the Wi-Fi signal, improving your laptop’s ability to connect and function optimally.
Gathering Your Arsenal: Essential Materials for DIY Antenna Construction
The beauty of this project lies in its simplicity. You likely have most of the necessary components already. This is what you need:
- A USB Wi-Fi Adapter: While your laptop has a built-in Wi-Fi card, we'll be using an external adapter. This provides a more accessible connection point for our antenna and, crucially, often boasts a more powerful receiver than the built-in card. Ensure the adapter is compatible with your operating system.
- A Soda Can (or Similar Conductive Material): An empty aluminum soda can, or a comparably sized container made of a conductive metal, serves as the primary reflector for our antenna. The can provides a parabolic shape that concentrates the incoming signal. The can needs to be clean and empty.
- A USB Extension Cable: This provides crucial flexibility, allowing you to position the antenna away from your laptop to improve reception and test different placements.
- Wire Cutters/Strippers: For preparing the wires and making neat, secure connections.
- Soldering Iron and Solder (Optional, but Highly Recommended): For a more robust and reliable connection, soldering is the best method.
- Hot Glue Gun or Electrical Tape: For securing the antenna components.
- A Wi-Fi Analyzer App (Smartphone or Laptop): This critical tool allows you to measure signal strength and fine-tune the antenna's positioning for optimal performance. Apps like "Wi-Fi Analyzer" (Android) or "NetSpot" (macOS) are excellent.
Step-by-Step Construction: Building Your Wi-Fi Reception Booster
Now, let's assemble our Wi-Fi saviour. Follow these steps carefully:
- Prepare the USB Wi-Fi Adapter: Disassemble your USB Wi-Fi adapter. Carefully take it apart to locate the antenna connector. This connector is where we will be attaching the antenna.
- Construct the Antenna (Soda Can Method):
- Cut the Can: Thoroughly wash and dry your soda can. Carefully, using wire cutters, cut a rectangular opening from the top of the can down towards the bottom creating a narrow opening. Cut the top off completely. Be cautious – the edges can be sharp.
- Optional: Create a Reflector Support: Though not strictly necessary, creating a small support structure within the can can help maintain its shape. This could be fashioned from cardboard or plastic, meticulously glued to the interior of the can.
- Connect the Antenna (Soldering Recommended):
- Prepare the Adapter Connection: Solder a wire to the internal antenna connector on your Wi-Fi adapter. Ensure a secure and clean contact.
- Connect the Wire to the Can: Run the wire from the Wi-Fi adapter connector to the inside of the can. Position the wire so that it faces the opening of the can, ensuring that the wire tip is located at the focus point of the parabolic reflector.
- Secure and Stabilize: Carefully apply hot glue or electrical tape to the connections to fortify and insulate them. Ensure all connections are secure and stable.
- Testing and Optimization: Plug the USB Wi-Fi adapter into the USB extension cable, and, subsequently, into your laptop. Employ your Wi-Fi analyzer app to measure the signal strength before and after deploying your antenna. Then, experiment with the antenna's positioning. Rotate, tilt, and move the can. Observe the signal strength readings in real-time. The goal is to locate the antenna in a position that yields the highest signal strength from your Wi-Fi router.
Fine-Tuning for Peak Performance: Optimizing Antenna Placement and Alignment
The ultimate effectiveness of your DIY antenna hinges on careful positioning. The following points are critical:
- Directional Focus: Consider your router's location. The can antenna should point towards the router. It acts as a parabolic reflector, focusing the signal. Experiment with different angles.
- Elevation: Raise the antenna off the floor. Signals can reflect off floors and walls, so slightly elevating the antenna from the ground can improve performance.
- Obstruction Avoidance: Keep the antenna clear of any obstructions, such as metal objects, walls, or appliances, particularly microwave ovens that could interfere with signal transmission. Even minor obstructions can degrade performance.
- The Goldilocks Zone: Your positioning will require experimentation. Using your Wi-Fi analyzer, slowly move the antenna, noting the signal strength. Find the “sweet spot” where the signal is at its strongest.
- Iteration is Key: Don't be afraid to make adjustments and try different configurations. Signal strength can vary dramatically depending on the environment, the router, and the specific laptop used.
Troubleshooting Common Problems and Refining Your Results
Even with careful construction, you might encounter issues. Here’s a quick troubleshooting guide:
- No Signal: Double-check your connections. Ensure the antenna wire is firmly connected to both the adapter and the can. Verify your USB Wi-Fi adapter is correctly installed and recognized by your operating system.
- Weak Signal: This often suggests alignment issues. Try repositioning the antenna. Ensure there are no obstructions between the antenna and the router. Also make sure the adapter has a good connection.
- Interference: If you suspect interference, experiment with the placement of the antenna away from appliances and sources of electromagnetic emissions.
- Soldering Issues: If you are not comfortable soldering, you may consider carefully wrapping the wire around the connector and taping it securely.
- Can Shape Distortion: If the can gets dented or misshapen, the antenna's performance may be reduced. You can use the smartphone app to measure the signal and get your best possible settings.
Beyond the Basics: Expanding Your Wi-Fi Horizons
Once you master this DIY project, you can explore more advanced techniques. Consider these possibilities:
- Using Multiple Antennas: For a truly advanced setup, explore building multiple can antennas and connecting them to your laptop using a more robust multi-antenna system. This can significantly boost signal strength and reliability over an extended range.
- Experimenting with Different Metals and Shapes: While the soda can is a convenient option, you can experiment with different types of metal or other conductive materials to construct the reflector. Consider varying the shape to fine-tune the antenna’s characteristics.
- Advanced Soldering Techniques: Improving your soldering skills will help build more robust and reliable antennas. Research how to solder to small components.
- Understanding Wi-Fi Basics: Deepen your knowledge of Wi-Fi frequencies and signal propagation. This will allow you to make informed decisions about antenna design, placement, and optimization.
Conclusion: Reclaiming Your Digital Life
By taking the time to build and optimize your DIY Wi-Fi antenna, you can transform your laptop’s wireless capability. This project is more than just a helpful solution; it is a statement. It shows that with the right knowledge and readily available materials, you can overcome frustrating technological limitations. Say goodbye to buffering woes and intermittent connections. Embrace the improved connectivity. The power to reclaim your digital life is quite literally, in your hands. So, get building, get testing, and prepare to say hello to a faster, more reliable Wi-Fi experience.
