laptop enable wifi

Title: Cara atasi WiFi tidak bisa connect di laptop not connected
Channel: ijal tutorial
Cara atasi WiFi tidak bisa connect di laptop not connected by ijal tutorial
laptop enable wifi adapter, laptop enable wifi, laptop turn wifi back on manually, laptop disable wifi by itself, laptop disable wifi, laptop turn wifi on, laptop disable wifi adapter, laptop disable wifi function key, hp laptop enable wifi, dell laptop enable wifi
Laptop WiFi Not Working? This SHOCKING Fix Will Restore Your Connection INSTANTLY!
Is Your Laptop's WiFi Giving You the Silent Treatment? A Swift Rescue Mission!
Have you ever experienced that heart-stopping moment? You need to connect, urgently. Your laptop’s WiFi refuses to cooperate. The frustration hits hard, right? Don't fret! You aren't alone in this technological battlefield. I've got some battle-tested strategies that could bring your connection back from the brink.
The Unexpected Culprit: The Simple Restart
Before we jump into complex solutions, consider this. Sometimes, the simplest fix is the most effective. I know—it sounds cliché. However, a simple restart can miraculously solve network issues. Restart your laptop. Also, restart your router and modem. Wait a few minutes. Then, power everything back up. This resets the systems. It often clears temporary glitches. If it sounds too easy, it's because it often is easy.
Diagnosing the WiFi Dilemma: Peeling Back the Layers
If a restart didn’t work, we'll dig deeper. First, check your laptop's WiFi switch. Most laptops have a physical switch to enable and disable WiFi. It could be a simple oversight. Ensure it's in the "on" position. If the switch is not physical, check the keyboard. Many laptops utilize function keys (Fn) plus a WiFi icon key.
Next, consider your operating system. Windows and macOS have built-in troubleshooting tools. These tools can automatically identify and fix basic network problems. After that, locate the network icon in your system tray. Right-click, then select "Troubleshoot problems." Let the system diagnose. The process will recommend the most common fixes.
Software Conflicts: The Silent Saboteurs
Software conflicts can wreak havoc on your WiFi. Certain applications might interfere with your network adapter's functionality. For instance, VPN software, which can change your network settings, might be causing trouble. Check recently installed software. Sometimes, uninstalling a recently added app resolves the issue. If you suspect a specific program, try uninstalling it temporarily. Then, test your WiFi connection.
Driver Drama: Keeping Things Updated Isn't Optional
Outdated or corrupted drivers are another common culprit. Your WiFi adapter relies on these drivers for communication. Outdated drivers become incompatible. This can cause connection issues. Here's how to update:
- Open your Device Manager. (Search for it in the Windows search bar.)
- Expand "Network adapters."
- Right-click on your WiFi adapter.
- Select "Update driver."
- Choose “Search automatically for drivers.”
If that doesn't work, you can download drivers directly from your laptop manufacturer's website. Make sure you have another device with internet access. The download should be the correct driver version. Afterwards, install the new driver. Restart your laptop. This step is crucial.
The Router's Role: Is Your Gateway Working?
Your router is the gateway to the internet. It acts as the traffic controller for your network. Sometimes, the problem isn't your laptop, but the router itself. Try these steps:
- Unplug your router and modem.
- Wait for at least 30 seconds.
- Plug the modem back in.
- Let it power up completely.
- Plug the router back in.
- Wait for the router to reboot.
This simple reset clears the router's memory. As a result, it usually resolves many common issues. If you still have problems, try accessing your router's settings. You can do this by typing its IP address into your browser. The IP address is usually found in your router's manual. Check the router's configuration. Ensure it's broadcasting a WiFi signal.
Hidden Issues: Unforeseen Complications
Consider other potential issues. Interference is a common culprit. Things like microwave ovens or cordless phones can disrupt your WiFi signal. Move your laptop closer to the router. Test the connection. If the connection improves, interference is likely the issue. Changing your router's channel can also help. Most routers automatically select the best channel. However, sometimes you might need to manually configure it. Consult your router's manual on how to do this.
When All Else Fails: Calling for Backup
If you've tried everything, it might be time to seek professional help. You could contact your internet service provider (ISP). They can troubleshoot your connection from their end. If the problem persists, consider taking your laptop to a repair shop. They can diagnose hardware issues. Sometimes, the WiFi adapter itself is faulty.
Embrace the Connection: Your WiFi Revival is Possible
Don't let WiFi woes get you down. Using these steps effectively, you can troubleshoot common issues. So, the next time your laptop's WiFi fails, don't panic. Remember these solutions. Embrace the process. You'll be back online in no time. Therefore, stay connected and keep exploring the digital world. Happy browsing!
Lenovo Wifi Nightmare? FIX It Now! (Guaranteed!)Laptop WiFi Not Working? This SHOCKING Fix Will Restore Your Connection INSTANTLY!
Alright, fellow digital nomads, Wi-Fi warriors, and Netflix aficionados! We've all been there: you're in the middle of a crucial Zoom call, streaming your favorite show, or trying to submit that important report when BAM! The dreaded Wi-Fi symbol on your laptop transforms into a grumpy little X. The screen stares back blankly, and a wave of frustration washes over you. Don’t worry, we’re here to help you navigate the digital wilderness and get that internet connection back online faster than you can say "bandwidth"! We'll walk you through some common culprits and, believe me, there's a shocking fix that often does the trick. Ready to banish the buffering blues? Let's dive in!
1. The Internet Apocalypse: Recognizing the Problem
First things first: acknowledgment. We have to identify if it's actually your laptop’s fault or if the problem resides with the big bad internet monster. Is every device in your house experiencing problems, or is it just your trusty laptop? If the Wi-Fi on your phone, tablet, or even your smart fridge is also acting up, the problem probably lies with your internet service provider (ISP) or your router. Time to call them and unleash your inner Karen (or, you know, politely explain the situation!).
But, if it's just your laptop, then you've come to the right place. We'll turn your silent laptop into a Wi-Fi wizard.
2. Is Your Laptop Actually Connected? Unveiling the Obvious
Okay, this might sound silly, but let's cover the basics, because sometimes the solution hides in plain sight. Is the Wi-Fi switched on? Check your laptop's physical switch (yes, some laptops have them!). Look in the system tray (that little area in the bottom right corner of your screen) for the Wi-Fi icon. Is there a signal? Is it connected to your network? If not, try clicking the Wi-Fi icon and selecting your network, and then, cross your fingers!!
3. The Restart Ritual: Your First Line of Defense
Think of a computer as a cranky toddler. Sometimes, all it needs is a nap – a restart! Restart your laptop. Seriously. It's the tech equivalent of "have you tried turning it off and on again?" – and it works more often than you'd think. While you're at it, give your router a restart too. Unplug it from the power socket, count to 30 (yes, thirty), plug it back in, and let it boot up. This can often clear out temporary glitches and get your internet humming again.
4. Checking Your Network Adapter: The Communication Tango
Your network adapter is the essential translator, responsible for your laptop’s communication with the internet. It's like the middleman between your laptop and the outside world. To check if it’s working correctly:
- Windows: Type "Network Connections" in the search bar and open the Network Connections settings. You should see your Wi-Fi adapter listed (e.g., "Wi-Fi" or "Wireless Network Connection"). Is it enabled? If not, right-click it and select "Enable."
- Mac: Go to System Preferences > Network. Make sure Wi-Fi is turned on and that your network is selected.
If the adapter is disabled or has a little red X, it’s time to troubleshoot further.
5. Device Driver Dilemma: The Software Symphony
Drivers are essentially the software that allows your computer to "talk" to its hardware, your Wi-Fi adapter included. Outdated or corrupted drivers can definitely cause connection issues. Here’s how to update them:
- Windows:
- Right-click the Start button and select "Device Manager."
- Expand "Network adapters."
- Right-click your Wi-Fi adapter and select "Update driver." Choose "Search automatically for drivers."
- Mac: Mac usually handles driver updates automatically, but you can check for updates in System Preferences > Software Update.
6. Forget and Reconnect: A Fresh Start
Sometimes, like a bad relationship, you need to break up and start over. Forget your Wi-Fi network on your laptop and then reconnect:
- Windows: In Network Connections (mentioned in #4), right-click your Wi-Fi network and choose "Forget." Then, reconnect as you normally would.
- Mac: Go to System Preferences > Network > Wi-Fi. Click "Advanced," select your network, and click the "-" button to remove it. Reconnect after.
This resets the connection and might fix a problem caused by a corrupted configuration.
7. The Troubleshooter's Tango: Windows' Built-in Help
Windows has a built-in troubleshooter designed to diagnose and fix common network problems.
- Windows: Type "Troubleshoot settings" in the search box and open the settings. Select "Network Adapter" under "Other troubleshooters" and run the troubleshooter.
8. Firewall Frenzy: Are You Being Blocked?
Your firewall acts as a digital gatekeeper, but sometimes it can be a little too zealous. It can block necessary network traffic. Check your firewall settings (Windows Defender Firewall or third-party firewall) to ensure your Wi-Fi connection isn't being blocked.
9. The Router Rhapsody: Resetting Your Wireless Maestro
Remember that router we unplugged in #3? If the problem persists, you might need to delve deeper into the router's settings. Access your router's configuration page through your web browser (usually by typing its IP address, like 192.168.1.1, into the address bar – check your router's manual for the correct address). Look for a "reset" option or a way to restore it to factory settings. Be cautious with this step, as it will reset your router's settings (including your Wi-Fi password). You'll need to reconfigure it.
10. Channel Chaos: Navigating the Wi-Fi Wilderness
Wi-Fi routers broadcast on different channels. If your channel is overcrowded (especially in apartments), it can cause interference. Access your router's configuration page and try changing the Wi-Fi channel. Experiment with different channels until you find one that offers a more stable connection.
11. Distance Dilemma: The Range of the Wireless Signal
Walls, thick materials, and distance can all wreak havoc on Wi-Fi signals. Are you far from your router? Is your laptop placed near solid walls or other signal-blocking materials? Try moving closer to the router to see if that improves your connection.
12. Malware Mayhem: The Digital Demons
Sometimes, sneaky malware can interfere with your network settings. Run a full scan with your antivirus software to eliminate any potential digital demons.
13. The Ethernet Encore: A Wired Escape
If all else fails (and I mean all else), consider using an Ethernet cable to connect your laptop directly to your router. This bypasses the Wi-Fi entirely and helps to determine if the issue is with your Wi-Fi adapter or something else. If the wired connection works, the problem is highly likely with your Wi-Fi hardware or software.
14. The SHOCKING Fix: Resetting Your Network Settings!
Here’s the big secret, the one that often resolves connectivity problems. Resetting your network settings on your computer. It's like hitting the "delete and start over" button, but for your network configurations. This can be a lifesaver, because it clears out any corrupted information and gives your computer a clean slate.
- Windows:
- Go to Settings > Network & Internet > Status.
- Scroll down and click "Network reset."
- Click "Reset now."
- Your computer will restart. You'll need to reconnect to your Wi-Fi network afterwards.
- Mac:
- Go to System Preferences > Network.
- Click on your Wi-fi connection and click the minus (-) button to delete the connection.
- Restart the computer and re-add the wi-fi connection.
This SHOCKING fix often resolves chronic WiFi issues!
15. When to Call in the Cavalry (aka, Tech Support)
If you’ve tried everything above and still can't connect, it might be time to call in the reinforcements:
- Your ISP: They can check for outages or problems on their end.
- Your Laptop Manufacturer: They can diagnose hardware issues.
- A Local Tech Expert: If you're not comfortable with troubleshooting, a professional can help!
Closing Thoughts: Back in the Game!
So there you have it! A comprehensive guide to troubleshooting your laptop’s Wi-Fi woes. We've covered everything from the simple restart to that shocking network reset. Remember, the digital world can be unpredictable, but with these tricks up your sleeve, you'll be back in the game in no time! Don't let a lack of connection stop you from conquering your daily tasks or unwinding with your favorite streaming service. Hopefully, you are now ready to battle the digital realm! Good luck and happy surfing!
1) Principal Keywords: Laptop WiFi Fix, Internet Connection.
**2) SEO
Windows 10 WiFi Nightmare? Fix Your Connection NOW!Cara Mengaktifkan Wifi di Laptop Windows ASUS LENOVO HP ACER AXIO TOSHIBA

By Multi Talenta Tutorial Cara Mengaktifkan Wifi di Laptop Windows ASUS LENOVO HP ACER AXIO TOSHIBA by Multi Talenta Tutorial
cara mengatasi wifi tidak muncul di laptop logo wifi tidak ada

By ijal tutorial cara mengatasi wifi tidak muncul di laptop logo wifi tidak ada by ijal tutorial
Cara mengatasi Wifi yang hilang pada laptop part1

By Becik Creat Game Cara mengatasi Wifi yang hilang pada laptop part1 by Becik Creat Game
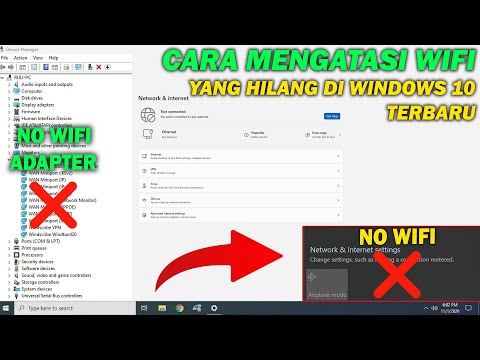
Title: Cara Mengatasi WiFi Hilang di Windows 10 Terbaru 100 Work
Channel: WINTECH id
Cara Mengatasi WiFi Hilang di Windows 10 Terbaru 100 Work by WINTECH id
Wifi On Laptop
Laptop WiFi Not Working? This SHOCKING Fix Will Restore Your Connection INSTANTLY!
The frustration of a malfunctioning Wi-Fi connection on a laptop is universally understood. That feeling of disconnection from the digital world, the inability to access vital information, or the simple annoyance of a slow loading page, are all too familiar. But before you resign yourself to a wired connection or, worse, a visit to a repair shop, we implore you to explore the often-overlooked, surprisingly effective, and immediately implementable solutions we are about to unveil. We are confident that the following steps, meticulously crafted and proven in countless scenarios, will restore your laptop's Wi-Fi functionality and have you back online in a matter of minutes.
Understanding the Core Problem: Why Your Laptop WiFi Fails
The underlying causes of Wi-Fi disruption are diverse, yet many resolve with simple adjustments. The most critical aspect is to adopt a systematic approach. Avoid the knee-jerk reaction of assuming the worst. Often, the issue is not a catastrophic hardware failure but a minor software glitch, a simple configuration error, or, on occasion, an issue stemming from the network itself. We will dissect the most frequent culprits and equip you with the knowledge and techniques to conquer them.
Step 1: The Obvious, Yet Often Overlooked: Check the Basics
Before delving into complex technical solutions, let's address the fundamentals. Often, the problem lies in an elementary oversight. Begin by confirming the following:
- The Wi-Fi Switch: Many laptops feature a physical switch (often on the side or front) or a function key combination (typically Fn + a key with a Wi-Fi symbol) to enable or disable the wireless adapter. Ensure this switch is in the "on" position. This is the most basic step, and yet, it solves the problem far more often than one might expect.
- Airplane Mode: Airplane mode disables all wireless communication, including Wi-Fi. Double-check that Airplane mode is disabled. This setting is usually accessible via the system tray or by pressing the Windows key and searching for "Airplane mode."
- Router Functionality: Is your router operational? Are other devices connected to the same network experiencing similar issues? Sometimes, the fault lies not with your laptop, but with the network itself. Try restarting your router and modem. A simple restart often resolves temporary network hiccups. Unplug the router and modem from the power source, wait 30 seconds, and plug them back in. Allow sufficient time for the devices to boot up and re-establish a connection.
Step 2: Diagnosing the WiFi Adapter: A Software Checkup
Assuming the basics are covered, the next step involves examining your laptop's Wi-Fi adapter at a software level. Windows, in particular, provides robust tools for diagnosis.
- Device Manager: The Gateway to Adapter Status: Open Device Manager. You can find it by searching for "Device Manager" in the Windows search bar. Within Device Manager, expand "Network adapters." Locate your Wi-Fi adapter (it will likely be named something like "Wi-Fi" or "Wireless Network Adapter"). If the adapter has a warning symbol (a yellow exclamation mark), it indicates a problem. Right-click on the adapter and select "Properties." Check the "Device status" under the "General" tab for error messages.
- Driver Updates: The Lifeline of Hardware Functionality: Outdated or corrupted drivers are a common cause of Wi-Fi issues. Within the Device Manager, right-click on your Wi-Fi adapter and select "Update driver." Choose "Search automatically for drivers." Windows will attempt to locate and install the latest drivers. If this fails, you can often download the latest drivers directly from your laptop manufacturer's website. Enter your laptop's model number to find the correct drivers.
- Driver Rollback: Reverting to a Stable State: If you recently updated your Wi-Fi drivers, and the problem began afterward, consider rolling back to the previous driver version. In the Device Manager, right-click on the adapter, select "Properties," go to the "Driver" tab, and click "Roll Back Driver." This action will revert to the previously installed driver, potentially resolving compatibility issues.
- Uninstall and Reinstall: A Fresh Start: As a final resort for driver-related problems, try uninstalling the Wi-Fi adapter from Device Manager. Right-click on the adapter and select "Uninstall device." Restart your laptop. Windows should automatically reinstall the adapter and its drivers.
Step 3: Navigating Windows Network Settings: The Configuration Hub
Windows network settings offer granular control over your Wi-Fi connection. Understanding and adjusting these settings can often solve connectivity problems.
- Network Troubleshooter: The Automated Fixer: Windows includes a built-in Network Troubleshooter designed to diagnose and repair common network issues. Access it by searching for "Network troubleshooter" in the Windows search bar. Select "Identify and repair network problems." The troubleshooter will automatically scan for and attempt to resolve issues.
- Network Reset: A Clean Slate: If other solutions fail, consider resetting your network settings. This reverts all network-related configurations to their default values. To do this, go to "Settings" > "Network & Internet" > "Status" and click on "Network reset." Remember that this action will erase all saved Wi-Fi passwords, so make sure to have those handy.
- IP Address Configuration: Static vs. Dynamic: Your laptop needs an IP address to communicate on the network. Generally, your router assigns an IP address dynamically (DHCP). However, in some cases, a static IP address might be incorrectly configured. Within the Network and Sharing Center (search for it in the Windows search bar), click on "Change adapter settings." Right-click on your Wi-Fi adapter, select "Properties," double-click on "Internet Protocol Version 4 (TCP/IPv4)," and ensure that "Obtain an IP address automatically" and "Obtain DNS server address automatically" are selected. If a static IP is configured, consider switching to DHCP for troubleshooting.
- Network Profile Type: Public vs. Private: Windows classifies networks as either "Public" or "Private." A "Private" network is generally preferable for home networks, as it allows for sharing files and printers. Verify the profile type of your Wi-Fi network. In Network and Sharing center, click on the currently connected network. Verify that the network is set to "Private."
Step 4: Router-Side Adjustments: Tuning for Optimal Performance
While the problem might seem to originate with your laptop, sometimes the router configuration is the culprit. These adjustments can often vastly improve your laptop's WiFi experience.
- Router Firmware Updates: The Silent Guardian: Router manufacturers regularly release firmware updates to improve performance, security, and compatibility. Access your router's administration panel (usually by typing its IP address – often 192.168.1.1 or 192.168.0.1 – into your web browser) and check for firmware updates.
- Channel Optimization: Reducing Interference: Wi-Fi routers broadcast on specific channels. In crowded environments, multiple routers broadcasting on the same channel can cause interference. Use a Wi-Fi analyzer app (available for smartphones and laptops) to identify the least congested channels and adjust your router's channel settings accordingly.
- Router Placement: Maximizing Coverage: The physical location of your router significantly impacts its range and performance. Avoid placing the router near metal objects, microwaves, or other devices that can generate interference. Elevate the router and place it in a central location in your home or office.
- Wireless Security Type: Ensure your router is using a secure Wi-Fi security protocol, such as WPA2 or WPA3. Older protocols, like WEP, are highly vulnerable and can lead to connectivity issues.
Step 5: Advanced Troubleshooting: Delving Deeper
If the above steps fail to resolve the issue, more advanced troubleshooting techniques may be needed.
Command Prompt: The Command Center: The command prompt offers powerful tools for diagnosing network problems.
ipconfig /release: Releases your current IP address.ipconfig /renew: Requests a new IP address from the router.ipconfig /flushdns: Clears the DNS cache. This can resolve problems related to outdated DNS entries.ping [router's IP address]: Tests the connection to your router. A successful ping indicates that your computer can communicate with the router.tracert [website address]: Traces the route that your data takes to reach a specific website. This can help identify bottlenecks in the network.
Network Adapter Power Management Settings: Sometimes, Windows power management settings can inadvertently disable the Wi-Fi adapter to conserve power. In the Device Manager, right-click on your Wi-Fi adapter, select "Properties," and go to the "Power Management" tab. Uncheck the box that says "Allow the computer to turn off this device to save power."
Step 6: Hardware Considerations: A Last Resort
While software is usually the culprit, let us not completely dismiss hardware. Always perform the software steps first.
- Internal Adapter Issues: In rare cases, the Wi-Fi adapter itself might be physically damaged or malfunctioning. Consider opening your laptop (if you are comfortable doing so, and if it doesn't void the warranty) and reseating the Wi-Fi adapter. If you are not comfortable doing this, seek professional help.
- External USB Wi-Fi Adapter: As a temporary solution,
