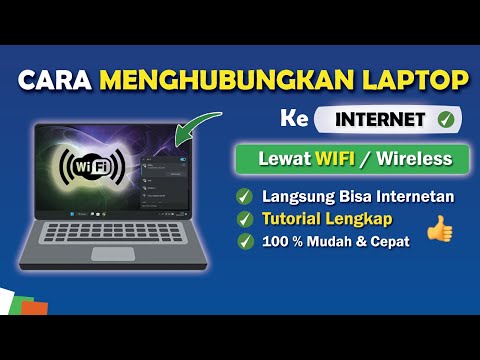
instal wifi pada laptop

Title: Cara atasi WiFi tidak bisa connect di laptop not connected
Channel: ijal tutorial
Cara atasi WiFi tidak bisa connect di laptop not connected by ijal tutorial
instal wifi di laptop, cara instal wifi di laptop windows 10, cara instal wifi di laptop windows 7, cara instal wifi di laptop windows 11
Install WiFi on Your Laptop: The SHOCKINGLY Easy Guide!
Get Connected: Your Laptop's WiFi Adventure
Right, so you're itching to get your laptop online, huh? Forget those frustrating tech hurdles because, honestly, it doesn't have to be a nightmare. We’re going to break down how to install WiFi on your laptop. It's probably much simpler than you think! Prepare to be amazed.
Unveiling the WiFi Secret: A Quick Look
Let's be clear. Your laptop most likely already has WiFi capability. That's a crucial first step. Think of it like this: your laptop is the eager actor. WiFi is its script. The internet is the stage. You need to make sure everything's in place, so the show can begin. Therefore, the initial focus is on connecting your laptop.
Step 1: The Discovery - Finding the Wireless Network Icon
First things first. Look at the bottom right of your screen. See that little icon that looks like a radio tower or some curved lines? That's your WiFi indicator. If it's there, give yourself a high-five. That's fantastic news, indeed! However, if it's not there, don't panic. It might be hidden or disabled. We'll get to that momentarily.
Step 2: Enabling the Connection - Turning WiFi "On"
Now, let's assume your WiFi icon is visible. Click on it. Doing so will reveal a list of available wireless networks. See your home network's name listed? That's what matters. However, if you don't recognize any, move on to troubleshooting.
Step 3: The Password Protection - Entering Your Network Key
Select your network. It’s the same one you use on your phone or tablet. You'll likely be prompted for a password. Enter your WiFi password carefully. Make sure you double-check it. Capitalization matters! Thus, precision is key at that moment.
Step 4: The Connection Dance - What if It Doesn't Connect?
Okay, so you entered the password. But still… nothing? No worries! This happens. Firstly, verify the password is correct. Secondly, restart your laptop. Sometimes a simple reboot works wonders. If that still doesn't solve it, check your router. Is it functioning?
Troubleshooting Time: When Things Go Wrong
Let's face it; technology can be temperamental. Subsequently, a few things might be preventing your laptop from connecting.
- Disabled WiFi: Is your WiFi adapter turned on? Check your laptop's function keys. There's often a key with a wireless icon to enable or disable WiFi.
- Driver Issues: Outdated drivers can be a problem. You can update your drivers through your laptop's settings.
- Router Problems: Is your router broadcasting the WiFi signal? Ensure it's turned on and properly connected to your internet source.
- Firewall Interference: Sometimes, firewalls block connections. Temporarily disabling your firewall can help determine if it's the culprit.
Diving Deeper: Advanced Tips and Tricks
We can dig even deeper!
- Airplane Mode: Make sure Airplane mode isn't enabled! This disables all wireless connections.
- Network Troubleshooter: Windows and macOS have built-in network troubleshooters. They can often identify and fix connection problems.
- Manual Configuration: For advanced users, you can manually configure your network settings. This is usually unnecessary for beginners.
The Unsung Hero: Why WiFi Matters
WiFi connects you to the world. Therefore, it’s become an essential part of modern life. Work. Entertainment. Communication. It all relies on a solid WiFi connection. So, getting your laptop connected unlocks a world of possibilities.
Beyond the Basics: Expanding Your Wireless Horizons
Now that you're online, consider enhancing your WiFi experience. Invest in a better router. Position it for optimal signal strength. This improves your connection. Moreover, consider a WiFi extender. They can help boost the signal in those far-off corners of your home. Thus, your experience will be better.
Final Thoughts: You Got This!
Installing WiFi on your laptop is not some daunting task. It truly doesn't have to be. Therefore, follow these steps, troubleshoot effectively, and you'll be connected in no time. Embrace the digital world! Furthermore, start enjoying all the benefits that come with it. Go forth and connect! And remember, if you get stuck, there are plenty of helpful resources available online. You can do this!
Download Compaq Laptop WiFi Driver: Get Online INSTANTLY!Install WiFi on Your Laptop: The SHOCKINGLY Easy Guide!
Hey fellow tech enthusiasts! Let's be honest, we've all been there. You're itching to binge-watch that new show, answer a vital email, or just browse the web, and then – BAM! – no Wi-Fi. Frustration levels soar higher than a drone on a windy day! But fear not, my friends, because getting your laptop connected to the glorious world of wireless internet is, surprisingly, not rocket science. In fact, it's shockingly easy. We're going to demystify the process, breaking it down into bite-sized pieces that even your grandma could understand (with a little help, of course!).
1. Understanding the Wi-Fi Galaxy: What's Really Going On?
Before we dive headfirst into the installation process, let's take a quick tour of the Wi-Fi universe. Think of your laptop as a tiny spaceship and the Wi-Fi router as mission control. The router, that boxy thing usually buzzing away in your living room, broadcasts a wireless signal (your Wi-Fi) that your laptop, if equipped with a Wi-Fi adapter, can pick up. It's like magic, but based on radio waves instead of rabbits pulled from hats!
Different laptops have different ways of connecting to Wi-Fi, but we’ll cover the most common scenarios. This guide will help you navigate the labyrinth of wireless connectivity, ensuring you're back online in no time.
2. Does Your Laptop Already Speak Wi-Fi? Checking the Basics
This is crucial. Before you start fiddling with settings, let's make sure your laptop even has the ability to connect to Wi-Fi. It's like trying to drive a car without an engine – pointless!
- Look for the Wi-Fi Icon: Most laptops have a dedicated Wi-Fi icon in the system tray (down near the clock). It usually looks like a curved signal bar. If you see this, you're off to a good start!
- Check the Device Manager (Windows): Type "Device Manager" in the Windows search bar (usually at the bottom left). Expand the "Network adapters" section. Look for something that says "Wireless Network Adapter" or something similar. If you see it, your laptop should be Wi-Fi ready. If not, you may need a Wi-Fi adapter (more on that later).
- Check Your Laptop's Specifications: If you're still unsure, Google your laptop's model number and "specs" or "specifications." This should tell you if it has built-in Wi-Fi.
3. The Great Wi-Fi Switch: Turning On Your Adapter
If you've confirmed your laptop has a Wi-Fi adapter, the next step is usually turning it on. Sometimes this is automatic, but sometimes you need to give it a little nudge.
- Physical Switch (Rare, but Possible): Some older laptops have a physical switch on the side or front. Flick it! It might have a light indicating its status.
- Function Keys: Often, there's a function key (usually a key labeled "Fn") combined with another key with a Wi-Fi icon (looks like those curved signal bars). Press them together (e.g., Fn + F2, depending on your laptop model).
- Software Switch: In your system tray near the clock, click the Wi-Fi icon, find your network, and connect.
4. Hunting for the Wireless Signal: Finding Your Network
This is the fun part! Your laptop is now (hopefully) scanning the airwaves, looking for Wi-Fi networks. This is like a sonar pinging, finding its way through the digital seas.
- Click the Wi-Fi Icon: That familiar icon in the system tray (Windows) or the menu bar (Mac) is your gateway.
- Network List: A list of available Wi-Fi networks should appear. These are all the wireless signals your laptop can "see."
- Identify Your Network: Look for your network's name (SSID). It’s usually the same name you chose when you set up your router (e.g., "MyHomeNetwork"). It should look like something you recognize.
- Important Note: If your network isn't showing up, try moving closer to your router. Sometimes, the signal is just too weak. Plus, restart your router.
5. Entering the Secret Code: Connecting to Your Network
Once you've found your network, it's time to enter the password - the key to the kingdom!
- Click Your Network's Name: Select your network from the list.
- Enter Your Password (Security Key): You'll be prompted to enter your Wi-Fi password (also known as a security key). This is often printed on a sticker on your router. Note: Passwords are case-sensitive, so double-check those caps!
- Connect! Click "Connect" or press Enter. If the password is correct, you are connected!
6. Not Connecting? Troubleshooting WiFi Woes.
If you're still struggling, don't despair! Technical hiccups happen even to the best of us.
- Double-Check the Password: It’s always the first thing to check. Seriously, it’s usually the culprit.
- Restart Your Laptop: A simple reboot can often solve minor glitches.
- Restart Your Router: This is the second go-to fix. Unplug it for 30 seconds, then plug it back in. Give it a few minutes to boot up.
- Check Your Router's Lights: Do the lights on your router indicate that the internet is working (e.g., the "Internet" light should be lit)?
- Network Driver Issues: There may be a problem with your Wi-Fi adapter's software (driver). Go to Device Manager (as we discussed earlier). If you see a yellow exclamation mark next to your "Wireless Network Adapter," you might need to update or reinstall the driver. Google how to do this.
- Contact Your Internet Service Provider: If all else fails, it’s time to call in the professionals.
7. The Wi-Fi Adapter Saga: What If You Don't Have One?
If you've determined your laptop doesn't have a built-in Wi-Fi adapter, don't worry! It’s not the end of the world. You can still join the wireless revolution.
- USB Wi-Fi Adapter: This is the simplest solution. It looks like a small USB drive. You plug it into a USB port on your laptop, install the necessary software (often included on a CD or available online), and it will add Wi-Fi functionality.
- Internal Wi-Fi Adapter (For Tech-Savvy Users): Replacing the internal Wi-Fi card within your laptop is an option, but this requires more technical skills and opening up your laptop. If you're not comfortable with this, stick with USB.
8. Wi-Fi Security: Keeping Your Data Safe
Once you are connected, it is important to secure your network.
- Use a Strong Password: This is your first line of defense. A strong password is long, complex, and unique.
- Enable WPA2/WPA3 Encryption: These are the standards for secure Wi-Fi. Your router should have these options in its settings.
- Keep Your Router's Firmware Updated: Router manufacturers regularly release updates that patch security vulnerabilities.
9. What About Public Wi-Fi? Navigating the Hotspot Jungle
Connecting to public Wi-Fi (coffee shops, libraries, etc.) is convenient, but it requires caution.
- Be Aware of the Risks: Public Wi-Fi networks are often less secure. Avoid transmitting sensitive information (banking, etc.) on public networks.
- Use a VPN (Virtual Private Network): A VPN encrypts your internet traffic, making it more secure. This is highly recommended when using public Wi-Fi.
- Look for HTTPS: Make sure websites you visit use "HTTPS" (rather than just "HTTP") in the address bar. This indicates a secure connection.
10. Avoiding Wi-Fi Dead Zones: Optimizing Your Signal
Sometimes, your Wi-Fi signal might be weak in certain parts of your home.
- Router Placement: Place your router in a central location, away from walls and obstructions.
- Avoid Interference: Microwaves, Bluetooth devices, and other electronics can interfere with your Wi-Fi signal.
- Wi-Fi Extender (Repeater): If your home is large, a Wi-Fi extender can boost the signal to extend its range.
11. Speed Tests and Bandwidth Blues: What to Do If Your Connection Is Slow
Slow Wi-Fi is the bane of our modern existence.
- Run a Speed Test: Websites like Speedtest.net will measure your internet download and upload speeds. This will show you if your connection is meeting the speeds your internet plan promises.
- Check Your Bandwidth Usage: Streaming video, online gaming, and downloading large files can consume significant bandwidth.
- Upgrade Your Internet Plan: If you consistently need more bandwidth, consider upgrading your internet plan.
12. The Wireless Hotspot: Sharing Your Internet Connection
Did you know your
Laptop WiFi Booster: Blast Your Signal Across the House!Cara Mengaktifkan Wifi di Laptop Windows ASUS LENOVO HP ACER AXIO TOSHIBA

By Multi Talenta Tutorial Cara Mengaktifkan Wifi di Laptop Windows ASUS LENOVO HP ACER AXIO TOSHIBA by Multi Talenta Tutorial
CARA MENYAMBUNGKAN WIFI KE LAPTOP UNTUK MENGAKSES INTERNET

By IT Newbie CARA MENYAMBUNGKAN WIFI KE LAPTOP UNTUK MENGAKSES INTERNET by IT Newbie
CARA MENGHUBUNGKAN LAPTOP KE WIFI UNTUK PEMULA

By IT Newbie CARA MENGHUBUNGKAN LAPTOP KE WIFI UNTUK PEMULA by IT Newbie
Title: Cara Menghubungkan LAPTOP Ke WIFI Bagi Pemula
Channel: Arik Channel
Cara Menghubungkan LAPTOP Ke WIFI Bagi Pemula by Arik Channel
Laptop Wifi Hotspot
Install WiFi on Your Laptop: The Supreme User-Friendly Handbook
The digital age marches forward, and the ability to connect to the internet wirelessly is no longer a luxury; it's an absolute necessity. Whether you're a seasoned tech guru or a complete novice, the prospect of setting up WiFi on your laptop should be a straightforward, rather than intimidating, endeavor. This guide is crafted to navigate you through every step, offering clear, concise instructions, ensuring you’re online in a matter of minutes. Consider this your definitive resource, promising a seamless experience from start to finish. Prepare to unlock the full potential of your laptop's wireless capabilities.
1. Decoding the WiFi Hardware: Understanding Your Laptop’s Capabilities
Before diving in, it's crucial to understand the built-in WiFi hardware. Most modern laptops come equipped with a wireless network adapter, essentially a tiny antenna that picks up radio signals from a wireless router. This adapter is the key to connecting your laptop to the internet without the clutter of Ethernet cables. Usually, your laptop features an 802.11 standard WiFi adapter, but knowing your specific device model will help you in the long run. Determine your laptop's manufacturer and model number—this information is often found on a sticker on the bottom of the laptop or within the system information settings. Once you have this, you can research the adapter's specifications online. Websites such as the manufacturer’s support pages, or product comparison websites, are invaluable resources for this purpose. This step is about building familiarity.
2. The Initial Connection: Activating Your Laptop's WiFi Adapter
The first step is simply making sure your laptop's WiFi adapter is enabled. In many cases, this is toggled with a physical switch located on the side or front of the laptop, often identifiable by a symbol resembling an antenna or "WiFi" text. If there is no switch, you'll need to manually enable the adapter using your operating system.
- For Windows Users: Click the WiFi icon (usually resembling a series of curved lines) in the system tray, often located in the bottom-right corner of your screen. A list of available WiFi networks will appear. If the list remains blank, or if the WiFi icon itself shows a red "X," right-click the Start button and select "Device Manager." Expand the "Network adapters" section. Find your wireless network adapter (e.g., "Intel(R) Wireless-AC 9560"). If it has a down arrow icon, it’s disabled. Right-click the adapter and select "Enable device."
- For macOS Users: Click the WiFi icon in the menu bar (top-right corner). If WiFi is off, it will display as a crossed-out antenna. Select "Turn WiFi On."
- For Linux Users: The steps will vary depending on your distribution (e.g., Ubuntu, Fedora, etc.). Usually, you can find the WiFi settings within your system settings or network manager application. Look for an option titled “Enable WiFi” or something similar.
3. Finding and Connecting: Discovering Available WiFi Networks
Once your WiFi adapter is running, the next step is to find available networks.
- On Windows: Click the WiFi icon in the system tray. A list of all identified WiFi networks will be presented. Each network will have a Signal Strength indicator shown through bars along the network's name.
- On macOS: As above, click the WiFi icon in the menu bar. A list of available networks will be shown.
- On Linux: Open your network manager (e.g., Network Manager in Ubuntu) and search for available networks. They should be presented in a list with their names. The signal strength will also be displayed.
Upon finding a network, select yours. If the network is secured with a password, you'll be prompted to enter it. If it's an open (unsecured) network, you’ll connect automatically.
4. The Password Puzzle: Entering Your WiFi Security Key
The most common security protocol is WPA2 or WPA3, which requires a passphrase to connect. This is the password set on your wireless router.
- Retrieving Your Password: If you don't know your WiFi password, locate your router. It’s usually printed on a sticker, either on the router itself or its accompanying documentation. If you still can't find it, consult your internet service provider (ISP) or refer to your router's user manual.
- Entering the Password: When prompted, enter the password correctly, ensuring capitalization, spaces, and special characters are entered exactly as they appear. Click "Connect."
5. Problem-Solving: Troubleshooting Common WiFi Connection Issues
Even the most streamlined process can hit a snag. Here's how to tackle some common connection problems.
- "No Networks Found": Ensure your WiFi adapter is enabled. Move closer to the router. Try restarting your router. Check your router's settings to ensure it's broadcasting its SSID (network name). Verify your laptop’s drivers are up-to-date, go to your laptop manufacturers website to verify.
- "Unable to Connect": Double-check that you’ve entered the password correctly. Restart the router and your laptop. Try forgetting the network and reconnecting (in your network settings, select the network and choose "Forget").
- "Limited Connectivity": This often means your laptop is connected to the WiFi but can't access the internet. Restart your router. Check your router's internet connection. Contact your ISP if the problem persists.
- Slow Connection: Move closer to the router. Reduce the number of devices connected to the network. Restart the router. Run a speed test (e.g., using Speedtest.net) to diagnose the speed. Consider upgrading your internet plan or your router.
6. Advanced Configurations: Exploring Network Settings
Once you’re connected, you can tweak your network settings.
- For Windows: Go to "Settings" > "Network & Internet" > "WiFi." Here, you can view connection properties, set a network as metered (useful if you have a data cap), and manage WiFi settings.
- For macOS: Go to "System Preferences" > "Network." Select "WiFi" in the left-hand panel. Click "Advanced" to configure settings such as DNS servers and proxy settings.
- For Linux: Network configuration varies depending on your distribution. Usually, you can find such settings in the system settings or network manager.
7. Drivers and Updates: Keeping Your Wireless Adapter Updated
Drivers are software programs that allow your laptop's hardware to communicate with your operating system. Keeping your WiFi adapter drivers updated is crucial for optimal performance and security.
- Windows: Open "Device Manager" (search for it in the Start Menu). Expand "Network adapters." Right-click on your wireless adapter and select "Update driver." Choose "Search automatically for drivers." You can also download the latest drivers from your laptop manufacturer's website.
- macOS: macOS typically updates drivers automatically. You can check for updates under "System Preferences" > "Software Update."
- Linux: The method to manage drivers, including WiFi drivers, depends on the specific distribution you are using. Many Linux distributions automatically manage the driver updates.
8. Security Best Practices: Safeguarding Your Wireless Connection
Security should always be paramount when using WiFi.
- Strong Passwords: Use a strong, unique password on your router. This includes a mix of upper and lowercase letters, numbers, and symbols.
- WPA2/WPA3: Ensure your router is using WPA2 or WPA3 security encryption. These are the most secure protocols currently available.
- Router Firmware Updates: Regularly update your router's firmware. These updates often include security patches that protect against vulnerabilities.
- Firewall Protection: Enable your laptop’s firewall. This will help block malicious traffic.
- VPN Use: Consider using a VPN (Virtual Private Network), especially when using public WiFi networks. A VPN encrypts your internet traffic, adding another layer of security.
9. Portable Hotspots: Utilizing Smartphones and Mobile Devices for WiFi
If you don’t have access to a traditional WiFi network, your smartphone can act as a mobile hotspot, essentially turning your phone into a WiFi router.
- Enabling Hotspot: The steps for enabling a hotspot vary depending on your smartphone's operating system (iOS or Android), but it’s usually found in the “Settings” > “Personal Hotspot” (iOS) or “Settings” > “Connections” > “Mobile Hotspot and Tethering” (Android).
- Connecting Your Laptop: Once the hotspot is activated on your phone, on your laptop, search for the hotspot's network name (SSID) in your WiFi settings as described above. Select it and enter the password set on your smartphone’s hotspot.
10. The Future of Wireless: Exploring Advanced Technologies
The evolution of WiFi continues at a rapid pace. Keep abreast of the following.
- WiFi 6E: This latest standard offers faster speeds and less interference, especially in crowded environments.
- Mesh Networks: These systems use multiple routers to provide broader and more reliable coverage throughout a home or office.
By following this comprehensive guide, you'll be equipped not only to install WiFi on your laptop but also to understand the underlying technologies and troubleshoot any potential issues. Embrace the freedom of wireless connectivity, and make the most of your laptop's capabilities.
