dell laptop dell d420 laptop turn on wifi

Title: Connecting to Wireless Network on Dell latitude laptop
Channel: The Laptop Barn
Connecting to Wireless Network on Dell latitude laptop by The Laptop Barn
Dell D420 WiFi Nightmare? FIX IT NOW! (Easy Steps)
Dell D420 WiFi Woes Vanquished: Reclaiming Your Connectivity
Were you ever wrestling with a stubborn Dell D420, its WiFi refusing to cooperate? It can be frustrating. You're not alone. Fortunately, a fix is within reach. This article will guide you. We'll transform that WiFi frustration into seamless browsing.
The Wireless Wilderness: Identifying the Culprit
First, we must determine the problem. Is your WiFi adapter even enabled? It's a simple check. Observe your system tray. Do you see a wireless icon? If not, investigate further. Sometimes, a simple toggle switch disables the adapter. Look for this switch on your laptop. If it’s off, flick it on right away.
Next, consider drivers. Outdated or corrupted drivers are common culprits. They often lead to connectivity issues. It’s like having a faulty map. Your computer searches for the signal. But it struggles to find the path.
Driver Detectives: Hunting Down the Right Software
Let's focus on your drivers. They are the unsung heroes of your wireless connection. Head to Dell's support website. Input your D420's service tag. This identifies your specific model. Therefore, you'll get the correct drivers. Locate the networking section. Download the latest WiFi driver. The installation is usually straightforward. Restart your laptop after it finishes. As a result, the changes will take full effect.
Another option is to use device manager. Right-click on the "Start" button. Select "Device Manager." Expand the "Network adapters" section. Find your wireless adapter. Right-click on it. Choose "Update driver." Select "Search automatically for drivers." Windows will seek out the best driver. Consequently, it updates the software.
Signal Strength Secrets: Boosting Your Reception
Is your connection weak? You can improve it. The distance from your router matters. Moving closer increases signal strength. Try to eliminate obstructions. Walls and furniture can weaken the signal. Position the laptop strategically. Experiment with location. You should find a better reception area.
Consider your router's antenna placement. Ensure they're correctly positioned. Try adjusting the angle. The best position maximizes the range. If your antenna is internal, the location changes the signal. Therefore, experiment with the laptop's angle.
Channel Chatter: Finding Wireless Harmony
Wireless routers operate on channels. Some channels are crowded. Others remain less congested. Log into your router's settings. Look for the wireless channel settings. Change the channel to one with less activity. Tools exist that scan for the best channels. They assess the traffic on each. A quick search will provide you with the applications.
Also, consider upgrading your router. Older routers use older standards. These standards may offer slower speeds. They may also have limited range. Modern routers support the latest standards. These offer improved performance. They also provide better stability.
Security Savvy: Securing Your Connection
Security is critical. Unsecured WiFi is vulnerable. Ensure your network is password-protected. Use a strong, complex password. Avoid easily guessed phrases. Update your router's firmware. This protects against vulnerabilities. Firmware updates include security patches. These updates are essential for safety.
Check your wireless security settings. They are in your router's configuration. Verify your encryption protocol. WPA2 or WPA3 are recommended. Using older protocols is risky.
Troubleshooting Toolkit: When Problems Persist
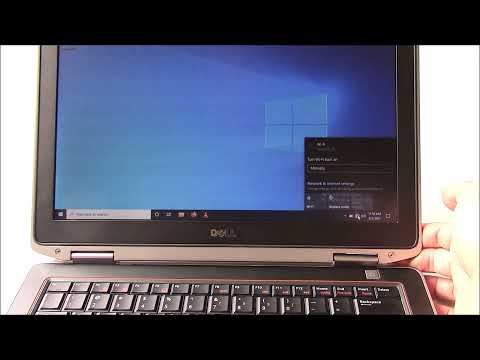
Sometimes, problems linger. Don’t give up. Restart your router. It’s a simple fix. It often resolves minor issues. Reset your network settings. This clears stored configurations. In Windows, go to "Settings” then “Network & Internet.” Choose "Network reset." This resets your network setup.
Check for interference. Other electronic devices interfere. This can disrupt the WiFi signal. Try moving your laptop away from these devices. Microwaves and cordless phones can cause disruptions.
Finally, consider a factory reset. This will restore your system to its original state. It can resolve deeper issues. However, backing up your data first is advisable. This protects your important files.
The Victory Lap: Embracing Seamless Connectivity
By following these steps, you will conquer that WiFi dilemma. You've learned to identify the problem. You have the tools for a solution. You can now enjoy a fast, reliable connection. Therefore, you can get back to work, browse the web, and enjoy your D420.
WiFi Nightmare Solved! My Laptop Can't Find Your IP Address!Dell D420 WiFi Nightmare? FIX IT NOW! (Easy Steps)
Alright, fellow Dell D420 aficionados! Let's be honest, that sleek little laptop was a marvel… years ago. But now? That WiFi connection can be a real test of your patience, right? Flickering signal bars, dropped connections, and the feeling of being digitally marooned. We've all been there. I, myself, have wrestled with my trusty D420, ready to hurl it across the room more than once in sheer frustration. But fear not, intrepid users! We're going to banish those WiFi woes and get you back online in no time. This isn't a technical manual; this is a survival guide, a rescue mission, a… well, you get the picture.
1. The Dell D420 WiFi Curse: Why Is It So Bad?
Let’s be brutally honest: the D420's WiFi card is a relic of a bygone era. Think of it as a vintage car: beautiful, charming, but definitely not built for today’s highway speeds. The technology is old, the drivers might be outdated, and it simply wasn't designed to handle the demands of modern internet. We're talking about a network standard circa the early 2000s. To give you a perspective, if your home internet setup is a roaring jet engine, the D420's WiFi is a sputtering biplane. That explains all the problems we are facing.
2. Identifying the Enemy: Pinpointing Your WiFi Woes
Before we declare all-out war on our connectivity issues, we need to know exactly what we're up against. Is it a weak signal? Frequent disconnects? Slow download speeds? Let's diagnose the problem. Think of yourself as a digital doctor. What are the symptoms?
- Weak Signal Strength: The WiFi icon in the system tray is showing fewer bars than a prison window.
- Intermittent Disconnects: You're connected… you’re disconnected… you’re connected again! A digital rollercoaster.
- Slow Download Speeds: Downloading a file feels like watching paint dry.
- Unable to Connect: Your D420 simply refuses to recognize your WiFi network.
- "Limited Connectivity" Error: The dreaded message that sends shivers down any internet user's spine.
3. The First Line of Defense: Basic Troubleshooting Tips
Okay, before we dive into the deep end, let's try some basic troubleshooting. Think of this as your first aid kit. Simple fixes that often work wonders.
- Restart, Restart, Restart: The classic cure-all. Reboot your D420. Restart your router. Sometimes, all it takes is a fresh start. This is like hitting the reset button on a bad day.
- Check Your Router’s Proximity: Moving the laptop closer to the router is like taking your medicine for a headache. It often solves the issue. Walls and obstacles can weaken the signal.
- Disable and Re-enable WiFi: Turn off your WiFi on the D420, wait a few seconds, and turn it back on. It’s like giving it a digital slap on the wrist.
- Forget and Reconnect to the Network: Sometimes, the connection gets… tangled. Forget the network on your D420, then reconnect, entering the password again. It’s like decluttering a messy desk.
4. Driver Drama: Updating Your WiFi Drivers
This is where things get a little more… techy… but don’t worry, we'll guide you through it. Outdated drivers are the silent killers of WiFi connectivity. Think of them as the tiny, invisible gremlins wreaking havoc inside your laptop.
- Finding the Right Driver: The easiest way is to go to Dell's support website. Enter your service tag or search for your D420 model. Then, look for the "Drivers & Downloads" section.
- Locate the Wireless Driver: Specifically, search for the driver related to your WiFi card. It might be labeled "Wireless Network Adapter Driver," or something similar.
- Download and Install: Download the driver. Most of the time, you just double-click the downloaded file and follow the on-screen instructions. It's usually a simple process, like assembling a Lego set.
- Reboot Your Laptop: After installing the driver, restart your D420. This allows the new driver to take effect.
5. The Antenna Angle: External Antennas (If You Dare)
This is a slightly more advanced option, but it can significantly improve the signal strength. The D420's internal antenna might be… well, let's just say it's not the best. An external antenna is like giving your laptop a super-powered hearing aid.
- USB WiFi Adapters: These are the easiest option. You simply plug them into a USB port, and they essentially become your WiFi card. Make sure to choose one that's compatible with your operating system.
- PCMCIA Card Adapters: This is a slightly older technology, but still viable. Look for a PCMCIA WiFi card that's compatible with your D420's slot.
- Installation: Once you've chosen your external antenna, follow the manufacturer's instructions for installation. Often, it's as simple as plugging it in or installing software.
6. The Router Revelation: Optimizing Your Router Settings
Believe it or not, your router might be part of the problem. It's like a chef who is using an old rusty pan. Let's check the settings.
- Channel Selection: Routers transmit on different channels. If your channel is congested (lots of other networks using the same channel), your signal can be weak. Log into your router's settings and try changing the channel.
- Security Settings: Ensure your router is using a secure WiFi encryption protocol (WPA2 or WPA3).
- Router Placement: Like your laptop, your router's position makes all the difference. Place it in a central, open location and away from walls and barriers.
7. Windows Firewall: Is It Blocking Your Connection?
Sometimes, your own operating system can be the culprit. The Windows Firewall can, in rare cases, block your WiFi connection. It's like having a security guard who mistakes you for a threat.
- Check Firewall Settings: Go to your Windows Firewall settings. Ensure that your WiFi network is allowed access.
- Troubleshoot Network Problems: Windows has a built-in network troubleshooter that can often identify and fix common issues.
8. Bandwidth Bottlenecks: Dealing With Network Congestion
Imagine a busy highway during rush hour. That's what happens on your WiFi network when multiple devices are online at the same time.
- Limit Concurrent Devices: If possible, limit the number of devices using the WiFi network simultaneously. Each device consumes bandwidth. This is like thinning out the crowd at a concert and allowing everyone to have more space.
- Prioritize Devices: Some routers allow you to prioritize certain devices. This might be useful if you want to give your D420 (or other important devices) preferential treatment.
9. The Power Play: Battery and WiFi Usage
Did you know that the D420 might be throttling its WiFi performance to save battery life? It's trying to be a good citizen by conserving energy, but at your expense.
- Power Management Settings: Go to your Windows power management settings. Ensure that your WiFi adapter is set to use maximum performance when on battery power.
- AC Power vs. Battery: For peak performance, consider using the D420 while it's plugged into AC power.
10. The Legacy Lament: Dealing with Older WiFi Standards
The D420 is stuck in the past when it comes to WiFi standards. It's like trying to run a race with a horse and buggy against a Formula 1 car.
- Router Compatibility: Make sure your router is compatible with the D420's older WiFi standards (802.11g). Sometimes, older devices struggle with newer router settings.
- Router Configuration: Experiment with your router settings. You might need to configure it to work with older protocols.
11. The Hardware Hurdle: Could Your WiFi Card Be Failing?
Let’s face it, sometimes things break. Your WiFi card could be the victim of its years of service. It’s like a well-worn pair of shoes – eventually, they wear out.
- Diagnose with Care: Try the troubleshooting steps above. If nothing works, and you've exhausted all software options, the WiFi card might be dead.
- Replace the WiFi card: This is a slightly more advanced fix. If you are comfortable with dismantling your laptop, you might consider replacing the card.
12. The Operating System Option: Switching to a Lighter OS
If you are struggling with drivers in Windows, you could consider other operating systems. Windows can be a heavy-duty beast. Consider a leaner, meaner operating system like a lightweight Linux distribution.
- Research Alternative OS: Research Linux distributions that are lightweight and are designed for older hardware.
- Install the OS: Create a bootable USB drive. Then install the new OS on your D42
How To Fix And Turn On No WiFi On A Dell Latitude Laptop Computer
By DIY University How To Fix And Turn On No WiFi On A Dell Latitude Laptop Computer by DIY University
How to enable Wi-Fi Dell Latitude E7440 laptop, Switch on Right side

By furulevi How to enable Wi-Fi Dell Latitude E7440 laptop, Switch on Right side by furulevi
How to Turn On Wifi Dell Laptop how to manually turn on WIFI on dell laptop

By Ybal Tech How to Turn On Wifi Dell Laptop how to manually turn on WIFI on dell laptop by Ybal Tech

Title: Fix Dell Laptop Wi-Fi is Not Working Problem in Windows 1087 2025
Channel: FIXsage
Fix Dell Laptop Wi-Fi is Not Working Problem in Windows 1087 2025 by FIXsage
Laptop Working
Dell D420 WiFi Woes? Conquer the Connection Conundrum: Simple Solutions
The Dell D420, a venerable workhorse of a laptop, has earned its place in computing history. It's a testament to enduring design and practical functionality. However, even the most steadfast of companions can falter, and one common complaint among D420 users centers around its WiFi capabilities. Are you wrestling with intermittent connections, agonizingly slow speeds, or the frustrating inability to connect to your network at all? You're not alone. Across forums and support groups, the cry of "Dell D420 WiFi nightmare!" echoes with frustrated users. But fear not, fellow D420 enthusiasts! We have meticulously compiled a straightforward guide, filled with actionable steps, to revitalize your wireless experience and banish those connection frustrations. We're going to get your Dell D420 back online, swiftly and efficiently.
Diagnosing the Distress: Identifying the Root of Your Wireless Troubles
Before we dive into solutions, let's establish a firm foundation of understanding. The first step in conquering any technical challenge is pinpointing the source of the problem. WiFi issues, as complex as they can appear, often stem from a few key areas. Begin by answering these critical questions:
- Is the WiFi radio enabled? This might seem elementary, but it's a frequent culprit. Physically, the D420 often had a dedicated switch or a keyboard shortcut (typically Fn + F2) to toggle its wireless radio on and off. Ensure it is in the "On" position. Check the system tray (bottom-right corner of your screen) for a wireless network icon. If it's grayed out or crossed out, the radio is disabled.
- Are you within range of a known WiFi network? The D420's wireless card, while adequate for its time, isn't particularly powerful. Distance and obstructions (walls, furniture) can dramatically impact its signal strength. Move closer to your router and see if the connection improves.
- Is your network password correct? Typing errors are remarkably common. Double-check the password you entered when trying to connect. Case sensitivity is often a factor, too.
- Have other devices connected successfully to the same network? This helps determine if the issue lies with your D420 or the network itself. If other devices are working fine, you can safely assume the problem is specific to your laptop.
- When did the problem start? Did your WiFi suddenly stop working after a Windows update, driver installation, or hardware change? This can help narrow down the possibilities.
Driver Dilemmas: Updating and Reinstalling Your Wireless Driver
Outdated or corrupted drivers are notorious for crippling wireless functionality. The driver serves as the vital translator between your D420’s hardware and the operating system, including Windows XP. Here's how to resolve this often-encountered issue:
- Identify Your Wireless Adapter: The D420 typically shipped with either an Intel PRO/Wireless 2200BG or 2915ABG network adapter. Knowledge of which adapter you're using is essential before installing the correct drivers. You can ascertain this by opening the Device Manager. Right-click the "My Computer" or "This PC" icon on your desktop or in the Start Menu, select "Manage," and then navigate to "Device Manager." Expand the "Network adapters" section. The name of your WiFi adapter will be listed there (e.g., Intel PRO/Wireless 2200BG Network Connection).
- Download the Correct Driver: Once you know your adapter type, it's time to download the appropriate driver. You can find drivers on the official Dell support website. Go to the Dell support website, enter your service tag (located on the bottom of your D420), and navigate to the "Drivers & Downloads" section. Filter the results by "Network" or "Wireless," and select the driver that matches your adapter model and operating system (usually Windows XP for this era). If the Dell website is unavailable, search online using the terms "Dell D420 [Your Wireless Adapter Model] driver XP."
- Uninstall the Existing Driver: Before installing a new driver, it's best to remove the existing one. In Device Manager, right-click your wireless adapter under “Network adapters” and select "Uninstall." In the confirmation dialog box, also check the option "Delete the driver software for this device" and confirm. Reboot your system.
- Install the New Driver: Run the downloaded driver installation file. Follow the on-screen instructions to install the driver. Restart your D420 again after installation.
- Test the Connection: After the reboot, test your WiFi connection. Check the system tray for the wireless icon. Try connecting to your preferred network.
Power Management Pitfalls: Optimizing Power Settings for Wireless Stability
Windows, being a power-conscious operating system, can sometimes aggressively manage power to the WiFi adapter, leading to intermittent connectivity. To mitigate this, adjust your power settings:
- Access the Power Settings: Open the Control Panel. Select "Performance and Maintenance" (if using Category View). Then, click on "Power Options" or search for "Power Options" in the search bar.
- Change Plan Settings: Select your current power plan (e.g., "Balanced" or "Power saver") and click "Change plan settings."
- Advanced Power Settings: Click on "Change advanced power settings." The "Power Options" window with a tree structure will open.
- Wireless Adapter Settings: Expand "Wireless Adapter Settings." If it’s not present you may need to install the latest BIOS.
- Maximum Performance: Set the "On battery" and "Plugged in" settings to "Maximum Performance."
- Confirm and Reboot: Click "Apply" and then "OK" to save the changes. Restart your computer.
Router Roulette: Ensuring Compatibility and Optimal Configuration
Your router is the source of your wireless signal, and it, too, can influence your D420's WiFi performance. Try these steps if you are still having trouble:
- Placement and Proximity: Ensure your D420 is within a reasonable distance of your router. Avoid thick walls and obstacles. Place your D420 and router in elevated positions instead of on the floor or basement.
- Router Reboot: A simple reboot of your router can often resolve many network-related issues. Unplug the router from its power source for 30 seconds, then plug it back in. Allow it to fully reboot before attempting to connect your D420 again.
- Router Firmware: Check for firmware updates for your router. Outdated firmware can cause compatibility problems and performance issues. Consult your router's manual or the manufacturer's website for instructions on how to update the firmware.
- Channel Selection: Wireless routers broadcast on different channels. Some channels are more congested than others. Log into your router's configuration interface (consult your router's manual for instructions on how to access it), and try changing the wireless channel. Experiment with different channels (1, 6, and 11 are often recommended). These are the non-overlapping channels for optimal performance. Many modern routers can also automatically select the least congested channel.
- Security Protocols: Ensure your router is using a modern security protocol like WPA2 or WPA3. Avoid older, less secure protocols like WEP.
Antenna Amplification: Internal and External Solutions
The D420's internal antenna, while functional, can be a limiting factor. Consider these strategies:
- Internal Antenna Integrity: Check the internal antenna connections. Inside the D420, the wireless card usually has a lead that attaches to the antenna. It may have become accidentally detached or loosened.
- External Antenna (If Equipped): Some D420 models had an external antenna connector. Ensure that if one is connected, it is in good working order.
- External Antennas (Third-Party): If you're comfortable with it, you can research third-party WiFi antennas that are designed to attach to the D420.
BIOS Boost: Updating Your BIOS for Improved Compatibility
Older BIOS versions can sometimes have compatibility issues with newer wireless cards and drivers. Updating your BIOS is a potentially more advanced step. However, it could be crucial for troubleshooting many WiFi problems.
- Identify Your Current BIOS Version: Open the system information tool that came with your D420 or search on the web for a similar program. The BIOS version will be displayed there.
- Download the BIOS Update: Visit the Dell support website and enter your service tag. Navigate to the "Drivers & Downloads" section, filter by "BIOS," and download the latest available BIOS update for your D420. Be extremely diligent when downloading the correct file for your system's model and revision.
- Prepare for the Update: Back up any important data before updating the BIOS. Ensure your laptop is connected to a stable power source.
- Run the Update Utility: Follow the instructions provided by the Dell BIOS update utility. This usually involves running an executable file that will flash the BIOS. Carefully follow all on-screen prompts. Never interrupt the flashing process.
- Restart and Test: After the BIOS update is complete, your D420 will reboot. Test your WiFi connection.
**The
