how to force laptop on wifi channel os x

Title: Show More Details Information on WiFi Wireless Signal on Mac OS X HDHow To 2023
Channel: Matt Horner
Show More Details Information on WiFi Wireless Signal on Mac OS X HDHow To 2023 by Matt Horner
Mac Wi-Fi Nightmare? Force Your Laptop Onto ANY Channel (macOS)!
Mac Wi-Fi Woes? Take Control of Your Wireless World (macOS)!
Ever feel like your internet connection on your Mac is fighting you? It's a common frustration, especially in crowded environments. You're not alone in this digital struggle. Your Mac might be automatically selecting the wrong Wi-Fi channel. This, as a result, can drastically impact your internet performance. But do not despair! We have a solution. You can take back control. This guide will show you how to wrestle your Mac's Wi-Fi settings into submission.
Decoding the Wi-Fi Channel Conundrum
Before diving into the solution, let's understand the problem. Your Wi-Fi router broadcasts on various channels. These are like different lanes on a highway. In areas with many Wi-Fi networks, some channels are congested. Your Mac, however, might not always pick the best channel. It usually defaults to the one it thinks is best. Unfortunately, this automated selection isn't always accurate. Therefore, your connection suffers. Interference from other networks can significantly slow you down.
Unleashing the Power of Wireless Diagnostics
Okay, ready to troubleshoot? The first step involves macOS's built-in Wireless Diagnostics tool. In other words, this is your secret weapon. It allows you to analyze the Wi-Fi landscape. First, press and hold the Option key while clicking the Wi-Fi icon in your menu bar.
Then, from the menu, select "Open Wireless Diagnostics…." This will launch the helpful utility. Next, follow the on-screen instructions. You can use it to scan for nearby Wi-Fi networks. More importantly, it identifies all the channels each network operates on. The tool suggests the clearest channels. These are your best options for optimal performance.
Manually Selecting a Wi-Fi Channel: The Key to Unlocking Speed
Armed with the diagnostics results, it's time to take action. But, there’s one small hurdle. macOS doesn't natively allow you to directly select a Wi-Fi channel. Don’t worry; there are tricks. This is where we get to the interesting part.
Firstly, open the "Keychain Access" app. It's located in your Utilities folder. Next, locate your Wi-Fi network's entry. You can find this by searching for the network's name. Double-click the entry to open it. Make sure the "Show Password" checkbox is checked. This will reveal your Wi-Fi password. Copy this for now; you will need it later.
Following this, disconnect from your Wi-Fi network. Then, delete this network from the list of known networks. This step is crucial. Subsequently, click the Wi-Fi icon in the menu bar. Select "Join Other Network…". Type in your network's name. Select the security type (usually WPA/WPA2 Personal). Enter your password from the Keychain. Now, here comes the magic. The “channel” field is what we need.
This is where you enter the Wi-Fi channel detected by Wireless Diagnostics. You can specifically force your Mac to use it. Therefore, your Mac will prioritize using this designated channel. After entering the channel, click "Join." It will then automatically connect you. It should now connect using the channel you selected. You could potentially experience a significant boost in speed.
Advanced Hacks for Wi-Fi Optimization
Furthermore, consider using a Wi-Fi analyzer app. These are available on the Mac App Store. They provide a more in-depth analysis of your wireless environment. They often offer real-time channel recommendations. This helps you optimize your network’s performance.
Also, remember that the best channel can change over time. This is because your neighbors' Wi-Fi networks might change. Therefore, periodically re-run Wireless Diagnostics. This helps you stay ahead of the curve. You should also, as a rule, regularly reboot your router. This can clear up temporary glitches. This improves performance.
Troubleshooting Common Wi-Fi Issues
Sometimes, the issue is deeper than channel selection. So, what if everything else still fails? First, check your internet speed. Use an online speed test. This will help verify your internet service.
Next, make sure your router's firmware is up-to-date. Outdated firmware can cause performance problems. You should also consider the physical placement of your router. Walls, and electronic devices can interfere with the signal. Move the router to a more central and open location. This will also improve range.
Conclusion: Get Connected!
Ultimately, taking control of your Wi-Fi channel is a simple yet powerful solution. It can vastly improve your Mac's internet performance. Therefore, remember to use Wireless Diagnostics. Additionally, experiment with different channels. Don't hesitate to use the advanced tips. Finally, make sure you follow the troubleshooting guidance. You can overcome those frustrating Wi-Fi slowdowns. Enjoy a smoother and faster online experience on your Mac. Embrace this newfound freedom!
HP WiFi Nightmare? Fix Your Connection NOW!Mac Wi-Fi Nightmare? Force Your Laptop Onto ANY Channel (macOS)!
Ever feel like your Mac's Wi-Fi is playing a cruel game of hide-and-seek with your internet connection? One minute you're streaming flawlessly, the next you're staring at the spinning wheel of doom, wondering if the apocalypse has finally arrived…or just your neighbor's new router. We've all been there. It's a frustrating experience, akin to trying to find a specific grain of sand on a beach. But fear not, fellow Mac users! We're diving deep into a potentially game-changing solution: forcing your Mac onto a specific Wi-Fi channel.
Why Is My Mac's Wi-Fi Such a Headache? Understanding the Root of the Problem
Before we grab our digital crowbars and pry open the Wi-Fi's secrets, let's understand why things go south. Think of your Wi-Fi router as a radio station, broadcasting on a specific channel. The airwaves are surprisingly crowded these days, with neighbors, smart home devices, and even your microwave all vying for attention. This constant competition leads to interference, like different radio stations trying to play the same song simultaneously. This interference manifests as slow speeds, dropped connections, and the ever-dreaded "no internet connection" message.
The Channel Conflict: A Crowded Airwave Scenario
The most common culprit? Channel congestion. Most routers automatically choose a channel, often based on the default settings or what they perceive as "least busy." But what if that perception is wrong? What if your trusty router, bless its digital heart, picked a channel that's already hosting a bustling party of other Wi-Fi signals? This is where the problem begins and the need for a change becomes apparent.
Automatic Channel Selection: Friend or Foe?
While automatic channel selection is meant to be helpful, it isn't always reliable. It's like letting your dog pick your dinner—they might think they know what's best, but the reality could be disastrous. Sometimes, manually choosing a channel, the right one, can drastically improve the performance.
The Power of Manual Control: Why Forcing a Channel Matters
Imagine being able to tune your radio precisely to a clear channel, avoiding all the static and noise. That's the beauty of forcing your Mac onto a specific Wi-Fi channel. By taking control, you can sidestep the chaotic auto-selection and find a digital haven for your data to flow freely. It's like giving your Wi-Fi a booster shot!
Let's Get Technical: Understanding Wi-Fi Channels in macOS
Before we jump in, let's quickly break down Wi-Fi channels. Modern routers operate on two primary frequency bands: 2.4 GHz and 5 GHz. The 2.4 GHz band has 11 (or sometimes 13) channels, while the 5 GHz band has significantly more. The 2.4 GHz band has a wider range but is prone to interference, while the 5 GHz band is faster and less crowded, but with a smaller range.
2.4 GHz vs. 5 GHz: Which Band Is Right for You?
- 2.4 GHz: Ideal for longer ranges and penetrating walls. However, it's more susceptible to interference from other devices like Bluetooth and microwaves.
- 5 GHz: Offers faster speeds and less interference, but the range is shorter. Perfect if you have a clear line of sight to your router.
Finding the Right Channel: A Little Detective Work
Before forcing a channel, you'll need to figure out which ones are least congested in your area. Don't worry; it’s not a complicated process. Think of it as surveying the digital land before establishing camp.
The macOS Toolkit: How to Scan Your Network (Without Third-Party Apps)
Good news! You don't need to download a bunch of third-party apps to check your network's channels. macOS has a built-in tool hidden in the Wireless Diagnostics Utility that can do the job for you (it’s like having a Wi-Fi superpower!)
Unveiling the Wireless Diagnostics Utility: Your Secret Weapon
- Hold down the Option key and click on the Wi-Fi icon in your menu bar. This reveals a hidden menu.
- Choose "Open Wireless Diagnostics."
- Ignore the initial "help" window. Instead, go to the "Window" menu and choose "Scan."
This scan will show you all the Wi-Fi networks in your area and their respective channels, along with the signal strength.
Interpreting the Results: Identifying the Least Crowded Channels
Look for the channels with the fewest other networks. The stronger the signal strength (lower the number, e.g., -40 dBm is better than -70 dBm), the better. For the 2.4 GHz band, look for channels 1, 6, and 11, as they are non-overlapping. For 5 GHz channels, almost any channel is a good option, although avoid the DFS channels if possible.
Forcing a Specific Channel: The Command-Line Magic
This is where the real fun begins! We're going to use the Terminal, macOS's command-line interface, to tell your Mac exactly which channel to use. (Don't worry, it’s easier than it sounds).
Finding Your Wi-Fi Interface Name: The First Step
You'll need to identify your Wi-Fi interface name, which is usually something like en0 or en1. Here's how:
- Open Terminal (search for it in Spotlight).
- Type
networksetup -listallnetworkservicesand press Enter. - Look for the line that says something like "Wi-Fi:" and then identify the "Hardware Port." The interface name is typically the same.
The Command Itself: Unleashing the Power
Once you have your interface name and have identified a clear channel, here's the magic command. Replace <interface_name> with your Wi-Fi interface name and <channel_number> with the channel number you want to use:
networksetup -setairportchannel <interface_name> <channel_number>
Example:
networksetup -setairportchannel en0 6
Enter this command in the Terminal and press Enter. Your Wi-Fi connection should immediately disconnect and reconnect, using the specified channel.
Troubleshooting and Tweaking: Finding Your Perfect Fit
If the first channel doesn't provide the results you hoped for, don’t lose heart! Experiment with different channels to see what works best. It may take a few tries, but it’s worth the effort.
Beyond the Channel: Additional Wi-Fi Optimization Tips
Forcing a channel is a fantastic start, but there are other things you can do to optimize your Wi-Fi experience:
Router Placement: Positioning Is Paramount
Where you place your router is crucial. Keep it away from walls, mirrors, and other electronics. Elevate it if possible.
Updating Your Router's Firmware: A Crucial Step
Make sure your router's firmware is up-to-date. It’s like giving your router a security update!
Restarting Your Router: A Simple Reset
Sometimes, a simple reboot is all it takes to refresh your connection.
The Benefits of a Smoother Connection: A World of Difference
Think of all the things you do on your Mac: streaming movies, video calls, online gaming, file sharing… A stable and fast Wi-Fi connection makes all these activities seamless and enjoyable. It's a quality-of-life improvement you'll appreciate every single day.
My Personal Wi-Fi Journey: From Frustration to Freedom
I can personally attest to the frustration of a flaky Wi-Fi connection. I remember countless moments of hair-pulling, especially when I was trying to work from home. But after learning to force my Mac onto a specific channel, the difference was night and day. It’s like the clouds parted, and the data just flowed! We're happy to share this knowledge.
Conclusion: Take Control of Your Wi-Fi Destiny!
So there you have it! You now have the knowledge and tools to tame your Mac's Wi-Fi woes and force it onto a specific channel. We've walked through the core problems, the steps to diagnose, and the ultimate solutions. Embrace the power of manual control, experiment with different channels, and reclaim your online experience. Your Mac—and your sanity—will thank you. Now go forth and conquer those Wi-Fi demons!
FAQs: Your Burning Questions Answered
1. Is forcing a Wi-Fi channel safe for my Mac?
Absolutely! It's a perfectly safe operation that doesn't risk damaging your hardware or software. It's just a configuration setting.
2. Will forcing a channel improve my internet speed?
It can, especially if you were experiencing interference. You should see a marked improvement in stability and reduced dropped connections.
3. What if I want to revert back to automatic channel selection?
No problem! Just go back into the Wireless Diagnostics Utility and uncheck "Override Wireless Channel." Your Mac will then return to automatic channel selection. Or, simply disconnect and reconnect to your Wi-Fi network from the Wi-Fi icon, and it will select the most appropriate channel.
**4.
Acer Wifi Laptop: Unbeatable Prices You Won't Believe!Free WiFi channel finder built in on Mac OSX

By Alexander Novozhilov Free WiFi channel finder built in on Mac OSX by Alexander Novozhilov
How to Boost Mac's Internet Speed in MINUTES 2024 New Update

By Easy Guide How to Boost Mac's Internet Speed in MINUTES 2024 New Update by Easy Guide
FIX Why Mac doesn't detectshow 5GHz WiFi Just a few clicks solution
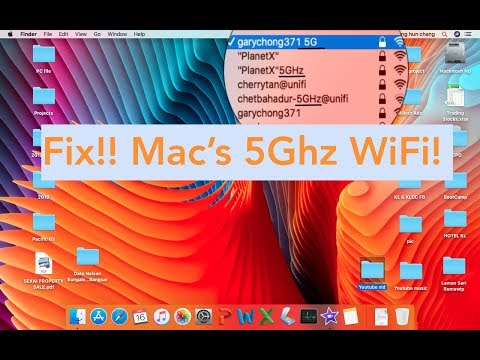
By Jacky Chong FIX Why Mac doesn't detectshow 5GHz WiFi Just a few clicks solution by Jacky Chong

Title: Boost WIFI On Your PC
Channel: oMace
Boost WIFI On Your PC by oMace
Laptop Wifi Connect
Mac Wi-Fi Nightmare? Force Your Laptop Onto ANY Channel (macOS)!
We've all been there: the dreaded Wi-Fi hiccup. Your Mac, usually a paragon of digital efficiency, suddenly stumbles, buffering videos, sluggishly loading web pages, or, worst of all, dropping the connection altogether. This can be immensely frustrating, especially when you're trying to work, stream entertainment, or stay connected with loved ones. While many factors contribute to Wi-Fi performance, a common culprit behind these connectivity woes is channel congestion. Your router, by default, often chooses a channel automatically, and sometimes that channel is already overflowing with traffic from neighboring networks. The good news? We can outsmart this automatic selection and take control, forcing your MacBook onto a less crowded channel, thereby dramatically improving your Wi-Fi experience.
Understanding Wi-Fi Channels and Congestion
Before diving into how to seize control, let's quickly clarify the core concept of Wi-Fi channels. Think of Wi-Fi channels as lanes on a highway. Your router broadcasts its signal on a specific channel (or multiple), and your Mac, along with other devices, uses that channel to communicate with the router. In the 2.4 GHz band, there are 11 channels (in North America), while the 5 GHz band offers a more expansive selection, often overlapping less with neighboring networks.
When multiple routers in your vicinity are broadcasting on the same channel, they create interference, like bumper-to-bumper traffic on the highway. This congestion leads to signal degradation, slower speeds, and dropped connections. The more devices vying for attention on a particular channel, the less efficient your Wi-Fi becomes. Overcrowding is more common in the 2.4 GHz band, primarily due to its wider range and the fact that older devices may not support 5 GHz.
Assessing Your Wi-Fi Landscape: Discovering Channel Clutter
The first step toward a smoother Wi-Fi experience is to understand the current state of your wireless environment. This means identifying which channels your neighbors are using, and which ones are less populated. Fortunately, macOS provides a built-in tool to accomplish this task.
- Access the Wireless Diagnostics Utility: Hold down the
Optionkey on your keyboard and click the Wi-Fi icon in your menu bar (the one that shows your Wi-Fi connection). From the drop-down menu, select "Open Wireless Diagnostics…” - Initiate the Scan: In the Wireless Diagnostics window, you'll be prompted with a few options. Click
Continue, and eventually, you'll see a menu. Click onScanto start analyzing your Wi-Fi bands for network congestion and interference. The utility will gather network information. - Interpret the Results: The scan will provide a wealth of information, including a list of nearby networks, their signal strengths, and the channels they're using. Pay close attention to the "Channels" column. The report will identify the channels with the least amount of interference. This data is invaluable because it reveals the least crowded “lanes” available for your MacBook to use.
Note the channels that appear the least populated. These will be your primary targets for manual channel selection.
The Power of Manual Channel Selection: Taking Control of Your Wi-Fi
Armed with the knowledge of your network environment, we can now move on to the proactive measures. MacOS allows you to manually select the Wi-Fi channel your router uses, giving you the ability to sidestep congestion and optimize your connection. However, there are a few requirements. You will have to access your router administration settings and the interface can vary from one router to the next.
- Access Your Router's Settings: This is normally done through a web browser. You'll need to enter your router's IP address into the address bar. This address is usually
192.168.1.1or192.168.0.1, but it varies. Consult your router's manual or look for a sticker on the device itself for the correct address. You'll also need your router's username and password. - Locate the Wireless Settings: Once you've logged into your router's administration interface, look for the "Wireless," "Wi-Fi," or "Basic Settings" section. The exact location will depend on your router's manufacturer and model.
- Find the Channel Selection Option: Within the wireless settings, you should find a "Channel" or "Channel Selection" option. It likely shows some form of "Auto" or "Automatic" selection.
- Select a Less Crowded Channel (5 GHz Band Recommended): It's time to put the data gleaned from the Wireless Diagnostics to work. From the drop-down menu, select one of the channels you identified as being less utilized in the scan. I highly recommend selecting a 5 GHz channel for better performance. For example, if the scan revealed minimal activity on channel 40, select this channel. If you have multiple routers, be aware that interference can result.
- Save Your Changes and Restart Your Router: Apply the changes and exit the settings. Most routers will prompt you to restart. Do so. This will allow the changes to take effect, including switching your router's channel.
Optimizing for the 2.4 GHz Band (If Necessary)
While the 5 GHz band generally offers superior performance, some devices may only support 2.4 GHz. If you find yourself reliant on the 2.4 GHz band, make sure to find the least congested channel using the Mac's Wireless Diagnostics tool.
The 2.4 GHz band has fewer available channels, which means that it is much easier to be congested.
- Channel Spacing and Overlap: Channels in the 2.4 GHz band overlap. This means that choosing channel 1 might also interfere with channel 2 and 3. Avoid channels that overlap with other channels. Channels 1, 6, and 11 are often considered the least overlapping and therefore may be better choices.
- Testing the Results: After changing the channel, give your Mac a chance to reconnect to your Wi-Fi network. Test your internet speeds. If you are still experiencing issues, repeat the manual channel selection, choosing a different channel. It’s very possible that the initial channel choice may also be congested.
Troubleshooting Common Issues
Sometimes, even after changing channels, you may encounter Wi-Fi problems. Here are some common issues and how to address them:
- Slow Speeds: If your speeds are still slow, ensure that you're not too far from your router. Walls and other obstacles can also significantly decrease the signal strength. Try moving closer to the router or repositioning the router in a more central location. Also, make sure that your Mac and your router support the latest Wi-Fi standards.
- Intermittent Connection Drops: Dropped connections can result from hardware issues as well as channel interference. Try restarting your modem, router, and your Mac. Also, ensure that your router's firmware is up-to-date. Firmware updates often include performance improvements and bug fixes. If issues persist, try resetting your network settings on your Mac.
- Compatibility Issues: Old devices or poorly configured routers and other network devices can affect a network. Ensure all of your devices are compatible with the latest Wi-Fi standards.
Conclusion: Reclaiming Your Wi-Fi Experience
Taking control of your Mac's Wi-Fi connection through manual channel selection is a powerful way to combat congestion and optimize your online experience. While the steps outlined above don't guarantee a perfect connection, they provide a robust framework for taking command of your network environment. Remember to regularly reassess your channel selection, especially as your neighborhood network landscape changes. With a little effort and the right tools, you can banish those frustrating Wi-Fi woes and reclaim the smooth, reliable connectivity your Mac deserves. Now go forth and enjoy the freedom of uninterrupted browsing, streaming, and working!
