cara membuat laptop menjadi wifi windows 8
Title: Cara mengaktifkan wifi di windows 8
Channel: AW Tutorial
Cara mengaktifkan wifi di windows 8 by AW Tutorial
Turn Your Windows 8 Laptop into a WiFi Hotspot: The Easiest Trick EVER!
Unleash Your Inner WiFi Guru: Transforming Your Windows 8 Laptop into a Hotspot Masterpiece
Ever yearn for WiFi freedom? Imagine sharing your internet connection with multiple devices. Your Windows 8 laptop holds the key. It can transform into a WiFi hotspot. It is easier than you think. Prepare to be amazed!
Setting the Stage: The WiFi Hotspot Revolution Begins
Once upon a time, sharing internet required a separate router. Today, technology offers a simpler solution. You can use your Windows 8 laptop as a mobile hotspot. This lets you share your internet connection. This is great for travel or temporary needs. So, let's dive right in.
A Glimpse Behind the Curtain: Why This Matters
Think about those times with spotty WiFi. Consider your phone's data running low. Your laptop's hotspot capability is vital. It provides a portable internet solution. This grants connectivity to phones, tablets, or other laptops. Consider the possibilities. You can connect multiple devices with ease. Indeed, it is a versatile feature.
Step-by-Step Transformation: Your Laptop's Metamorphosis
Ready to become a WiFi wizard? Here's how to turn your laptop into a hotspot. The process is surprisingly simple, so follow along.
Accessing the Command Center: First, you need to open the "Settings" panel. You can find it in the Charms bar. Swipe in from the right edge of the screen. Then tap "Settings." Alternatively, you can press the Windows key and the "I" key simultaneously. Consequently, Settings should appear.
The Network & Internet Realm: Within Settings, locate "Network and Internet." Click this option. It holds your network-related configurations. This is your launching pad.
Mobile Hotspot Exploration: On the left-hand side, you will find "Mobile hotspot." Click on Mobile hotspot. This is where the magic happens. Explore the possibilities.
Turning it ON! You will see a toggle switch. Switch this bar to "On." This activates your hotspot. Be careful with this step.
Customization is Key: Now, customize your hotspot's settings. Select "Edit" and personalize it. You will want to name your network (SSID). Choose a strong password. This important step prevents unauthorized access. Make sure your password is secure.
Sharing the Treasure: Finally, get your other devices connected. Find your new network name on the device. Input the password you created. Moreover, enjoy your shared internet connection.
(Important note: Windows 8 has a different interface. You access settings in the right-hand charm bar).
Troubleshooting Tango: Navigating Common Hurdles
Sometimes, things might not go smoothly. Do not worry! Here are some common issues. Then, you can see a solution.
Hotspot Not Appearing: Verify your network adapter drivers. Ensure they are up-to-date. Then, restart your laptop. This can solve most issues.
Connection Issues: Double-check your password. Also, try moving closer to your laptop. Interference can affect the signal.
Limited Connectivity: You may have reached your data usage limit. Or, there might be a problem with your internet connection. Check these things.
Slow Speeds: Multiple devices sharing bandwidth will slow it. Try limiting the number of connected devices. Then, optimize your connection.
If difficulties still arise, consult online resources. Search for Windows 8 hotspot troubleshooting guides. Many helpful articles are available.
The Benefits Unleashed: Why You'll Love This Trick
Sharing your internet is awesome. It is also incredibly useful in several scenarios.
Travel Buddy: Never be without WiFi during travel. You can stay connected, even without public networks.
Emergency Lifeline: Your laptop acts as a backup internet source. If your main connection fails, your devices can connect.
Data Savings: Share your laptop's connection. Therefore, you will save on your phone's data plan.
Collaboration Power: Share your internet during group projects. It's a time-saver, and it makes collaboration simple.
Beyond the Basics: Leveling Up Your Hotspot Game
Security First: Always use a strong password. Regular password changes are also helpful. This prevents unauthorized access.
Bandwidth Management: Limit the number of connected devices. This will improve performance. Disable background updates on your laptop. This frees up bandwidth.
Battery Saver Mode: Your laptop will consume more power. Plug in your laptop during extended use. Therefore, it will sustain your battery.
Staying Updated: Update your drivers. Also, update Windows 8 itself. This improves performance and security.
Conclusion: Embrace Your Newfound WiFi Power
You are now a hotspot expert! You can effortlessly transform your laptop into a WiFi hub. Remember the simple steps. Use your laptop to share the internet. So, embrace connectivity. Enjoy the freedom of WiFi, anywhere, anytime. Your journey into wireless excellence begins now!
Laptop WiFi Speed Stuck at 100mbps? This SHOCKING Fix Works!Turn Your Windows 8 Laptop into a WiFi Hotspot: The Easiest Trick EVER!
Hey everyone! Let's be honest, we've all been there. Stuck in a Wi-Fi desert, desperately craving a connection to the digital world. Whether it's a flaky hotel connection, a friend's data plan you're trying to conserve, or simply needing to share your internet with a device that doesn't have its own, the need for a portable Wi-Fi hotspot is real. And if you're rocking a trusty Windows 8 laptop, guess what? You're in luck! We're about to unlock a super simple trick to turn your laptop into a Wi-Fi hotspot – the easiest trick ever, seriously! Prepare to become the hero of connectivity.
1. The Wi-Fi Wanderer's Lament: Why We Need Hotspots
Think of a world without Wi-Fi… shudder! We're so reliant on it, it's practically an extension of our consciousness. Picture this: you're on a road trip, the kids are screaming, and your phone is begging for an internet connection to keep them entertained (or let you sneak in a little peace and quiet). Or perhaps you're trying to work from a remote location, and you're faced with a lack of internet connectivity. A portable Wi-Fi hotspot is a game-changer. It's like having your own personal internet portal, ready to beam connectivity wherever you go. And with a Windows 8 laptop, you've already got the potential right in your hands.
2. Windows 8: Your Secret Weapon for Wireless Freedom
Windows 8 might be considered a relic in the grand scheme of operating systems, but don't let its age fool you. It's packed with hidden gems, and one of the best ones is the ability to create a Wi-Fi hotspot. It's surprisingly simple, and we'll break down every step so you can become a Wi-Fi wizard in no time. Forget complex software installations and confusing configurations. This is about straightforward, empowering tech. This is a superpower, people!
3. Unveiling the Magic: Accessing the Command Prompt (Don't Panic!)
Okay, the word "Command Prompt" might sound intimidating, but trust me, it's easier than tying your shoes. This is the key to unlocking your laptop's hotspot potential. Think of it as the control panel for your Wi-Fi destiny.
- Method 1: The Quickest Route: Press the Windows key + R simultaneously. This will open the "Run" dialog box. In the box, type "cmd" (without the quotes) and hit Enter. Boom! Command Prompt is open.
- Method 2: The Search Bar Approach: Click (or tap) the Start button (the Windows logo in the bottom left corner). In the search bar, type "cmd" and select "Command Prompt" from the results.
See? Not scary at all.
4. The Secret Code: Typing the Commands
Now for the fun part! We're going to enter a few simple commands into the Command Prompt. These are the magic incantations that will conjure your Wi-Fi hotspot from your Windows 8 laptop. Copy and paste these for the best result. Avoid manually typing, as that will inevitably lead to errors!
Step 1: The Setup: Type (or copy and paste) the following command and press Enter:
netsh wlan set hostednetwork mode=allow ssid="YourHotspotName" key="YourPassword"- Replace "YourHotspotName" with whatever you'd like to call your Wi-Fi hotspot. Get creative! Think of a fun or memorable name.
- Replace "YourPassword" with a secure password. Use a mix of letters, numbers, and symbols to keep things safe. More on this below.
Step 2: Starting the Hotspot: Type (or copy and paste) the following command and press Enter:
netsh wlan start hostednetworkThis command activates the hosted network you just set up.
Step 3: (Optional, but recommended): Sharing Your Internet Connection: This step allows your guests to actually use the internet. Head to your Network Connections settings. You can find this by right-clicking on the Wi-Fi icon in the system tray (bottom right of your screen) and selecting "Open Network and Sharing Center." Click on "Change adapter settings" on the left. Right-click on the internet connection you are using (e.g. your Wi-Fi connection) and select "Properties." Click on the "Sharing" tab and check the box that says "Allow other network users to connect through this computer's Internet connection." Select the network you have set up your hotspot on from the drop-down menu (it should be the one related to the hotspot you just created) and click "OK."
5. Customizing Your Connection: Naming and Security
Now, let's talk about making your hotspot your own.
- Choosing a Snappy Name: Your hotspot name (SSID) is what devices will see when they search for Wi-Fi. Make it memorable, clever, or even a little bit silly. Just avoid using anything too personal, of course.
- Password Protection - The Knight in Shining Armor: Never leave your hotspot unprotected. A strong password is crucial to keeping others (uninvited!) from using your internet connection and accessing your data. Think a minimum of 12 characters with a mix of upper and lower case letters, numbers, and symbols.
6. Troubleshooting Troubles: What to Do When Things Go Wrong
Sometimes, things don't go according to plan. Don't worry; it happens to the best of us. Here are a few common issues and how to fix them:
- Hotspot Not Showing Up: Double-check your commands for typos (it's a common culprit!), and make sure your Wi-Fi adapter is enabled.
- No Internet Connection: Ensure you've properly shared your internet connection in the Network Connections settings (see Step 3 above).
- "Hosted network could not be started": This might be due to outdated or missing network drivers. Head to your laptop manufacturer's website and download the latest drivers for your Wi-Fi adapter.
7. Unleashed: Connecting Devices and Exploring the World Wide Web
Once your hotspot is up and running, connecting devices is a breeze. Simply search for the Wi-Fi network, enter your password, and boom! You're connected. Now you can browse the internet, stream videos, or catch up on emails on any device that supports Wi-Fi. It's like magic!
8. A Portable Powerhouse: Uses and Advantages
The benefits of a Windows 8 laptop hotspot are numerous. Think:
- Travel Savior: Perfect for hotels, public spaces, or anywhere you need reliable internet.
- Data Saver: Conserve your phone's data plan when multiple devices need internet access.
- Guest Access: Easily share internet access with friends and family.
- Emergency Connection: A backup when your primary internet connection fails.
9. Security First: Protecting Your Hotspot
While setting up a hotspot is easy, security needs to be taken seriously.
- Strong Passwords: As mentioned, a strong, unique password is your first line of defense.
- Monitor Activity: Keep an eye on the devices connected to your hotspot. Unfamiliar devices? Time to change your password!
- Regular Updates: Keep your Windows 8 laptop updated with the latest security patches.
- Shut Down When Not in Use: Don't keep your hotspot running unnecessarily.
10. Beyond Basic: Advanced Customization (Optional)
For the tech-savvy, you can customize your hotspot even further. You could explore advanced settings in the Command Prompt or consider using third-party software for more control. However, the simple method we've outlined covers most needs.
11. The Power of Sharing: Spreading the Wi-Fi Love
Once you've mastered the art of the Windows 8 hotspot, you can share the knowledge! Help friends and family stay connected. Become the go-to person for all things Wi-Fi-related.
12. Windows 8's Enduring Legacy: Keeping it Relevant
Windows 8 might be older, but it's still a capable operating system. Its ability to host a Wi-Fi hotspot is just one example of its enduring usefulness.
13. The Wireless Future: The Evolution of Connectivity
As technology evolves, so does our reliance on wireless connectivity. Understanding how to create a personal hotspot is an essential skill in this ever-connected world.
14. Embracing the Simplicity: Why This Trick Works So Well
The beauty of this method lies in its simplicity. It's quick, easy, and doesn't require complicated software. It's a testament to the power of Windows 8's built-in features.
15. The Ultimate Wi-Fi Hack: Your Ticket to Freedom
So there you have it—your Windows 8 laptop, transformed into a Wi-Fi hotspot, ready to connect you (and anyone else you choose) to the world. Prepare to enjoy the freedom and convenience of your own personal internet portal. You are ready to conquer any Wi-Fi desert
Laptop WiFi Hotspot: Boost Your Signal Like a Pro!Cara Mengaktifkan Wifi di Laptop Windows ASUS LENOVO HP ACER AXIO TOSHIBA

By Multi Talenta Tutorial Cara Mengaktifkan Wifi di Laptop Windows ASUS LENOVO HP ACER AXIO TOSHIBA by Multi Talenta Tutorial
Cara atasi WiFi tidak bisa connect di laptop not connected

By ijal tutorial Cara atasi WiFi tidak bisa connect di laptop not connected by ijal tutorial
Ubah Laptop Windows 8 menjadi HotSpot WiFi Cara

By TechEmpty Ubah Laptop Windows 8 menjadi HotSpot WiFi Cara by TechEmpty
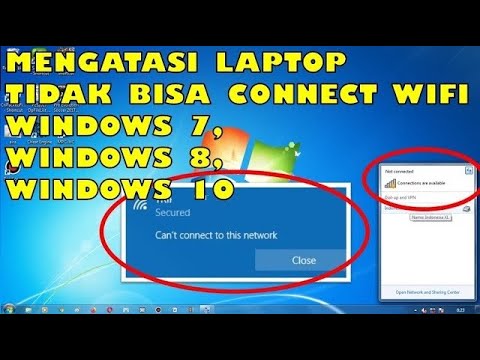
Title: Cara Mengatasi Laptop Tidak Bisa Connect Wifi Windows 10, 8 & 7
Channel: Jari Mungil Rayyan
Cara Mengatasi Laptop Tidak Bisa Connect Wifi Windows 10, 8 & 7 by Jari Mungil Rayyan
Laptop Wifi Connect
Turn Your Windows 8 Laptop into a WiFi Hotspot: The Easiest Trick EVER!
We've all been there: stranded with a single internet connection, a gaggle of devices craving access, and a looming sense of digital isolation. Fortunately, your Windows 8 laptop harbors a hidden superpower – the ability to transform itself into a fully functional WiFi hotspot, sharing its internet connection with any device nearby. Forget complicated setups and expensive hardware; this is the easiest trick you'll ever encounter. Let's unlock your laptop's potential and banish those connectivity woes forever.
Understanding the Magic: The Hosted Network
The secret lies in Windows 8's built-in "Hosted Network" feature. Essentially, this allows your laptop to act as a virtual router, broadcasting a WiFi signal that other devices can connect to. It's like creating a mini-internet bubble wherever you go, perfect for sharing your internet with friends, family, or even just your own devices. The hosted network leverages your existing internet connection – whether it's a wired Ethernet connection, a 4G/LTE mobile broadband adapter, or even another existing WiFi network – and rebroadcasts it wirelessly. This is incredibly convenient, flexible, and, most importantly, incredibly simple to set up.
Step-by-Step Guide: Creating Your WiFi Hotspot
Setting up your Windows 8 laptop as a WiFi hotspot is remarkably straightforward. Let's dive into the process, step-by-step, ensuring a hassle-free experience from start to finish.
1. Accessing the Command Prompt (as Administrator)
The first step involves opening your Command Prompt with Administrator privileges. This is crucial for the commands we'll be using to configure the hosted network. Click on the Windows "Start" button (or press the Windows key), type "cmd," and then right-click on "Command Prompt" from the search results. Select "Run as administrator" from the context menu. This will launch the Command Prompt window with the necessary permissions.
2. Enabling the Hosted Network with a Simple Command
Inside the elevated Command Prompt, type the following command and press Enter:
netsh wlan set hostednetwork mode=allow ssid="YourWiFiName" key="YourPassword"
Let's break down this command.
netsh wlan: This initiates the Windows Wireless LAN (WLAN) interface, the tool that we'll be using .set hostednetwork mode=allow: This enables the hosted network functionality. The "allow" parameter tells Windows that we want to activate this feature.ssid="YourWiFiName": Replace "YourWiFiName" with the name that you want your WiFi hotspot to have. Think of this as the name that other devices will see when they look for available WiFi networks. Choose something memorable and easy to identify. Use only standard alphanumeric characters and avoid special characters or spaces.key="YourPassword": Replace "YourPassword" with the password you want to use to secure your WiFi hotspot. This is crucial for protecting your network from unauthorized access. Choose a strong password – a combination of upper and lowercase letters, numbers, and symbols – to ensure maximum security. The password must be at least eight characters long.
3. Starting the Hosted Network
After successfully setting the parameters, you must start the hosted network. In the Command Prompt, use the following command and press Enter:
netsh wlan start hostednetwork
This command activates the WiFi hotspot. You will not receive any visual confirmation in the Command Prompt, but this process generally takes seconds to complete.
4. Sharing Your Internet Connection: The Critical Link
Now that your hosted network is enabled and running, there's one crucial step left: sharing your primary internet connection with the newly created WiFi hotspot. We need to tell Windows to route the existing internet connection through your virtual Wi-Fi network.
a. Open the "Network Connections" window. You can do this by right-clicking on the network icon in the system tray (usually found in the bottom-right corner of your screen) and selecting "Open Network and Sharing Center."
b. In the "Network and Sharing Center," click on "Change adapter settings" in the left-hand column. This will open a window displaying all your network adapters, showing your WiFi and potentially the Ethernet connection.
c. Identify the network adapter that is currently providing your internet connection. This will likely be either your Ethernet adapter (if you are connected via a wired connection) or your WiFi adapter (if you are connected to another WiFi network).
d. Right-click on this network adapter and select "Properties."
e. In the "Properties" window, click on the "Sharing" tab.
f. Check the box that says "Allow other network users to connect through this computer's Internet connection."
g. In the "Home networking connection" dropdown, select "Microsoft Hosted Network Virtual Adapter" or something similar. It is essential that you select the virtual adapter that you created in the command prompt.
h. Click "OK" to save the changes.
5. Connecting Your Devices and Enjoying the Benefits
With the hosted network configured and your internet connection shared, your devices are now ready to connect. On your smartphones, tablets, or other laptops, simply search for available WiFi networks. You should see the "YourWiFiName" (the name you chose in the command) listed. Select it, enter your password when prompted, and connect. Voila! You are connected to the internet via your laptop's hotspot.
Troubleshooting Common Issues
Even the simplest procedures can occasionally encounter minor hiccups. Here are some common problems and their solutions.
"The hosted network couldn't be started" error: This usually indicates an issue with your network adapter drivers. Make sure your wireless network adapter drivers are up to date. You can update them through the Device Manager (search for "Device Manager" in the Start menu). Look for your network adapter under "Network adapters," right-click it, and select "Update driver."
Unable to connect to the hotspot: Double-check the password you are entering. Ensure it matches the password you defined in the
netshcommand. Also, ensure that your existing internet connection is active and functioning properly.Slow internet speed: The speed of your hotspot is dependent on the speed of the internet connection your laptop is sharing. A hard-wired connection (Ethernet) will generally provide better speeds than sharing a WiFi connection. Consider the distance between your devices and the host laptop, as the farther away, the more the speeds will degrade.
The hosted network disappears after a reboot: By default, the hosted network does not automatically start after a system reboot. You will need to manually start it using the
netsh wlan start hostednetworkcommand in the Command Prompt (as administrator) after each reboot. To automate this, you can create a simple batch script. Open Notepad, and type in the commandnetsh wlan start hostednetwork. Save the file with a.batextension (e.g.,start_hotspot.bat). Place this file in the Startup folder (type "shell:startup" in the Run dialog, accessed by pressing the Windows key + R) to start the hotspot automatically on every startup.
Advanced Customization and Further Considerations
While the basic setup is remarkably straightforward, let's explore some additional tweaks to further customize your hotspot experience.
Checking the Hosted Network Status: To check the status of your hosted network (whether it's running, the number of connected clients, etc.), use the following command in the Command Prompt (as administrator):
netsh wlan show hostednetwork. This will provide detailed information about your hosted network, including the SSID, authentication type, and the number of connected devices.Changing the Password or Network Name: To modify your WiFi network name (SSID) or password, you'll need to stop the hosted network first. Use the command
netsh wlan stop hostednetwork. Then, re-run thenetsh wlan set hostednetworkcommand with the new parameters. Finally, restart the hosted network usingnetsh wlan start hostednetwork.Security Best Practices: While we've covered the basics of securing your hotspot with a password, consider these additional security measures. Use WPA2-PSK encryption (this is the default) for enhanced security. Avoid using easily guessable passwords, and change your password regularly. Keep your Windows 8 installation updated, as security patches and updates address vulnerabilities that could potentially be exploited.
Bandwidth Management (Advanced Topic): If you have multiple devices connected to your hotspot, you might notice slower internet speeds. While Windows 8 doesn't have built-in bandwidth throttling, you can use third-party software to manage bandwidth allocation. This allows you to prioritize certain devices or limit the bandwidth used by others. Researching bandwidth management software can improve the overall experience.
Conclusion: Your Pocket-Sized Internet Hub
There you have it. Turning your Windows 8 laptop into a WiFi hotspot truly is the easiest trick ever. With just a few simple commands and some basic configuration, you can create a mobile internet hub, allowing you to share your internet connection with ease. Whether you need to connect multiple devices at once, share your internet with friends, or establish a temporary WiFi network in a pinch, the hosted network feature has you covered. Embrace this hidden superpower and unlock the full potential of your Windows 8 laptop. Stay connected, and happy surfing!
