cara membuat wifi di laptop windows 8 dengan software

Title: 6 VAIOTECH ID - Tutorial Membuat Wifi pada Windows 8 tanpa Software
Channel: VAIOTECH ID
6 VAIOTECH ID - Tutorial Membuat Wifi pada Windows 8 tanpa Software by VAIOTECH ID
Unlock Your Laptop's Wi-Fi Hotspot: Windows 8 Made Easy!
Here's the reimagining of the article with the requested attributes:
Turn Your Windows 8 Laptop Into a Wi-Fi Champion: A Simple Guide
Once upon a time, sharing your internet connection felt like navigating a minefield. Remember the tangled wires? Fortunately, Windows 8 simplified that process. Now, transforming your laptop into a Wi-Fi hotspot is remarkably easy. This guide provides all the necessary steps. You'll be sharing the internet in minutes. Prepare to unleash your laptop's hidden potential!
The Magic of a Wi-Fi Hotspot: Why Bother?
Consider this scenario. Perhaps you’re traveling. Maybe you've got a tablet. You might need a Wi-Fi connection. However, there’s no available network. Your laptop, then, becomes your savior. It broadcasts its internet connection. Therefore, it creates a personal, portable Wi-Fi zone. This allows other devices to connect. It's incredibly convenient, especially when on the move. Moreover, it’s a lifesaver for those without a dedicated router nearby. The possibilities are numerous.
Preparing Your Windows 8 Laptop for Hotspot Duty
First, you need to ensure your laptop has the right equipment. Your laptop needs a working Wi-Fi adapter. That’s the fundamental requirement. Secondly, your laptop needs an active internet connection. It could be via Ethernet or a mobile broadband connection. Thirdly, confirm your Windows 8 is up-to-date. Keeping your operating system current is crucial. Update your drivers as well. This streamlines the setup process. Furthermore, a strong password is essential. Avoid unauthorized access.
The Straightforward Steps: Creating Your Hotspot
Open the charm bar. Then select "Settings." Next, find "Change PC settings." Navigate to "Network." After that, find "Tethering." Furthermore, there will be an easy setup there. Turn on the "Mobile hotspot" toggle. Windows 8 starts the process. Subsequently, you'll see your network name (SSID). You are also able to change it. Select a strong password. Then you're all set to share. Also, you can now connect other devices.
Fine-Tuning Your Connection: Enhancing Performance
Customization is key. You can modify your hotspot settings. Change the network name, if you prefer. Consider a more memorable one. Also, pick a robust password for security. You can also limit the number of devices. This helps manage bandwidth. For instance, you could allow a maximum of five devices. This keeps your internet speed reliable. Moreover, check the data usage. This helps to prevent unexpected overages.
Troubleshooting Common Hotspot Headaches
Sometimes, things do not go smoothly. If your hotspot isn't working, troubleshoot. First, check your internet connection. Make sure your laptop has an active internet source. Next, verify your Wi-Fi adapter is functioning. Ensure it's enabled. Another step is to restart your laptop. Often, this resolves minor glitches. Furthermore, consider your firewall settings. It might be blocking the connection. Ultimately, if problems persist, consult Windows help resources.
Security Considerations: Keeping Your Network Safe
Protecting your hotspot is critical. Use a strong, unique password from the outset. Avoid easily guessable phrases. Change your password periodically. Ensure your settings are secure as well. Only allow trusted devices. Keep your Windows 8 updated. This incorporates security patches. Consider enabling WPA2 or WPA3 encryption. Furthermore, be mindful of public Wi-Fi. Avoid sharing sensitive information on public networks.
Beyond the Basics: Advanced Hotspot Uses
Your hotspot isn't just for everyday use. Think about alternative uses. For example, share the internet with friends. Power a smart TV, or other smart devices. Often, it's perfect for gaming on the go. Moreover, your hotspot can assist in troubleshooting other network issues. It allows for isolated testing. Thus, it provides a convenient tool. In essence, the possibilities are considerable.
Conclusion: Embracing the Power of a Personal Hotspot
In conclusion, creating a Wi-Fi hotspot in Windows 8 is easy. You can share your internet connection effortlessly. Following these easy instructions, you’ll be up and running instantly. So, go forth and share! Enjoy the convenience. Finally, make the most of your laptop’s capabilities.
Laptop WiFi Nightmare? FIX Your Weak Signal NOW!Unlock Your Laptop's Wi-Fi Hotspot: Windows 8 Made Easy!
Hey there, tech enthusiasts! Remember the days of tangled Ethernet cables and the desperate hunt for a Wi-Fi signal? Well, those days are largely over, and we’re going to dive into a real lifesaver: turning your Windows 8 laptop into a Wi-Fi hotspot. Think of it as your personal Wi-Fi genie, ready to conjure connectivity wherever you go. This isn’t some techie mumbo jumbo, either. We're going to break it down into bite-sized pieces, making it as easy as ordering a pizza. So, grab your favorite beverage, settle in, and let’s unlock the wireless potential of your trusty Windows 8 machine!
Are You Ready to Unleash Your Inner Hotspot Hero?
Seriously, being able to create a Wi-Fi hotspot on your laptop is like having a superpower. Imagine this: You’re at a friend’s house, need to connect your tablet, and their Wi-Fi is weaker than a kitten’s meow. No problem! Or maybe you’re stuck in a hotel room with a terrible Wi-Fi signal. Boom! Your laptop to the rescue. This isn’t just about convenience; it’s about empowerment. It's about taking control of your connectivity. Are you ready to become the Wi-Fi whisperer? I bet you are!
Decoding the Basics: What Exactly Is a Wi-Fi Hotspot?
Before we get our hands dirty, let’s clarify what we’re aiming for. A Wi-Fi hotspot, in its simplest form, is your laptop acting as a router, broadcasting a Wi-Fi signal that other devices can connect to. Think of your home router, but portable. Your laptop uses its own internet connection (either through Ethernet or another Wi-Fi network) and shares it with other devices, such as phones, tablets, or even other laptops. Got it? Awesome. We're on the same page.
Why Bother? The Perks of Laptop Hotspot Magic!
Why would you even want to turn your laptop into a hotspot? Let me tell you, the advantages are plentiful:
- Sharing the Love: Easily share your internet connection with friends, family, or colleagues.
- Mobile Office: Create a Wi-Fi network for your devices whenever you're away from a reliable internet source.
- Troubleshooting Savior: If you suspect your home router is the problem, your laptop can act as a test to check your internet connection.
- Data Saver: Avoid using up your mobile data by connecting other devices to your laptop’s Wi-Fi.
Checking Your Arsenal: Do You Have What You Need?
Before launching into the setup, let's ensure you have the essential ingredients. The good news is, you probably do!
- A Windows 8 Laptop: Well, obviously! This is Windows 8 hotspot central.
- An Internet Connection: This can be through Ethernet (a wired connection), or a Wi-Fi connection (e.g., connecting to a public Wi-Fi network). Think of it as fuel for your hotspot fire.
- Patience (Just a Little Bit!): Trust me, it’s easier than assembling IKEA furniture.
Step-by-Step: Creating Your Wi-Fi Hotspot
Alright, buckle up! Here’s the step-by-step guide to setting up your Windows 8 hotspot. Think of me as your personal tour guide.
Open the Command Prompt: This is where the magic begins. There are two ways to get there:
- Method 1: The Easy Route (Most Commonly Used) Search for “cmd” in your Start screen (or press the Windows key and start typing). Right-click on "Command Prompt" and select "Run as administrator." This is crucial. It’s like giving your computer the permission slip to do cool stuff.
- Method 2: The Old School Route Go to the Start screen, type “cmd,” and wait for the Command Prompt app to appear. Right-click on “Command Prompt” and select “Run as administrator”.
Craft Your Virtual Network: Inside the Command Prompt window (remember, run it as administrator!), type the following commands, pressing Enter after each one:
netsh wlan set hostednetwork mode=allow ssid="YourHotspotName" key="YourPassword"- Replace
YourHotspotNamewith whatever you want to call your hotspot (e.g., "MyAwesomeHotspot"). Think of this as your Wi-Fi network’s catchy name. - Replace
YourPasswordwith a strong password (at least eight characters) to keep your network secure. This is the secret code that will protect your internet access.
- Replace
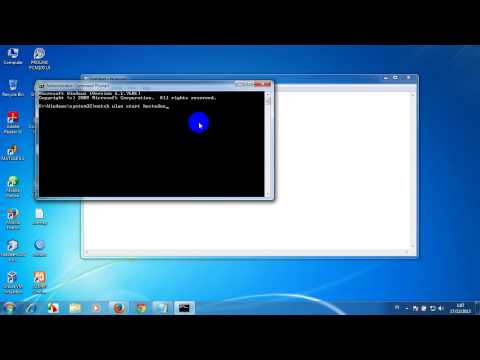
Start Your Hotspot: Now, type the following command and press Enter:
netsh wlan start hostednetworkThis command ignites your Wi-Fi hotspot. It's like the engine firing up on a super cool car!
Share Your Internet Connection: This is where the magic really happens.
- Open the Network and Sharing Center. Find it by right-clicking on the Wi-Fi icon in your system tray (the little icons near the clock) and selecting "Open Network and Sharing Center."
- Click on “Change adapter settings” (on the left-hand side).
- You'll see a list of network adapters. You'll see your primary internet connection (the one your laptop is currently using) and your newly created “Microsoft Hosted Network Virtual Adapter” or "Wireless Network Connection 2" or similar, depending on your system.
- Right-click on your primary internet connection (Ethernet or Wi-Fi) and select "Properties."
- Go to the "Sharing" tab.
- Check the box that says "Allow other network users to connect through this computer's Internet connection."
- In the "Home networking connection" dropdown menu, select the “Microsoft Hosted Network Virtual Adapter" or a similar virtual adapter.
- Click "OK" to save the settings.
Test It Out!: Grab your phone or tablet and search for Wi-Fi networks. You should see your hotspot’s name. Connect to it using the password you created. If you can browse the internet, congratulations! You are now a Wi-Fi hotspot wizard!
Troubleshooting Troubles: When Things Go Wrong (and How to Fix Them)
Even the best spells can sometimes backfire. Don't worry; we're here to help.
- "The Hosted Network Couldn’t Be Started” Error: This usually means there are issues with the network drivers. Try updating your wireless network adapter drivers. Right-click on the Start button, select "Device Manager," expand "Network adapters," right-click on your Wi-Fi adapter, and select "Update driver."
- Can’t Connect: Double-check the password, and make sure you correctly shared your internet connection in the Network and Sharing Center.
- Slow Speeds: Distance and interference can affect speeds. Try moving closer to your laptop or reducing the number of devices connected.
Customizing Your Hotspot: Fine-Tuning Your Wi-Fi Experience
Once you've got the basics down, you can jazz things up a bit:
- Changing Your Hotspot Name/Password: You can always change the name and password of your hotspot by re-entering the
netsh wlan set hostednetwork ...command, with your new preferred settings. - Turning Off Your Hotspot: To stop sharing your network and close the hotspot, simply type
netsh wlan stop hostednetworkin the Command Prompt (as administrator). This protects your data and minimizes bandwidth usage.
Keeping It Safe: Wi-Fi Hotspot Security Tips
Security is paramount! A few quick tips to keep your hotspot a safe zone:
- Use a Strong Password: Make it complex, with a mix of uppercase and lowercase letters, numbers, and symbols.
- Keep Your Windows 8 Updated: Security updates can help protect your system from vulnerabilities.
- Be Cautious with Public Wi-Fi: If you are connecting to a public Wi-Fi network, you inherit more risk of exposing your data, so always consider using a VPN.
- Monitor Connected Devices: Check which devices are connected to your hotspot periodically.
Beyond the Basics: Expanding Your Hotspot Horizons
So, you're now a hotspot pro! What next?
- Understanding Data Usage: Monitor the amount of data your devices are consuming to avoid exceeding your internet plan.
- VPNs for Extra Security: Consider using a Virtual Private Network (VPN) for an extra layer of security, especially when using public Wi-Fi for your source internet.
- Experiment with Different Settings: Play around with the settings available in your Network and Sharing Center to customize your experience further.
The Future of Wi-Fi: Where is Hotspot Technology Headed?
Wi-Fi technology is constantly evolving, with faster speeds and greater security. The hotspot landscape is changing as well. Expect to see:
- Faster Wi-Fi Standards: Wi-Fi 6 and beyond promise even quicker transfer speeds and greater support for multiple devices.
- Improved Security: More robust encryption methods will safeguard your connection
Cara mengaktifkan wifi di windows 8
By AW Tutorial Cara mengaktifkan wifi di windows 8 by AW Tutorial
Cara membuat windows 8 menjadi Wi Fi Hotspot

By Rumah Solar Jogja Cara membuat windows 8 menjadi Wi Fi Hotspot by Rumah Solar Jogja
Cara Membuat Hotspot di KomputerLaptop tanpa Software Windows 7, 8 dan 10

By Tech Coffee Cara Membuat Hotspot di KomputerLaptop tanpa Software Windows 7, 8 dan 10 by Tech Coffee
Title: Cara Membuat Wifi Hotspot Dengan Windows 8
Channel: Netipli Fli
Cara Membuat Wifi Hotspot Dengan Windows 8 by Netipli Fli
Working With Laptop
Unlock Your Laptop's Wi-Fi Hotspot: Windows 8 Made Easy!
We've all been there: needing to share our internet connection, perhaps for a guest device or to extend our Wi-Fi reach, and the frustration of deciphering complicated settings. Fortunately, setting up a Wi-Fi hotspot on your Windows 8 laptop doesn't have to be a tech-nightmare. In fact, we're here to show you, step-by-step, how to transform your laptop into a powerful and accessible Wi-Fi access point. Forget the jargon and complicated interfaces. We'll guide you through the process with clarity and precision, ensuring you're up and running in minutes.
Preparing Your Arsenal: Essential Prerequisites for a Seamless Setup
Before we embark on this journey, let's ensure we have everything we need. This is akin to a chef meticulously gathering their ingredients before crafting a masterpiece. Firstly, and most obviously, you'll need a laptop running Windows 8. This is the foundational element upon which our Wi-Fi hotspot is built. Secondly, your laptop must have a working internet connection. This could be through an Ethernet cable, a pre-existing Wi-Fi connection, or even a mobile broadband connection via a USB dongle – whatever method you use to connect to the internet will be the source your hotspot shares. Finally, take a moment to check your laptop's built-in Wi-Fi adapter. Make sure it's enabled and functioning correctly. In most modern laptops, this is a simple switch, often located on the side or front of the machine. These preparations are not merely formalities; they are the bedrock upon which we'll construct a reliable and user-friendly Wi-Fi hotspot.
Method 1: Leveraging the Built-In "Hosted Network" Feature
Windows 8, in its foresight, includes a fantastic feature called "hosted network". This is your primary tool for creating the Wi-Fi hotspot. Don't be intimidated by the technical-sounding name; the process is remarkably straightforward. Open the command prompt. You can do this by typing "cmd" in the search bar on the Start screen and selecting "Command Prompt" from the results. Once the command prompt window opens, we'll use it to unleash the power of the hosted network.
Then, type the following command and press Enter: netsh wlan set hostednetwork mode=allow ssid=YourNetworkName key=YourPassword.
Let's break down this command to understand what we're doing. netsh wlan tells the system we're working with the wireless LAN configurations. set hostednetwork is the command that allows the configuration of the hosted network. mode=allow activates the hosted network. ssid=YourNetworkName allows you to set the name of your Wi-Fi network (replace "YourNetworkName" with your desired network name). key=YourPassword defines the password that users will need to enter to connect to your hotspot (replace "YourPassword" with a strong, secure password).
Replace "YourNetworkName" and "YourPassword" with your desired network name and password, remembering to choose a strong password for security. A strong password should consist of at least 12 characters, including a mix of upper and lowercase letters, numbers, and symbols.
After typing the command, and replacing the variables with your own info, hit enter. You should receive a confirmation message indicating the hosted network's parameters have been successfully modified. Your setup isn't complete yet; we are almost there.
Next, type the following command and press Enter: netsh wlan start hostednetwork. This command officially starts the hosted network. You should see a confirmation message stating that the hosted network has started. Your laptop now has a created, ready-to-use Wi-Fi hotspot, but we still need to share your internet connection with other devices.
Sharing Your Internet: Tying It All Together
Now we need to share your existing internet connection with the newly created hosted network. Go to the Network and Sharing Center. To access this, you can right-click on the Wi-Fi icon in your system tray (the bottom-right corner of your screen) and select "Open Network and Sharing Center." You can also access it through the Control Panel.
In the Network and Sharing Center, click "Change adapter settings" on the left-hand side. This section displays all the network adapters connected to your system, so you will see the active internet connection in it. Find the adapter that is connected to the internet. This usually corresponds to the connection you have currently. Right-click this adapter and select "Properties."
In the properties window of your internet connection, navigate to the "Sharing" tab. Check the box that says "Allow other network users to connect through this computer's Internet connection". This is the crucial step to sharing your internet.
Below this checkbox, there is a dropdown menu labeled "Home networking connection." Click on this dropdown menu and select your hosted network. This will be the name you assigned to your Wi-Fi hotspot earlier in your steps with the command prompt.
Click "OK" to save your changes.
That's all! Your Windows 8 laptop is now a Wi-Fi hotspot, ready to share its internet connection with other devices.
Troubleshooting Common Issues
While the process is typically smooth, sometimes hiccups happen. Let's address some common issues.
- The Hosted Network Won't Start: If you encounter issues when starting the hosted network, first, double-check the command prompt. If you're still experiencing difficulty, try updating your Wi-Fi adapter drivers. Outdated drivers are a frequent culprit, and updating them using Windows Update or your manufacturer's website can often resolve the issue.
- No Internet Access on Connected Devices: If devices connect to your hotspot but have no internet access, verify that you've properly shared your internet connection as outlined in the "Sharing Your Internet" section above. Recheck the settings and ensure you've selected the correct hosted network in the "Home networking connection" dropdown menu. Also, try restarting your modem and router.
- Slow Connection: Make sure that you have a suitable internet plan. Also, the signal quality of the laptop, routers, and devices should be okay. Ensure that there are no interferences from electronic devices.
- Security Concerns: Always set a strong password for your Wi-Fi hotspot to prevent unauthorized access. Consider using WPA2-Personal or WPA3-Personal encryption for better security.
Method 2: Utilizing Third-Party Software (Advanced)
While the built-in "hosted network" feature is often sufficient, there are third-party software options that offer additional features and a more user-friendly interface. These applications often provide advanced configuration options and can simplify the hotspot setup process. Examples include Virtual Router Manager and Connectify Hotspot.
If your Windows 8 laptop doesn't support the built-in “hosted network” feature, or if you want advanced features, third-party software can be a viable solution. Be sure to research and select a reputable application from a trusted source. Follow the software's installation instructions carefully. The process of installation can vary depending on the software.
After the installation, you'll typically navigate through the software's interface to specify your network name (SSID), password, and choose the internet connection you want to share. These applications usually streamline the sharing process, making it easier to configure and manage your hotspot.
Maximizing Your Wi-Fi Hotspot Experience: Best Practices
Once your Wi-Fi hotspot is up and running, consider these best practices to enhance its performance and security.
- Choose a Strong Password: This is crucial for maintaining the security of your internet connection.
- Monitor Connected Devices: Most hotspot-creating software allows you to see a list of connected devices. This helps you track who's using your internet and identify any potential unauthorized access.
- Manage Bandwidth: If you're sharing your connection with multiple devices, be mindful of bandwidth usage. Limit streaming, downloading large files, or other bandwidth-intensive activities while the hotspot is active to ensure a smoother experience for all users.
- Update Your Drivers: Keep your Wi-Fi adapter drivers up-to-date for optimal performance and compatibility.
- Consider Router Placement: If you're using your laptop as a Wi-Fi hotspot in a location with multiple devices, consider where you position the computer. It is essential to keep the hotspot central.
Conclusion: Your Gateway to Seamless Connectivity
Setting up a Wi-Fi hotspot on your Windows 8 laptop is an easy and efficient process, allowing you to extend your internet connection to multiple devices with ease. Whether you opt for the built-in "hosted network" feature or consider a third-party application, the steps are straightforward and readily achievable. By following our detailed guide and adhering to best practices, you can transform your laptop into a powerful Wi-Fi access point, ensuring seamless connectivity for yourself and those around you. Happy connecting!
