how to connect switch to wifi through laptop
Title: How to Set Up an Ethernet Switch Internet Setup
Channel: Howcast
How to Set Up an Ethernet Switch Internet Setup by Howcast
how to connect switch to laptop wifi, can you connect a switch to your laptop
Laptop to WiFi: The SHOCKINGLY Easy Trick You NEED!
Unlock the Wireless World: Your Laptop's WiFi Savior
Ever find yourself wrestling with a laptop that stubbornly refuses to connect to WiFi? It is a frustrating experience. You feel cut off from the digital world. Thankfully, there's a remarkably uncomplicated solution. It is something you absolutely need. This article will reveal the secrets. Prepare to be amazed at how easy it is.
The Silent Struggle: Recognizing Your WiFi Woes
First things first. Is your laptop even seeing available WiFi networks? Do icons signal a connection failure? You might see a small "x" over the WiFi icon. Sometimes, it shows limited connectivity. These are the common signs. These are signals that something is amiss. Let's get your laptop back online, immediately.
The Unsung Hero: Checking Your Hardware Switches
Believe it or not, a physical switch often holds the key. Many laptops have a dedicated WiFi hardware switch. Look closely at the sides or front. You are searching for a small switch or button. It might have an antenna icon. Ensure this switch is flipped to the "on" position. Sometimes it is as simple as this. It really is that easy.
Software Sleuthing: Diagnosing the Digital Demons
Once you are sure about your hardware, let's check the software. Your operating system controls WiFi. Double-check that your WiFi is enabled in the settings. For Windows, head to your system tray. Click the WiFi icon. Ensure WiFi is actually turned on. Look for a sliding switch. Set it to "on". Then, try reconnecting to your WiFi network.
Driver Dilemmas: The Tech Troubleshooter’s Trick
Drivers are vital. They are the software that allows your laptop to communicate. Outdated or corrupted drivers can cripple WiFi functionality. Here's a straightforward process. Access Device Manager within your operating system. You can usually find it by searching in the Start menu. Locate "Network adapters." Expand this section. Find your WiFi adapter (it will usually have "WiFi" or "Wireless" in its name). Right-click it. Choose "Update driver." Windows will search automatically. It will look for the latest version. Restart your laptop after the driver update. Test your WiFi connection again.
The Router Rundown: Ensuring a Solid Connection
Sometimes, the problem isn't your laptop. The router is the heart of your home network. Try these quick fixes. Firstly, restart your router. Unplug it from the power outlet for about 30 seconds. Then, plug it back in. This can often clear up minor glitches. Next, move closer to your router. The signal strength can be affected by distance. Additionally, check for interference. Avoid placing your router near other electronic devices. These devices can interfere with the WiFi signal.
Network Name Nonsense: Forgetting and Remembering
Your laptop might have a hiccup with a remembered network. Consider this potential fix. Forget the network. Then, reconnect. In your WiFi settings, find the network. Choose the "Forget" option. Then, search for the network again and re-enter the password. This can refresh the connection. You may have solved the problem.
Hidden Hardware: Checking the Adapter Status
Your WiFi adapter has a status. It gives you valuable information. In Device Manager, right-click your WiFi adapter. Select "Properties". Look for the "Device status" section. This reveals any error messages. If there are any issues, this is the place to find them. The status will provide hints. These hints will lead you to a solution.
The Password Predicament: Ensuring Accuracy
Double-check your WiFi password. It’s an easy mistake to make. Ensure you are entering the correct password. Passwords are case-sensitive. Small errors can lead to connection failure. Try entering it very carefully.
Troubleshooting Tactics: When All Else Fails
If these steps don't work, don't panic. Consider a system restore. This returns your laptop to an earlier state. It can fix software problems. Alternatively, research your laptop model. Search online for specific troubleshooting steps. You are likely to find a few forums. These forums offer targeted advice. You can also contact the manufacturer. Their support team can provide more detailed guidance.
The Wireless Victory: Reclaiming Your Connection
Following these steps should resolve most WiFi issues. You are now armed with essential knowledge. You can overcome connection problems. You can now reconnect quickly. Enjoy your renewed access to the online world. Stay connected easily.
Unlock Your Laptop's Hidden Hotspot: Free WiFi Anywhere!Laptop to WiFi: The SHOCKINGLY Easy Trick You NEED!
Ever been stranded, laptop in hand, staring desperately at that blinking "no internet" icon? We've all been there. That frustrating moment when the Wi-Fi decides to stage a walkout, leaving you feeling disconnected and, frankly, a bit lost. But what if I told you there's a ridiculously simple trick, a hidden gem of technology, that can get you back online in a flash? A trick so easy, so readily available, you'll kick yourself for not knowing it sooner? Well, buckle up, because we're about to dive into the shockingly simple world of connecting your laptop to Wi-Fi.
1. The Wi-Fi Wilderness: Why We ALL Struggle
Let's be honest, Wi-Fi woes are practically a rite of passage in the digital age. From glitchy signals to forgotten passwords, the path to online freedom is often paved with frustration. We've all wrestled with dropped connections mid-video call, the buffering wheel of doom, and the sheer panic of a looming deadline coupled with a stubborn refusal from our laptops to play nice. Remember that time your crucial presentation was due, and the Wi-Fi decided to take a sabbatical? Yeah, we feel you. This is why a foolproof method is so crucial.
2. The Unexpected Savior: Your Phone to the Rescue
Now, here's where the magic happens. The often-overlooked hero of our connectivity problems isn't a fancy router or a tech guru; it's your smartphone. Yes, that small, pocket-sized device that's already holding the world in its palm. Your phone, with its built-in cellular data capabilities, can be transformed into a personal Wi-Fi hotspot, acting as a bridge between your laptop and the internet. Think of it like a digital Swiss Army knife, always ready to save the day.
3. Unlocking the Power: How to Turn Your Phone into a Hotspot
This is where things get incredibly simple. The process varies slightly depending on your phone's operating system (iOS or Android), but the core concept remains the same:
- Android:
- Go to your phone's settings.
- Look for "Network & Internet" or "Connections."
- Select "Hotspot & tethering."
- Tap on "Wi-Fi hotspot."
- Toggle the switch to turn it on.
- You can personalize your hotspot by changing the network name (SSID) and password.
- iOS (iPhone):
- Open your phone's settings.
- Tap on "Personal Hotspot."
- Toggle the switch to turn it on.
- Ensure on the same screen that "Allow Others to Join" is enabled. You can also create or change the Wi-Fi password here.
See? Easy peasy!
4. Connecting Your Laptop to the Phone-Powered Wi-Fi
Once your phone's hotspot is activated, connecting your laptop is a breeze. It's almost identical to connecting to any other Wi-Fi network:
- On your laptop, click the Wi-Fi icon in the system tray (usually in the bottom right corner).
- You should see a list of available Wi-Fi networks. Look for the network name (SSID) you set up on your phone.
- Select your phone's hotspot network.
- Enter the password (also set up on your phone) when prompted.
- Voilà! Your laptop should be connected to the internet, using your phone's data.
5. A Word of Caution: Data Consumption and Costs
Now, a gentle reminder: using your phone as a hotspot consumes cellular data. This means you need to be aware of your data plan. Streaming videos or downloading large files can quickly eat through your allowance. Think of it like eating a delicious meal; the better the meal (the more data you consume), the higher the bill (the potential overage charges). Keep an eye on your data usage to avoid any unpleasant surprises. Most phones have data usage trackers within the settings.
6. Beyond the Basics: Optimizing Your Hotspot Experience
Want to squeeze even more performance out of your phone-powered Wi-Fi? Here are a few tips:
- Choose the Right Bandwidth: Your phone may offer both 2.4 GHz and 5 GHz Wi-Fi bands. 5 GHz is generally faster but has a shorter range. 2.4 GHz has a longer range but can be slower and more prone to interference. Choose the one that best suits your needs and the distance between your phone and laptop.
- Keep Your Phone Charged: Running a hotspot drains your phone's battery. Make sure your phone is adequately charged, or better yet, plugged in.
- Location, Location, Location: Place your phone in a location with good cellular reception. The stronger the signal, the better the connection. Think of it like finding the sunniest spot in your garden for optimal plant growth.
7. The Everyday Scenarios: When This Trick Shines
This simple trick is a lifesaver in countless scenarios:
- Traveling: Stuck on a train, in a cafe with unreliable Wi-Fi, or in a hotel with outrageous internet fees? Your phone to the rescue!
- Emergency Situations: When your home internet goes down, or you need a backup plan.
- Remote Work: Working from a location with limited or no Wi-Fi.
- Staying Connected on the Go: Streaming your favorite shows, checking emails, or staying in touch with friends and family – anytime, anywhere.
8. Troubleshooting Common Issues
Sometimes, things don't go as planned. Here are a few quick fixes for common problems:
- Laptop Can't Find the Hotspot: Make sure your phone's hotspot is turned on and visible (check the settings).
- Slow Connection: Check your phone's cellular signal strength. Try moving your phone to a location with a better signal.
- Connection Drops: Restart both your phone and your laptop.
- Security Errors: Ensure the Wi-Fi password is correct. Re-enter it.
9. Beyond Hotspots: Other Ways to Connect Laptops to Wi-Fi
While a phone hotspot is a fantastic solution, other options exist. Consider these:
- USB Tethering: Connect your phone to your laptop via a USB cable and enable USB tethering in your phone's settings. This tends to be more stable than a Wi-Fi hotspot.
- Mobile Broadband Dongles: A mobile broadband dongle offers a dedicated cellular connection for your laptop. These can be a good option if you frequently need internet access on the go.
- Public Wi-Fi: Utilize public Wi-Fi hotspots at cafes, libraries, and other locations. Always use a VPN (Virtual Private Network) for security when using public Wi-Fi.
10. Level Up Your Tech Skills: Embracing the Simple Solutions
The beauty of technology is its ability to simplify our lives. By embracing these simple solutions, you're not just solving a problem; you're empowering yourself with the knowledge and skills to navigate the digital world with confidence. It's like learning a new language – once you understand the basics, you can communicate with the world in exciting new ways.
11. Security First: Protecting Your Hotspot and Data
While convenience is fantastic, remember to prioritize security. Use a strong, unique password for your hotspot. Avoid connecting to unsecured Wi-Fi networks, and consider using a VPN, especially when dealing with sensitive data. Think of your data as your castle; you wouldn’t leave the drawbridge down, would you?
12. The Psychological Boost: Instant Connectivity and Peace of Mind
Knowing this simple trick can provide immense peace of mind. Think about it; the ability to access the internet in an instant, regardless of your location, can be a massive stress reliever. It's like having a superpower, ready to deploy whenever needed.
13. Comparing Options: Hotspot vs. Alternative Forms of Connection
Let’s evaluate the options more carefully. A phone hotspot offers unrivaled convenience and accessibility. However, it relies on having a phone with enough data and adequate cellular reception. USB tethering offers greater stability for a slightly less mobile solution. Mobile broadband dongles provide dedicated connections but require upfront cost and a separate data plan.
14. Future-Proofing Your Connectivity: Trends and Predictions
The world of connectivity is constantly evolving. We can anticipate even faster data speeds with the rollout of 5G and beyond. The integration of Wi-Fi and cellular technologies will become seamless and even more accessible. The ability to adapt to these changes is essential.
15. Final Thoughts (And a Little Encouragement!)
So there you have it: a shockingly easy trick to connect your laptop to Wi-Fi, directly from your pocket. We hope this guide empowers you with the knowledge to stay connected, wherever life takes you. Remember, technology should be an enabler, not a barrier. Embrace the simplicity, experiment, and never be afraid to explore the possibilities. Happy surfing!
Closing
We've explored the simple, yet potent, method of transforming your smartphone into a Wi-Fi hotspot. This straightforward technique equips you with the ability to connect your laptop to the internet, regardless of your location. From troubleshooting connection hiccups to considering data consumption, we've covered all the necessary aspects
**ASUS X550V WiFi Nightmare? FIX Your Missing Adapter NOW!**How to Add Wireless Wifi Network Manually in Windows 10 PC or Laptop

By Discover You How to Add Wireless Wifi Network Manually in Windows 10 PC or Laptop by Discover You
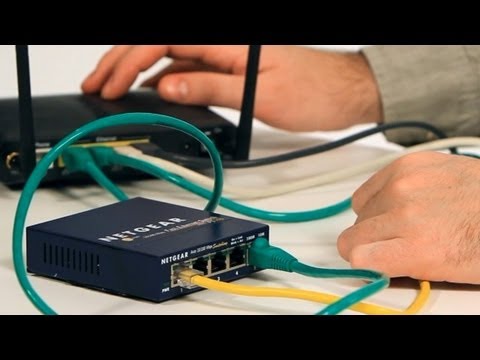
How to Switch Laptop from Wifi to Ethernet

By Digital Unraveled How to Switch Laptop from Wifi to Ethernet by Digital Unraveled
How to Create Wifi Hotspot in Windows 10 Tutorial

By MDTechVideos How to Create Wifi Hotspot in Windows 10 Tutorial by MDTechVideos

Title: Turn Windows 8 Laptop into WiFi HotSpot How To
Channel: TechEmpty
Turn Windows 8 Laptop into WiFi HotSpot How To by TechEmpty
Laptop Wifi Connect
Laptop to WiFi: Unlock Seamless Connectivity With This Simple Guide
In today's hyper-connected world, a reliable WiFi connection is no longer a luxury; it's an absolute necessity. For laptop users, the ability to effortlessly connect to the internet, regardless of location, is paramount. We've crafted this comprehensive guide to help you navigate the often-overlooked aspects of connecting your laptop to WiFi, ensuring a smooth and frustration-free experience. Forget tedious troubleshooting and complex configurations. Here, we'll reveal the “shockingly easy trick” that transforms your laptop into a WiFi-enabled powerhouse.
Understanding the Fundamentals: Your Laptop's WiFi Capabilities
Before we delve into the tactical steps, let's establish a foundational understanding of your laptop's WiFi capabilities. Most modern laptops come equipped with an integrated wireless network adapter, often referred to as a WiFi card. This hardware is the cornerstone of your wireless connectivity. It allows your laptop to "see" and connect to nearby WiFi networks, transmitting and receiving data through radio waves.
The WiFi card’s capabilities are dictated by the latest WiFi standards. These standards, such as 802.11ac and the newer 802.11ax (WiFi 6), represent the evolution of wireless technology, offering enhanced speeds, greater range, and improved performance in crowded environments. Knowing your laptop's WiFi standard will help you understand factors such as the maximum theoretical speed it can support and the overall performance you should expect. You typically find the specific version of your WiFi card by checking your laptop's specifications or in the Device Manager within your operating system.
Beyond the hardware, your laptop's operating system plays a crucial role. Windows, macOS, and Linux all provide built-in tools and settings that manage WiFi connections. Understanding how to navigate these settings is key to troubleshooting and optimizing your wireless experience.
The Easy Trick: A Step-by-Step Guide to Connecting to WiFi
Connecting your laptop to WiFi should be intuitive, however, sometimes a seemingly simple process can become a source of frustration. Here’s our streamlined, step-by-step guide, designed to remove any roadblocks and ensure a seamless connection, making your laptop WiFi-ready in minutes.
Step 1: Activate Your Laptop's WiFi Adapter
This is often the most overlooked initial step. The WiFi adapter may be disabled, preventing your laptop from detecting any available networks. The process of turning on your WiFi adapter differs slightly depending on your laptop model and operating system.
- Windows: Look for the WiFi icon in your system tray (lower-right corner of the screen, next to the clock). If the icon shows a crossed-out WiFi symbol, your WiFi adapter is disabled. Click the icon, and a list of available WiFi networks should appear. If no networks appear, find the physical WiFi button on your laptop. This button is typically located on the keyboard above the function keys or on the side of the laptop. Toggle this button to enable your WiFi. Alternatively, you can use the Windows settings: go to Settings > Network & Internet > WiFi. Toggle the WiFi switch to "On."
- macOS: Click the WiFi icon in the menu bar (upper-right corner of the screen). If the icon is gray, your WiFi is off. Click the icon and select "Turn Wi-Fi On." If it’s on but no networks are listed, it may not be detecting any signal. You can also check WiFi settings in System Preferences > Network. Ensure WiFi is enabled and the adapter is active.
- Linux: The process varies depending on your distribution (e.g., Ubuntu, Fedora, etc.). Generally, you'll find a network icon in the system tray. Click the icon and select "Enable Wi-Fi." Or, use the command line utility to verify connectivity.
Step 2: Scan for Available WiFi Networks
Once your WiFi adapter is active, your laptop needs to search for available networks.
- Windows: Click the WiFi icon in the system tray again. A list of available networks will appear.
- macOS: Click the WiFi icon in the menu bar. A list of available networks will appear.
- Linux: Click the network icon in your system tray. Select the "View Networks" or similar option.
Step 3: Select Your Desired Network and Enter the Password
Identify the network you wish to join from the list. Take note of the signal strength indicator, usually provided on the access point, as this can give you an idea of each network’s strength. Select your chosen network and click "Connect." You will be prompted to enter the network's security key or password. This information is usually found on the router, often printed on a sticker on the bottom or side of the device. Enter the password carefully, ensuring caps lock is off.
Step 4: Verify the Connection
After entering the password, your laptop will attempt to connect to the network. Look for a confirmation message that indicates a successful connection. The WiFi icon in your system tray or menu bar will change to indicate that you are connected to the network.
Step 5: Test Your Connection & Troubleshoot if Necessary
Open a web browser and navigate to any website to confirm that you have internet access. If you encounter any issues, there are several troubleshooting steps you can take:
- Check Your Password: Double-check the password for accuracy.
- Restart Your Router: This simple step often resolves connectivity issues. Unplug the router, wait for thirty seconds, and plug it back in.
- Move Closer to the Router: Ensure adequate signal strength.
- Update Your Network Adapter Driver: Outdated drivers can cause connectivity problems.
If problems persist, check out our advanced troubleshooting further below.
Beyond the Basics: Advanced WiFi Tips and Tricks
Now that you have mastered the basics, let's explore some advanced techniques to optimize your WiFi experience, ensuring both speed and security.
Optimizing Your Router Settings
Your router plays a critical role in your overall WiFi performance. Fine-tuning its settings can yield significant improvements.
- Channel Selection: Most routers operate on multiple channels. The default channel may be congested, leading to slower speeds. Access your router's administration panel (usually by typing its IP address into a web browser) and manually select a less crowded channel.
- Frequency Band Selection (2.4 GHz vs. 5 GHz): If your router supports both 2.4 GHz and 5 GHz bands, choose the 5 GHz band for faster speeds and less interference. However, the 5 GHz band has a shorter range than 2.4 GHz. Select the band that best suits your environment and usage.
- Router Firmware Updates: Regularly update your router's firmware to benefit from the latest security patches and performance enhancements.
Securing Your WiFi Network
Protecting your WiFi network from unauthorized access is paramount.
- Use Strong Encryption: Ensure your router uses WPA3 or WPA2 encryption. Avoid outdated security protocols like WEP, which are easily compromised.
- Create a Strong Password: Use a complex password that includes a combination of uppercase and lowercase letters, numbers, and symbols.
- Change the Default Router Password: The default password is often well-known and easily discoverable. Change it immediately.
- Enable MAC Address Filtering: Limit access to your network by only allowing connections from specific devices based on their MAC addresses (unique hardware identifiers).
- Disable WPS (Wi-Fi Protected Setup): WPS is a convenient feature but can be vulnerable to security exploits.
Troubleshooting Common WiFi Problems
Even after mastering the basics and optimizing your settings, you may occasionally encounter WiFi issues. Here's how to tackle some common problems.
- Slow Internet Speed: Test your internet speed using an online speed test tool. If the speed is significantly lower than your plan's advertised speed, troubleshoot your router, network adapter settings, or contact your internet service provider.
- Intermittent Connection: This issue can be caused by interference, distance from the router, or outdated drivers. Try the following:
- Move your laptop closer to the router.
- Change your router's channel.
- Update your network adapter driver.
- Test for Interference: Avoid positioning your router near appliances that can cause interference, such as microwaves and cordless phones.
- Unable to Connect: If you can't connect, double-check your password, restart your router, check the WiFi adapter settings, and update your driver. You can also check your laptop's IP configuration (see details further down).
Advanced Troubleshooting: Diving Deeper
When the standard fixes fail, you may need to dig deeper.
- IP Configuration: Your laptop needs an IP address to communicate on the network. To view your current IP configuration on Windows, open the command prompt and type
ipconfig. On macOS, open Terminal and typeifconfig. On Linux, use the commandifconfigorip addr. If your laptop isn't receiving an IP address (look for values such as "0.0.0.0" or other error messages), try renewing the IP address by typingipconfig /renew(Windows) or releasing and renewing your IP address within the Network settings of your OS. - Network Adapter Drivers: If you're still facing problems, consider reinstalling or updating your network adapter driver. Windows users can find the driver in Device Manager. macOS users may need to consult the manufacturer's website for the latest drivers. Linux users may require additional configurations.
- **
