how to connect two laptops wifi

Title: Transfer Files Between Two Laptops over Wi-Fi
Channel: Techy Druid
Transfer Files Between Two Laptops over Wi-Fi by Techy Druid
how to connect two computers wifi, how to connect two laptops using wifi for data transfer, how to connect two laptops using wifi windows 11, how to connect two laptops without wifi, how to connect two laptops together using wifi, how to connect two laptops using same wifi, how to connect two computers using wifi in windows 10, how to connect two computers using wifi router in windows 10, how to connect two computers via wifi in windows 10, how to connect two computers without wifi
Laptop to Laptop WiFi: The SHOCKINGLY Easy Trick!
Unleash the Wireless Wizard Within: Connecting Laptops Without a Hitch!
Ever felt tethered by the digital leash of wires, longing for a swift connection between your laptops? Frustrated with the cumbersome USB transfers and the slow dance of cloud storage? Prepare to be amazed! There's a secret, a shockingly simple trick, that will have you sharing files, and data in a flash. This guide will unlock the power of direct laptop-to-laptop WiFi connectivity.
Ditching the Wires: The WiFi Direct Revelation
Forget the old ways. We're embracing the modern, wireless revolution. Laptop-to-laptop WiFi opens up a world of possibilities. So, how does this magic work? It leverages the built-in WiFi capabilities of your machines. You can create a small, private network. Therefore, you can share files and data instantly. Think of it as a private bridge between devices.
Setting the Stage: Preparing Your Digital Duo
Before we dive in, let's get prepared. You'll need two laptops, of course. But, ensure they both have WiFi enabled. Additionally, check your operating systems. Windows and macOS handle WiFi connections differently. However, the core principle remains the same. Make sure your laptops are within a reasonable distance. That would be to maintain a strong signal. Now, you are ready to proceed.
Windows Wizards: The Hosted Network Approach
For Windows users, the process is relatively straightforward. First, you need to create a hosted network. Navigate to the Control Panel; you can use the search bar for faster access. Go to "Network and Sharing Center". From there, select "Change adapter settings". You may see different network adapters listed. Click "Create a new connection". You should choose "Set up a wireless ad hoc (computer-to-computer) network." Follow the on-screen instructions. Give your network a name and password. Once created, you can share files. You can start by selecting shared folders. Now, proceed by granting access permissions.
macOS Mavericks: AirDrop to the Rescue!
Apple users, rejoice! macOS offers an even simpler solution. It’s called AirDrop. Make sure AirDrop is enabled on both Macs. Open Finder and look for AirDrop in the sidebar. If you don’t see it, go to Finder's settings. Then, enable AirDrop discovery. To share a file, simply drag and drop it onto the recipient's profile. Once the transfer starts, you'll see a progress bar. This quick and easy feature makes sharing intuitive.
Beyond Sharing Files: Unleashing the Power
Connecting laptops via WiFi opens doors beyond simple file transfers. You can even set up a temporary, local area network (LAN). Imagine creating a shared workspace for collaborative projects. You can share printers and other peripherals. Furthermore, you might use the connection for gaming. It is a great choice for competitive matches. The possibilities are truly exciting.
Troubleshooting Troubles: Fixing the Common Glitches
Sometimes, things don't go as planned. Don't worry – it's normal. If you're having trouble connecting, first, double-check your WiFi settings. Make sure both laptops are on the same network. Firewall settings may also be interfering. Temporarily disabling your firewall can sometimes solve the issue. Also, ensure the devices are compatible. Some older hardware might not support the latest WiFi standards. If you're still struggling, consult your operating system's documentation. These documents offer detailed troubleshooting guides.
Boosting Your WiFi Experience: Tips and Tricks
To maximize performance, there are a few things you can do. Position your laptops close together. This will ensure a strong signal. Also, minimize interference. Try to avoid obstacles. These can impede the WiFi signal. Regularly update your Wireless adapter drivers. This helps to optimize performance. Don't forget to secure your connection. Secure your network with a strong password.
The Future is Wireless: Embracing the Freedom
Connecting laptops via WiFi is more than just a technical trick. It's a step towards a more flexible, and connected digital life. It's about reclaiming your time and streamlining your workflow. Now that you know how, try it. You'll be amazed by how easy it is. So, embrace the convenience of wireless connectivity. Enjoy the freedom it brings!
Download HP 630 i3 WiFi Drivers NOW! (Free & Easy)Laptop to Laptop WiFi: The SHOCKINGLY Easy Trick!
Hey tech adventurers! Ever been in a pinch, desperately needing to transfer files between laptops but Wi-Fi is spotty, or you're miles from any Wi-Fi access point? We’ve all been there, right? Picture this: you're on a flight, working on a crucial presentation, and your colleague needs the final draft. Or maybe you're at a friend's house, ready to share some epic vacation photos. The frustration can be real when the internet gods aren’t cooperating. But hold on to your hats, because we’re about to reveal a secret, a ridiculously simple trick that'll have you transferring files like a digital ninja in no time. Forget scrambling for Wi-Fi passwords or fiddling with cloud storage! This is the “Laptop to Laptop WiFi: The SHOCKINGLY Easy Trick!” that everyone should know.
1. The Problem: Limited Connectivity, Maximum Frustration
Let's face it: Wi-Fi can be a fickle beast. Sometimes it's lightning-fast, and other times it’s slower than a snail in molasses. Public Wi-Fi is often unreliable and a security risk. And then there are those situations where you simply don't have Wi-Fi. Think about it: on a train, in a remote cabin, or even during a sudden internet outage at home. How do you smoothly share documents, photos, or videos when traditional methods fail? The struggle is, as they say, real. That's where our secret weapon comes in.
2. Introducing the Magic: Ad-Hoc Networks – Your Digital Bridge
The secret lies in creating an ad-hoc network. Think of it like this: your laptops will directly talk to each other, bypassing the need for a router or an internet connection. It's like building a private, secret communication channel just for you and your chosen laptop buddy. It's like setting up a digital campfire, where you can share stories (or, in this case, files) without needing the whole internet to gather around.
3. Setting the Stage: Your Laptop's Preparations
Before we dive in, let's make sure your laptops are ready to party. This is a step-by-step setup, and we'll make sure it works on both Windows and macOS systems. Don't worry, it's a piece of cake (and much easier than baking an actual cake!).
A. Windows Warriors: The Ad-Hoc Creation
- Step 1: Open Network and Sharing Center. You can usually find this by right-clicking the Wi-Fi icon in your system tray (lower right corner of your screen).
- Step 2: Set up a new connection or network. Click on this option.
- Step 3: Choose "Set up a wireless ad hoc (computer-to-computer) network." This is the magic button!
- Step 4: Name your network. Choose a simple, memorable name (like “MyLaptopNetwork”).
- Step 5: Choose a security type. We recommend WPA2-Personal for security, and set a strong password.
- Step 6: "Turn on sharing."
B. macOS Mavericks: The Ad-Hoc Adventure
- Step 1: Go to System Preferences. You can find this in your Apple Menu (upper left corner, click the Apple icon).
- Step 2: Click on Sharing.
- Step 3: Select Internet Sharing.
- Step 4: Choose "Share your connection from" (e.g., Wi-Fi).
- Step 5: Under "To computers using," select "Wi-Fi."
- Step 6: Click "Wi-Fi Options." Give the network a name, and choose a security protocol (WPA2 Personal is best) along with a password.
- Step 7: Check the box to start sharing (sometimes requires you to re-enter your administrator password).
4. Connecting the Dots: Joining the Network
Now that you've created your ad-hoc network, it’s time to bring in the other laptop!
A. Windows: Joining the Party
- Step 1: On the second laptop, click the Wi-Fi icon in the system tray. You should see the name of the network you created earlier (e.g., "MyLaptopNetwork").
- Step 2: Click to connect. Enter the password you set when creating the network.
- Step 3: That's it! Both laptops are now connected.
B. macOS: Tuning In
- Step 1: Click the Wi-Fi icon. You should see the network you created.
- Step 2: Select the network and enter the password
- Step 3: Voila! Two's company, three's a crowd (but in this case, two laptops on a Wi-Fi network are just perfect).
5. The Grand File Transfer: Sharing is Caring (and Easy!)
Now comes the fun part: transferring files! This is where the magic really happens.
A. Windows: Sharing Made Simple
- Step 1: On the laptop where the files are located, locate the specific files or folders you want to share.
- Step 2: Right-click on the file or folder.
- Step 3: Select "Give access to" or "Share."
- Step 4: Choose "Specific people" and select the user account on the other laptop. You might need to change the "Permission Level" to "Read/Write" if you want to modify files on the other system.
- Step 5: Click "Share". The files should now be accessible on the other laptop.
B. macOS: Sharing with Style
- Step 1: Right-click on the file or folder (or control-click if you're using a one-button mouse).
- Step 2: Select "Get Info."
- Step 3: Scroll down to the "Sharing & Permissions" section.
- Step 4: Click the lock icon, enter your administrator password, and then add the user account from the other laptop by clicking the "+" icon.
- Step 5: Set the permissions to "Read & Write" so that you can make modifications if necessary.
- Step 6: Close the "Get Info" window. The files should now be ready to access on the other laptop.
6. Troubleshooting Troubles: When Things Go Awry
Let’s be honest, sometimes things don't go according to plan. Don't worry, we’ve got you covered.
- Check the Basics: Are both laptops actually connected to the ad-hoc network? Verify this by checking the Wi-Fi icon on both machines.
- Firewall Follies: Your firewall might be blocking file-sharing. Temporarily try disabling the firewall on both laptops (remember to re-enable it afterward!).
- Permissions Problems: Double-check the file-sharing permissions on both laptops. Make sure the other user has "Read/Write" access.
- IP address issues: Verify the machines are on the same network (typically 192.168.1.x). If not, manually setting an address in the same range might assist.
- Restart, Refresh, Repeat: Sometimes a simple restart of both laptops does the trick! Don't underestimate the power of a good reboot.
7. Speed Demon: How Fast is it Really?
The transfer speed depends on several factors, including the Wi-Fi capabilities of your laptop's network card and the size of the files you’re moving. But, we can say that with appropriate networking parameters, you can expect better speeds than with a USB 2.0 connection.
8. Security Snippets: Keeping Your Data Safe
While ad-hoc networks are great for convenience, they’re not as secure as a good, old-fashioned router-based network. When using an ad-hoc network, be mindful of these points:
- Use a Strong Password: Always set a robust password for your network.
- Public Places Beware: Avoid using ad-hoc networks in public places where you don't trust the people around you.
- Encryption is Key: Ensure you are using WPA2 encryption, which provides a good level of protection.
9. Beyond Files: More Than Just Transfers!
While file transfer is the primary use case, ad-hoc networks can open up a world of other possibilities!
- Printer Sharing: Share a printer connected to one of the laptops with the other (in most cases).
- Gaming Night: Play local multi-player games together (if the game supports it).
- Direct Chat: Set up a private chat between laptops, or share the access to the Internet of a single laptop.
10. The Advantages: Why Choose This Trick?
Why go this route? Here’s why:
- No Internet Needed: Perfect for situations where there is no Wi-Fi.
- Fast Transfers: Usually much faster than using a USB drive.
- Simple Setup: Amazingly
How to connect two computers on the same wifi network windows 11

By IT Magics How to connect two computers on the same wifi network windows 11 by IT Magics
How to use a Laptop a Second Monitor
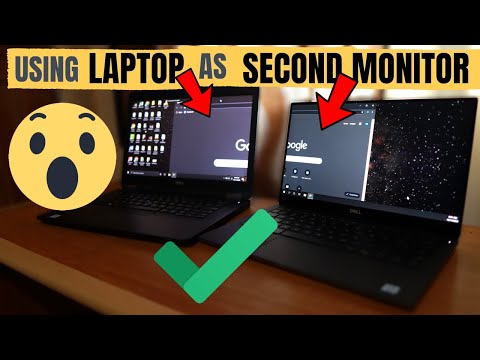
By Torogi Pro How to use a Laptop a Second Monitor by Torogi Pro
How to combine two Internet or WIFI connections for faster Internet

By Naveen Yadav How to combine two Internet or WIFI connections for faster Internet by Naveen Yadav

Title: HOW TO Connect Two Computers WIRELESSLY
Channel: Online Tech Tips
HOW TO Connect Two Computers WIRELESSLY by Online Tech Tips
Wifi Not Found
Laptop to Laptop WiFi: Unleashing the Power of Direct Connection
The digital age demands seamless connectivity. Whether you're a seasoned professional, a dedicated student, or simply someone who enjoys sharing files and data, the ability to transfer information between laptops quickly and efficiently is paramount. While cloud storage and USB drives have their place, there’s a faster, direct-connection method that often gets overlooked: Laptop to Laptop WiFi. We're here to unveil the shockingly easy trick that will revolutionize how you share and access your digital worlds.
Understanding the Core Concept: Ad-Hoc Networking
The key to this effortless transfer lies in ad-hoc networking. Think of it as building a private, temporary WiFi network, a digital bridge that connects your two laptops directly. Unlike connecting to an existing WiFi router, which requires an internet connection and relies on external infrastructure, ad-hoc networking lets your laptops communicate directly, creating a localized network solely for file transfer. This bypasses the need for external networks, making the transfer process much faster and incredibly convenient.
Setting the Stage: Preparing Your Laptops
Before we initiate the setup, ensuring both laptops are prepared is crucial. First, make sure both of your machines have WiFi adapters enabled and functional. Ideally, update the network drivers on both laptops. Outdated drivers are a common culprit behind slow speeds and potential connection problems. Check the manufacturer’s website for the latest updates for your specific laptop models.
Next, disable any active firewalls or temporarily adjust their settings to allow the connection. Firewalls, designed to protect your system, can sometimes inadvertently block the ad-hoc network's traffic. We recommend temporarily disabling firewalls while establishing the initial connection, and then, if absolutely necessary, creating rules to specifically allow the ad-hoc network traffic through.
Windows: The User-Friendly Approach
Windows, being the most popular operating system, offers a streamlined process for setting up an ad-hoc network. Here's how to get started, step by step, and this is easy whether you have Windows 10, Windows 11, or the older version:
Access the Network and Sharing Center: Begin by opening the Control Panel (or use the search bar to quickly find it). Within the Control Panel, locate and click on the "Network and Sharing Center."
Set up a new connection or network: Click on the link that reads "Set up a new connection or network." Windows will then walk you through the setup process.
Choose the Ad-Hoc Option: In the subsequent window, select "Set up a wireless ad-hoc (computer-to-computer) network" and click "Next."
Configure Your Network: Now, you'll configure the crucial settings for your ad-hoc network.
- Network Name: Choose a memorable and easy-to-remember network name. This is what the other laptop will see when searching for available WiFi networks.
- Security Type: Select "WPA2-Personal" or "WPA2-PSK" for the best connection security.
- Security Key: Create a strong, secure password to protect your network from unauthorized access. This is essential for preventing unwanted users from connecting and potentially accessing your files.
- Save the Network Settings: check the box "Save this network" and click "Next"
- Enable Internet Connection Sharing: Windows will likely ask if you want to enable Internet connection sharing. This is usually unnecessary for a basic file transfer, so you can typically skip this part.
Initiate the Connection: Once the network is created, Windows will prompt you to start the network. Make sure to do this, and then your laptop will begin broadcasting the ad-hoc network signal.
On the Second Laptop: Connecting to the Ad-Hoc Network: The second laptop’s process is streamlined.
- Find the Network: Click the WiFi icon in the system tray (usually in the bottom-right corner of your screen) and look for the network name you created on the first laptop. The second laptop should see your network listed under available networks.
- Enter Your Password: Select the network and enter the security key (password) you set up on the first laptop.
- Connect: Click "Connect." Both laptops should now establish a connection.
File Sharing Made Simple: Sharing Files Across Laptops
With the ad-hoc network established, the stage is set for seamless file transfer. To share files between the connected laptops:
Enable File Sharing:
- Go to "Control Panel" -> "Network and Sharing Center" -> "Change advanced sharing settings."
- Under "Private," turn on "Turn on network discovery" and "Turn on file and printer sharing."
- Under "All Networks," turn on "Turn on sharing so anyone with network access can read and write files in the Public folders."
- Set the password-protected sharing to "off" only if you are sure your network is secure.
Share the Files: On the laptop containing the files you wish to share, locate the folder or files you want to transfer. Right-click on the item and choose "Properties." Go to the "Sharing" tab. Click on "Share."
Network Path: Click "Share" and select "Everyone" from the drop-down menu and give the shared files "Read/Write" permissions.
Access the Shared Files: On the second laptop, open File Explorer (Windows key + E). In the left-hand menu, click on "Network." You should see the other laptop listed. Double-click on the laptop’s name to access the shared files and folders.
MacOS: A Smooth, Intuitive Experience
MacOS, renowned for its user-friendliness, also embraces the ad-hoc networking concept:
Enable WiFi: Ensure your WiFi adapter is enabled. Click the WiFi icon in the menu bar and ensure the connection is “on.”
Create Computer-to-Computer Network: From the Apple menu at the top of your screen, click on "System Preferences." Next, click on "Sharing." Check the box next to "Internet Sharing" on the left to enable sharing. But for the purpose of an ad-hoc network, look to the drop-down menu where you select "Share your connection from" and select WiFi option.
- Then click "WiFi Options…" Under the "Channel" dropdown select an open channel. This will help with performance.
- Set a "Network Name" for your ad-hoc network, similar to Windows' approach. Choose a memorable name that's easily identified.
- Select a security type, preferably "WPA2 Personal."
- Set a strong password.
Initiate Sharing: Check "Internet Sharing" on the left-hand side panel to enable.
Connect on the Second Macbook: Enable WiFi and from the list of available networks, connect your MacBook to the created network. Enter the password when prompted.
File Sharing: To share files, enable the settings. Go to "System Preferences" -> "Sharing" -> Click "File Sharing." Select the folders you want to share.
Access the Shared Files: On the second Mac, open Finder. In the sidebar, under the "Shared" section, you should see the other MacBook. Click on it and enter your login details if requested. You can now access the shared folders.
Troubleshooting Common Issues
Even with straightforward setup processes, occasional issues may arise. Here's a breakdown of common problems and their solutions:
- Inability to Find the Network:
- Check Adapter Status: Ensure both laptops' WiFi adapters are enabled and functional.
- Check Network Name and Password: Double-check that the network name and password are entered identically on both laptops.
- Distance: Ensure the laptops are within reasonable range of each other. Physical obstructions, such as thick walls, might interfere with the signal strength.
- Slow Transfer Speeds:
- Driver Updates: Ensure both laptops' network drivers are updated.
- Router Interference: Try to set up the ad-hoc network as far away from other wireless networks as possible.
- Connection Drops:
- Signal Strength: Move the laptops closer to each other.
- Interference: Avoid potential interference from other devices like microwave ovens or cordless phones.
- Power Saving Mode: Ensure power-saving settings aren't unintentionally disabling the WiFi adapter. Check the adapter settings in Device Manager (Windows) or Network Preferences (MacOS).
Security Best Practices
While ad-hoc networks are convenient, they also come with potential security risks. We strongly recommend the following precautions:
- Use Strong Passwords: Always set strong, unique passwords for your ad-hoc networks.
- Disable Sharing When Not in Use: Turn off file sharing when you're not actively transferring files to prevent potential unauthorized access.
- Be Aware of Your Environment: Be mindful of who might be in range of your network. Ad-hoc networks can have a limited range, but it's important to maintain awareness.
- Monitor Your Network: Keep an eye on your connected devices. If you notice any unauthorized connections, immediately change your password.
Conclusion: The SHOCKINGLY Easy Trick That Revolutionizes File Transfers
The Laptop to Laptop WiFi direct connection, established through ad
