how to connect brother hl-l2395dw printer to laptop with wifi

Title: How to do Brother Hl-L2395DW Printer Wireless Setup Printer Tales
Channel: Printer Tales
How to do Brother Hl-L2395DW Printer Wireless Setup Printer Tales by Printer Tales
Brother HL-L2395DW WiFi Setup: Laptop Connection Made EASY!
Seamless WiFi Setup: Connecting Your Laptop to the Brother HL-L2395DW
Let's face it; technology can be a maze. Trying to get your new printer, the Brother HL-L2395DW, connected to your laptop shouldn't feel like navigating one. Thankfully, it's easier than you might think! This guide will walk you through the setup process. We'll make it simple, so you can print your documents quickly.
Unboxing and Initial Preparations
Before you even think about connecting, there are a few preliminary steps. First things first, carefully unpack your Brother HL-L2395DW. Ensure you have all the components. You should find the printer itself, a power cord, and perhaps some starter toner cartridges. Do not discard anything. Double-check the user manual, just in case. After that, find a suitable spot with a power outlet and good WiFi signal. Location is key for optimal performance.
Powering Up and WiFi Configuration
Now, it's time to breathe life into your printer. Connect the power cord to the printer. Plug it into the wall. Next, power on the printer. Allow it to initialize itself. The LCD screen should light up. Afterwards, you'll need to configure the WiFi settings. Explore the printer's menu. Locate the "Network" or "WiFi" settings. You'll often access these using the arrow keys and 'OK' button. Choose your WiFi network from the list of available networks. Enter your WiFi password when prompted. This step is crucial for wireless printing.
Downloading and Installing the Brother Printer Driver
Your laptop needs to "understand" your new printer. You will need to install the necessary drivers. Go to the Brother support website. Search for the HL-L2395DW driver. Select the driver compatible with your operating system. Download the driver. Once downloaded, find the file on your laptop. Run the installation program. Follow the prompts. Usually, this involves accepting terms and conditions. Furthermore, it might prompt you to select your printer model. Make sure you choose the HL-L2395DW. The installation wizard will guide you smoothly.
Connecting Via WiFi: The Simple Steps
The setup should be straightforward. Most of the time, the installer will detect your printer automatically. If not, you might need to add the printer manually. On Windows, go to "Devices and Printers" in the Control Panel. Click "Add a printer." Select your Brother HL-L2395DW from the list. If it’s not visible, make sure the printer is powered on. Also, confirm that the WiFi connection is functioning correctly. Follow the prompts to finish the setup. Similarly, Mac users can navigate to "System Preferences" then "Printers & Scanners." Click the "+" icon and add your printer. Select your printer from the list.
Troubleshooting Common WiFi Connection Issues
Occasionally, things don't go as planned. Don't panic! Several common issues might arise. Firstly, check your WiFi password. Make sure it’s entered correctly. Secondly, verify that both your laptop and printer are on the same WiFi network. Also, restart your router, printer, and laptop. This often resolves minor glitches. In addition, ensure your printer is not too far from the router. Signal strength matters. Finally, try a different USB cable connection, if necessary.
Testing Your Connection and Printing a Test Page
Congratulations! You've come this far. Now, it’s time to test your connection. Send a test print from your laptop. Select a document or image. Click "Print." Choose your Brother HL-L2395DW from the printer list. If the print job goes through, celebrate! If not, revisit the troubleshooting steps. You can also print a test page directly from the printer's menu. This can pinpoint issues. This will help to confirm the connection is working.
Maintaining Optimal Printer Performance
Once connected, keep things running smoothly. Regularly clean your printer. Occasionally, wipe the exterior with a soft, dry cloth. Replace the toner cartridge when needed. Moreover, update the printer drivers when new versions are available. Regularly check for firmware updates. This can improve performance and fix any bugs. Don't neglect paper quality. Use paper that's compatible with your printer. And, most importantly, don't let your printer sit unused. Periodic use helps prevent ink and toner-related issues.
Conclusion: Printing Made Easy
Setting up your Brother HL-L2395DW can be very easy. You've conquered the initial setup. Now you can print wirelessly from your laptop. By following these simple steps, you should be enjoying the convenience of wireless printing. In addition, if you encounter any significant problems, consult the complete Brother HL-L2395DW manual. As a result, you're ready to print all of your important documents.
Laptop WiFi Upgrade: The 2 BEST Dual-Band Cards (2024)Brother HL-L2395DW WiFi Setup: Laptop Connection Made EASY!
Hey everyone! Have you ever felt like wrestling an octopus when trying to connect a new printer to your laptop? I know I have! Remember that time I spent an entire Saturday afternoon trying to figure out how to connect my old printer? It felt like a personal Everest. Well, fear not, because today, we're tackling the Brother HL-L2395DW WiFi setup – and trust me, it’s going to be a walk in the park. We’re going to make connecting your laptop to this fantastic printer a breeze, simplifying the process and making sure you're up and running in no time. Let’s get started!
Why Choose the Brother HL-L2395DW? A Quick Rundown
Before we dive into the WiFi setup, let's quickly cover why you made a smart choice with the Brother HL-L2395DW. This printer isn't just your run-of-the-mill device; it's a workhorse! We're talking fast, reliable printing, crisp text, and the added bonus of wireless connectivity. It's like having a personal printing genie in your home office! This printer is perfect for home offices, students, and anyone who needs a dependable printing solution. Plus, the WiFi capability means you can print from anywhere in your house, as long as you and your laptop are within network range. That's convenience at its finest.
Unboxing and Preparation: Setting the Stage for Success
The first step, of course, is unboxing. Carefully remove everything from the box – the printer, the toner cartridge (usually pre-installed, but double-check!), the power cord, the documentation, and maybe some marketing flyers. Now, place your printer on a stable surface near a power outlet. This is crucial, as we want to avoid any accidental spills or drops. Ensure the power cord is readily accessible, as you might need to unplug it during the setup process. A tidy space is key here. It's like preparing a chef's station before a big meal; the smoother the setup, the better!
The Two Main Setup Methods: Your Choice is Key
Here's where the fun begins. We have two primary ways to get that laptop connected to your Brother HL-L2395DW via WiFi:
- Method 1: The Wi-Fi Protected Setup (WPS) Button: This is the easiest, fastest, and usually the preferred method if your router supports WPS. Imagine it as the express lane to printer connectivity.
- Method 2: Manual WiFi Setup: This involves connecting to your printer's temporary network and entering your WiFi password manually. It's slightly more involved but works perfectly well if your router doesn't support WPS. This is your reliable backup plan for success.
Method 1: WPS Setup – The Speedy Route
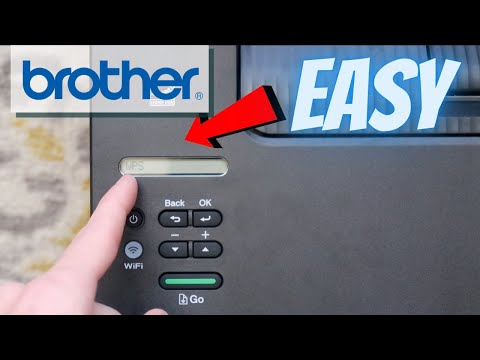
Let's tackle the WPS setup first. If your router has a WPS button (it usually looks like this symbol: ⊽), you're in luck!
- Locate the WPS Button: Find the WPS button on your router. It's generally on the back or side, and you might need a flashlight to locate it.
- Power on Your Printer: Make sure your Brother HL-L2395DW is powered on. The indicator light should be on.
- Press the WPS Button on Your Printer: Locate the WPS button on your Brother printer (it's usually labeled or in the menu settings on the printer's control panel). Press it. You may need to hold it for a few seconds.
- Press the WPS Button on Your Router: Within two minutes of pressing the button on your printer, press the WPS button on your router.
- Wait for the magic: The printer and router should now communicate, exchanging information like a secret handshake. The WiFi light on your printer will blink during the setup process and eventually become solid, indicating a successful connection. This can take a few minutes.
Method 2: Manual WiFi Setup - The Steady Approach
If WPS isn't an option, fear not! The manual setup is still relatively straightforward.
- Access the Printer's Setup Menu: On your Brother HL-L2395DW, navigate to the setup menu via the printer's control panel.
- Select Network then WiFi: Choose the network or WiFi setup option within the menu, and then select the "WiFi" option.
- Choose "Setup Wizard" or Equivalent: Look for an option that says "Setup Wizard" or something similar. This will guide you through the next steps.
- Select Your Wi-Fi Network: The printer will scan for available networks. Select the name of your home wireless network (the same one your laptop uses).
- Enter Your Password: You will be prompted to enter your Wi-Fi network password. Type it in carefully, ensuring you get every letter and number correct. This is the most common place where people stumble, so double-check!
- Confirm and Connect: The printer will then attempt to connect to your network. If successful, you should see a confirmation message and the WiFi light on your printer will become solid.
Installing the Printer Driver on Your Laptop: The Final Piece
Now that your printer is connected to your WiFi network, it's time to tell your laptop about it.
- Download the Driver: Go to the Brother support website and download the correct driver for your Brother HL-L2395DW model and your laptop's operating system (Windows or macOS). Don't make the mistake of downloading the wrong driver; it's a bit like using the wrong key.
- Run the Installer: Once the download is complete, double-click on the downloaded file to run the installer.
- Follow the On-Screen Instructions: The installation wizard will walk you through the process. You'll likely be asked to choose your connection type (WiFi) and select your printer from a list of available devices.
- Test Print: After the driver installation is complete, send a test print to confirm everything is working correctly. If you get a print, you're golden! If not, review your steps.
Troubleshooting Common Issues: Don't Panic, We're Here!
Sometimes, things don't go as planned. Here's what to do if you run into trouble:
- Printer Not Detected: Double-check that your printer is powered on and connected to the same WiFi network as your laptop. Restarting both the printer and the laptop can magically resolve connectivity issues.
- Incorrect WiFi Password: Verify that you've entered your WiFi password correctly. It’s easy to mistype a character. Retype and retry.
- Router Problems: Sometimes, the issue lies with the router. Try restarting it. If that doesn't help, check your router's manual for troubleshooting suggestions.
- Driver Issues: Make sure you've downloaded the correct driver for your printer model and operating system.
- Firewall Interference: In some cases, your firewall might be blocking the printer from connecting. Temporarily disable your firewall to see if that resolves the issue; if it does, you will have to go into the settings on your firewall and allow the printer.
Fine-Tuning Your Printing Experience: Beyond the Basics
Once you're up and running, there are a few things you can do to enhance your printing experience:
- Set Default Print Settings: Customize your print settings (paper size, print quality, etc.) to your preferences.
- Monitor Toner Levels: Keep an eye on your toner levels to avoid running out of toner at a critical moment.
- Explore Advanced Features: Delve into the printer's advanced features, such as duplex printing (printing on both sides of the paper), and mobile printing (printing from your smartphone or tablet).
Maintaining Your Brother HL-L2395DW: Keep It Running Smoothly
A little maintenance goes a long way:
- Clean Regularly: Dust the printer regularly to keep it clean.
- Replace Toner: Have a spare toner cartridge on hand so you aren’t caught short when you need to print an important document.
- Update Firmware: Check for firmware updates on the Brother support website and install them to ensure your printer runs smoothly and securely.
The Joy of Wireless Printing: A Game Changer!
Being able to print wirelessly is a game changer. Imagine sitting on your couch and printing a last-minute assignment, or sending a recipe to the printer from your phone while cooking. It's liberating! You'll find that being able to access and print your documents and photos from anywhere in your home makes life so much easier.
Expanding Your Network: Printing On Multiple Devices
Once you have your laptop connected, connecting other devices, such as tablets and smartphones, becomes even easier. Simply download the Brother iPrint&Scan app (available for both iOS and Android devices) and follow the on-screen instructions. You can now print from any of your devices!
The Importance of a Reliable WiFi Connection: Stay Connected
A stable WiFi connection is crucial for uninterrupted printing. Ensure your router is positioned to provide good coverage throughout your house, and consider upgrading your router if you experience frequent dropouts or slow speeds. It's like having a great car but driving on a bumpy road; the ride won't be as smooth as it should be.
The Brother HL-L
HP Laptop WiFi Nightmare? FIX It NOW!Brother HL-L2395DW Tutorial Wireless Connection

By Techno support Brother HL-L2395DW Tutorial Wireless Connection by Techno support
Brother Printer Wireless Setup with 2 Methods Easy or Painful
By thecollegepicker Brother Printer Wireless Setup with 2 Methods Easy or Painful by thecollegepicker
Brother Printer Scan To PC or Computer.
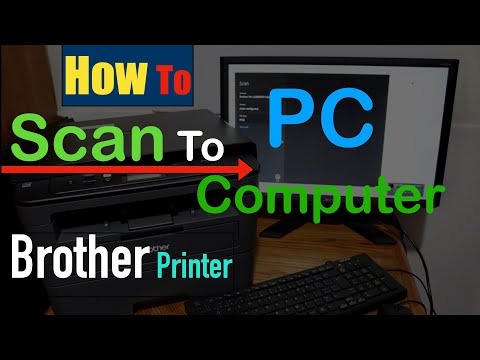
By Copy Print Scan Brother Printer Scan To PC or Computer. by Copy Print Scan

Title: How To Connect Brother Printer to the Computer Printer Tales
Channel: Printer Tales
How To Connect Brother Printer to the Computer Printer Tales by Printer Tales
Working With Laptop
Brother HL-L2395DW WiFi Setup: Laptop Connection Made EASY!
Introduction: Seamless Printing Begins Here
Welcome! Embarking on the journey of setting up your Brother HL-L2395DW printer's Wi-Fi functionality to connect with your laptop should be a smooth, intuitive experience. We are here to guide you through the process, ensuring that you can effortlessly transition from box to printing, all while maximizing the convenience of wireless connectivity. This setup is designed to be user-friendly, allowing you to print documents, photos, and more from your laptop without the constraints of USB cables. Let's begin!
Step 1: Unboxing and Initial Preparation – Your Printer's Awakening
Before diving into the digital realm of Wi-Fi setup, let's ensure your Brother HL-L2395DW is physically ready for action. Carefully unpack the printer from its box, removing all protective materials, including any tape or plastic coverings on the exterior and within the paper tray. Locate the power cord and insert one end securely into the back of the printer and the other into a functioning wall outlet. Now, turn on the printer using the power button. Allow a few moments for it to initialize, and watch for any initial system checks to complete. This is crucial to set the foundation for wireless connectivity. Make sure that paper is loaded into the paper tray.
Step 2: Finding Your Printer’s Wi-Fi Credentials
You’ll require access to your Wi-Fi network name (SSID) and your password. These details are essential for connecting your printer to your home network. You can typically find these credentials on your router, usually on a sticker located on its physical device. If you can’t locate the sticker, consult your router’s manual or, if necessary, contact your Internet Service Provider (ISP). Having this essential information ready will ensure a seamless setup process; without these details, the printer will not be able to connect to your personal wireless network. Make sure that the network you are connecting to is not a public network.
Step 3: Choosing Your Setup Method: WPS or Manual Entry
The Brother HL-L2395DW facilitates two primary methods for Wi-Fi setup: using the WPS (Wi-Fi Protected Setup) button on your router, provided your router supports this protocol, or manually entering your Wi-Fi network information into the printer's system.
WPS: Quick and Easy: The WPS method is often the simplest, relying on a one-touch connection. Ensure your router has a WPS button. On the printer’s control panel, navigate to the Wi-Fi setup section. This generally involves pressing the Menu button, navigating to the Network settings, and selecting the WLAN option. Then, initiate the WPS setup on the printer. Within a couple of minutes, press the WPS button on your router. The printer will then automatically connect to your network, assuming compatibility. The LCD display on the printer will provide confirmation that a connection has been established.
Manual Entry: Precision and Control: Manual Wi-Fi configuration provides more control. From the printer's control panel, locate the Wi-Fi setup option, select Manual Setup or Configuration, and choose your network from the list of available networks that the printer detects. Then, on the printer's display panel, carefully enter your Wi-Fi network password. If the name of your Wi-Fi network does not appear, you have the option to manually input your Wi-Fi network name. It is critical to ensure that all letters and special characters of your network's name and password are entered correctly for the printer to connect successfully. Once entered, the printer typically verifies the connection.
Step 4: Installing the Printer Drivers on Your Laptop – The Software Bridge
Now, turning our attention to your laptop, installing the correct printer drivers is crucial if you want to communicate effectively between your computer and the Brother HL-L2395DW. You have a few options for obtaining and installing the drivers.
Using the Included Installation Disc (If Applicable): If your printer came with an installation disc, insert it into your laptop’s CD/DVD drive. Follow the on-screen prompts, selecting the appropriate model of your printer. Once installed, the software will guide you through the setup process, including the Wi-Fi configuration if you haven’t already configured it.
Downloading from the Brother Website: The Recommended Approach: Visit the official Brother support website. Search for "Brother HL-L2395DW drivers." Download the latest drivers for your operating system (Windows or macOS), ensuring they are compatible with your laptop. Run the downloaded installer file. Follow the prompts that appear on your screen. During the installation, you are prompted to select a connection type, select “Wireless Network.” The software should detect your printer on the network; if not, double-check the printer's Wi-Fi connection.
Step 5: Confirming the Wireless Connection – The Ultimate Test
Once the drivers are installed, it's time to verify the Wi-Fi connection. It's usually suggested to print a test page. From your laptop, open a document or image and select the print option. Choose your Brother HL-L2395DW printer from the list of available printers. If the printer shows up, send a test print job.
Successful Printing: If the test page prints without issue, congratulations! You have successfully connected your Brother HL-L2395DW to your laptop via Wi-Fi. You can now print wirelessly.
Troubleshooting Connection Issues: If the test page does not print:
- Check Printer Status: Ensure the printer is powered on and not displaying any error messages on its control panel.
- Verify Network Connection: Confirm your laptop and printer are connected to the same Wi-Fi network. Double-check the Wi-Fi signal strength for your laptop and printer.
- Restart Devices: Try restarting both the printer and your laptop. This can often resolve temporary network hiccups.
- Reinstall Drivers: Remove the printer from your laptop’s printer list and reinstall the printer drivers.
- Consult the Troubleshooting Guide: Check the printer's manual or the Brother support website for further troubleshooting tips, which can provide you with solutions to specific issues.
Step 6: Adding the Printer to Your Laptop's Printer List – Software Configuration
After successful driver installation, your laptop should recognize the printer automatically. However, if you previously had issues, or it isn't showing up, you might have to add the printer manually to your laptop's printer list. The process slightly varies depending on your operating system.
Windows:
- Go to the Settings app (search for "Settings" in the Start menu).
- Select "Devices," then "Printers & scanners."
- Click "Add a printer or scanner."
- Your Brother HL-L2395DW should appear in the list. Select it, and follow the on-screen instructions. If it doesn’t appear, click "The printer that I want isn't listed" and then select "Add a printer using TCP/IP address or hostname", and then enter the printer's IP address (which you can find by printing out a network configuration report from the printer's control panel).
macOS:
- Click the Apple menu (top left corner of your screen), and select "System Preferences" or "System Settings" (depending on your macOS version).
- Click "Printers & Scanners."
- Click the "+" button to add a printer.
- Your Brother HL-L2395DW should automatically appear in the list. If not, make sure your laptop is connected to the same Wi-Fi network as the printer. Select your printer and follow the display instructions.
Step 7: Utilizing the Printer's Features: Unleashing Printing Potential
Now that your printer is set up, begin exploring its full potential. Beyond basic document printing, the Brother HL-L2395DW offers a range of features to enhance productivity.
Duplex Printing: (If supported) Set your printer to print on both sides of the paper automatically. This feature saves you money on paper.
Mobile Printing: Brother printing solutions offer many options compatible with your printer.
Adjusting Print Quality: Optimize your printer settings to choose the desired print resolution and paper type based on the document.
Managing Toner Levels: Monitor the toner cartridge levels via the printer's display panel or your computer’s software. Order new cartridges in advance to avoid print interruptions.
Step 8: Troubleshooting Common Problems – A Guide for Solutions
Occasionally, you might encounter minor hiccups during the setup or printing process. Here are some solutions to common problems.
Printer Not Detected: Ensure the printer and laptop are on the same Wi-Fi network. Restart both devices and reinstall the drivers. Check the network connection on the printer's control panel.
Printing Errors: Verify the printer has paper and toner. Check the printer queue on your laptop to remove any stalled print jobs.
Slow Printing Speeds: Check for interference on your network from other devices. Move the printer closer to your router. Make sure that you have the latest printer drivers installed.
Wireless Connection Issues: The printer may lose the Wi-Fi connection from time to time. You can check by performing a network test.
Conclusion: Printing Made Effortless
Congratulations
