gateway laptop wont connect to wifi windows 7

Title: Not connected no connections are available windows 7 laptop
Channel: IT Magics
Not connected no connections are available windows 7 laptop by IT Magics
Gateway Laptop WiFi Nightmare? FIX It NOW! (Windows 7)
Gateway Laptop WiFi Woes: Conquering the Connection Chaos (Windows 7)
So, you're wrestling with a Gateway laptop that's decided to stage a WiFi rebellion? Don't fret! You're certainly not alone. Many users experience this frustrating scenario. It's the digital equivalent of being stranded on a deserted island. We'll embark on a mission and decode the secrets to restoring your internet sanity. Fortunately, several solutions are at your disposal. Let's dive in and get that connection humming again!
Is Your Gateway Laptop Truly Offline? The Initial Check
Before we charge headfirst into troubleshooting, confirm the problem. Firstly, double-check the obvious. Is your WiFi switch turned on? Often, a simple flick of a switch resolves the issue. Moreover, inspect your router's status. Is it powered on and functioning correctly? Secondly, verify other devices can connect. If other devices enjoy connectivity, the problem likely resides with your Gateway. However, a widespread outage points to a network issue. Keep an open mind; it’s important to avoid assumptions.
Unveiling the Hidden Wireless Adapter: Driver Drama!
Drivers are the unsung heroes of your computer’s functions. They are the key to WiFi functionality. In some cases, outdated, corrupted, or missing drivers can choke your wireless connection. Consequently, updating your drivers is a crucial step. Go to the Device Manager. You can find it through the Windows search bar. Expand the "Network adapters" section. Right-click on your wireless adapter and select "Update driver." Choose "Search automatically for updated driver software." Windows will then hunt for the latest compatible driver. If that fails, consider visiting the Gateway support website. Download the correct driver for your specific laptop model and Windows 7. Therefore, installing the latest drivers can be a real game-changer.
The Router Tango: Re-establishing the Connection
Sometimes, the problem originates outside of your laptop. Rebooting your router can work wonders. Unplug your router and modem. Wait a full minute. Then, plug the modem back in. Give it a few minutes to boot up. After the modem is ready, plug the router back in. Allow the router to also fully power up. Now, try connecting your Gateway laptop again. Furthermore, ensure your router's broadcasting WiFi signal. Check its settings, as well.
Network Troubleshooter: A Windows Savior
Windows 7 provides a built-in network troubleshooter. This handy tool can automatically diagnose and fix many connection problems. Navigate to the "Network and Sharing Center." You can find it in the Control Panel. Then, click "Troubleshoot problems." Select "Internet Connections" or "Network Adapter," and follow the on-screen instructions. This troubleshooter is often surprisingly effective, after all.
The Elusive Wireless Network: Unmasking Hidden Networks
Sometimes, your Gateway laptop simply can't "see" your WiFi network. First, ensure your network is broadcasting its SSID (Service Set Identifier). This is the name of your WiFi network. If it's hidden, you'll need to manually add it. Click on the WiFi icon. Then, click "Open Network and Sharing Center". Click on "Set up a new connection or network". Then, choose “Manually connect to a wireless network." Enter your network’s details: SSID, security type, and security key (password). Then, save the settings, and try connecting. Indeed, this method resolves many similar issues.
IP Address Issues: Decoding the Digital Address
An incorrect or conflicting IP address can hinder your internet connectivity. You can try releasing and renewing your IP address. Open the Command Prompt. You can search for it in the start menu. Type ipconfig /release and press Enter. Wait a moment. Then, type ipconfig /renew and press Enter. Afterward, restart your laptop. This process frequently restores normal functionality.
Firewall Interference: Is Your Security Blocking You?
Security software, like firewalls, can sometimes block your internet connection. Temporarily disable your firewall. Try connecting to the WiFi. If it works, then your firewall is the culprit. You can configure its settings. Allow your Gateway laptop to connect freely. Alternatively, you can try adding an exception for your wireless network adapter. Be cautious when making changes. Remember, security is important.
Beyond the Basics: Advanced Troubleshooting
If all else fails, you might consider a few more advanced steps. First, check for interference. Nearby devices like microwaves can disrupt the signal. Second, test with a different WiFi router, if possible. This helps isolate the problem. You might also consider resetting your network settings to their default values. This can sometimes iron out persistent issues. Be sure to back up important data before making significant changes. Ultimately, persistence is key.
Final Thoughts: Reclaiming Your WiFi Freedom
Experiencing WiFi problems on a Gateway laptop with Windows 7 is frustrating. However, with a little detective work and the steps we've detailed, you can surely regain your internet connection. Stay patient. Don’t give up! Remember to systematically work through each solution. In most cases, you can vanquish the WiFi woes. Now, go forth and enjoy the digital world again!
Lenovo WiFi Driver Nightmare? FIX IT NOW!Gateway Laptop WiFi Nightmare? FIX It NOW! (Windows 7)
Hey there, fellow tech travelers! Remember those days when a wonky Wi-Fi connection felt like a personal affront? That buffering wheel of doom, the dropped video calls… ugh! If you're rocking a Gateway laptop and battling Wi-Fi woes on Windows 7, you've stumbled upon the right place. We've all been there, staring at our screens, wondering if we’ve angered the internet gods. But fear not! We’re going to rip apart this "Wi-Fi nightmare" and rebuild your wireless connection, brick by digital brick. Think of it like this: your Wi-Fi is the lifeblood of your online experience. Let's bring that lifeblood back to a healthy flow!
1. The Gateway to Frustration: Why Is Your WiFi Giving You Grief?
First things first: let's understand the beast we’re fighting. Gateway laptops, even the sturdy ones, are prone to specific Wi-Fi headaches. It could be a driver issue, a hardware glitch, or simply a configuration quirk. Older Windows 7 systems, in general, are more susceptible to these issues due to their age and the evolving landscape of Wi-Fi technology. Imagine your Wi-Fi card as an old, slightly rusty mail carrier. The mail (your internet data) might take longer to reach the right address, or even get lost along the way if the carrier is struggling. Many factors can clog the pipes of your wireless connection.
2. Diagnose the Downtime: Pinpointing the Source of the Problem
Before we start throwing fixes at the wall, let's figure out which stick. Is it always slow? Does it disconnect randomly? Can other devices connect to your Wi-Fi without issue? Try these quick checks:
- Reboot Everything: Seriously, this is the first thing most tech people do, and it works surprisingly often. Restart your laptop, your router, and your modem. Think of it as hitting a digital reset button.
- Check the Physical Connection: Is the Wi-Fi switch on? (Yes, I've made this mistake before!) Is your laptop physically near the router? Thick walls can be Wi-Fi kryptonite.
- Run the Windows Troubleshooter: Right-click the Wi-Fi icon in your system tray (that's the little icon in the bottom-right corner of your screen). Select “Troubleshoot problems.” Windows might actually offer a quick fix!
- Other Devices: Test other devices (phones, tablets, other laptops) on your network. If they're having the same issues, the problem is likely with your router or internet service.
3. The Driver's Seat: Updating Your Wireless Network Adapter Driver
A faulty or outdated driver is a common culprit. Think of the driver as the instruction manual for your Wi-Fi card. If it’s the wrong version or doesn’t know how to communicate properly, your signal will suffer. Here's how to update it:
- Open Device Manager: Click the Start button, type "Device Manager" into the search box, and press Enter.
- Expand "Network adapters." You'll see a list of network devices.
- Right-click your wireless network adapter. It might be labeled something like "Wireless Network Adapter" or have the name of your Wi-Fi card manufacturer (e.g., Intel, Broadcom).
- Select "Update driver software." Choose "Search automatically for updated driver software." Windows will search for the latest driver online. If it finds one, install it.
- Restart your laptop. Then, test your Wi-Fi connection.
4. Channel Surfing: Finding the Best Wi-Fi Channel
Your router broadcasts its signal on a specific channel. Just like radio stations overlapping, other Wi-Fi networks in your building can cause interference.
- Access Your Router’s Settings: You'll likely need to type an IP address (like 192.168.1.1 or 192.168.0.1) into your web browser. Check your router’s manual or online resources for the specific login details.
- Find the Wireless Settings: Look for a "Wireless" or "Wi-Fi" section.
- Change the Channel: Experiment with different channels (1, 6, and 11 are usually good choices). Save the changes and restart your router. See if this leads to smoother sailing on the internet sea.
5. Power Saving Pains: Disable Power Saving for Your Wireless Adapter
Windows 7, by default, tries to save power. While admirable, this can sometimes throttle your Wi-Fi performance.
- Go back to Device Manager (see Step 3).
- Right-click the wireless network adapter and select "Properties."
- Click the "Power Management" tab.
- Uncheck "Allow the computer to turn off this device to save power."
- Click "OK" and restart your laptop.
6. Firewall Fumbles: Check Your Firewall Settings
Your firewall is like a digital security guard. Sometimes, it can overzealously block necessary Wi-Fi traffic.
- Open the Windows Firewall: Go to the Start menu and type "Windows Firewall" into the search box.
- Click on "Allow a program or feature through Windows Firewall."
- Make sure that your wireless network adapter software (usually labeled something like "Network Connection") has its boxes checked for both "Private" and "Public" networks.
- If it's missing, click "Allow another program" and add it.
7. The Router Rundown: Firmware Updates and Router Reboots
Your router has its own software (firmware) that needs to be kept up-to-date.
- Check for Firmware Updates: Access your router's settings (as in Step 4) and look for a "Firmware" or "Update" section. Follow the instructions to update.
- Factory Reset (Last Resort): If all else fails, you can reset your router to its factory settings. Warning:, this will erase your custom settings (SSID, password, etc.), so make sure you know what they are! You’ll usually find a small reset button on the back of your router that you can press and hold for several seconds.
8. Location, Location, Location: Optimize Your Router's Placement
Your router's location can significantly impact its signal strength.
- Center it: Place your router in a central location in your home.
- Elevate it: Put it on a shelf or a table, away from the floor.
- Avoid Obstacles: Keep it away from walls, metal objects, and appliances that can cause interference.
9. Wireless Security Woes: Ensure Your Network is Secure
If your network isn't secure, your Wi-Fi connection could be slow because other people are leeching off of it.
- Use WPA2 or WPA3 Encryption: This is the most secure type of encryption.
- Create a Strong Password: Use a long and complex password.
- Change the Default Router Password: The default password for your router is often easy to guess.
10. Speed Test Showdown: Measuring Your Internet Performance
Run a speed test to see if your internet speed matches what you’re paying for. This will help you determine if the problem is with your Wi-Fi or your internet service provider.
- Use a reliable speed test website (like Speedtest.net or Fast.com).
- Run the speed test on multiple devices to see if the problem is specific to your Gateway laptop.
- Compare the results to your internet plan.
11. The Old-Fashioned Trick: Removing Wireless Profiles
Sometimes, old, corrupted wireless profiles can cause issues. Let's clear the slate:
- Open the Network and Sharing Center: Right-click the Wi-Fi icon in your system tray and select "Open Network and Sharing Center."
- Click on "Manage wireless networks" on the left-hand side.
- Right-click the troublesome Wi-Fi network and select "Remove network."
- Reconnect to your Wi-Fi network and enter your password again.
12. Banish the Buffering: Tips for Improving Wi-Fi Range
Even with a fix, your Wi-Fi range might still be limited.
- Use a Wi-Fi extender: This is a device that you can plug into an outlet that repeats your Wi-Fi signal, extending its range.
- Upgrade your router: If you have an older router, consider upgrading to a newer model with better range and performance.
- Consider Mesh Wi-Fi: A mesh Wi-Fi system uses multiple nodes to create a seamless Wi-Fi network throughout your home.
13. When All Else Fails: The Nuclear Option - Reinstalling Your Network Adapter
This is a more advanced step, but sometimes it's necessary.
- Go to Device Manager (see Step 3).
- **Right-click your wireless network adapter and select "Uninstall."
Windows was unable to connect wifi windows 7 Laptop and Desktop

By IT Magics Windows was unable to connect wifi windows 7 Laptop and Desktop by IT Magics
How FIX WIFI Gateway Connection Problems Notebook Desktop Ultra Slim Creator NV NE M Series NE LT

By Helping Hermit How FIX WIFI Gateway Connection Problems Notebook Desktop Ultra Slim Creator NV NE M Series NE LT by Helping Hermit
Fix windows 7 no internet access but connected ethernet
By IT Magics Fix windows 7 no internet access but connected ethernet by IT Magics

Title: How to enable your network connection in Windows 7
Channel: MHELP2U
How to enable your network connection in Windows 7 by MHELP2U
My Laptop Work
Gateway Laptop WiFi Nightmare? FIX It NOW! (Windows 7)
Have you found yourself wrestling with a recalcitrant Gateway laptop, its Wi-Fi connection stubbornly refusing to cooperate? Frustration mounts as the coveted internet access remains elusive. It's a common scenario for Gateway laptop owners, especially those still navigating the Windows 7 operating system. This guide is meticulously crafted to provide a comprehensive, step-by-step approach to diagnosing and resolving your Wi-Fi woes, ensuring you can reclaim your online experience. We'll dissect the problem, explore potential causes, and present solutions designed to get you back online quickly and efficiently.
Identifying the Source of the WiFi Disconnect: A Preliminary Check
Before delving into the complexities of network configurations, a preliminary assessment is essential. This initial troubleshooting phase often unveils the simplest solutions, saving you time and effort.
The Physical Switch: Many Gateway laptops, particularly older models, incorporate a physical switch to enable or disable the Wi-Fi adapter. This switch, often located on the laptop's side or front, might inadvertently be in the "off" position. Locate this switch and ensure it is toggled to the "on" position.
The Function Key Combination: Alongside the physical switch, many Gateway laptops employ a function key (Fn) combination to control Wi-Fi functionality. Typically, this involves pressing the "Fn" key, located near the Ctrl key on your keyboard, simultaneously with a key featuring a Wi-Fi icon (usually a series of curved lines emanating from a signal bar). Experiment with this key combination to ensure the Wi-Fi is activated. The status of the Wi-Fi, whether enabled or disabled, will usually be indicated by a light on your laptop.
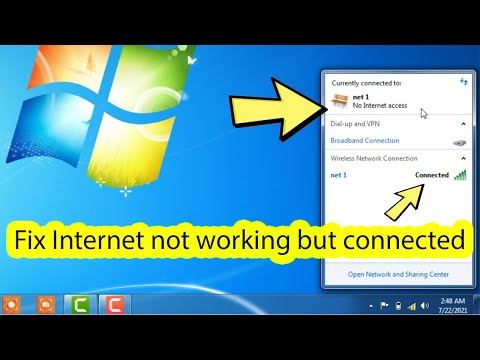
The Windows 7 Network Icon: The system tray, located in the lower-right corner of your Windows 7 screen, houses the network icon. This icon provides visual cues about your network connection status. A red "X" signifies a complete lack of network connectivity. A yellow warning triangle denotes limited or no internet access, while a series of bars indicates the strength of your Wi-Fi signal. Pay close attention to this icon and any error messages it might display.
Diagnosing Your WiFi Issues: Diving Deeper with Windows 7 Tools
Once the initial checks are complete, the next step involves leveraging the diagnostic capabilities built into Windows 7. These tools help pinpoint the specific cause of the connectivity problem.
The Network Troubleshooter: Windows 7 incorporates a built-in troubleshooter designed to diagnose and resolve common network issues. To access it, right-click on the network icon in your system tray and select "Troubleshoot problems." The troubleshooter will then scan for issues and suggest potential solutions. Follow the on-screen prompts, noting carefully any suggestions given.
The Device Manager: A Gateway to Hardware Status: The Device Manager provides a comprehensive view of all the hardware components connected to your laptop, including your Wi-Fi adapter. Access the Device Manager by navigating to the Control Panel, then selecting "Hardware and Sound," and finally "Device Manager." In the Device Manager window, expand the "Network adapters" category. Look for your Wi-Fi adapter (e.g., "Wireless Network Adapter" or a name specific to your model).
- Check for Error Indicators: A yellow exclamation mark next to the Wi-Fi adapter indicates a problem. A red "X" suggests the adapter is disabled. Double-click the adapter to view its properties. The "Device status" section provides detailed information about the problem. Possible error messages include "This device is not working properly," "This device cannot start," or "Drivers for this device are not installed." Addressing these errors is crucial.
Confirm Radio Is Enabled: In the adapter properties, on the "Driver" tab, click the "Update Driver" button. This will start the driver update wizard. Choose "Search automatically for updated driver software". If a driver update is available, Windows will install it. If the driver is already up to date, then you may continue to the next step.
Resolving Driver Conflicts and Compatibility Issues
Driver problems are a frequent cause of Wi-Fi connectivity problems, especially in older operating systems like Windows 7. These outdated drivers, or incompatible ones, often prevent the Wi-Fi adapter from functioning correctly.
Updating Your Wireless Adapter Driver: Navigate to your Gateway laptop manufacturer's website or the website of your Wi-Fi adapter manufacturer (e.g., Intel, Broadcom, or Realtek). Locate the support or driver download section. Identify your specific Gateway laptop model or the make and model of your Wi-Fi adapter. Download the latest compatible driver for Windows 7. Ensure you choose the correct version based on your system architecture (32-bit or 64-bit).
- Driver Installation Process: Once the driver download is completed, execute the file. Follow the on-screen instructions to install the new driver. You may be prompted to restart your laptop after installation.
Rolling Back the Driver: If you recently updated your driver and your Wi-Fi issues started after the update, consider rolling back to a previous version. In the Device Manager, right-click on your Wi-Fi adapter, select "Properties," and go to the "Driver" tab. If the "Roll Back Driver" button is available, click it. This reverts to the previous driver installed before the update.
Uninstalling and Reinstalling the Driver: In severe cases, a corrupted driver can cause the Wi-Fi adapter to fail. In the Device Manager, right-click on the Wi-Fi adapter and select "Uninstall." When prompted, choose to delete the driver software. Restart your laptop. Windows 7 will often automatically reinstall the driver during the boot process. If not, manually install the driver downloaded from the manufacturer's website.
Investigating Router and Wireless Network Settings
While the problem might reside within your Gateway laptop, your Wi-Fi router settings and the network configuration could be the root of the problem.
Router Reboot: A simple router reboot often resolves temporary glitches. Unplug your router from the power outlet, wait for at least 30 seconds, and then plug it back in. Allow the router to fully boot up before attempting to connect your laptop.
Router Firmware Updates: Outdated router firmware can cause compatibility issues. Check your router's manufacturer's website for the latest firmware updates. These updates often include security patches and performance enhancements that could address your Wi-Fi problems. Consult your router's manual for instructions on updating its firmware.
Wireless Security Settings: Ensure your laptop is configured with the correct security settings. Windows 7 must match your router's security protocol (e.g., WPA2-PSK, WPA3-PSK) and password. Open the "Network and Sharing Center" in the Control Panel and navigate to "Manage wireless networks." Select your Wi-Fi network and verify the security settings.
Channel Interference: Wireless routers operate on different channels. Interference from other Wi-Fi networks in your area can disrupt your connection. Access your router's settings (often through a web browser by typing the router's IP address, usually 192.168.1.1 or 192.168.0.1) and change the Wi-Fi channel to one that is less congested. Use a Wi-Fi analyzer app on your smartphone or another device to identify less crowded channels.
Advanced Troubleshooting Techniques: Exploring Deeper Solutions
If the previous steps have proven ineffective, more advanced techniques may be needed to resolve your Wi-Fi issues.
Command Prompt Diagnostics: The Command Prompt offers powerful tools for network troubleshooting. Open the Command Prompt as an administrator (search for "cmd" in the Start menu, right-click on "cmd.exe," and select "Run as administrator").
The
ipconfigCommand: Typeipconfig /alland press Enter. This command will display detailed information about your network configuration, including your IP address, subnet mask, default gateway, and DNS server addresses. Verify whether your laptop is obtaining a valid IP address. If the IP address is in the 169.254.x.x range, it indicates that your laptop is unable to obtain an IP address from your router (often a sign of a DHCP issue).The
pingCommand: To test connectivity to your router, use thepingcommand. Typeping 192.168.1.1(or your router's IP address) and press Enter. If you receive replies, it indicates that your laptop can communicate with your router. If the ping requests time out, it suggests a connectivity problem.The
netsh winsock resetCommand: This command resets the Winsock catalog, which can help resolve networking issues caused by software conflicts. Typenetsh winsock resetand press Enter. Restart your laptop after the command is executed.
Checking the Wireless Adapter's Physical Condition: Although less common, there is a chance that the physical Wi-Fi adapter in the Gateway laptop is malfunctioning. It is generally not possible to replace the Wi-Fi adapter without disassembling the laptop case, so consult a qualified technician if you suspect a physical problem.
Operating System Reinstallation (Last Resort): As a last resort, if all other troubleshooting steps have failed, consider reinstalling Windows 7. This restores the operating system to its default settings, potentially resolving stubborn software conflicts that are causing Wi-Fi issues. Back up your important files before attempting this step as you will lose all
